How to Stitch My Robin in Holly Panel – A Festive Step-by-Step Guide
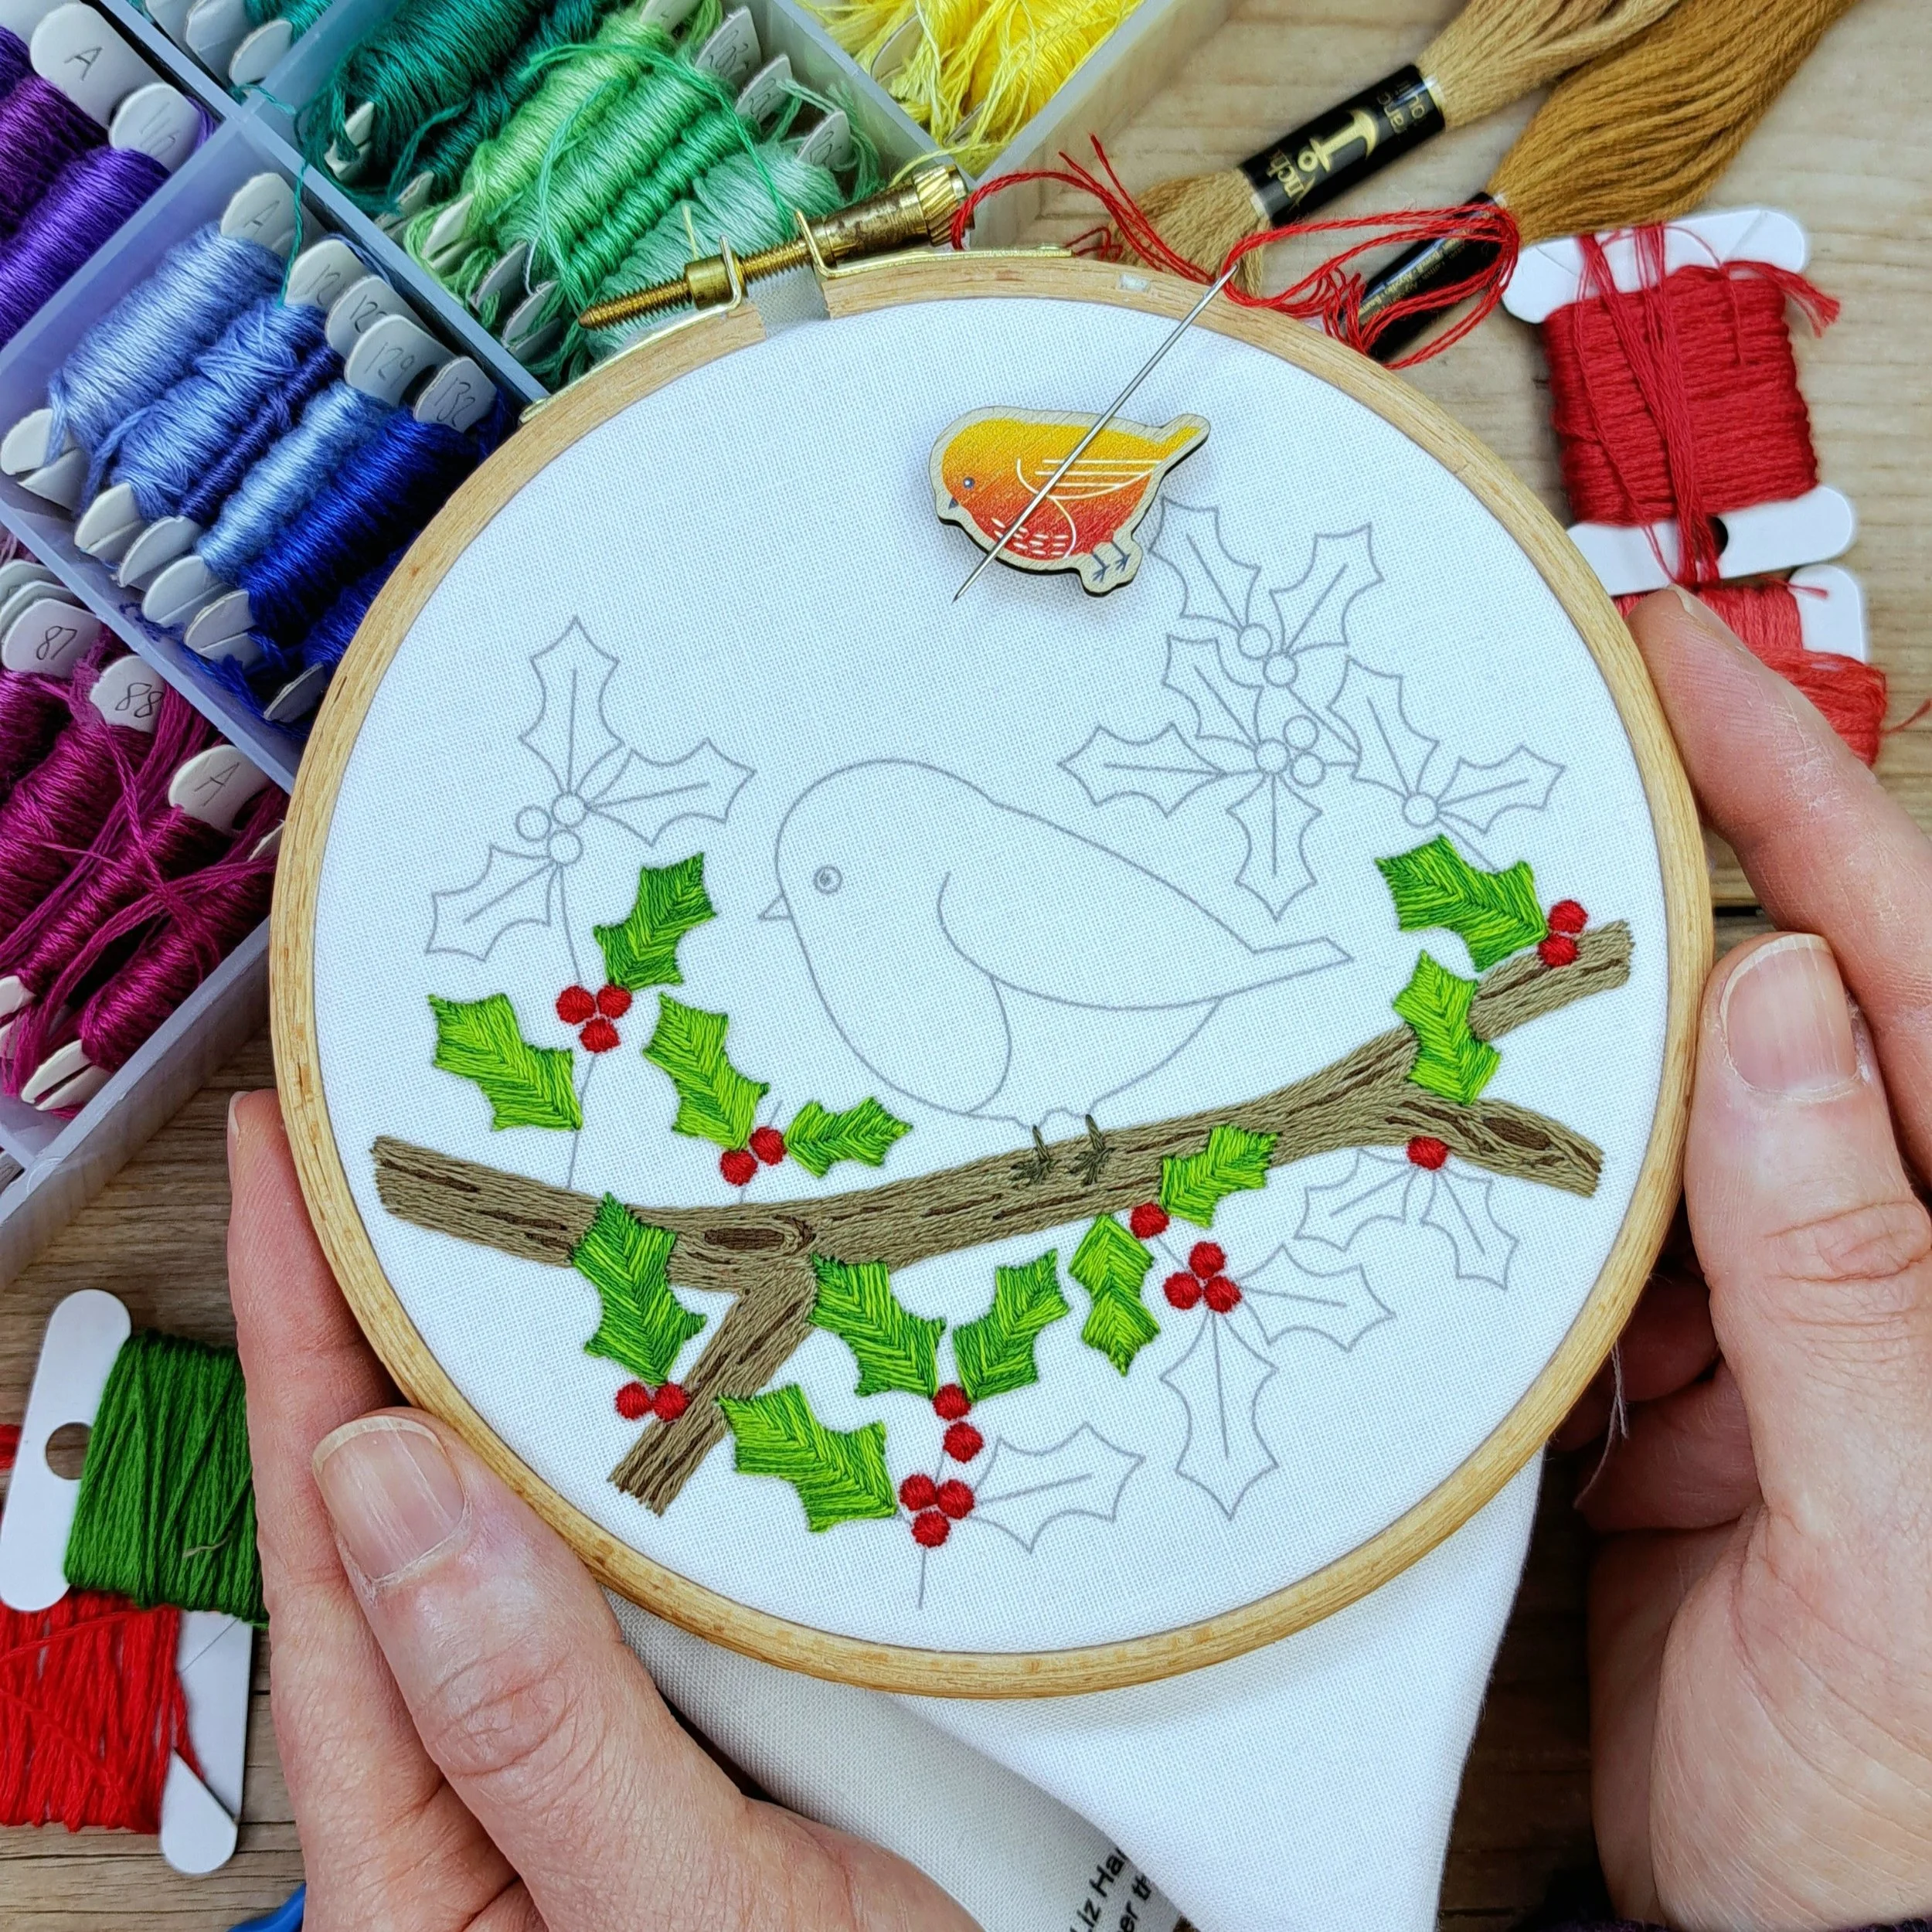
It was the beginning of November when I started stitching this festive little robin panel — exactly the sort of cosy project you want to be making as the nights draw in. I’ve squeezed this one in as possibly the last of my stitched panels for the year, and of course, it had to be a robin. You can’t get much more festive than robins, holly, and berries, right? If I stitch it now, I should be able to finish it and enjoy it on display all through the festive season 🎄
This robin is one of six garden-bird embroidery panel designs. Although each bird stands in a different tree, you can stitch any of them the same way I’ve stitched this little robin. I’m planning to stitch the whole flock at some point, but since I’m in the Christmas spirit, this adorable robin had to be next.
If you’ve just stumbled across me and my embroidery panels – hello and welcome! I’m Liz – the illustrator, maker and stitcher behind Bluebell Love. I’ve been stitching for many, many years now, and like most stitchers, I’ve built up quite the stash of embroidery threads. Some I bought because I just had to have the colour (magpie instincts), others are leftovers from kits, some were gifts, and a few I’m convinced just magically appeared 😏. And if you’re anything like me, I’m guessing you’ve got a good stash growing too!
That’s exactly why I created these embroidery panel designs – they’re pre-printed, so you can pop them straight into a hoop and get stitching, using all those lovely threads that deserve to be seen (not hidden away in a box!).
And just like with all of my embroidery panels… there are no rules 😄. Use your favourite colours, your favourite stitches, and stitch as much or as little as you like. Just the outlines, a few pops of colour, or go full-on and cover the whole panel.
For this embroidery, I used 13 thread colours from my stash (pretty pared-back for me 😄). You absolutely don’t need all of them — it’ll look lovely with fewer colours too. I had a lot of fun adding extra oranges to get that classic robin breast blend, and a couple of greens for some lovely texture on the leaves.
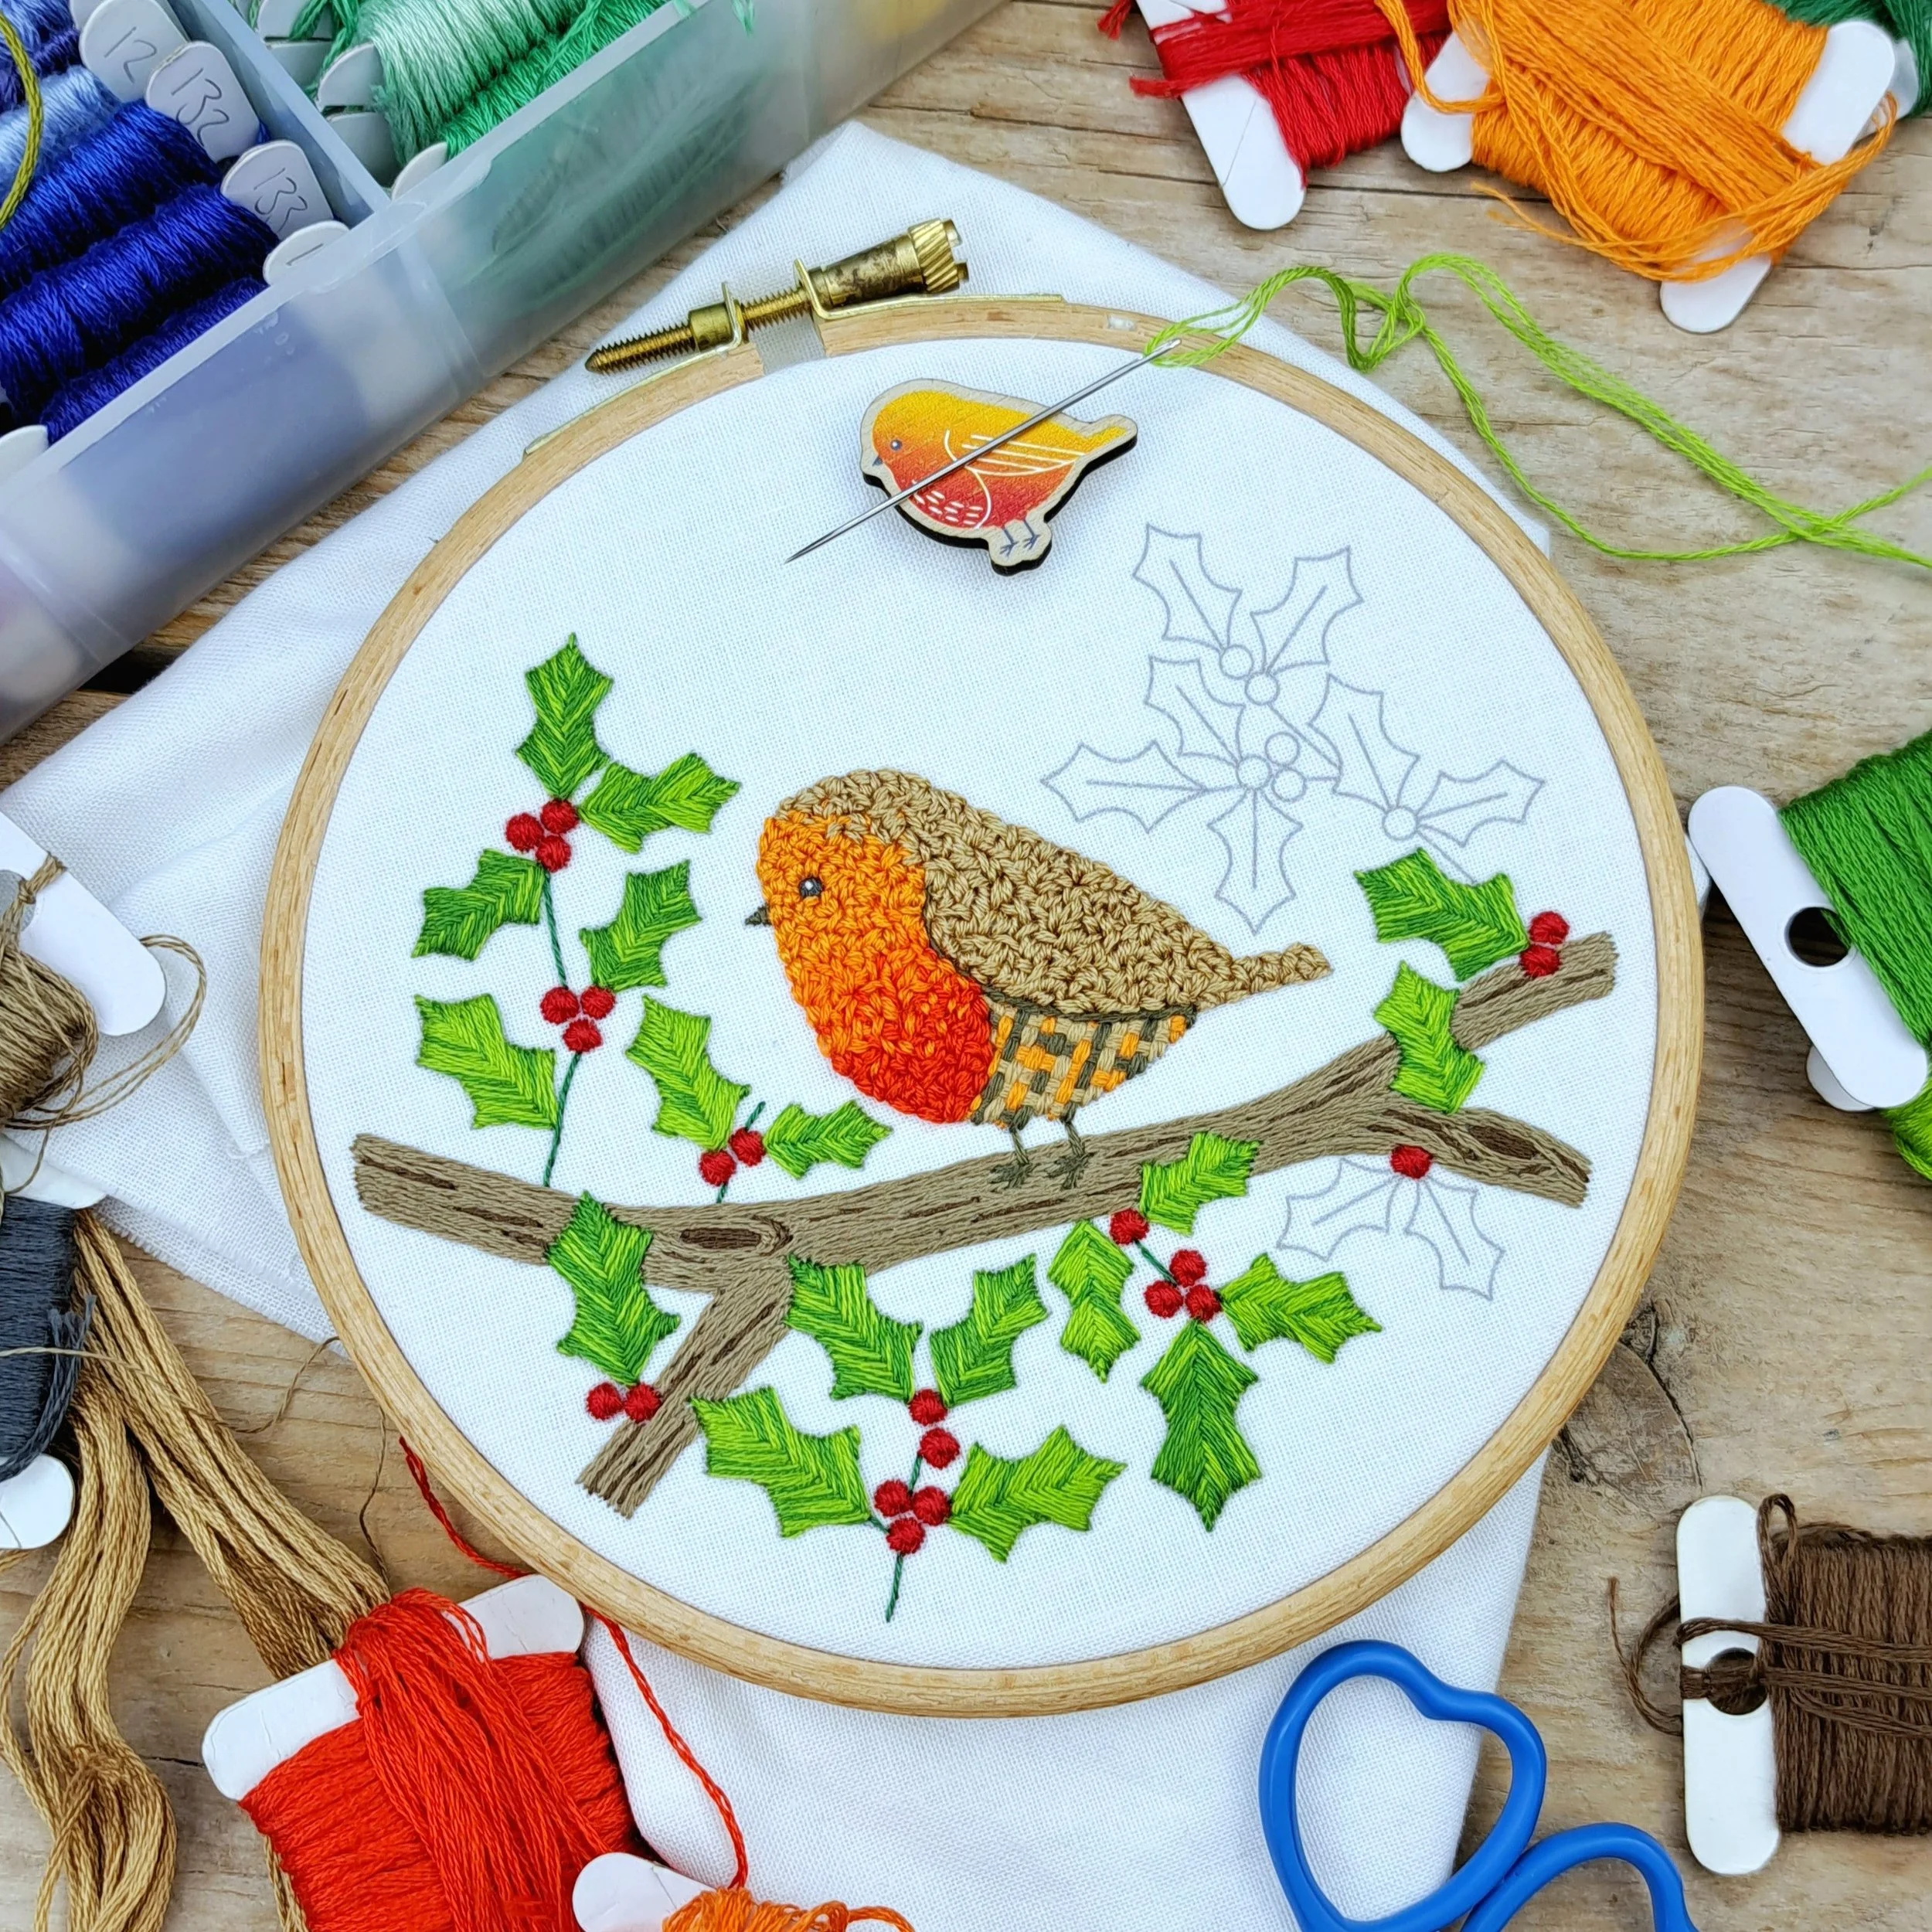
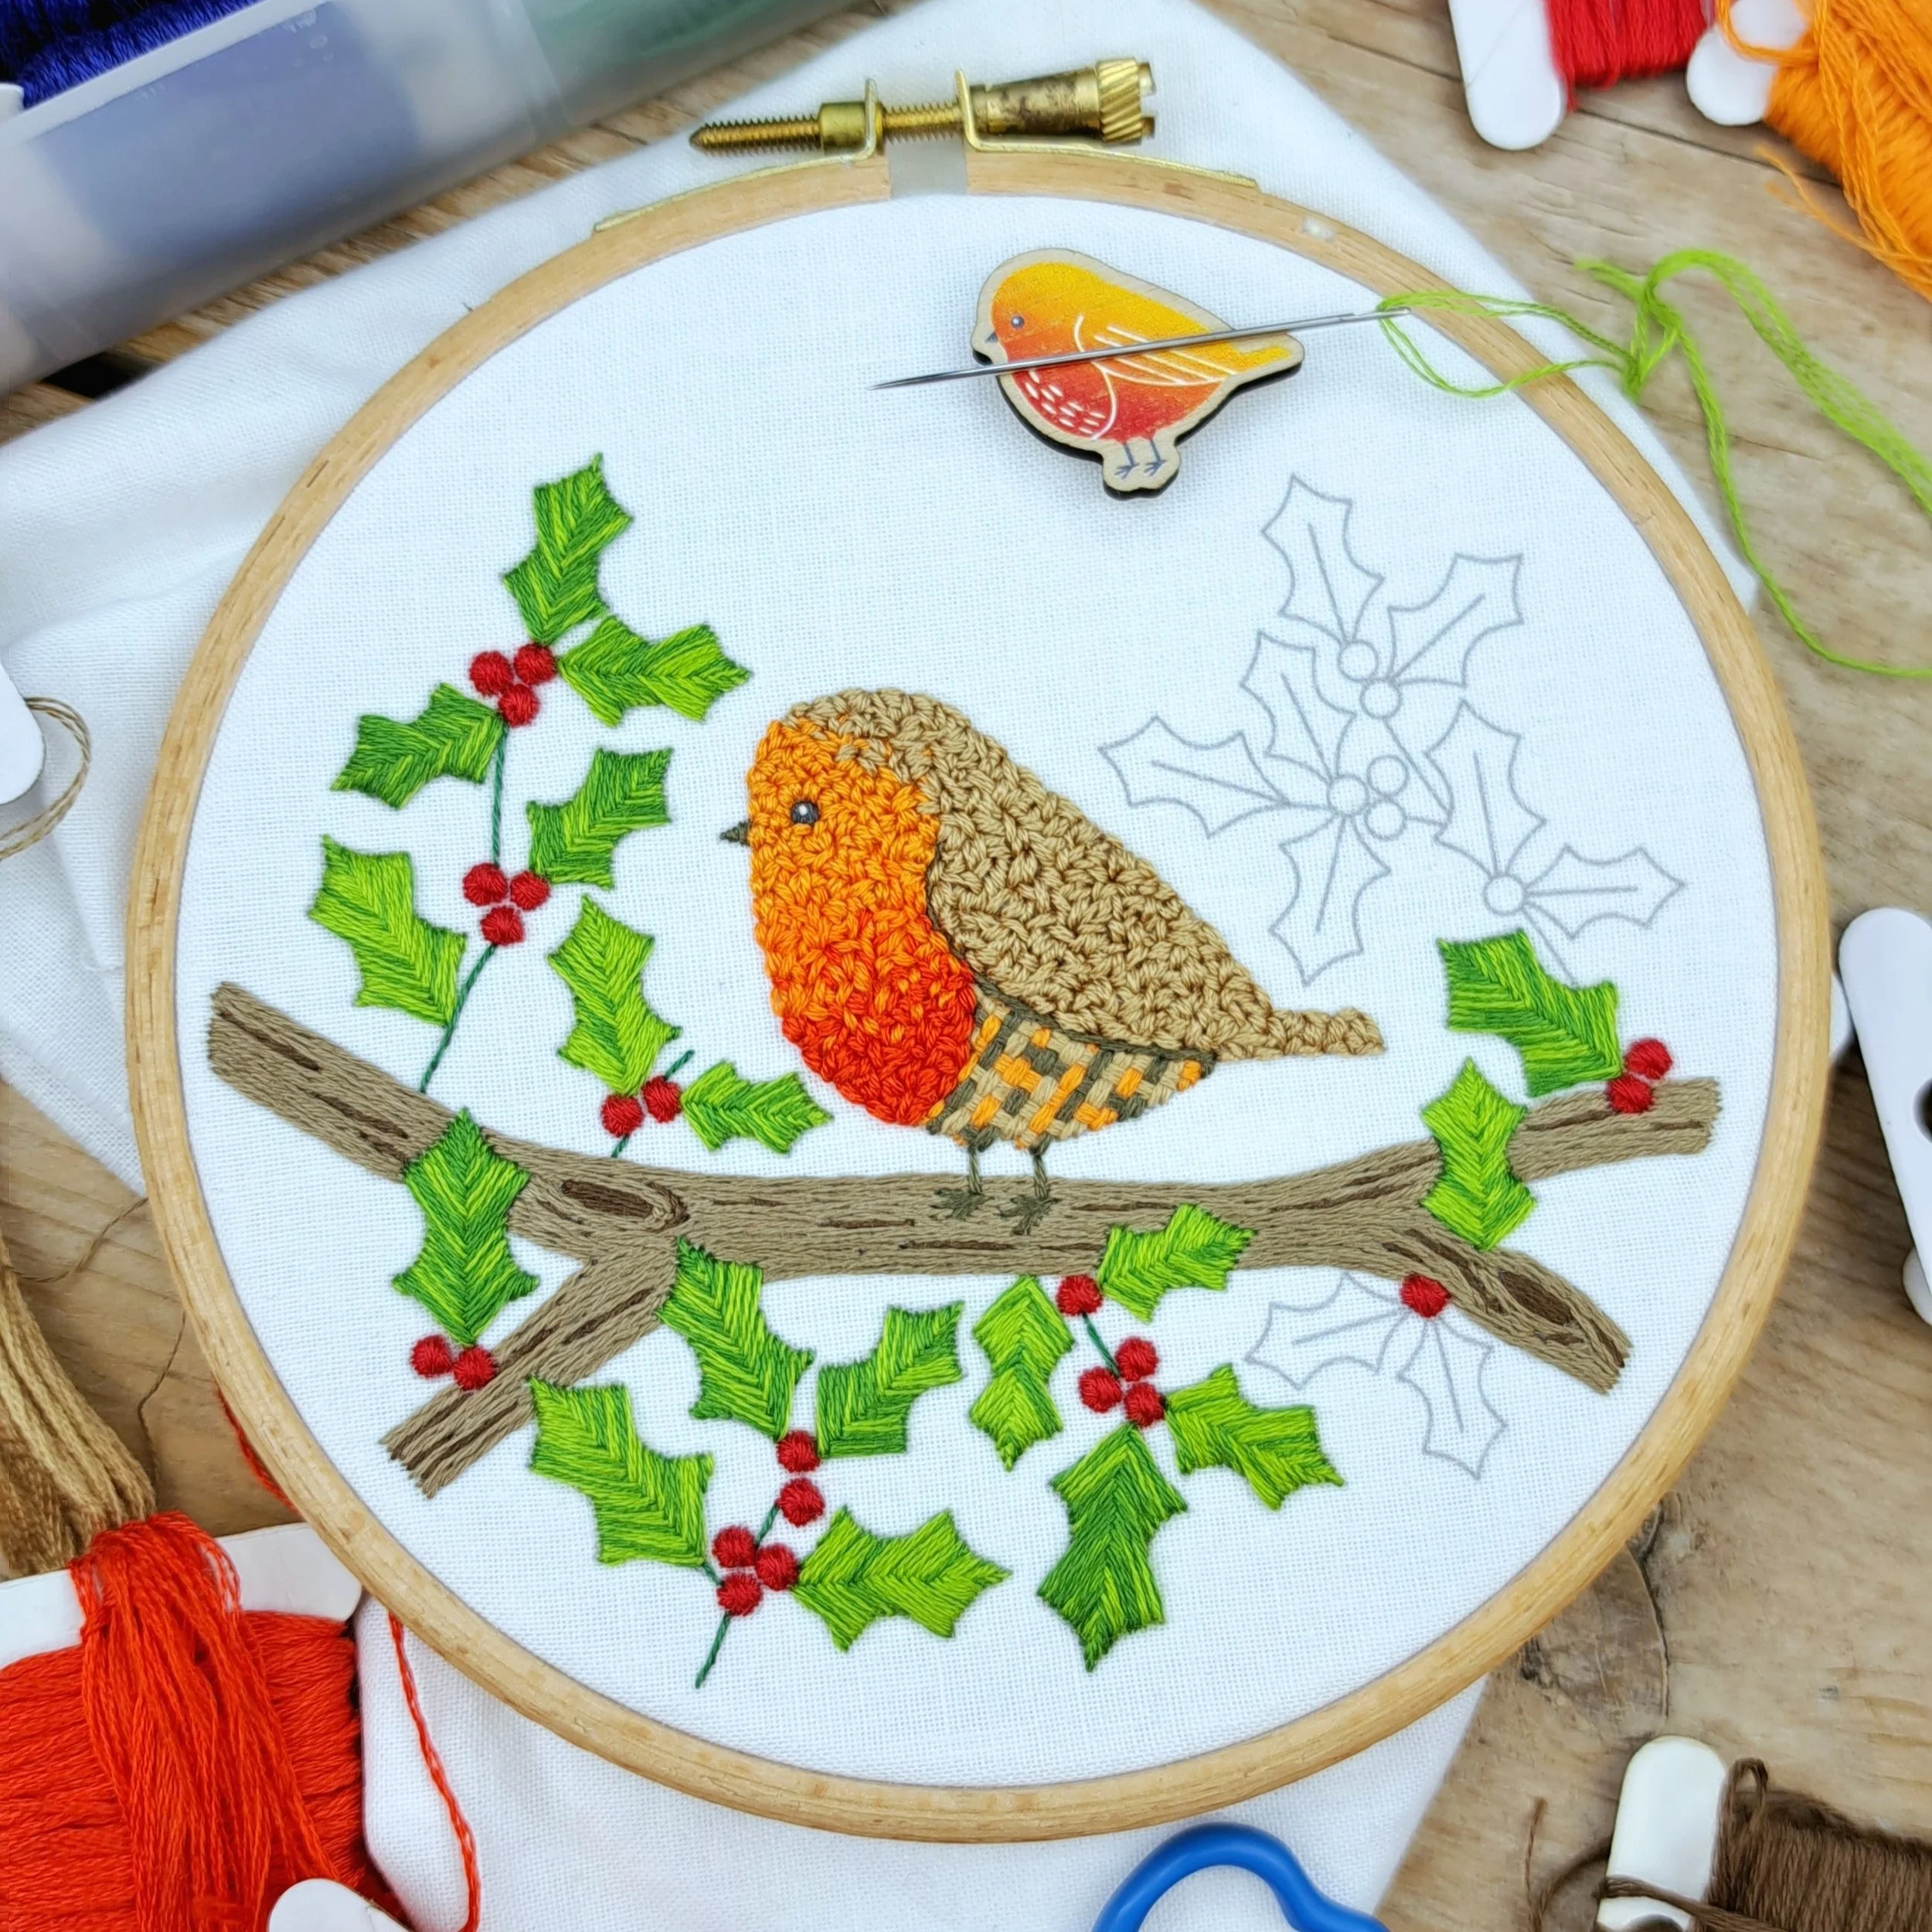
I haven’t quite finished stitching yet (I’ll add a final photo soon — promise!), but now that the robin is mostly stitched, I’ll walk you through exactly how I did it in this step-by-step guide. I’ll cover the stitches, threads, needle sizes, techniques, and a few handy tips along the way.
Let’s get stitching! 🪡
What You’ll Need
Time to gather your supplies! Here’s everything you’ll need to get started on your Robin embroidery panel:
A Robin in Holly embroidery panel
A 5” embroidery hoop
Some extra white fabric to double up inside your hoop
Embroidery needles (I’ll chat through sizes in a bit)
A selection of embroidery threads
A pair of sharp scissors
And of course… a nice hot cuppa ☕ or a cheeky mulled wine! 🤭
Don’t worry – I’ll talk through each of these in more detail below so you know exactly what I used and why.
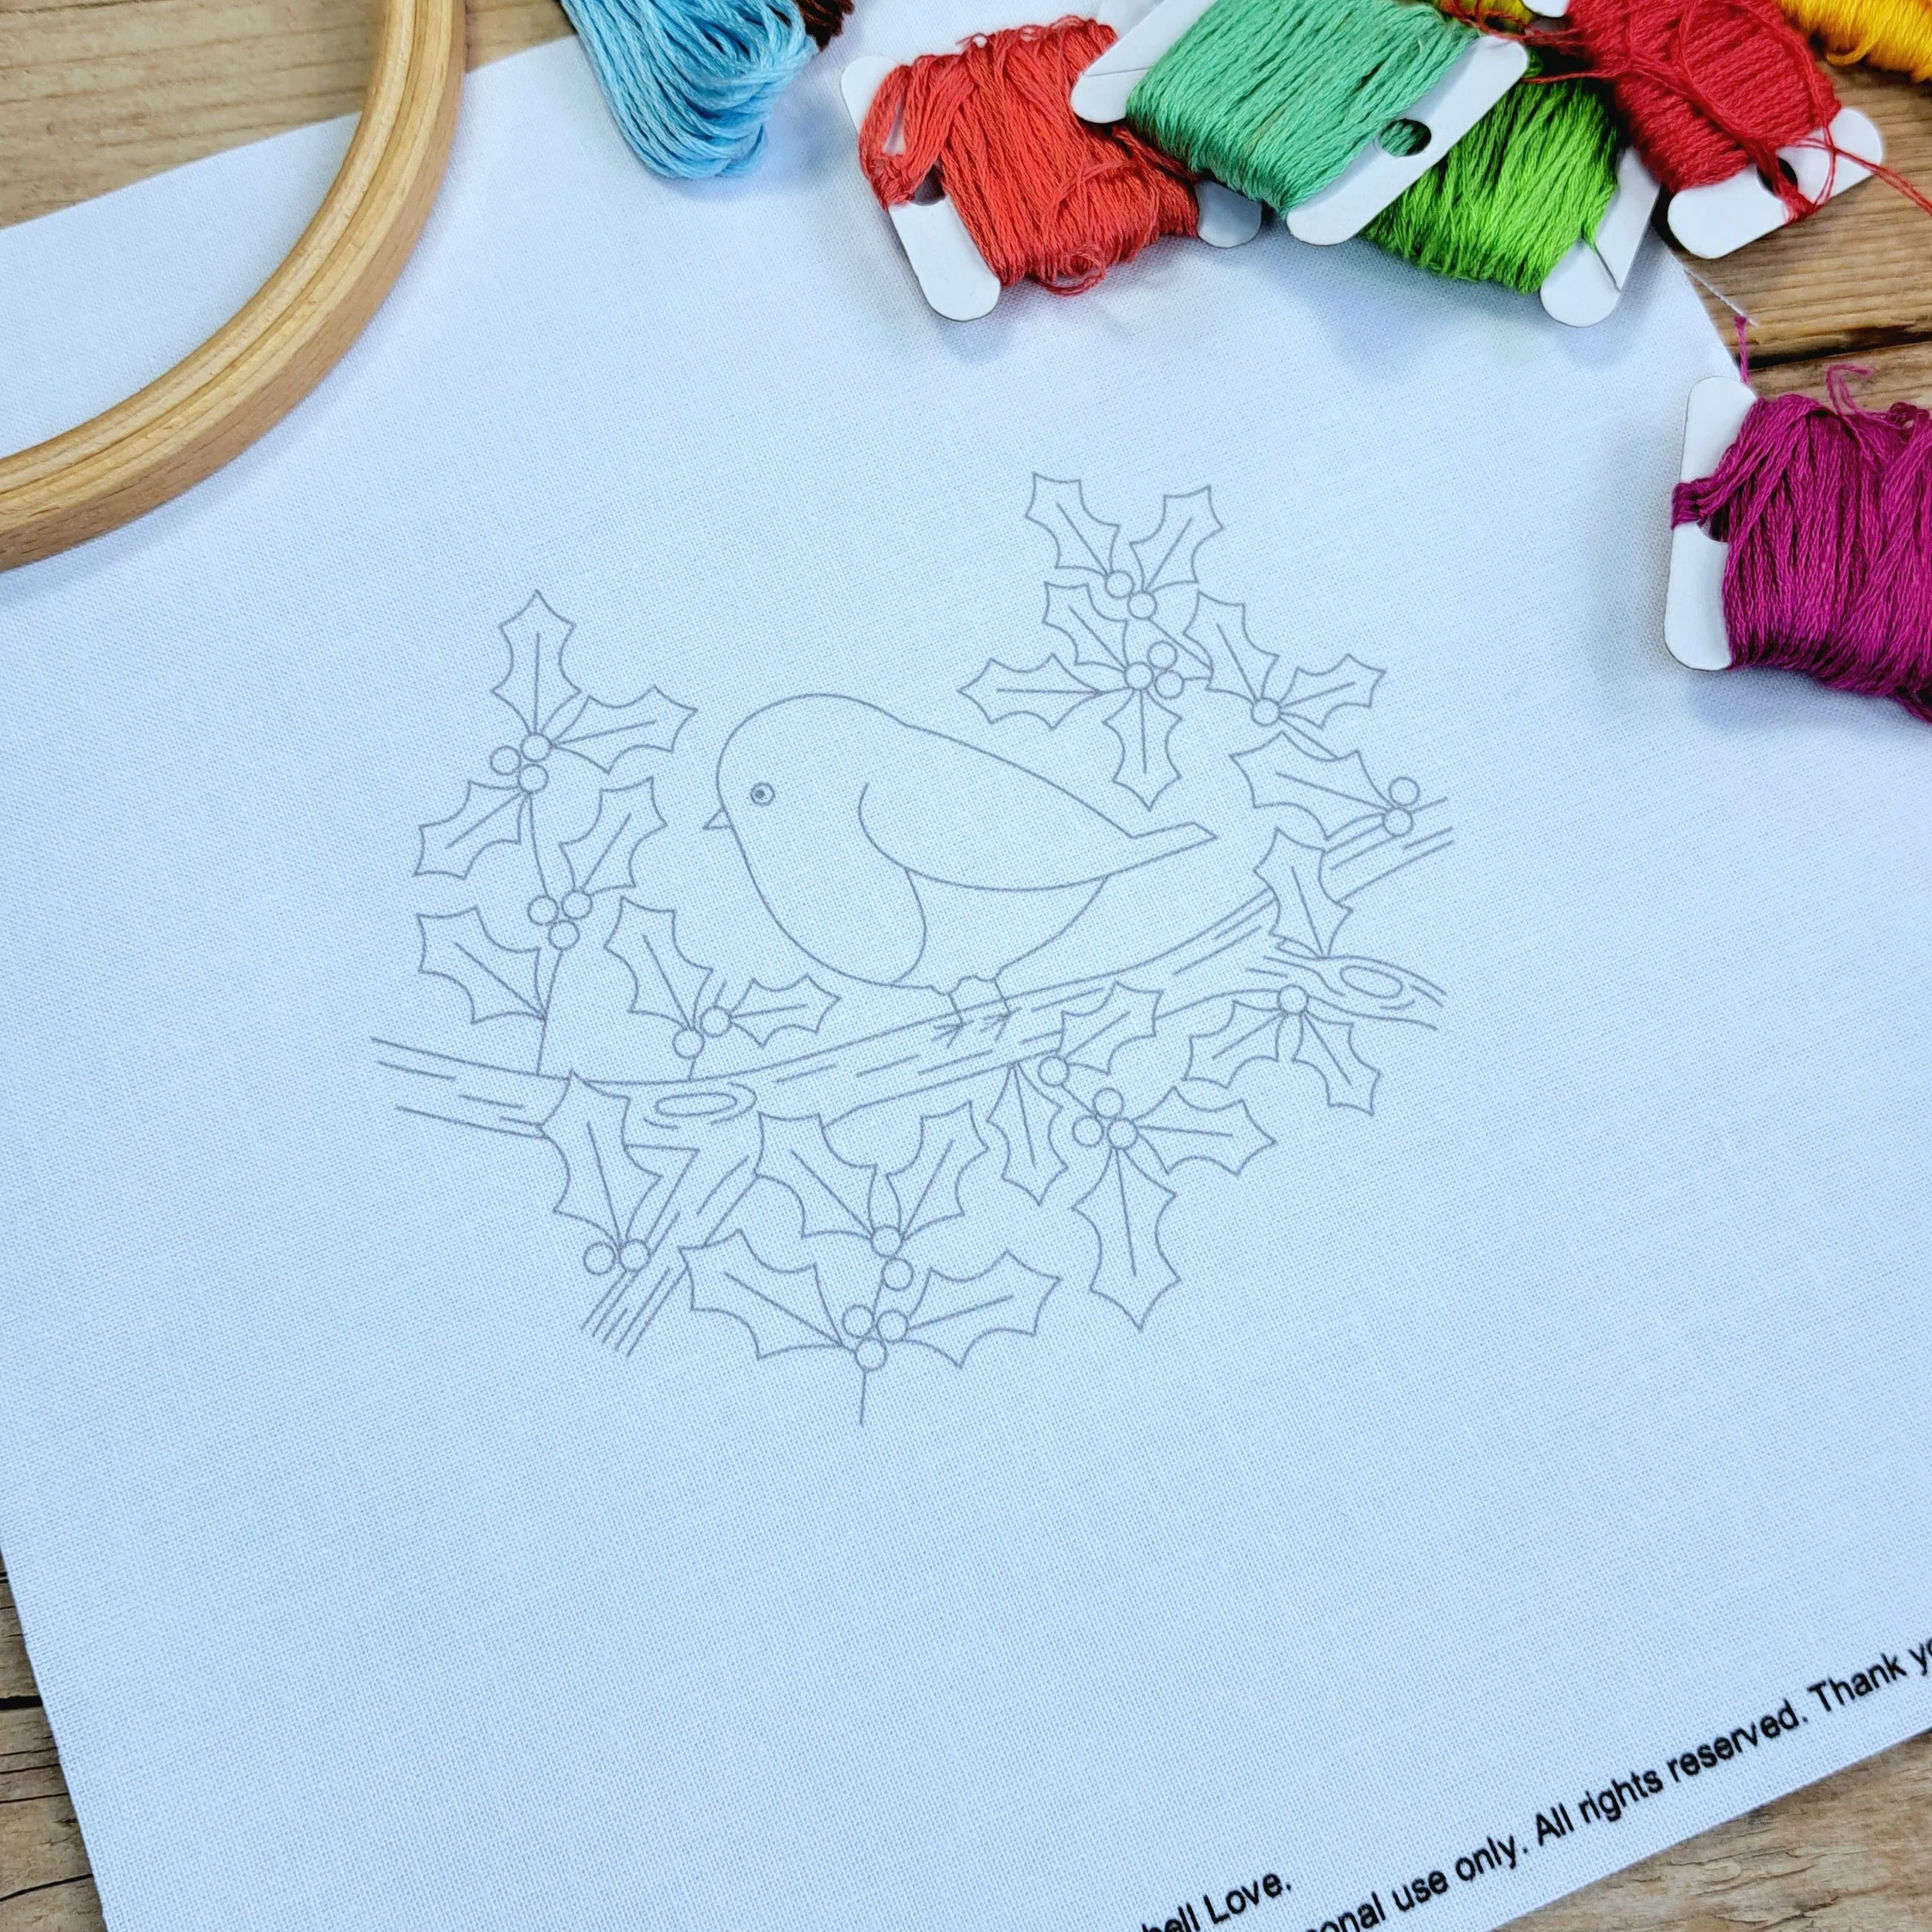
A Robin Embroidery Panel
First up, you’ll need one of my Robin in Holly embroidery panels. This design was digitally illustrated by me and printed onto 100% cotton fabric using eco-friendly, water-based pigment inks – all made right here in the UK 🌿
You can grab your panel from my shop here:
I also offer this design as part of a Panel Pack, which includes a 5” hoop and extra backing fabric – perfect if you’re just getting started or want everything bundled together 😊
A 5” Embroidery Hoop
This design fits snugly in a 5” hoop. I always recommend using a hardwood hoop – they’re more durable and hold a more consistent tension while stitching. Wooden hoops sometimes have little natural imperfections, but in my experience, hardwood ones grip the fabric better and have fewer gaps.
Extra White Fabric
I highly recommend doubling up your fabric in the hoop!
I didn’t do this when I stitched the Rabbit Panel – and honestly, I really wish I had 😬 For this robin panel, I added an extra layer of plain white cotton behind the printed panel, and it made such a difference. It keeps the background crisp and prevents thread tails from showing through.
It also helps hold the tension nice and firm - so if you can, definitely go with two layers of fabric!
Embroidery Needles
The right needle can make a huge difference in how easy it is to stitch and how tidy your stitches turn out.
Embroidery needles come in different sizes, and here’s what to keep in mind:
Larger needles: Best for stitching with all 6 strands of embroidery thread. They create bigger holes in the fabric, so if you’re using fewer strands, your stitches might shift of leave gaps.
Smaller needles: Great for finer stitching with 1-2 strands. If you use them with too many strands, it can be tricky to pull the thread through smoothly.
To keep things simple, I offer needle packs in my shop with six needles in three sizes:
Large needles: For stitching with 6 strands.
Medium needles: For stitching with 3–4 strands.
Small needles: For stitching with 1–2 strands.
I’ll refer to these sizes throughout the guide to help you follow along easily.
🧵 You can grab a needle pack from my shop here:
Embroidery Threads
For this project, I used Anchor 6-stranded cotton threads. They’re a brilliant quality brand, with vibrant colours that hold up beautifully over time.
I picked my shades from my (very full!) thread stash – but feel free to choose colours that match your own vision for this cheerful robin. A rough colour plan can be handy before you start, but don’t be afraid to change your mind as you go. Sometimes a new colour just feels right in the moment!
Here’s the full list of the 13 colours I used:

Anchor 46 – Berry Red, Anchor 324 – Light Orange, Anchor 330 – Dark Orange, Anchor 335 – Bright Red, Anchor 255 – Light Green, Anchor 258 – Dark Green, Anchor 211 – Stem Green, Anchor 360 – Dark Brown, Anchor 904 – Mid Brown, Anchor 903 – Light Brown, Anchor 373 – Light Golden Brown, Anchor 401 – Dark Grey and Anchor 2 – White
Anchor threads are numbered for easy reference, so if you’d like to match the colours I used exactly, just look for these numbers. But honestly – this is your project! Choose the colours that make you happy.
Scissors
Any sharp scissors will do the trick, but embroidery scissors are ideal. Their small, pointed blades help you trim threads cleanly and get into tight spaces without fraying the ends. If you don’t have embroidery scissors, no stress – any small, sharp pair from your sewing kit will work just fine.
A Nice Hot Cuppa
I’m a tea girl… but you do you! 😊☕
2. The Stitches
For this Robin I used:
Satin Stitch
Stem Stitch
Fishbone Stitch
Rhodes Circle Stitch
Straight Stitch
Basket Weave Stitch
Loop Stitch
Couch Stitch (just one little one)
That said — you absolutely don’t need to use all (or any!) of these. I love mixing stitches to bring texture, but if there’s one you don’t enjoy… life’s too short to be stitching things we don’t love ✨
So feel free to swap in stitches you do love. Or, if you’re feeling adventurous, add a few extras! Most importantly — have fun with it. 😊
If you’d like a little extra help, check out my Stitch of the Week page — it’s a growing library of tutorial videos. Not every stitch may be up yet, but I add new ones regularly.
3. Let’s Start Stitching
First things first — pop your Robin panel (with that extra backing fabric) into your hoop and get everything nice and taut. I always aim for a satisfying drum-like tension — it helps keep stitches neat and stops the fabric puckering.
How to Get That Drum Tension:
Lay the fabric over the inner hoop, then press the outer hoop down on top.
Gently pull the edges of the fabric outside the hoop to smooth out any wrinkles or bumps.
Tighten the screw mechanism until the hoop feels secure.
Give the fabric around the edges one final little tug to tighten it up even more.
Your fabric should now feel tight like a drum — perfect and ready for stitching!
✨ A little Tip:
Tension can loosen as you stitch. If that happens, pause and tighten the hoop again before carrying on.
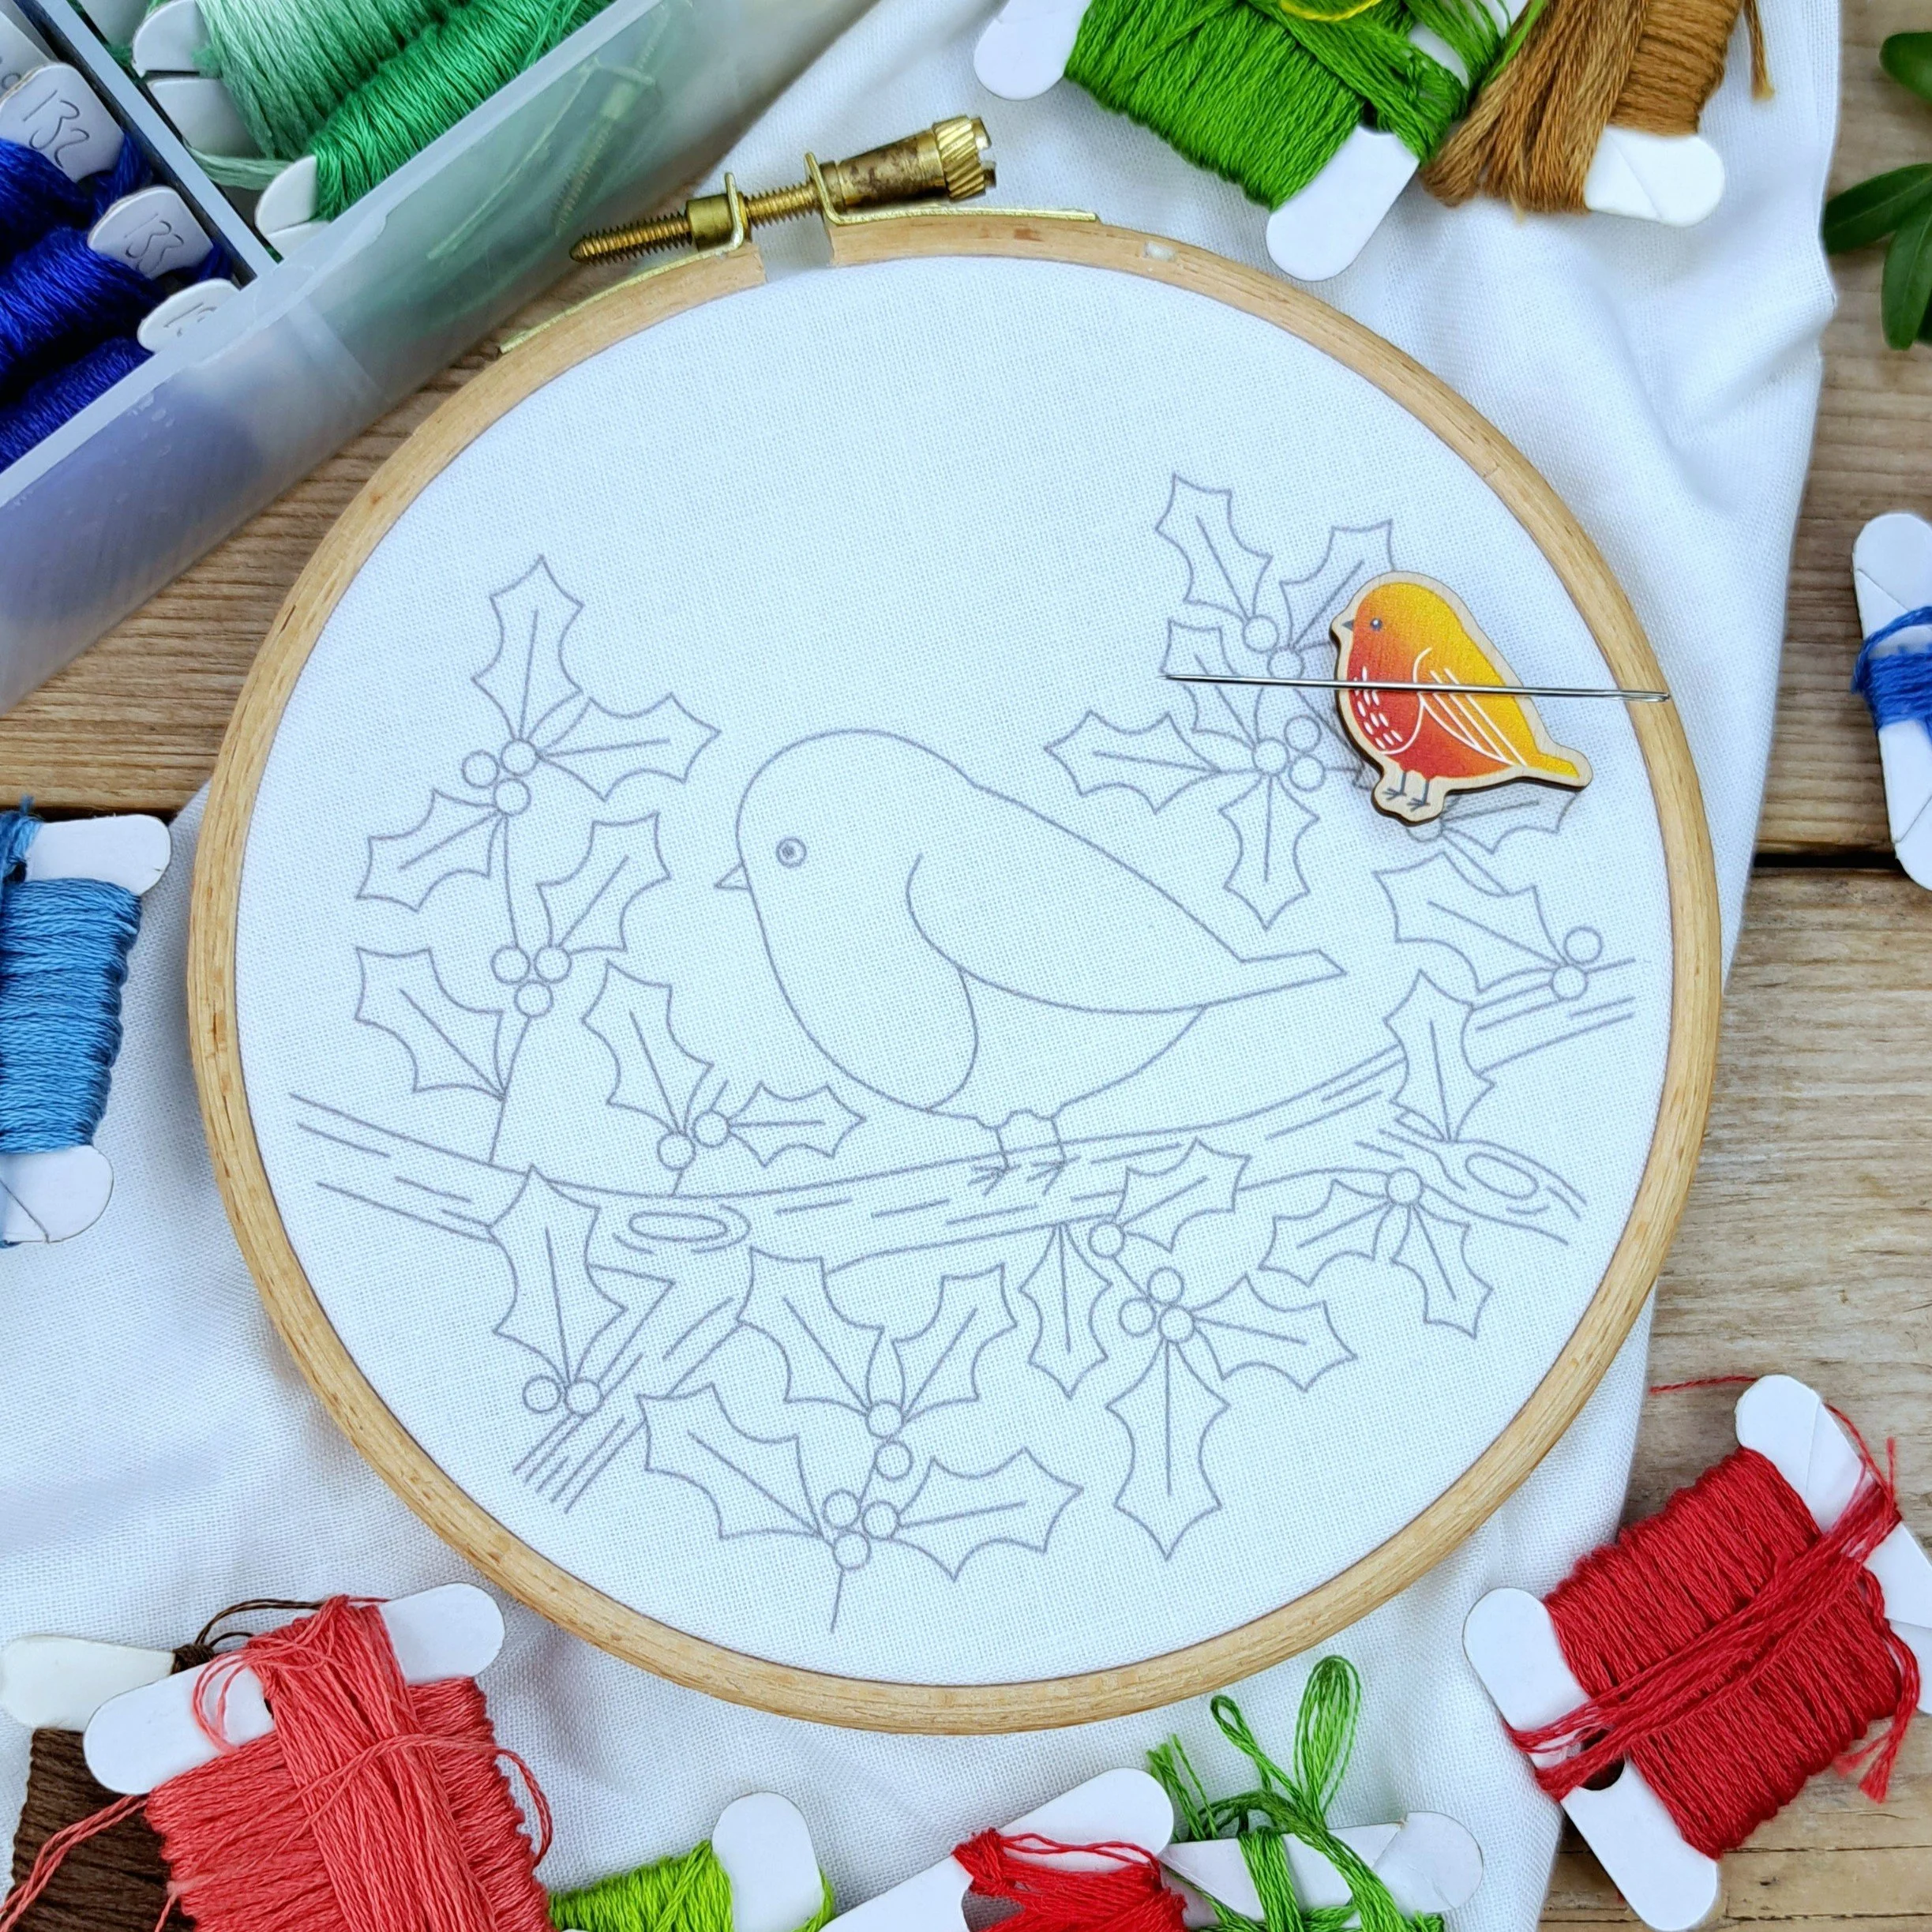
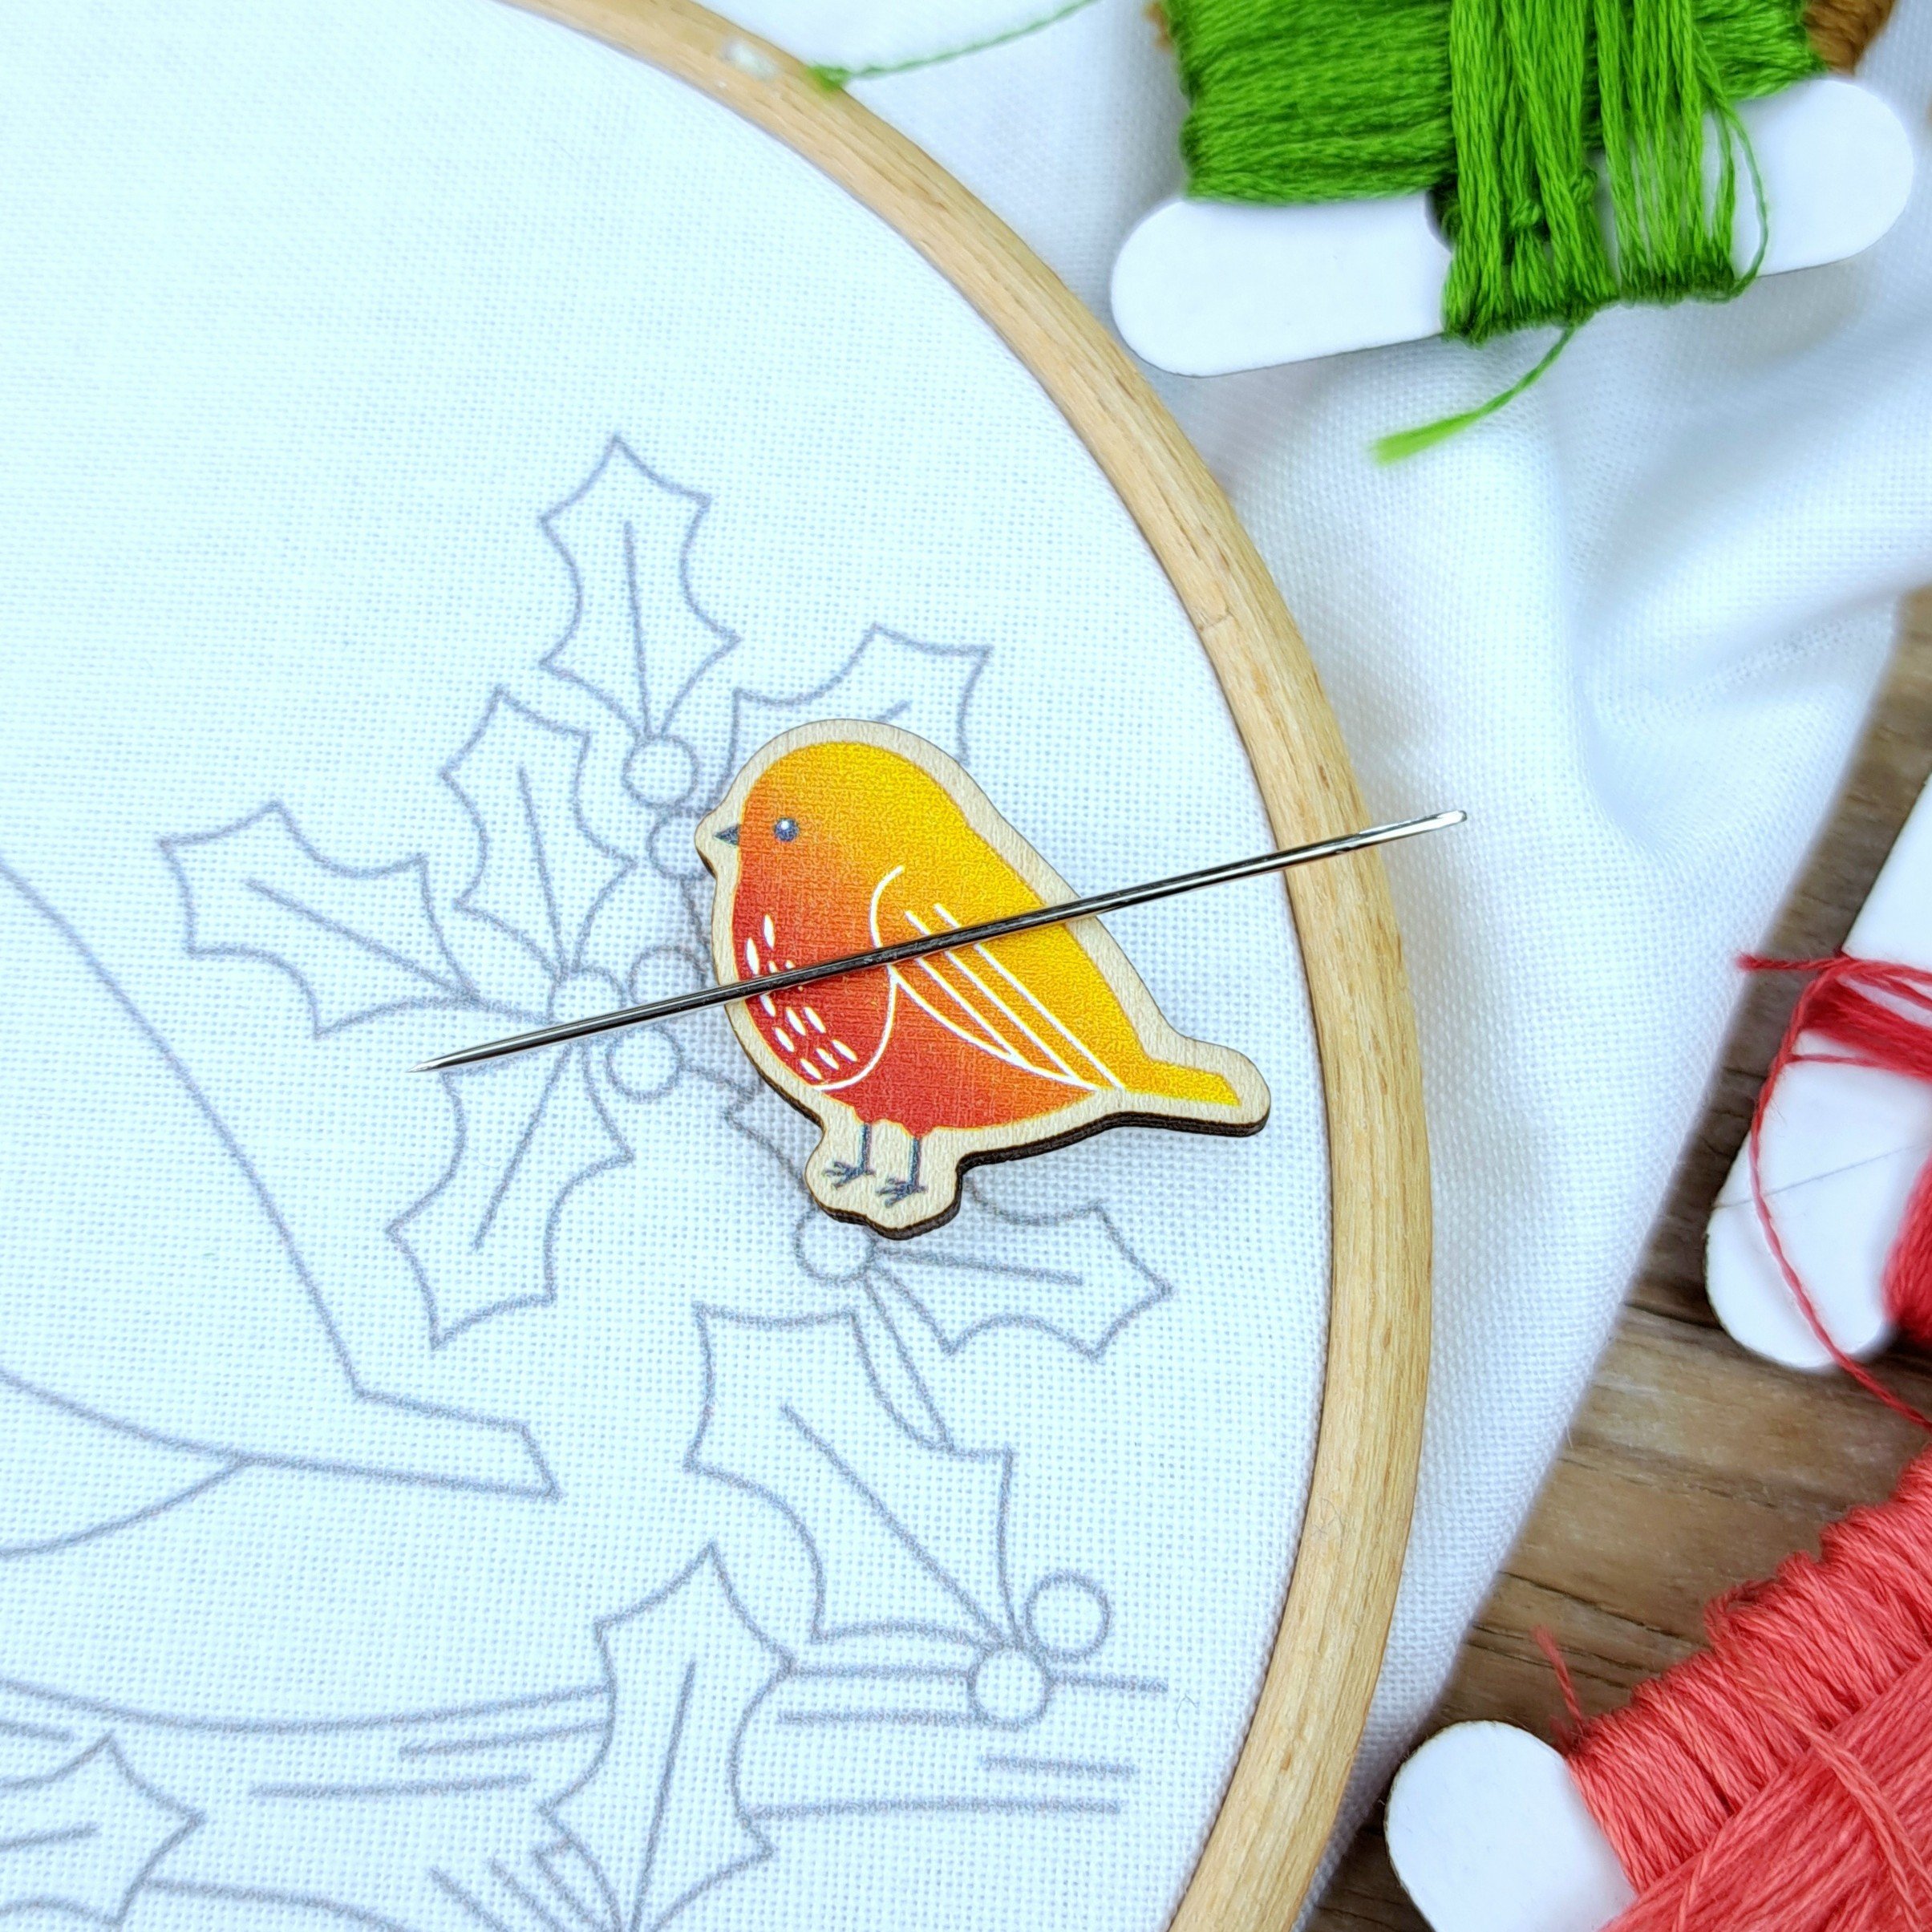
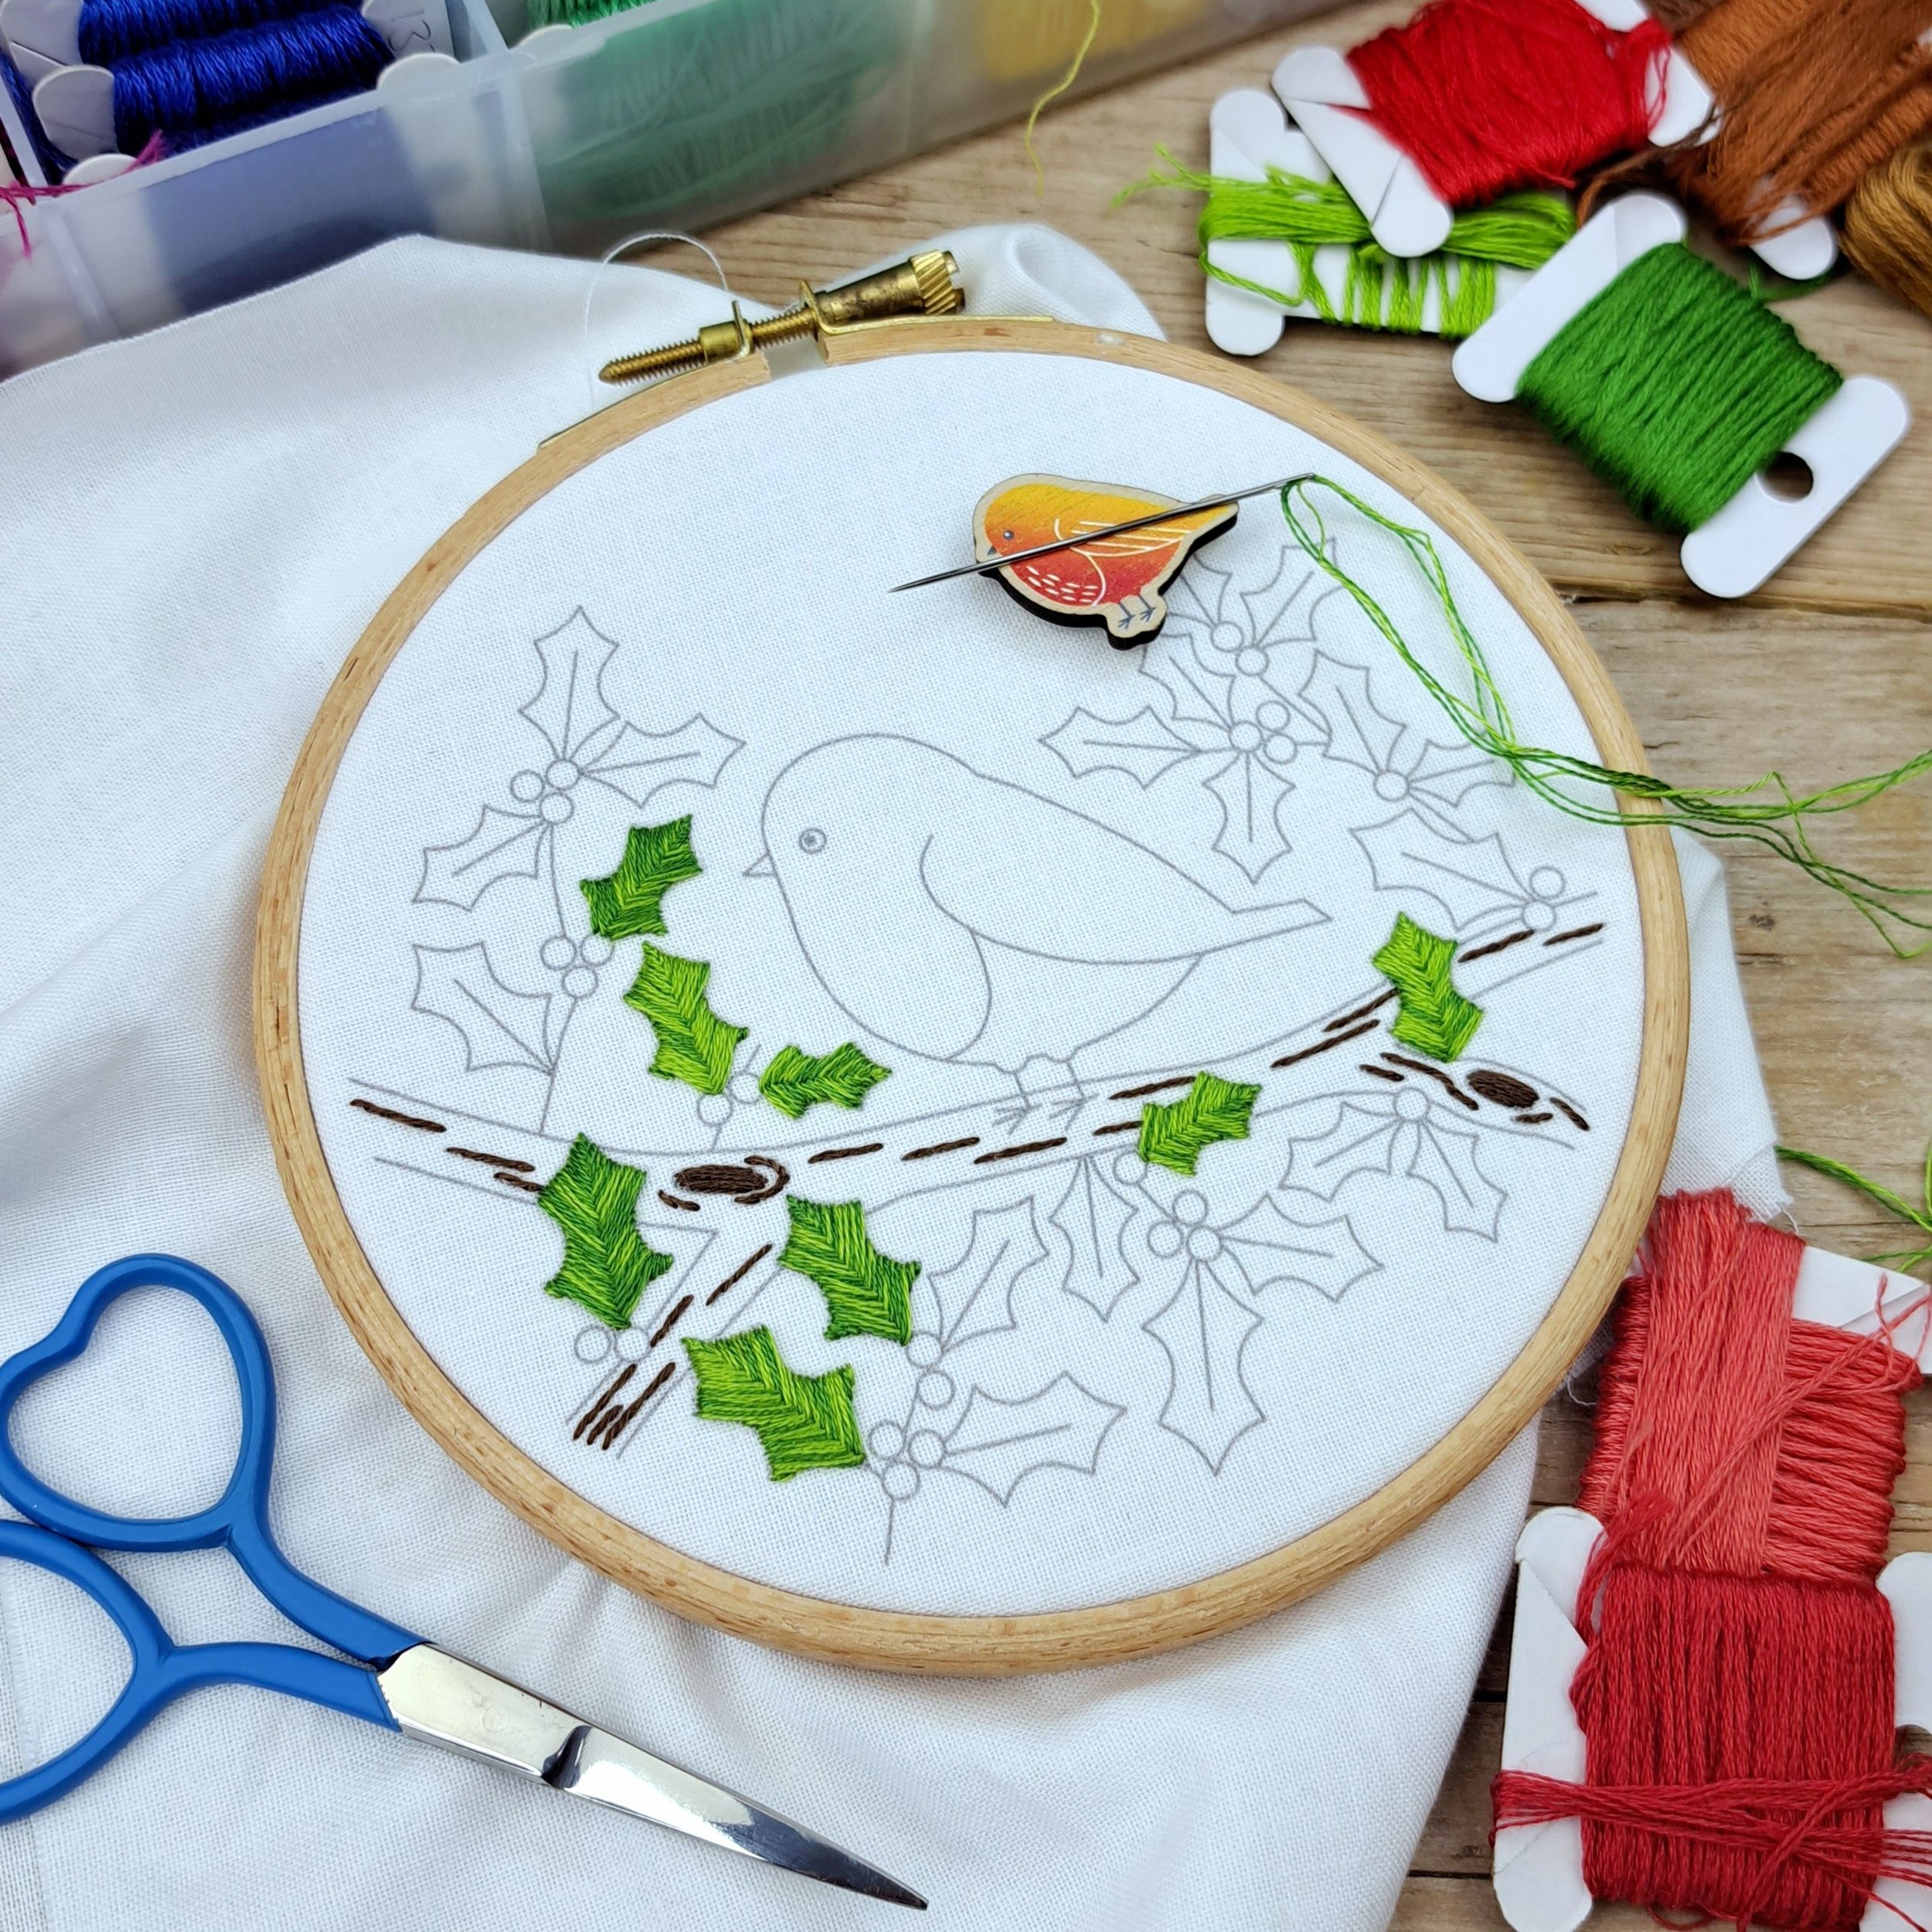
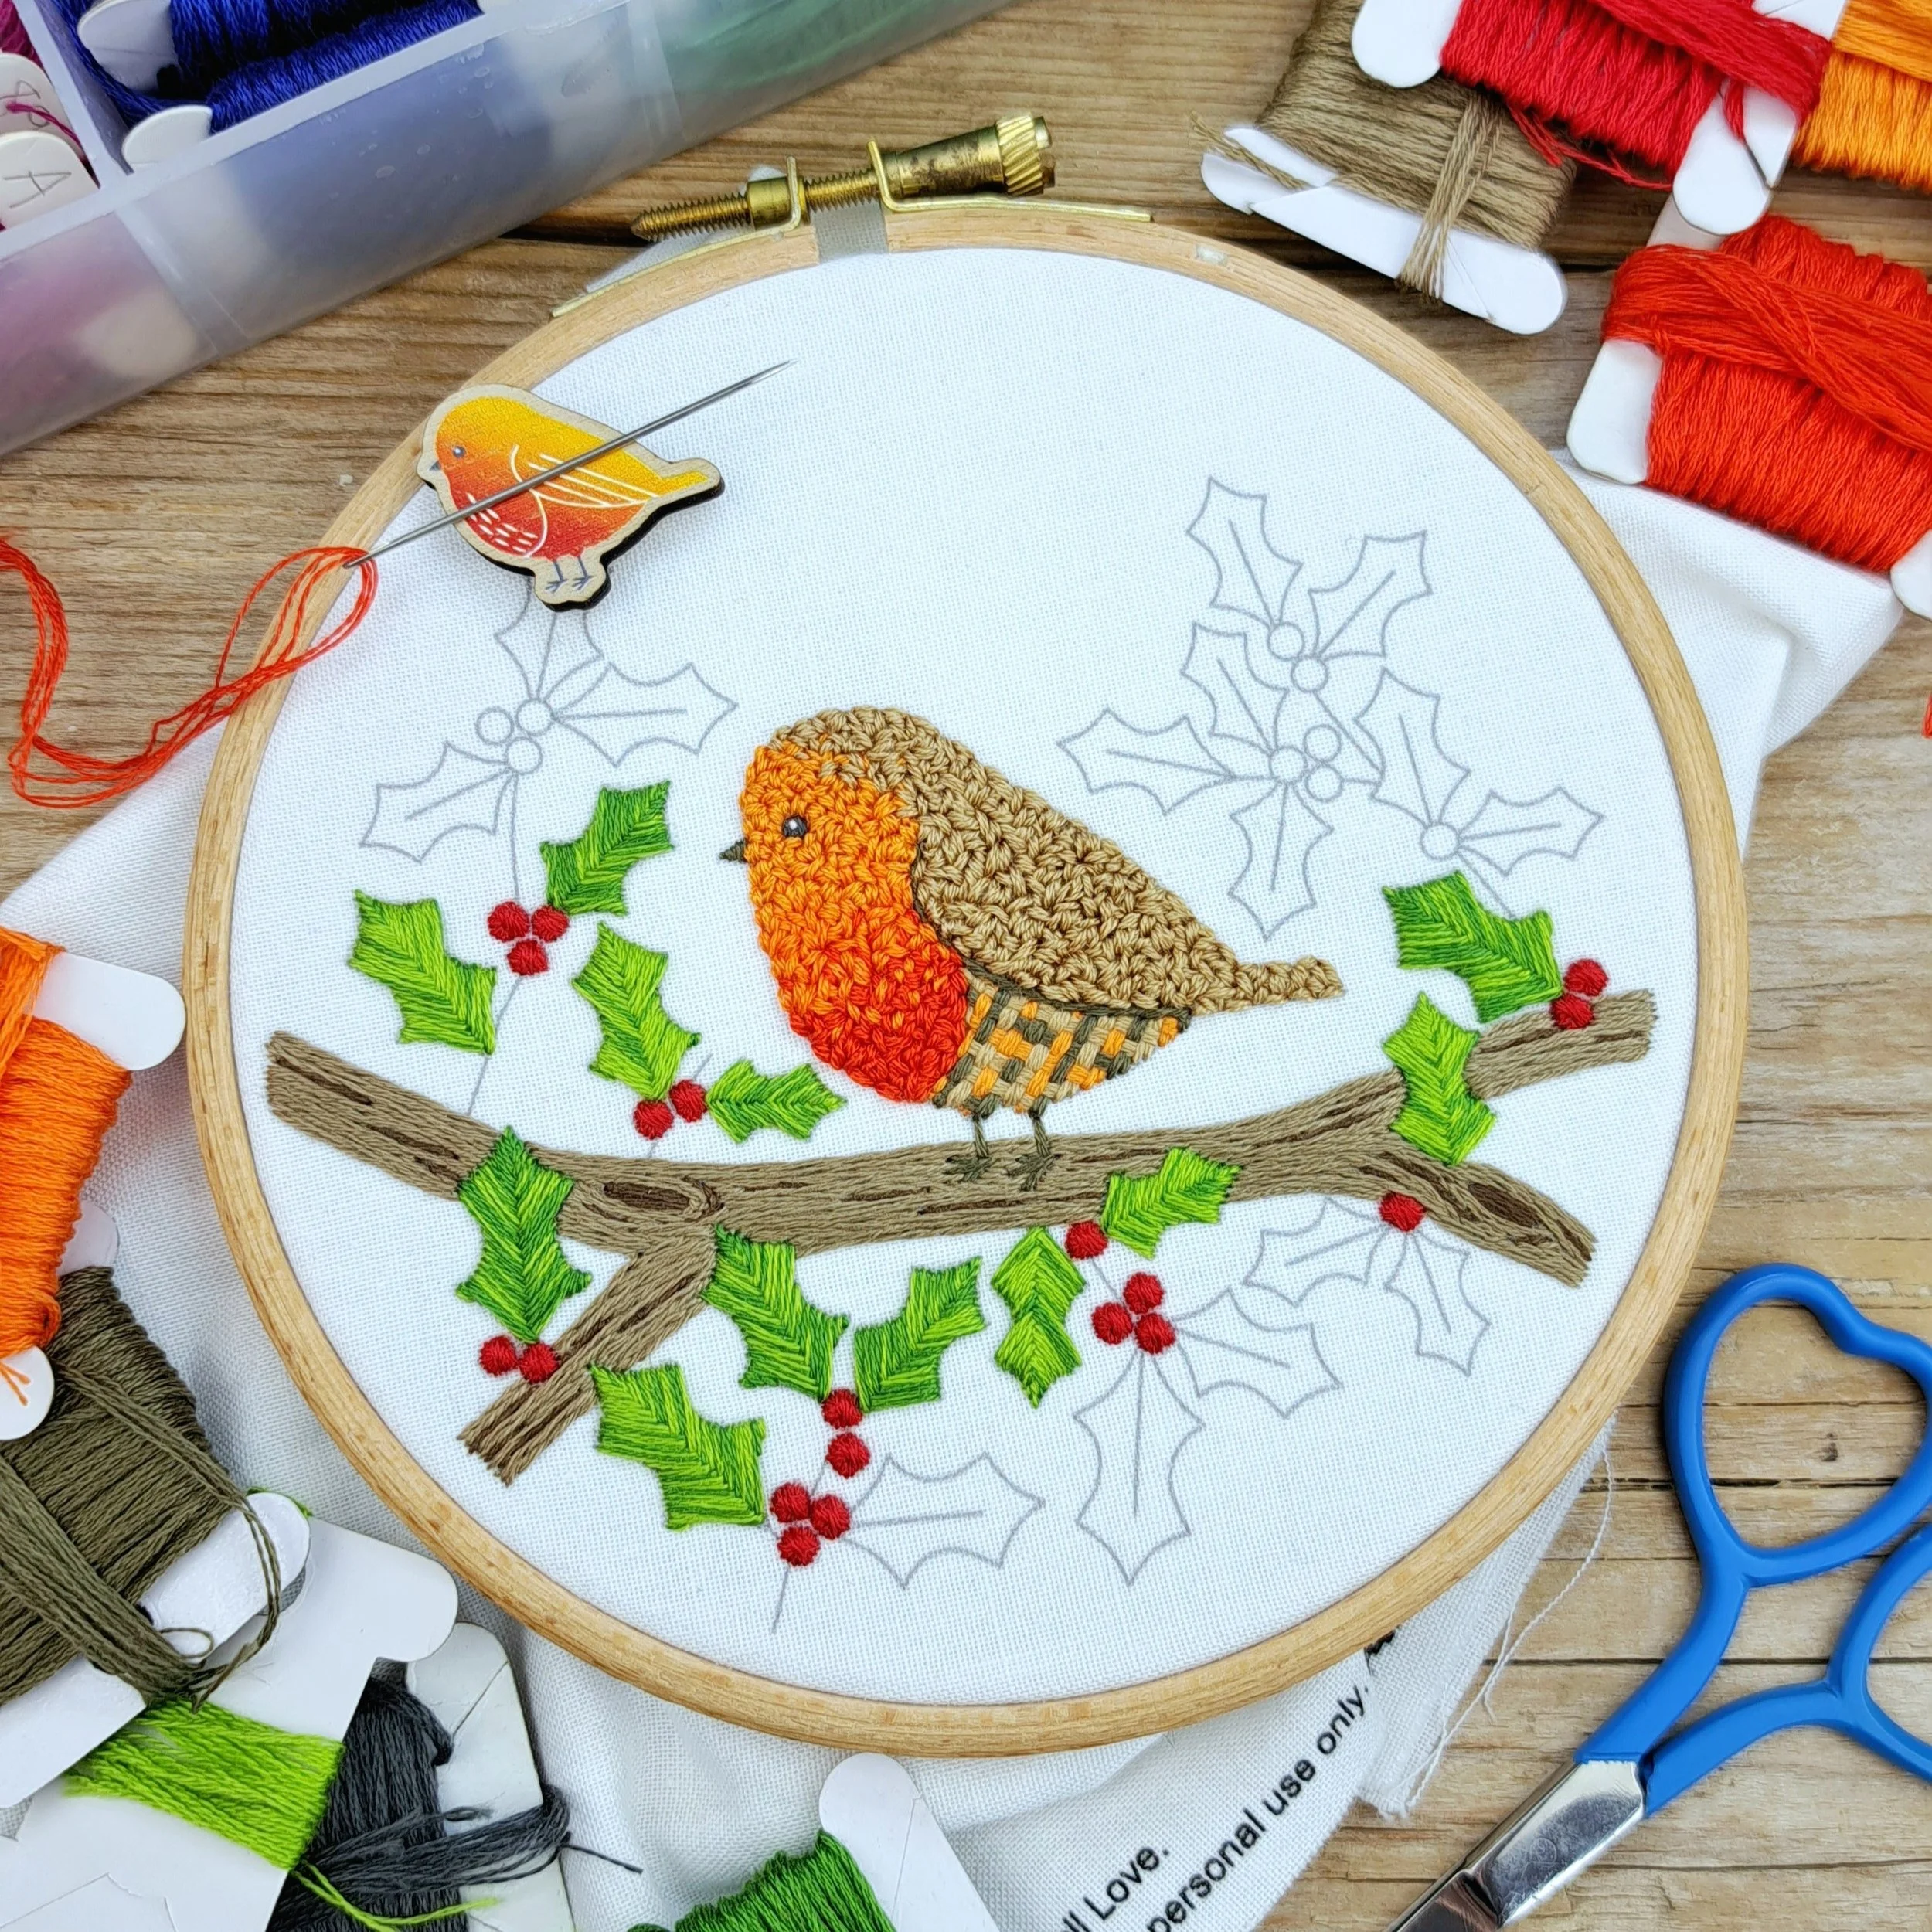
You might have noticed the little robin sitting on my hoop — that’s one of my matching needle minders. It’s a small magnetic helper that sandwiches onto your fabric and holds your needle safely in place whenever you take a break (because we all know how easily needles like to disappear 😅). I designed it to go perfectly with this festive panel, so I switched out the mushroom needle minder I’d been using for a robin on this one. If you’d like one for your own hoop, you can find it over in my shop here:
4. Step-by-Step Stitching Guide
You can start stitching wherever you like — if a particular part makes you excited, just dive in! I usually recommend working from the back forward so foreground elements sit neatly on top, but it’s not a hard rule. This design has several overlapping bits, so starting at the back can help the finished piece look tidy, though you can always tuck stitches behind other areas if needed.
There are quite a few elements in this design, but don’t worry - I’ll walk you through how I stitched each one, step by step.
Okay, onto the stitching!
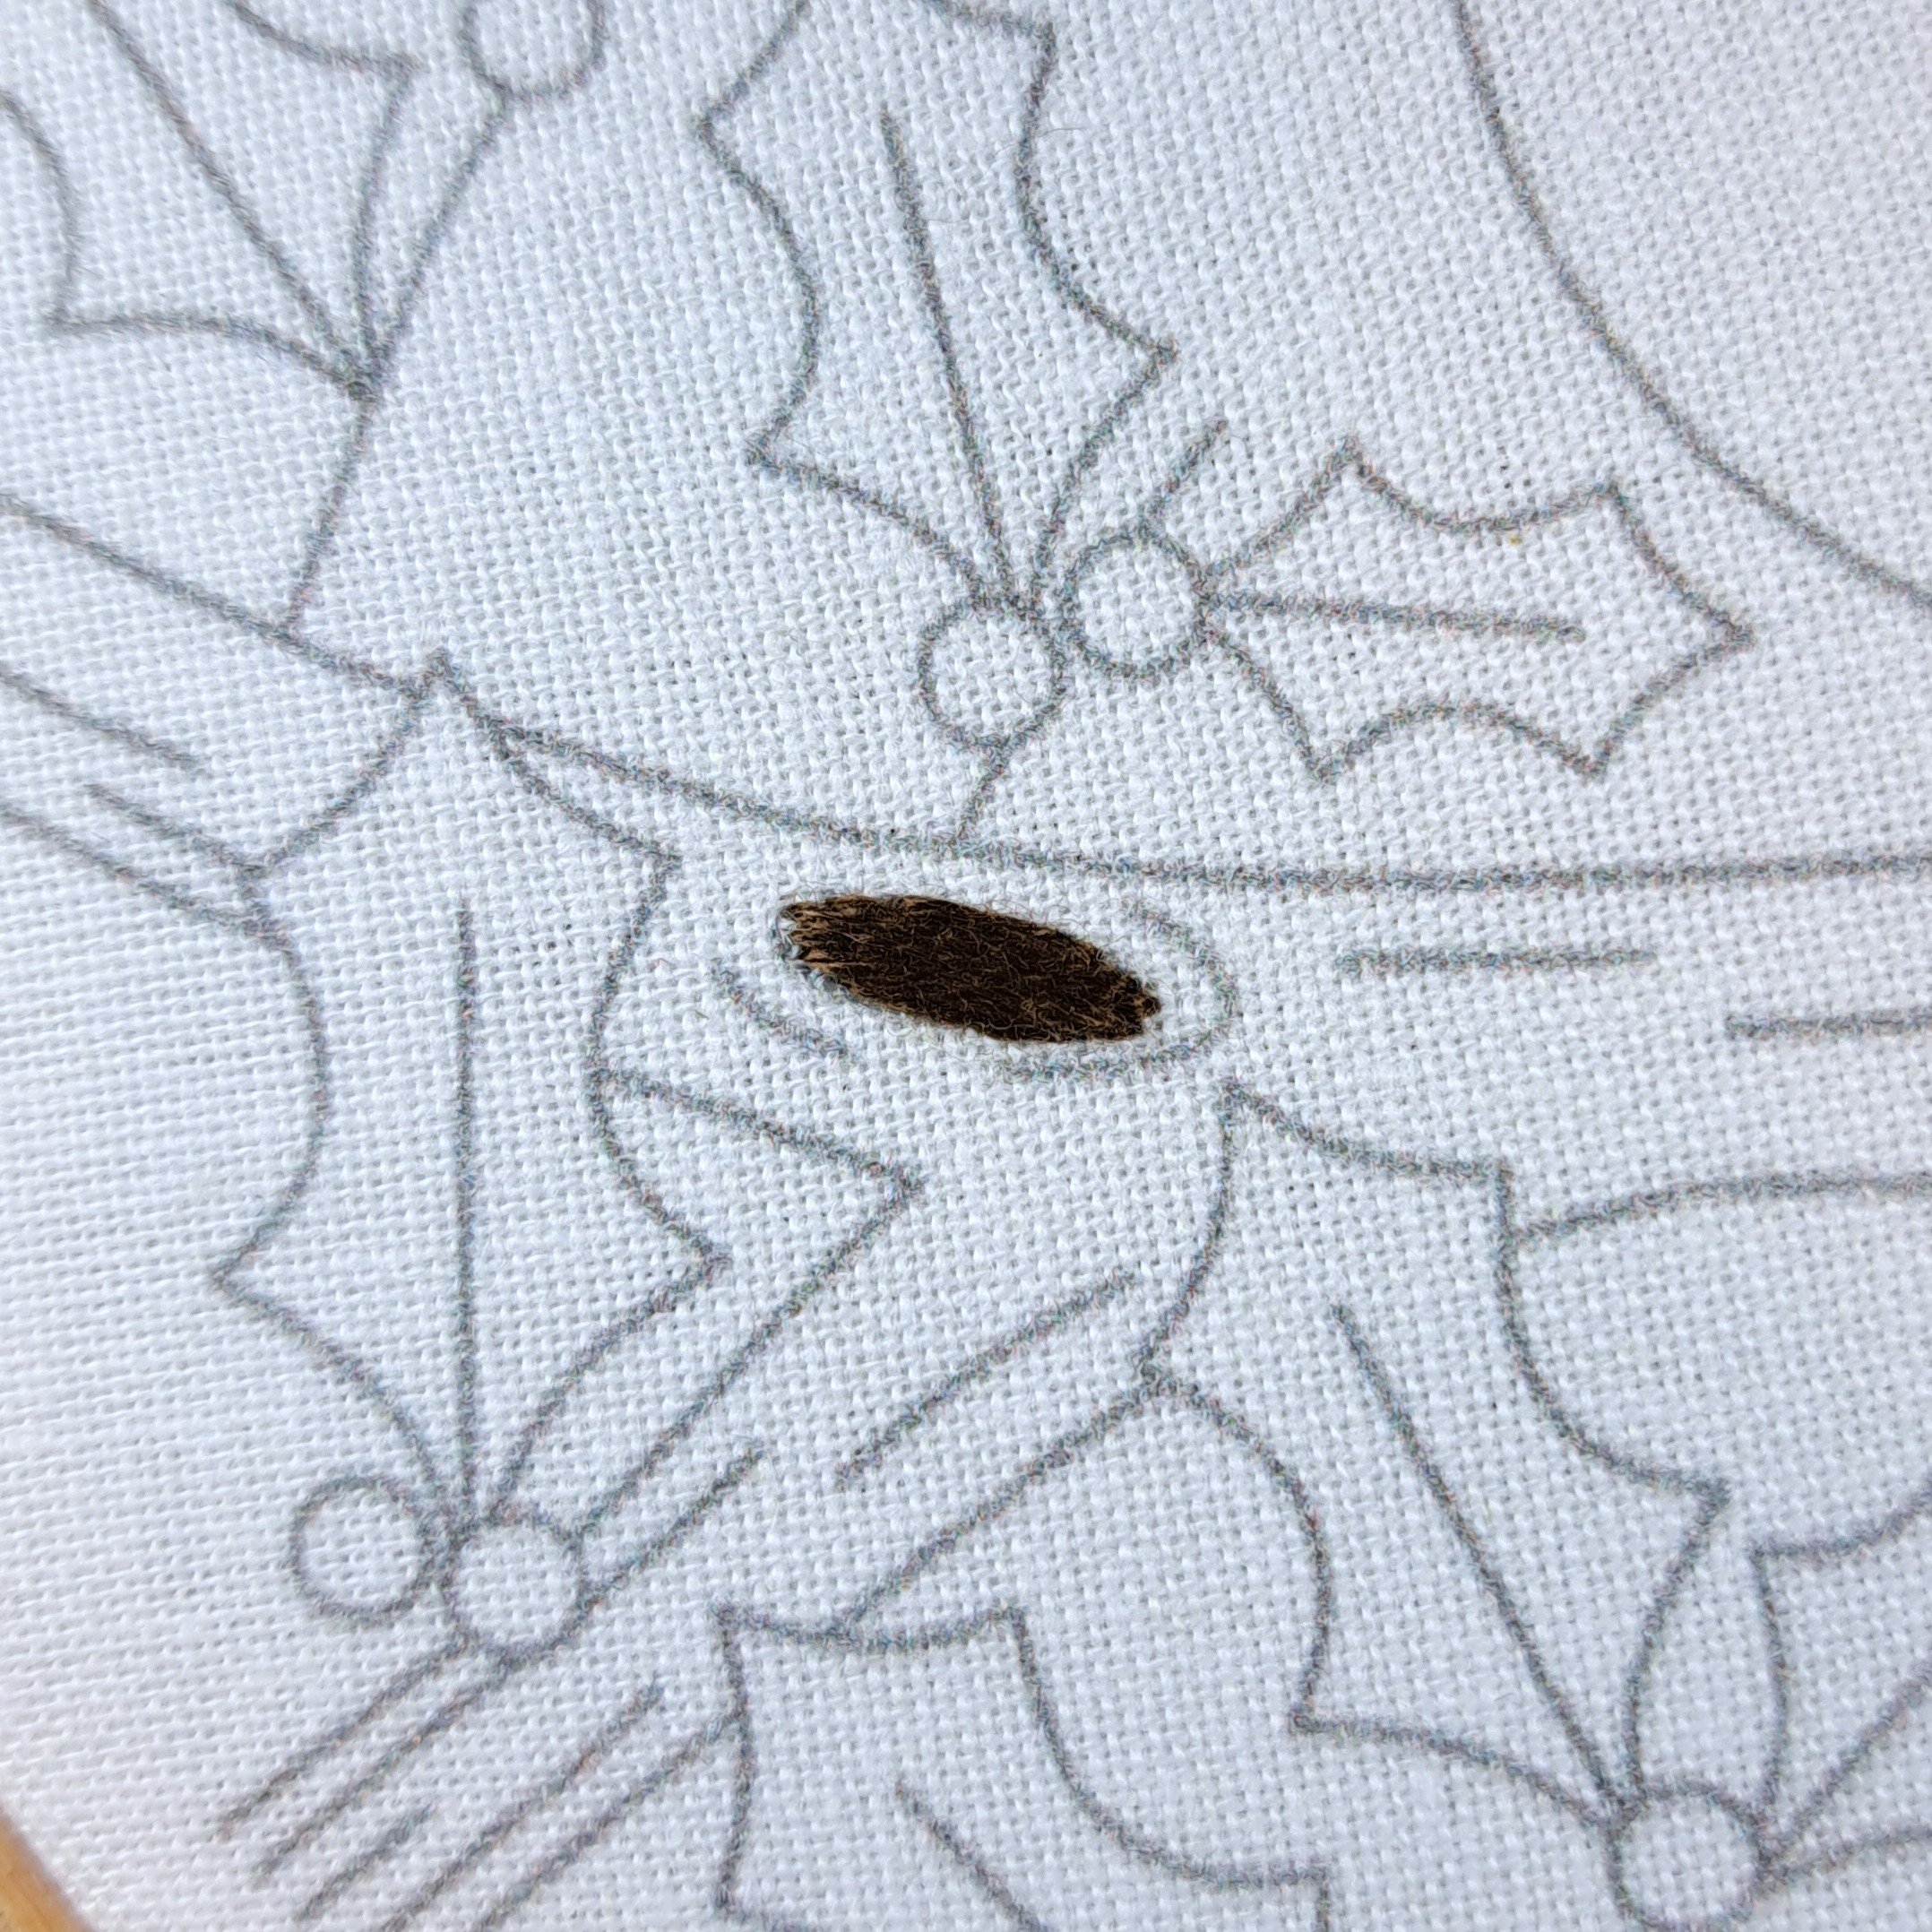
The Branch Knots
I started with the two little knots on the branch — a nice, easy way to ease in before tackling the rest of the design. I filled each knot with horizontal Satin Stitches, which gave them a lovely smooth texture that really stands out against the bark. I added around 5–6 stitches per knot.
Stitch - Satin Stitch
Thread colour - Anchor 360 (Dark Brown)
Number of strands – 2
Needle size – Small
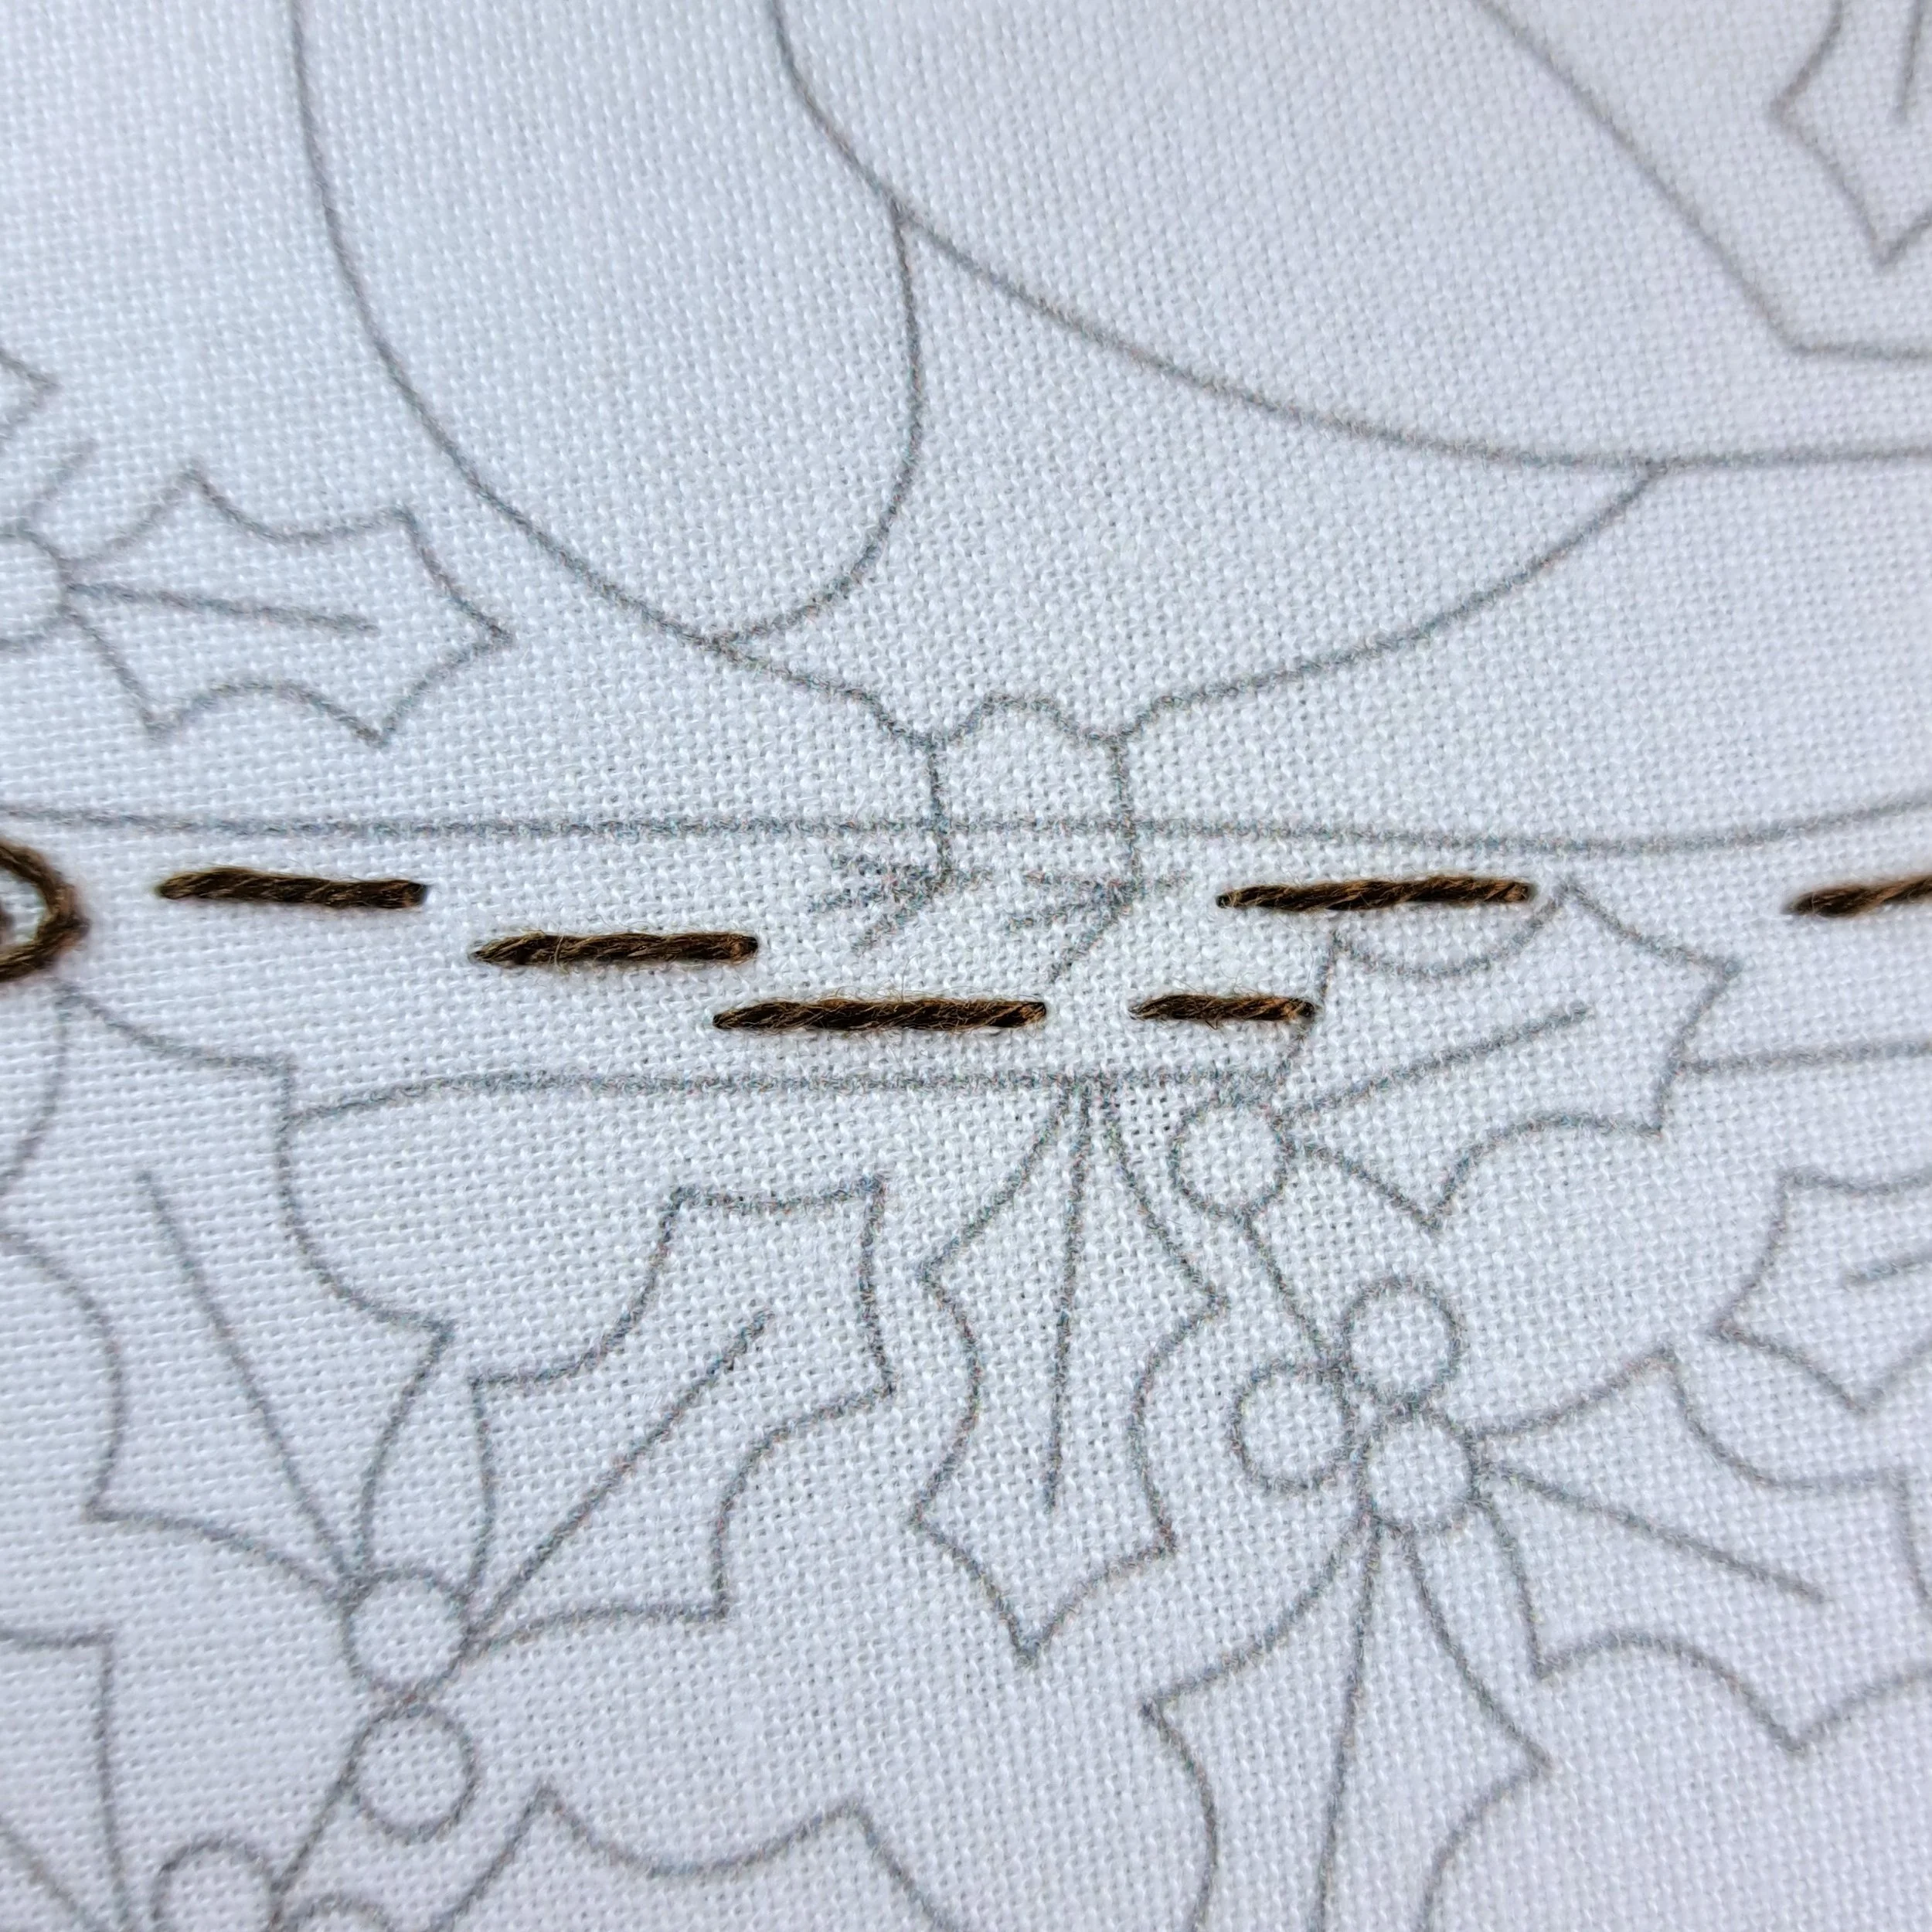
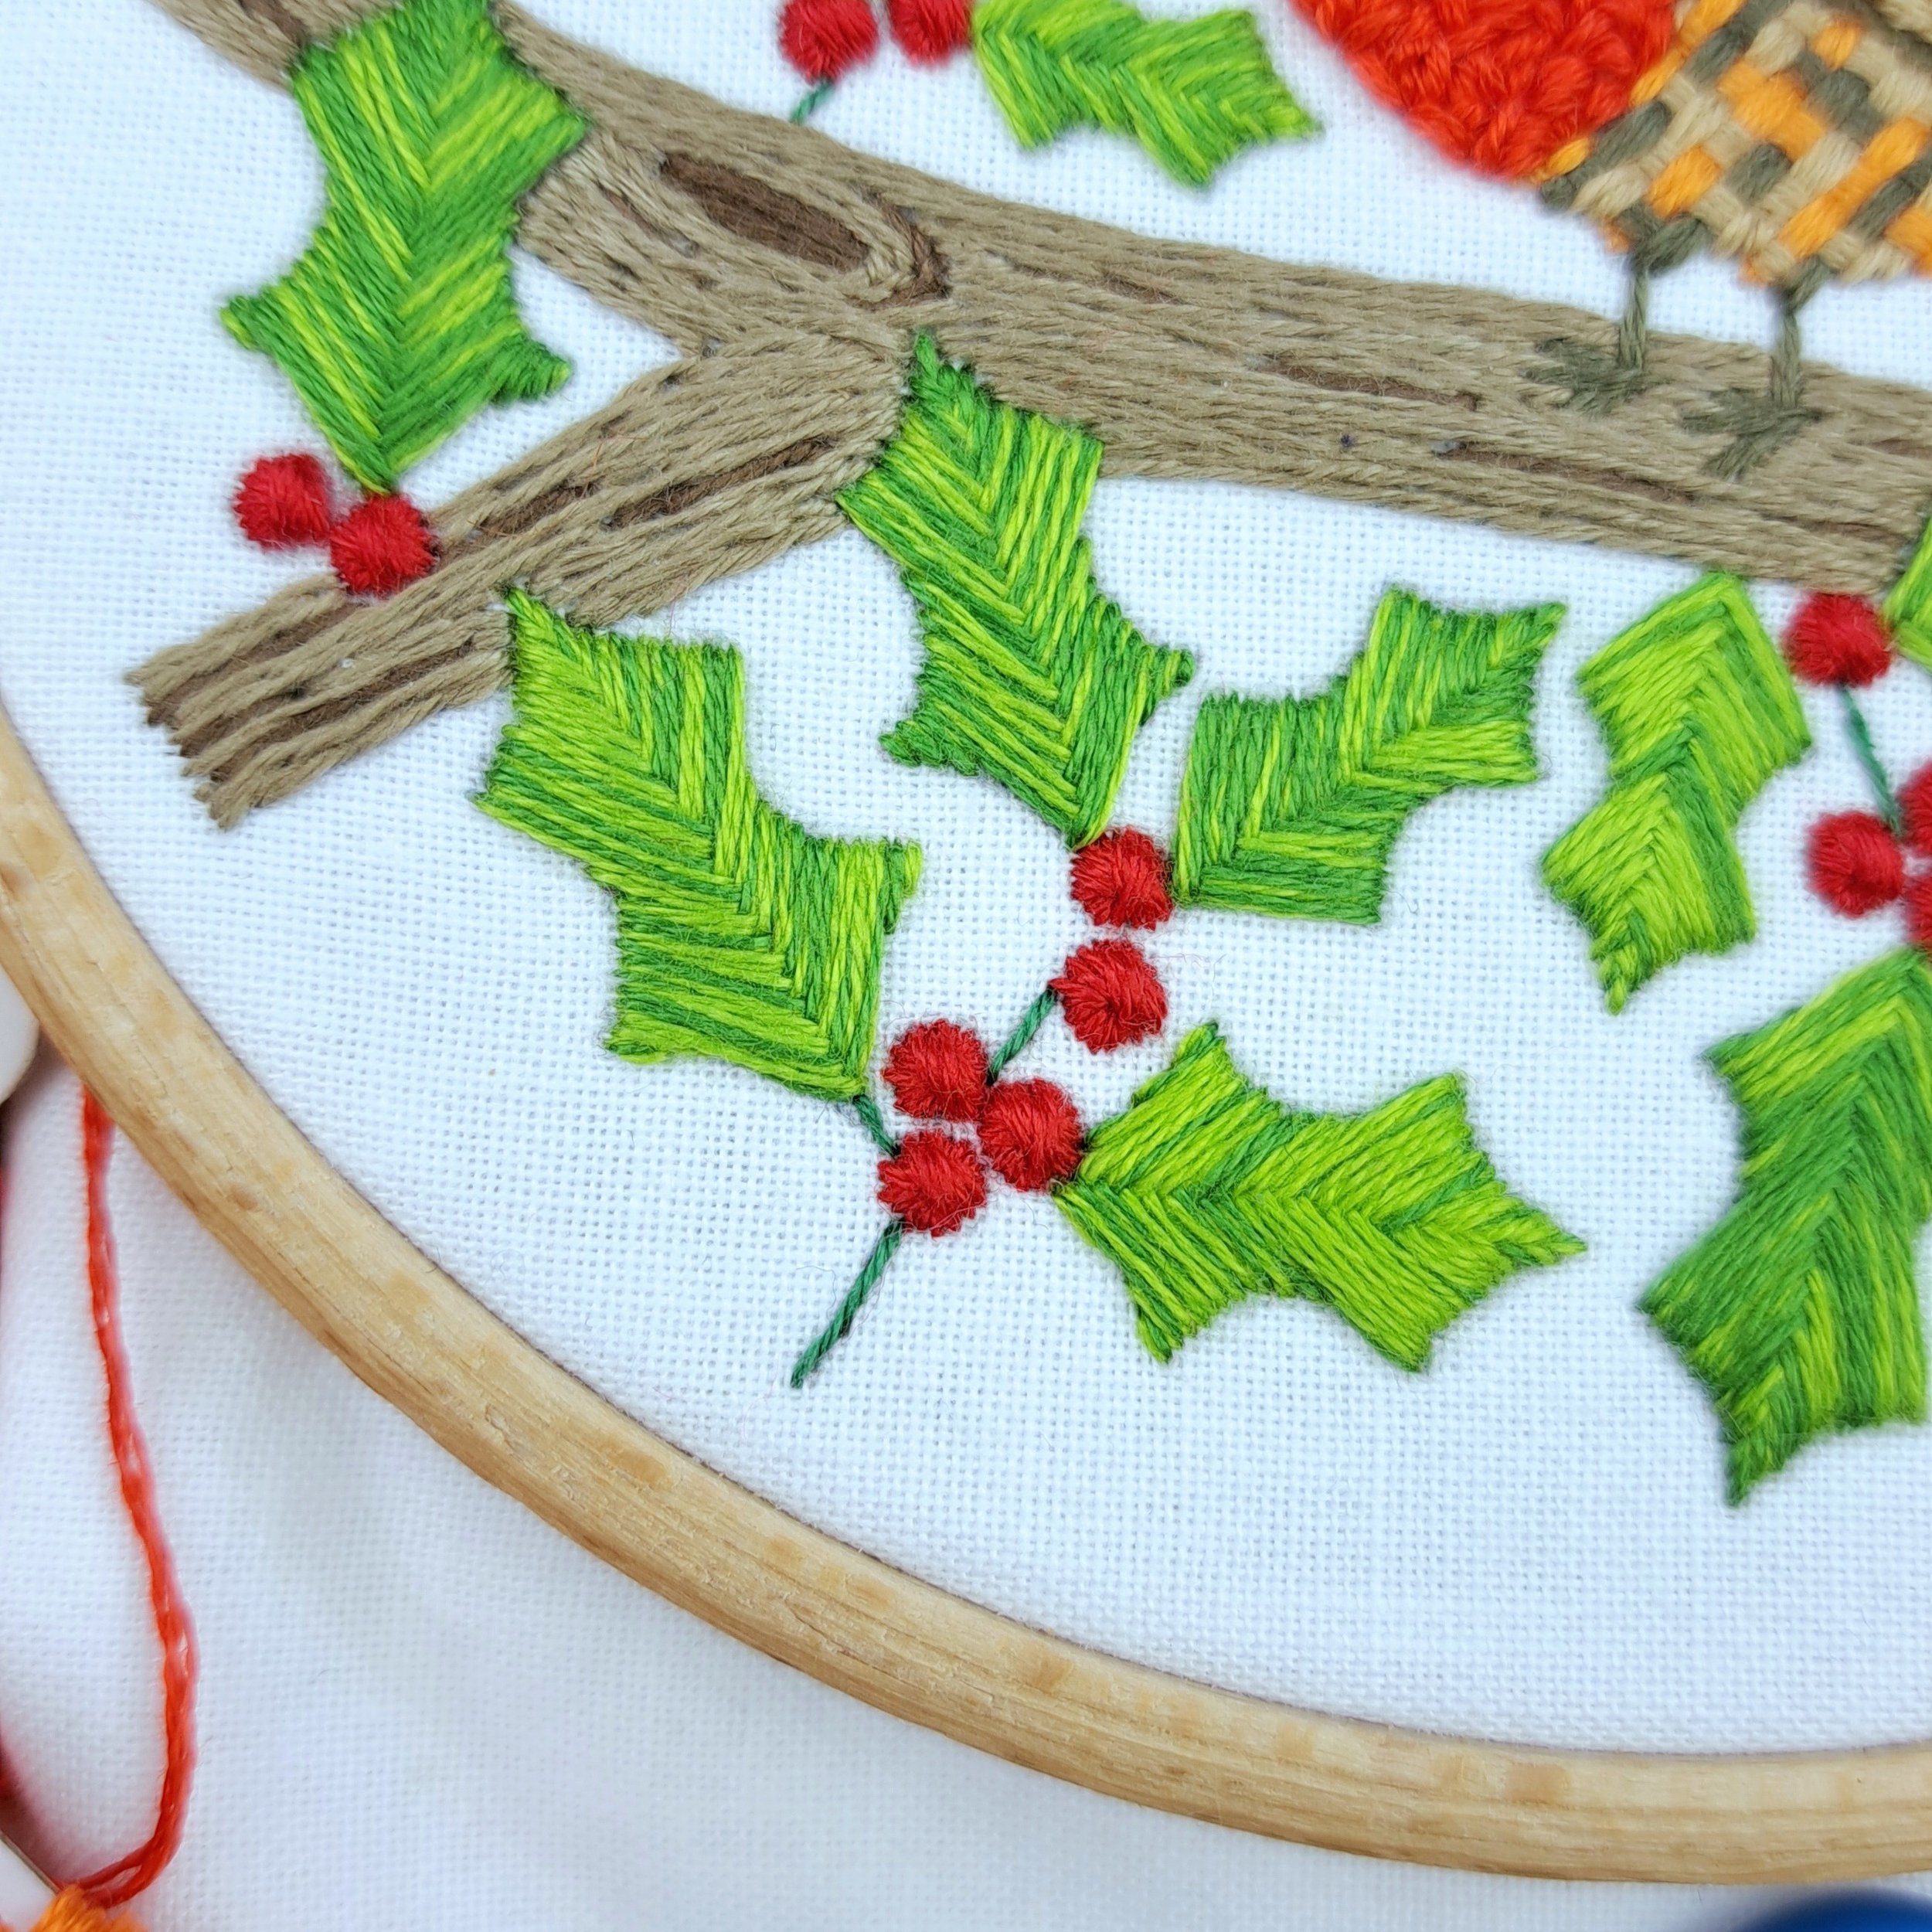
The Bark Lines
Next, I stitched a single row of Stem Stitch along each of the bark detail lines. Some of these lines curve around the knots, while others run along the length of the branch. Once the rest of the branch is filled in, these lines add lovely subtle texture — they’ll peek through as natural details, even if they get partially covered. Honestly, it doesn’t matter too much exactly where you place them; just have fun following the lines in the design.
✨ A little tip:
Shorter Stem Stitches give a more twisted, textured look, so feel free to vary the lengths or make them a bit uneven for a natural effect. For the lines that curve around the knots, use shorter stitches so they follow the curves neatly.
Stitch - Stem Stitch
Thread colour - Anchor 360 (Dark Brown)
Number of strands – 2
Needle size – Small
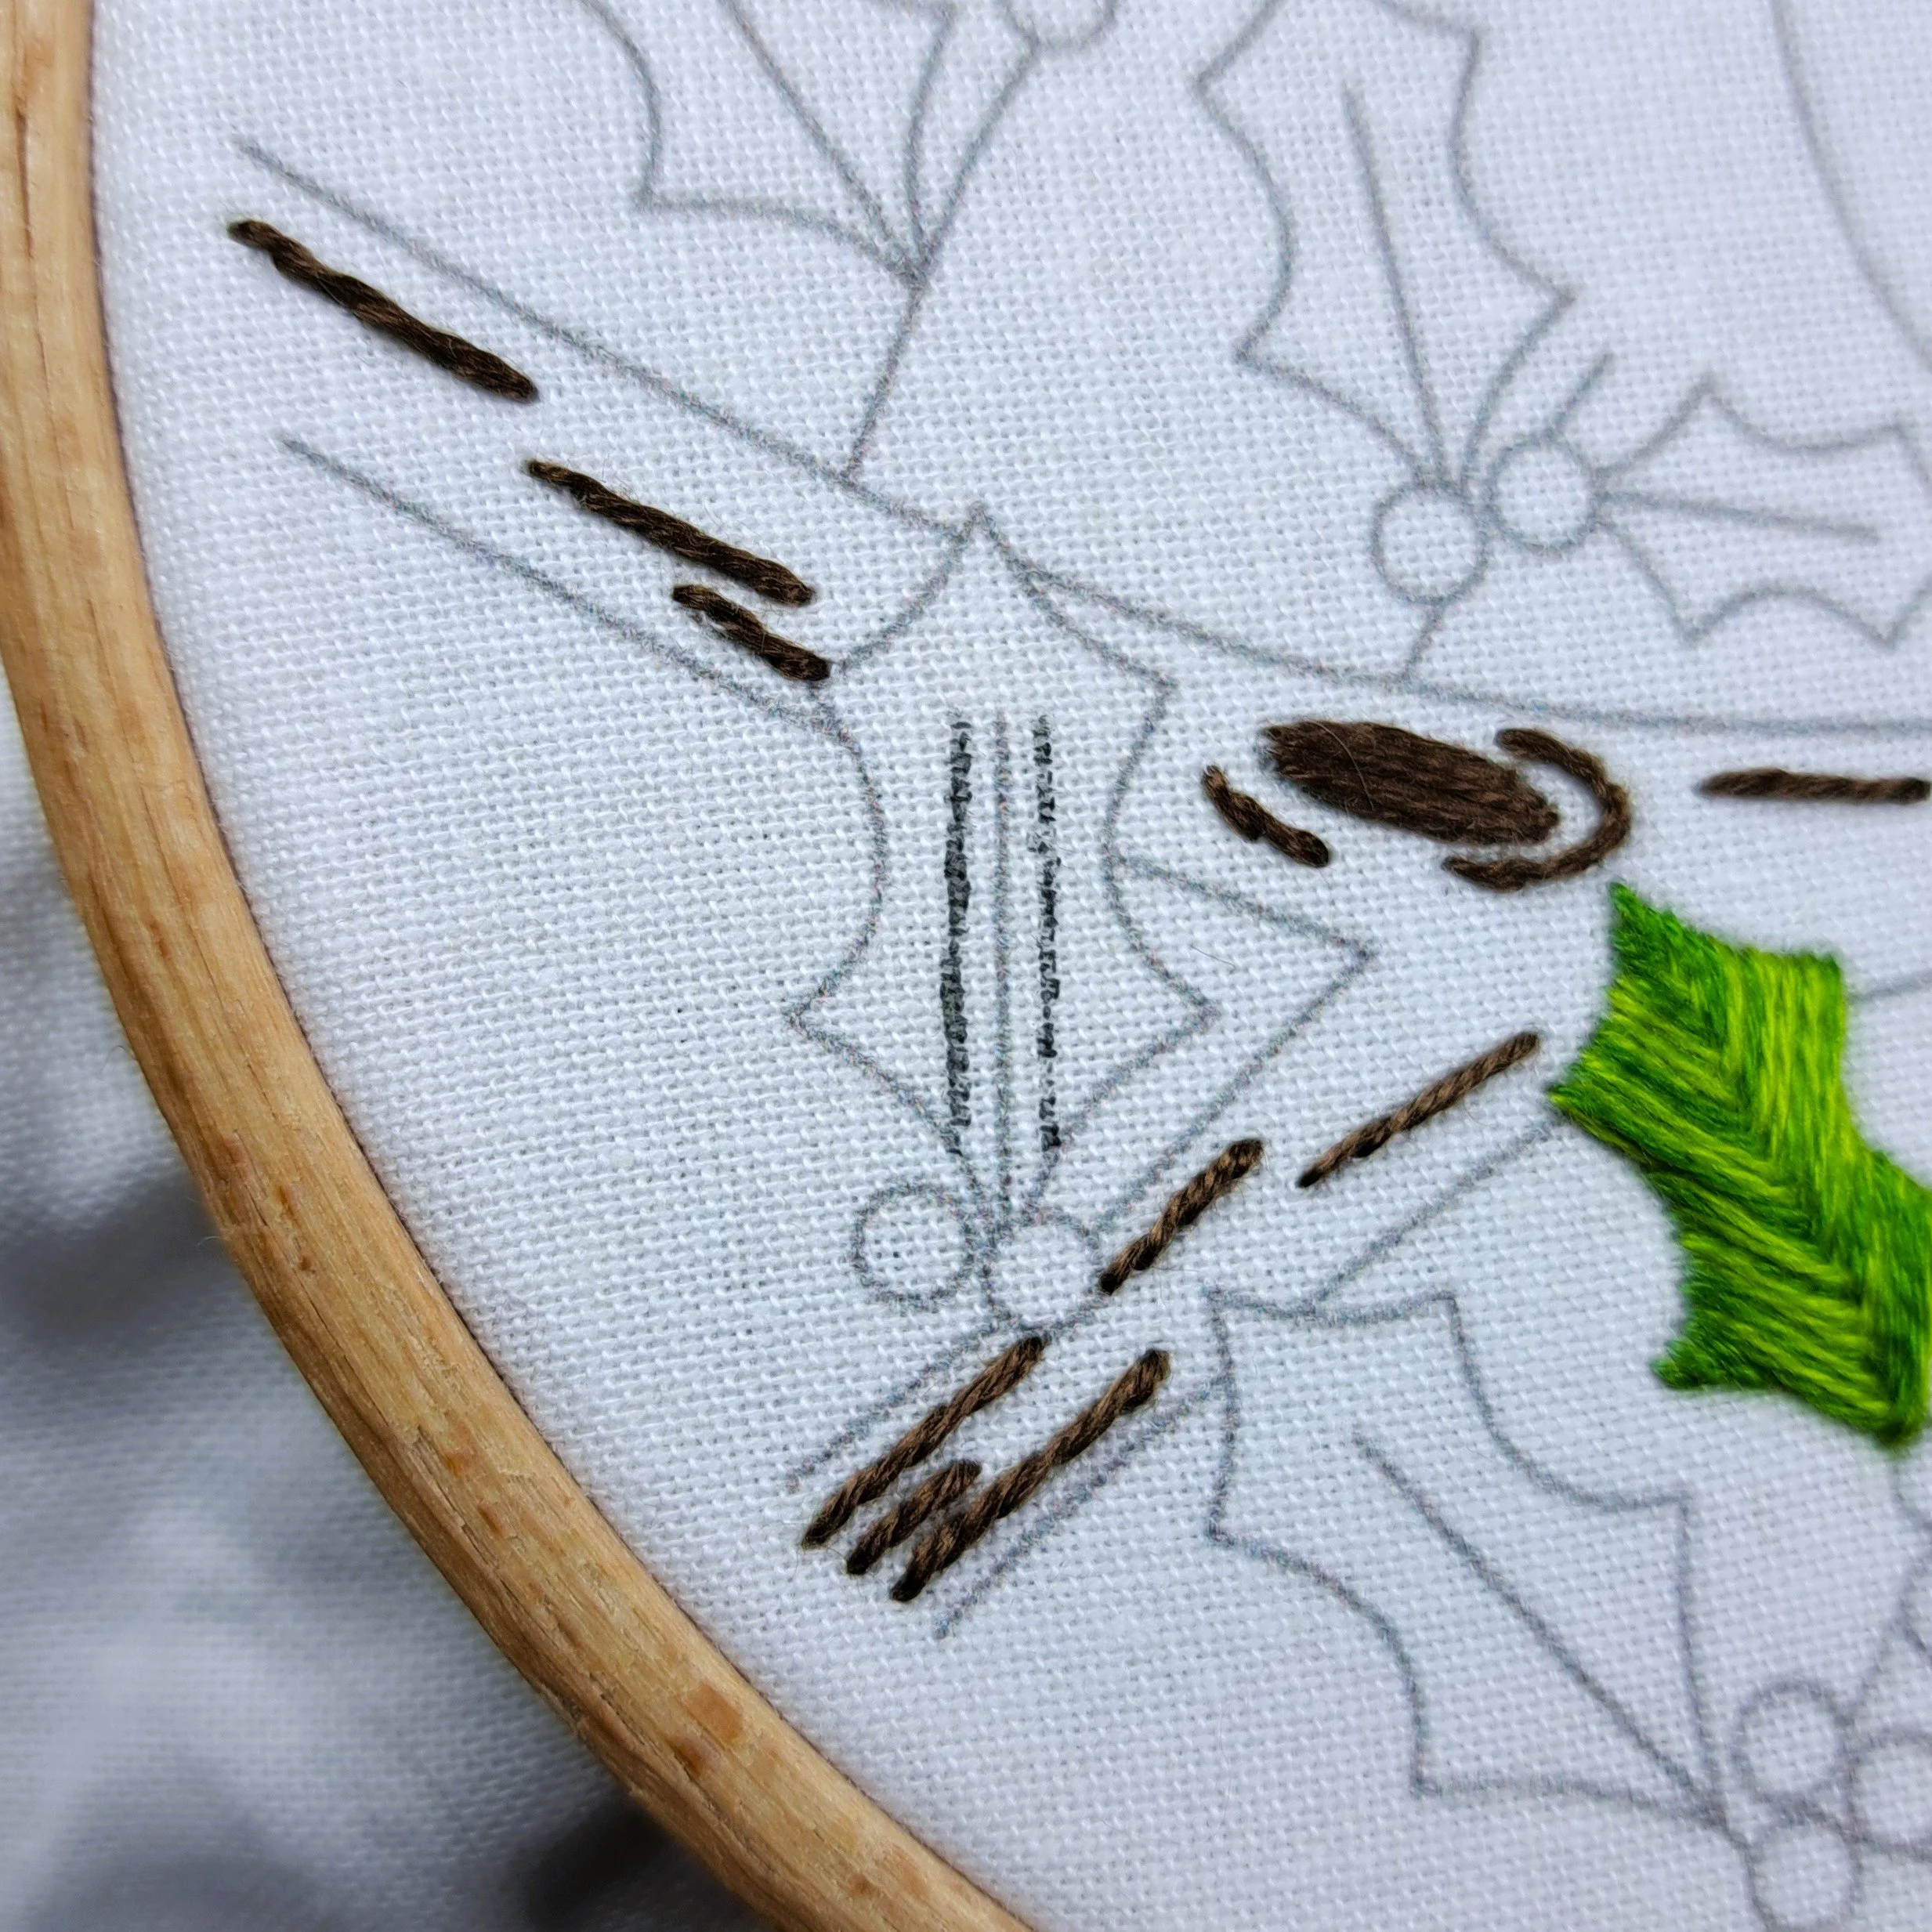
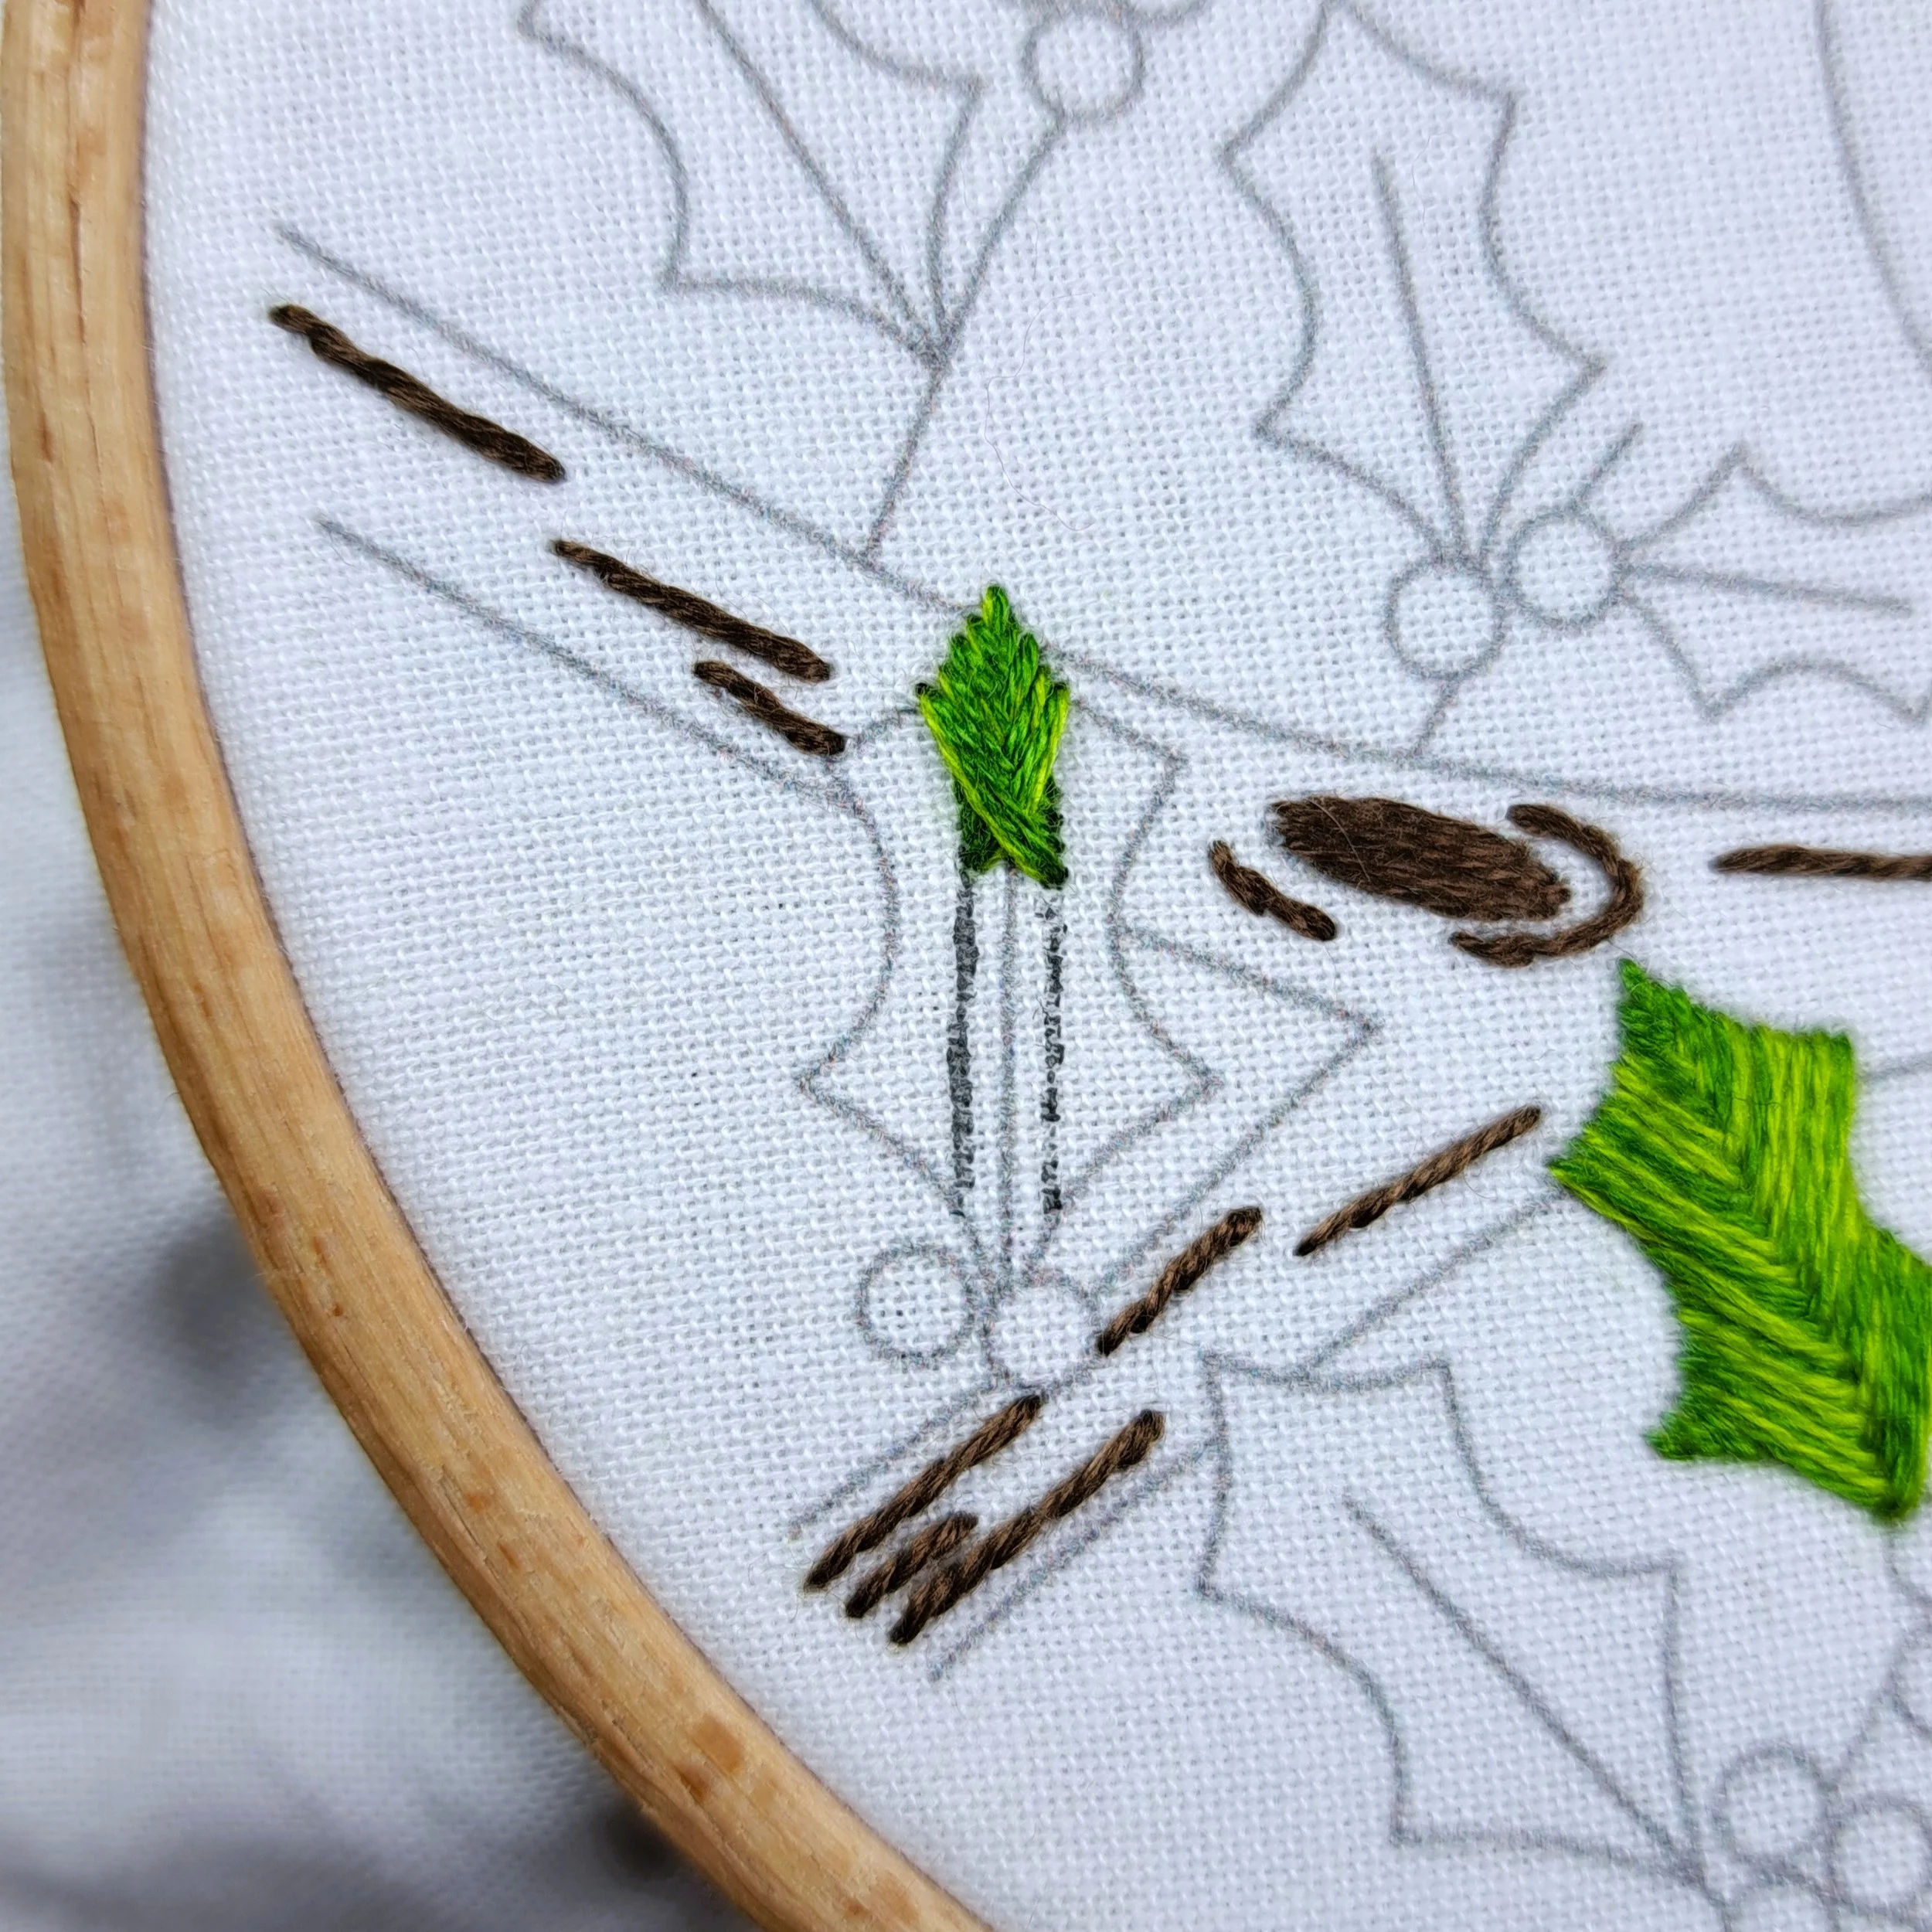
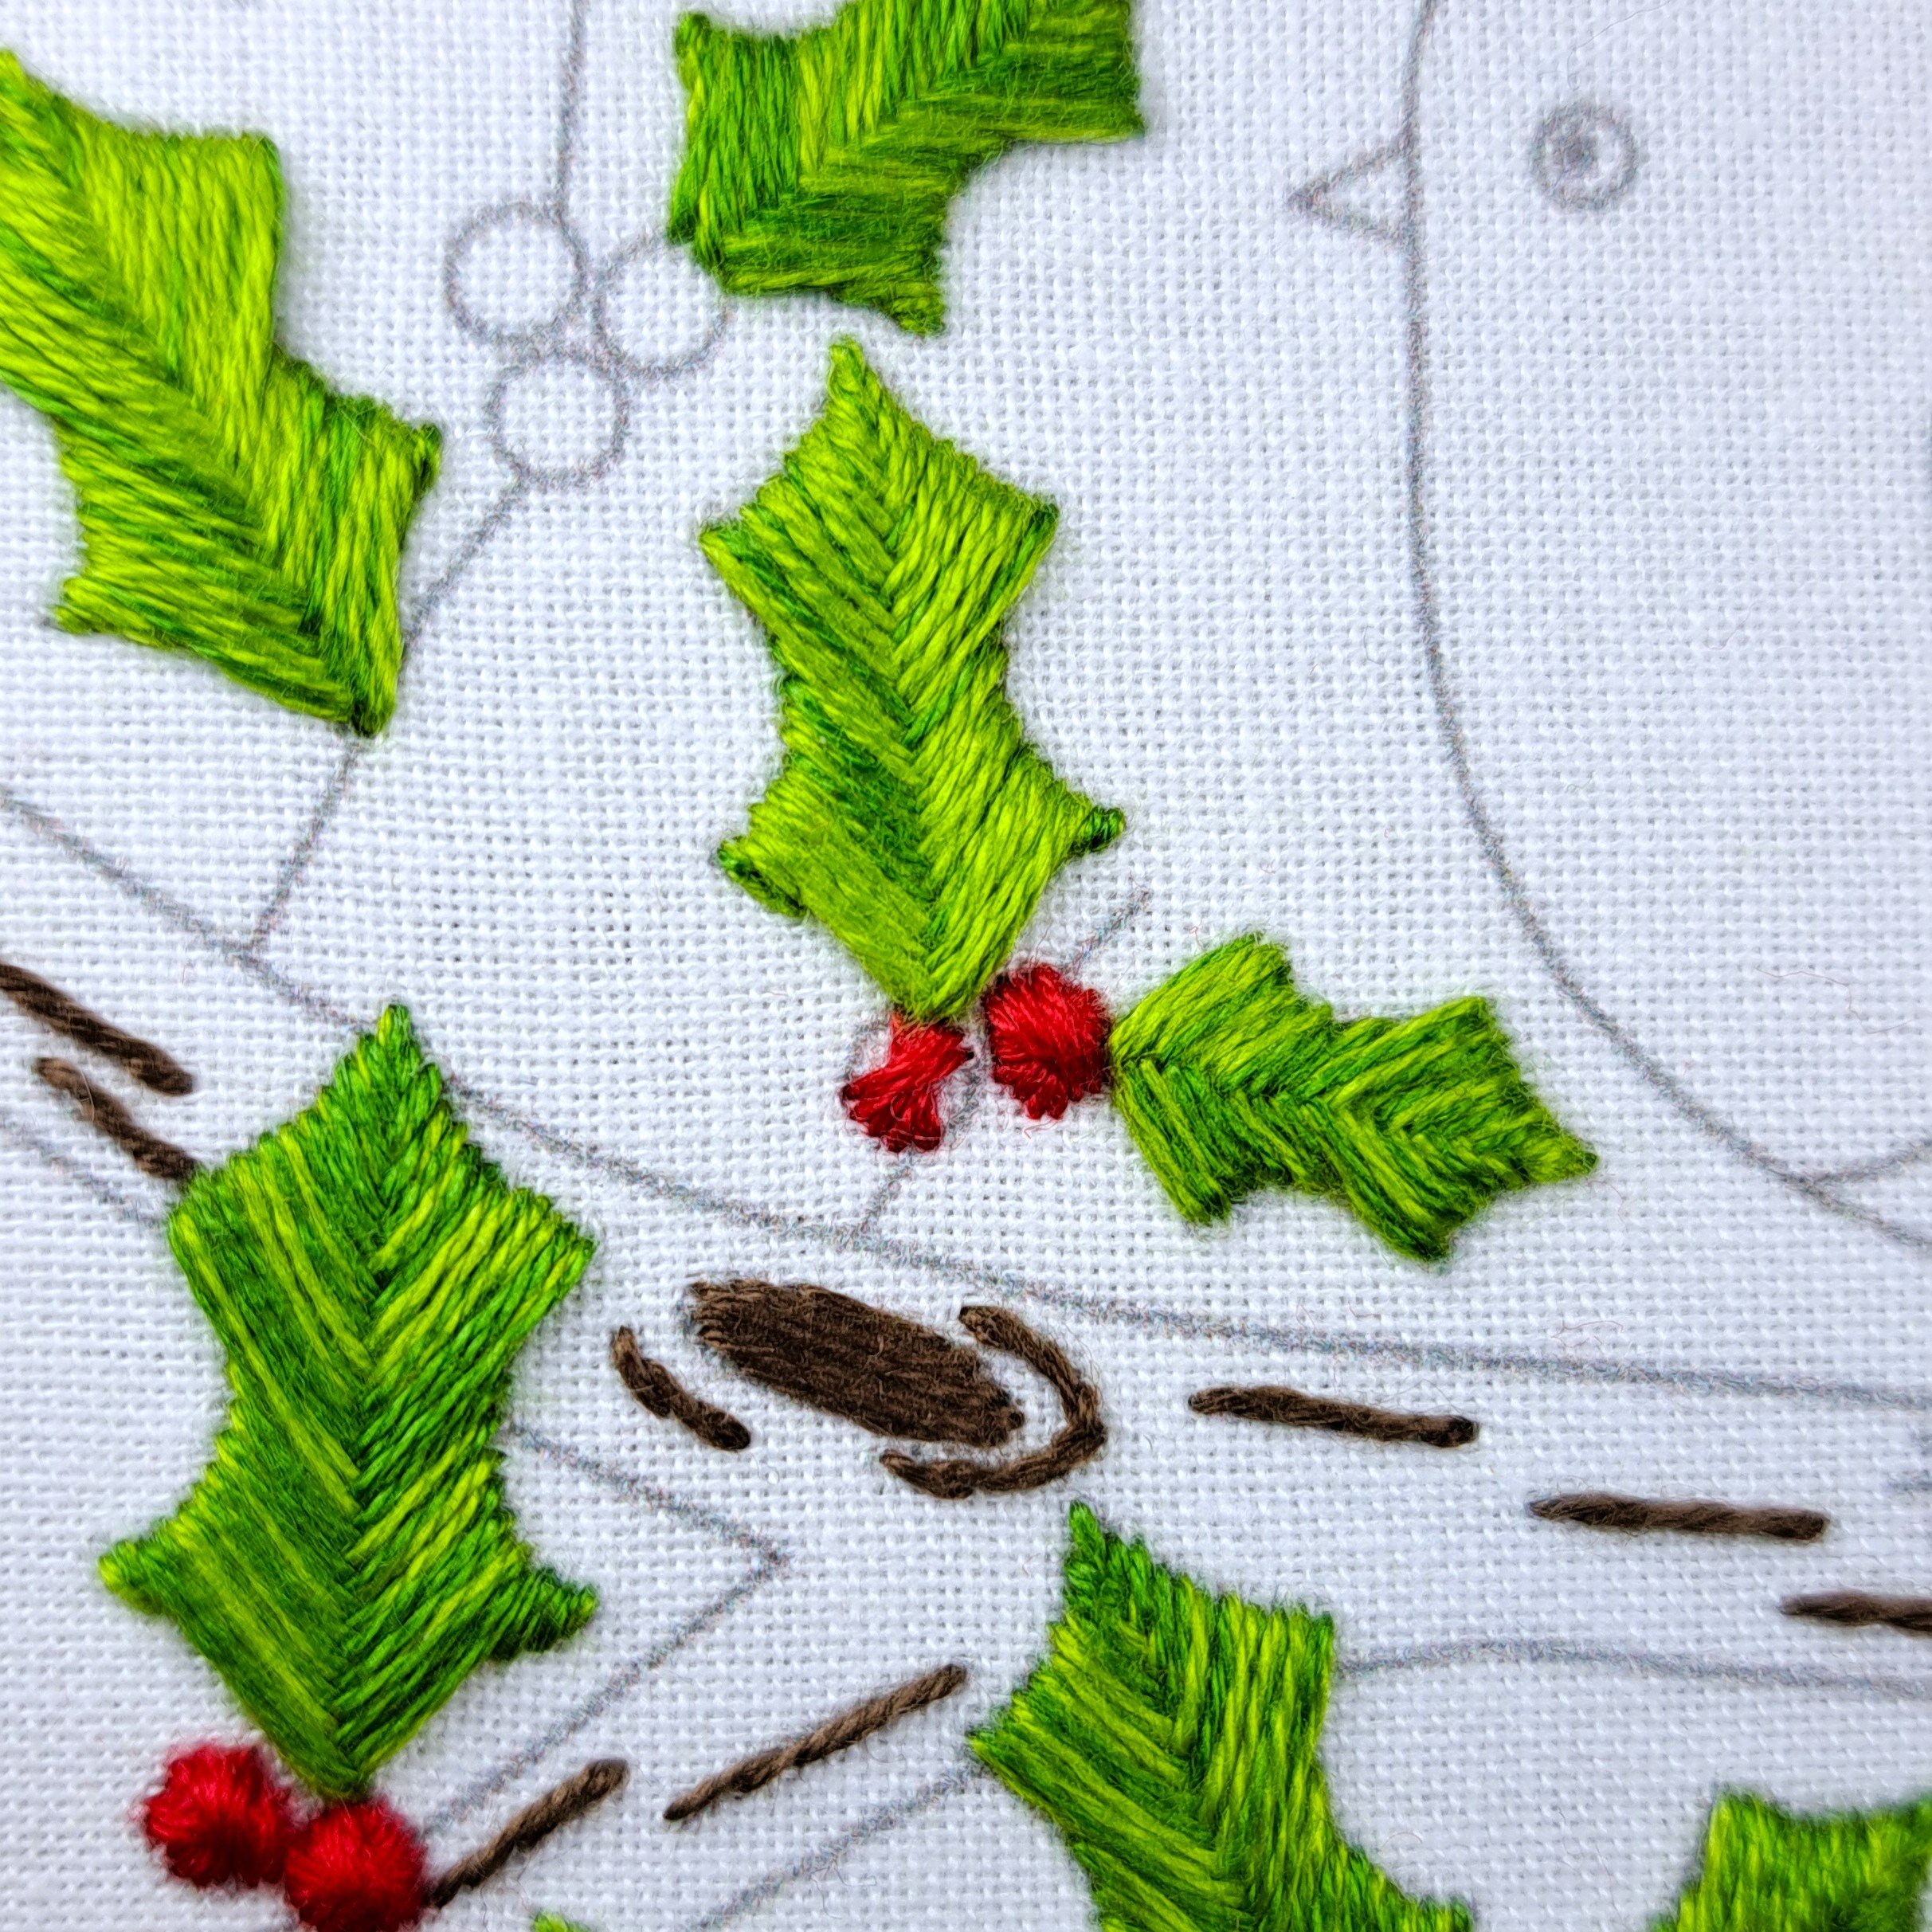
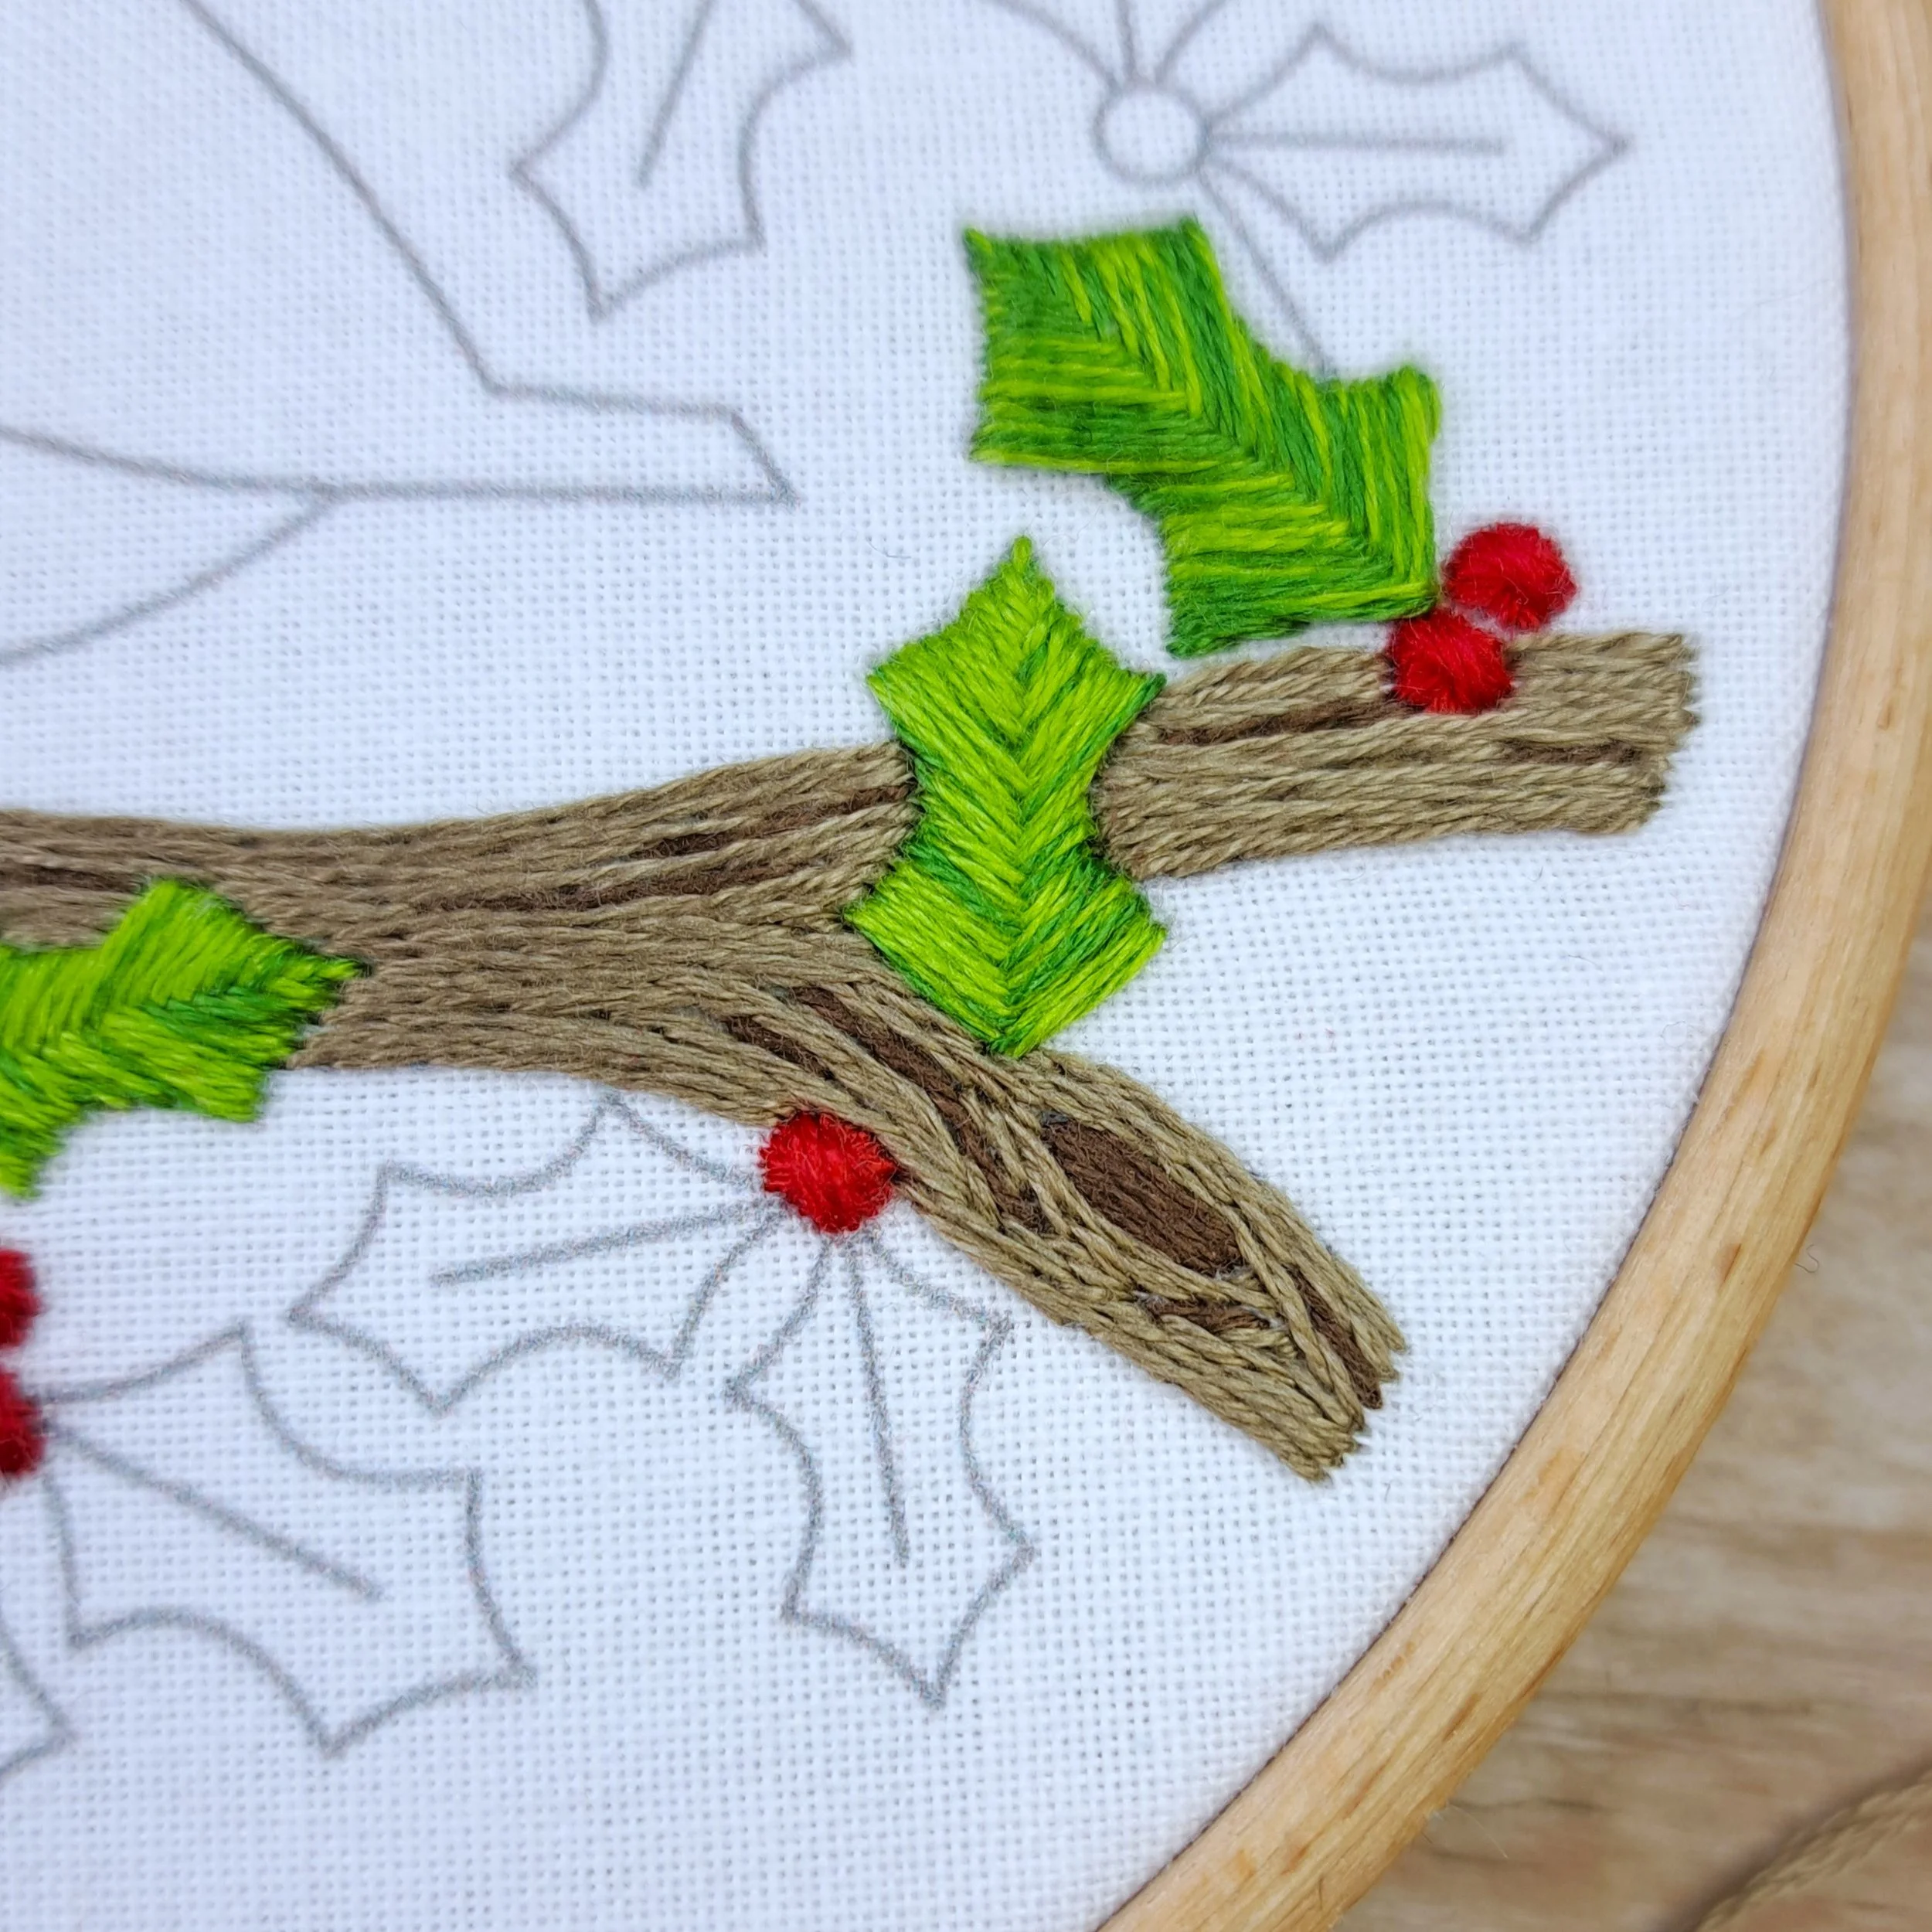
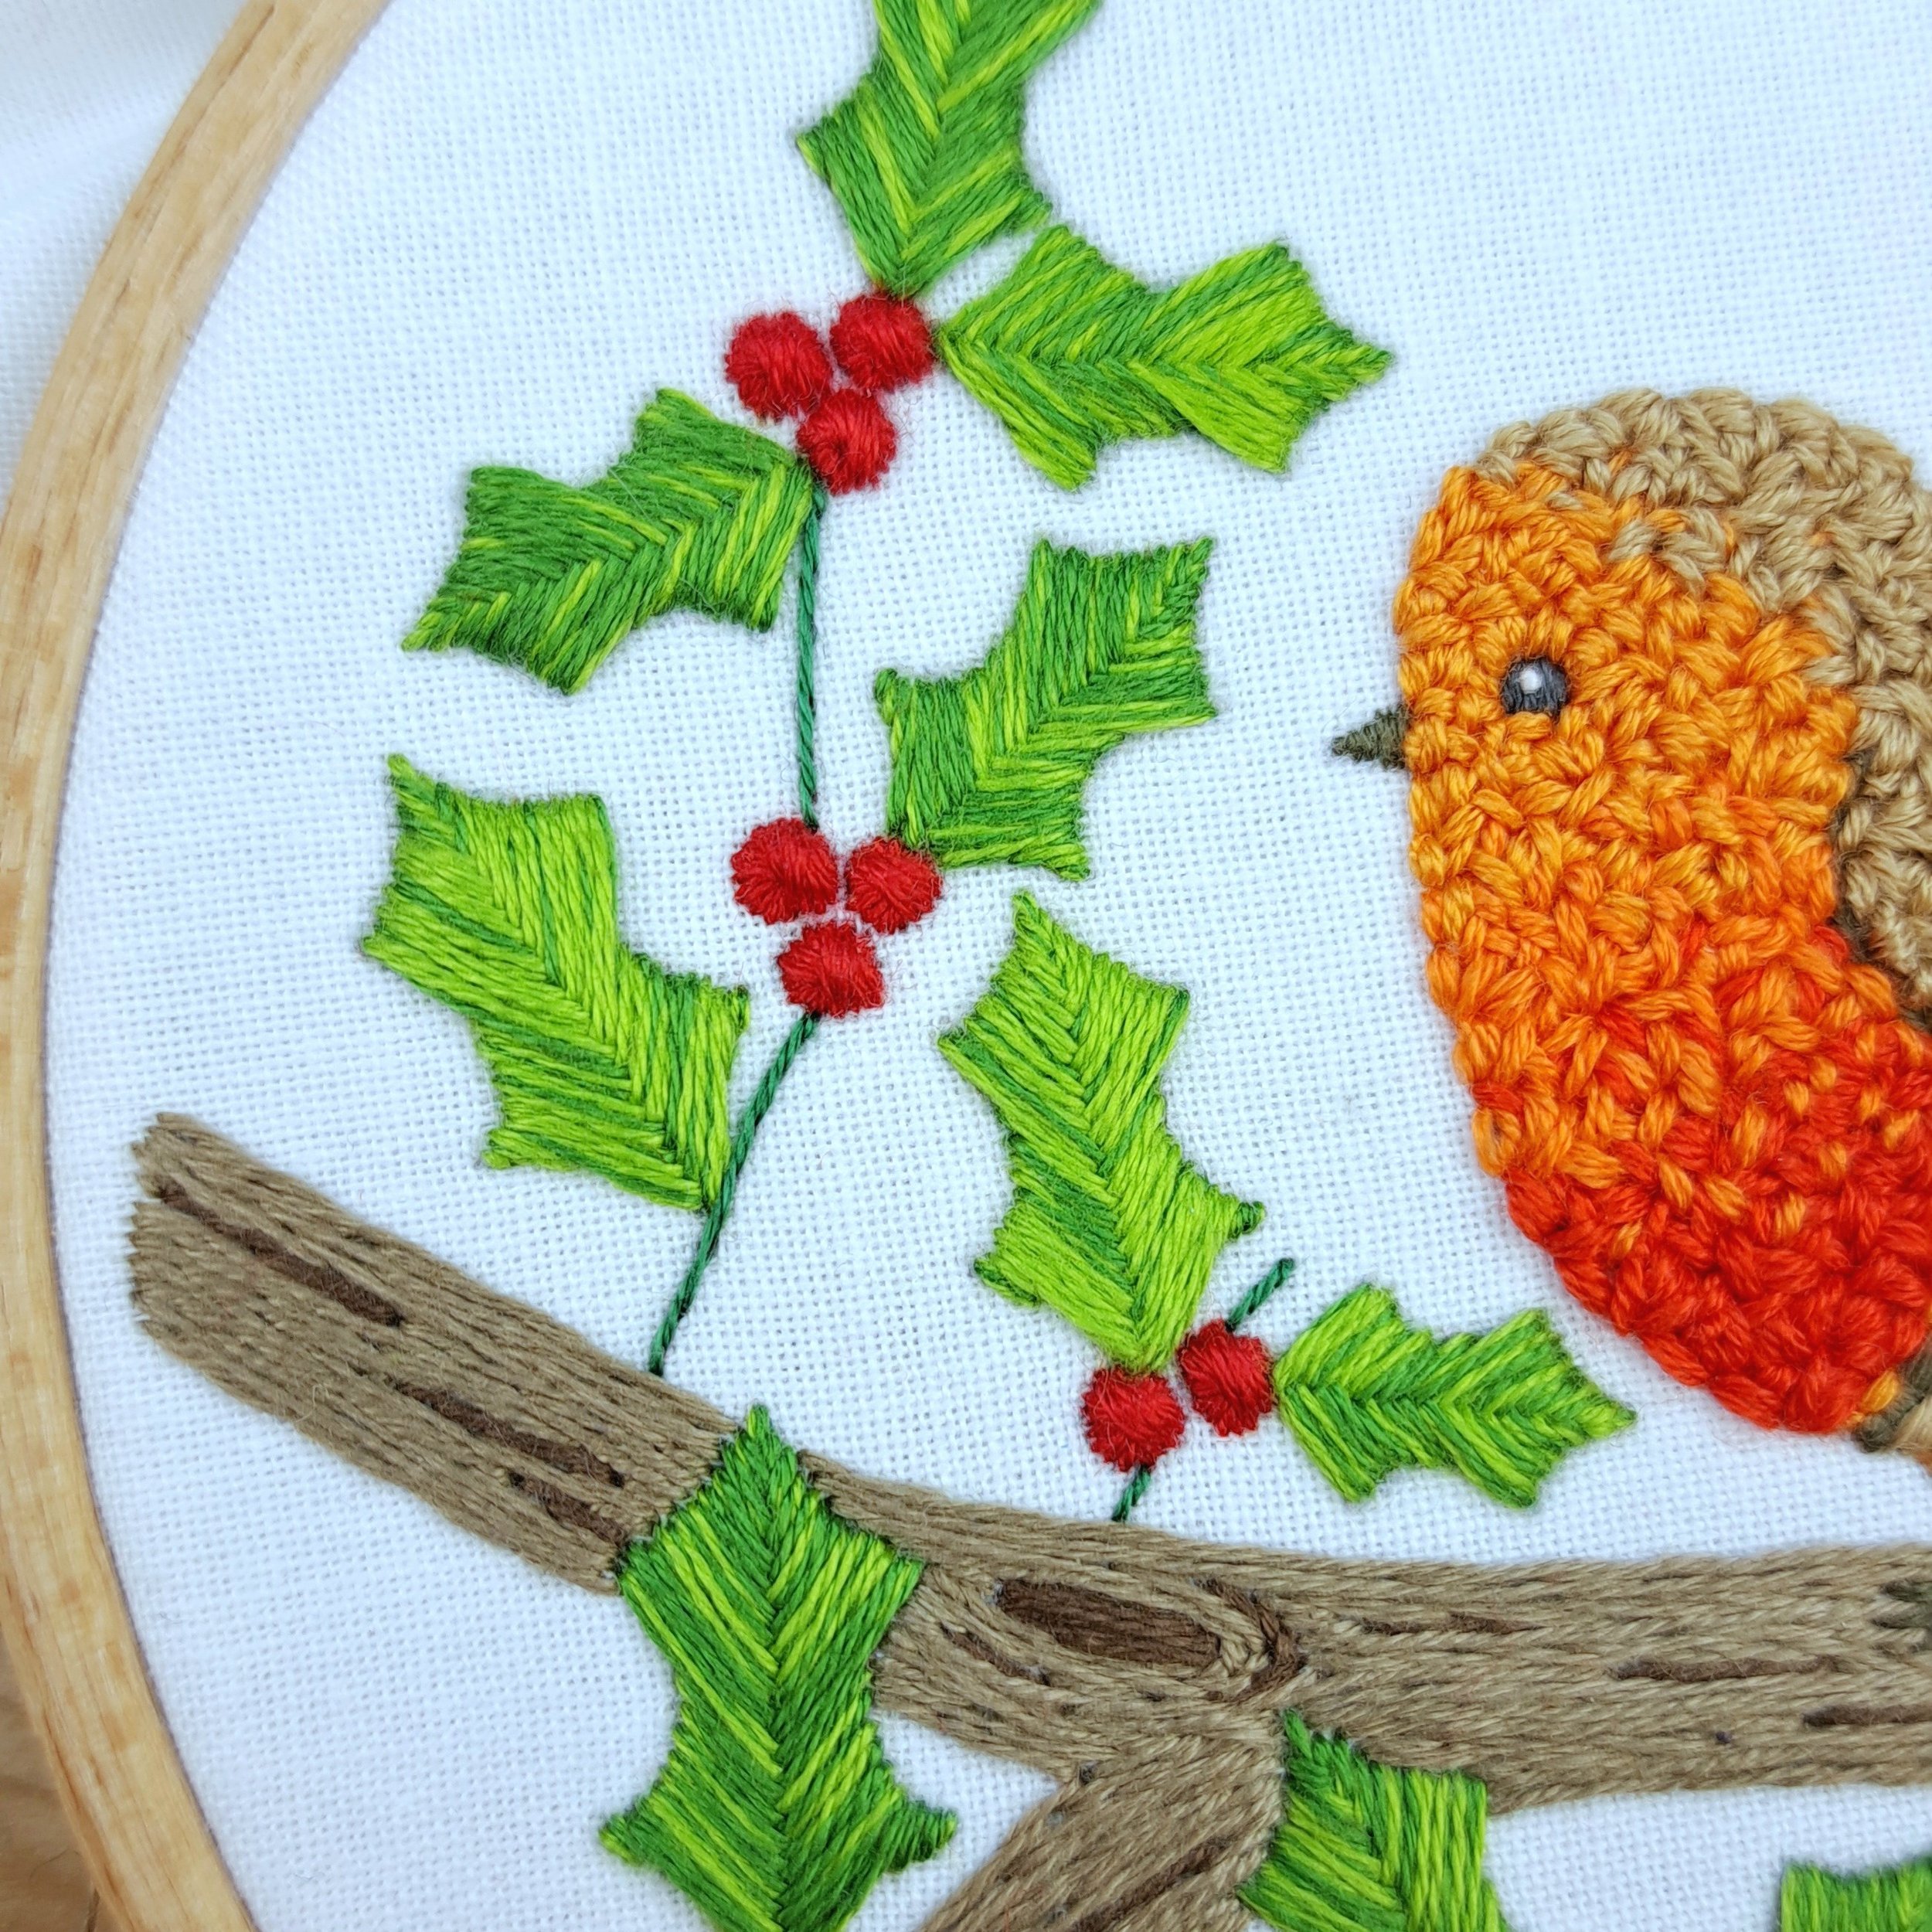
The Holly Leaves
I was actually planning to finish the branch first, but then I realised it’d be much easier to stitch some of the holly leaves before filling the branch. I usually work on elements further away first, but these spiky leaves overlap the branch, so stitching them now makes the shapes much easier to see.
There are quite a few leaves in this design, so I like to start them and keep coming back as I fancy (I just made sure that I stitched any leaves that over lap the branch first).
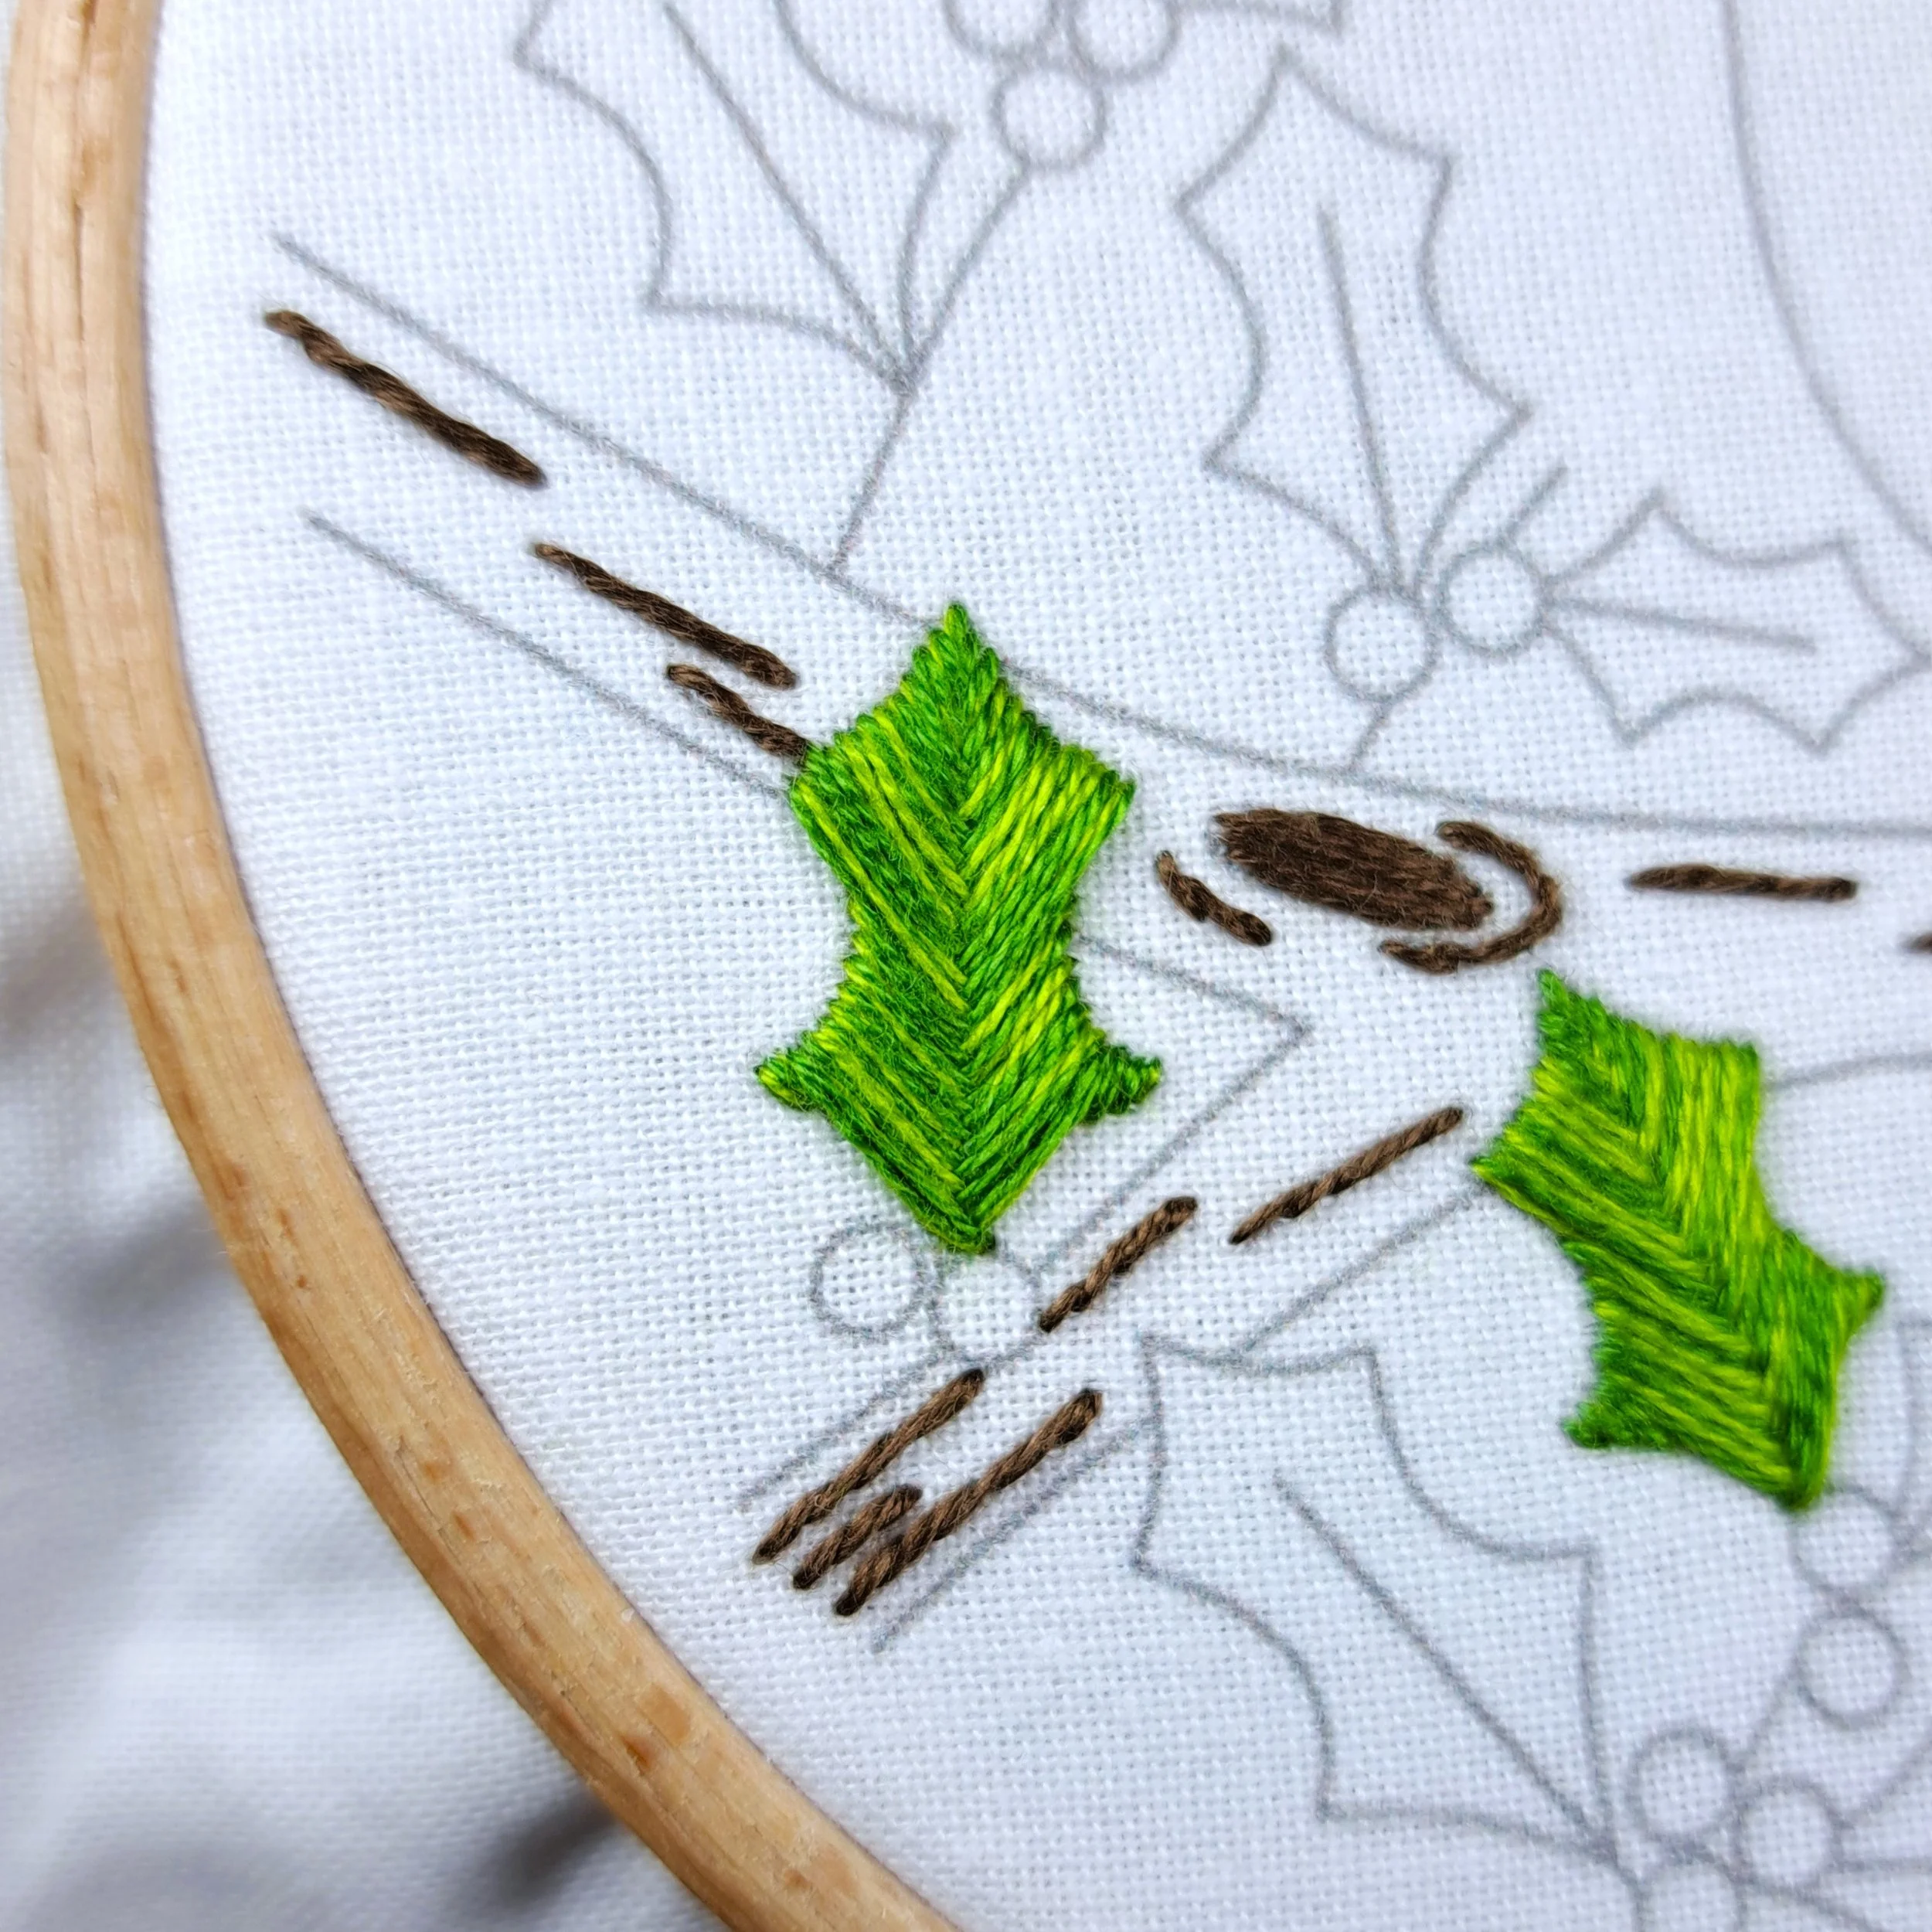
I filled each leaf with Fishbone Stitch using 3 strands of thread. I combined strands of both greens (Light Green and Dark Green) and stitched with them together — for some leaves, I used 2 strands of Light Green with 1 strand of Dark Green, and for others, 1 strand of Light Green with 2 strands of Dark Green. This creates subtle variations so each leaf is a little different. I really love using two different shades in Fishbone Stitch — it makes that criss-cross texture pop beautifully! 🌿
✨ A little tip:
I like to draw a couple of lines (one on each side of the leaf’s centre line) to guide my stitches. It helps keep the criss-cross neat and even. I use a fabric pen, but you could just use a pencil since the whole leaf will be covered.
For the larger leaves, once you’ve stitched down the centre, you can finish the bottom points with a few Satin Stitches to complete the leaf shape.
Stitch - Fishbone Stitch
Thread colours - Anchor 255 (Light Green) and Anchor 258 (Dark Green)
Number of strands – 3
Needle size – Medium


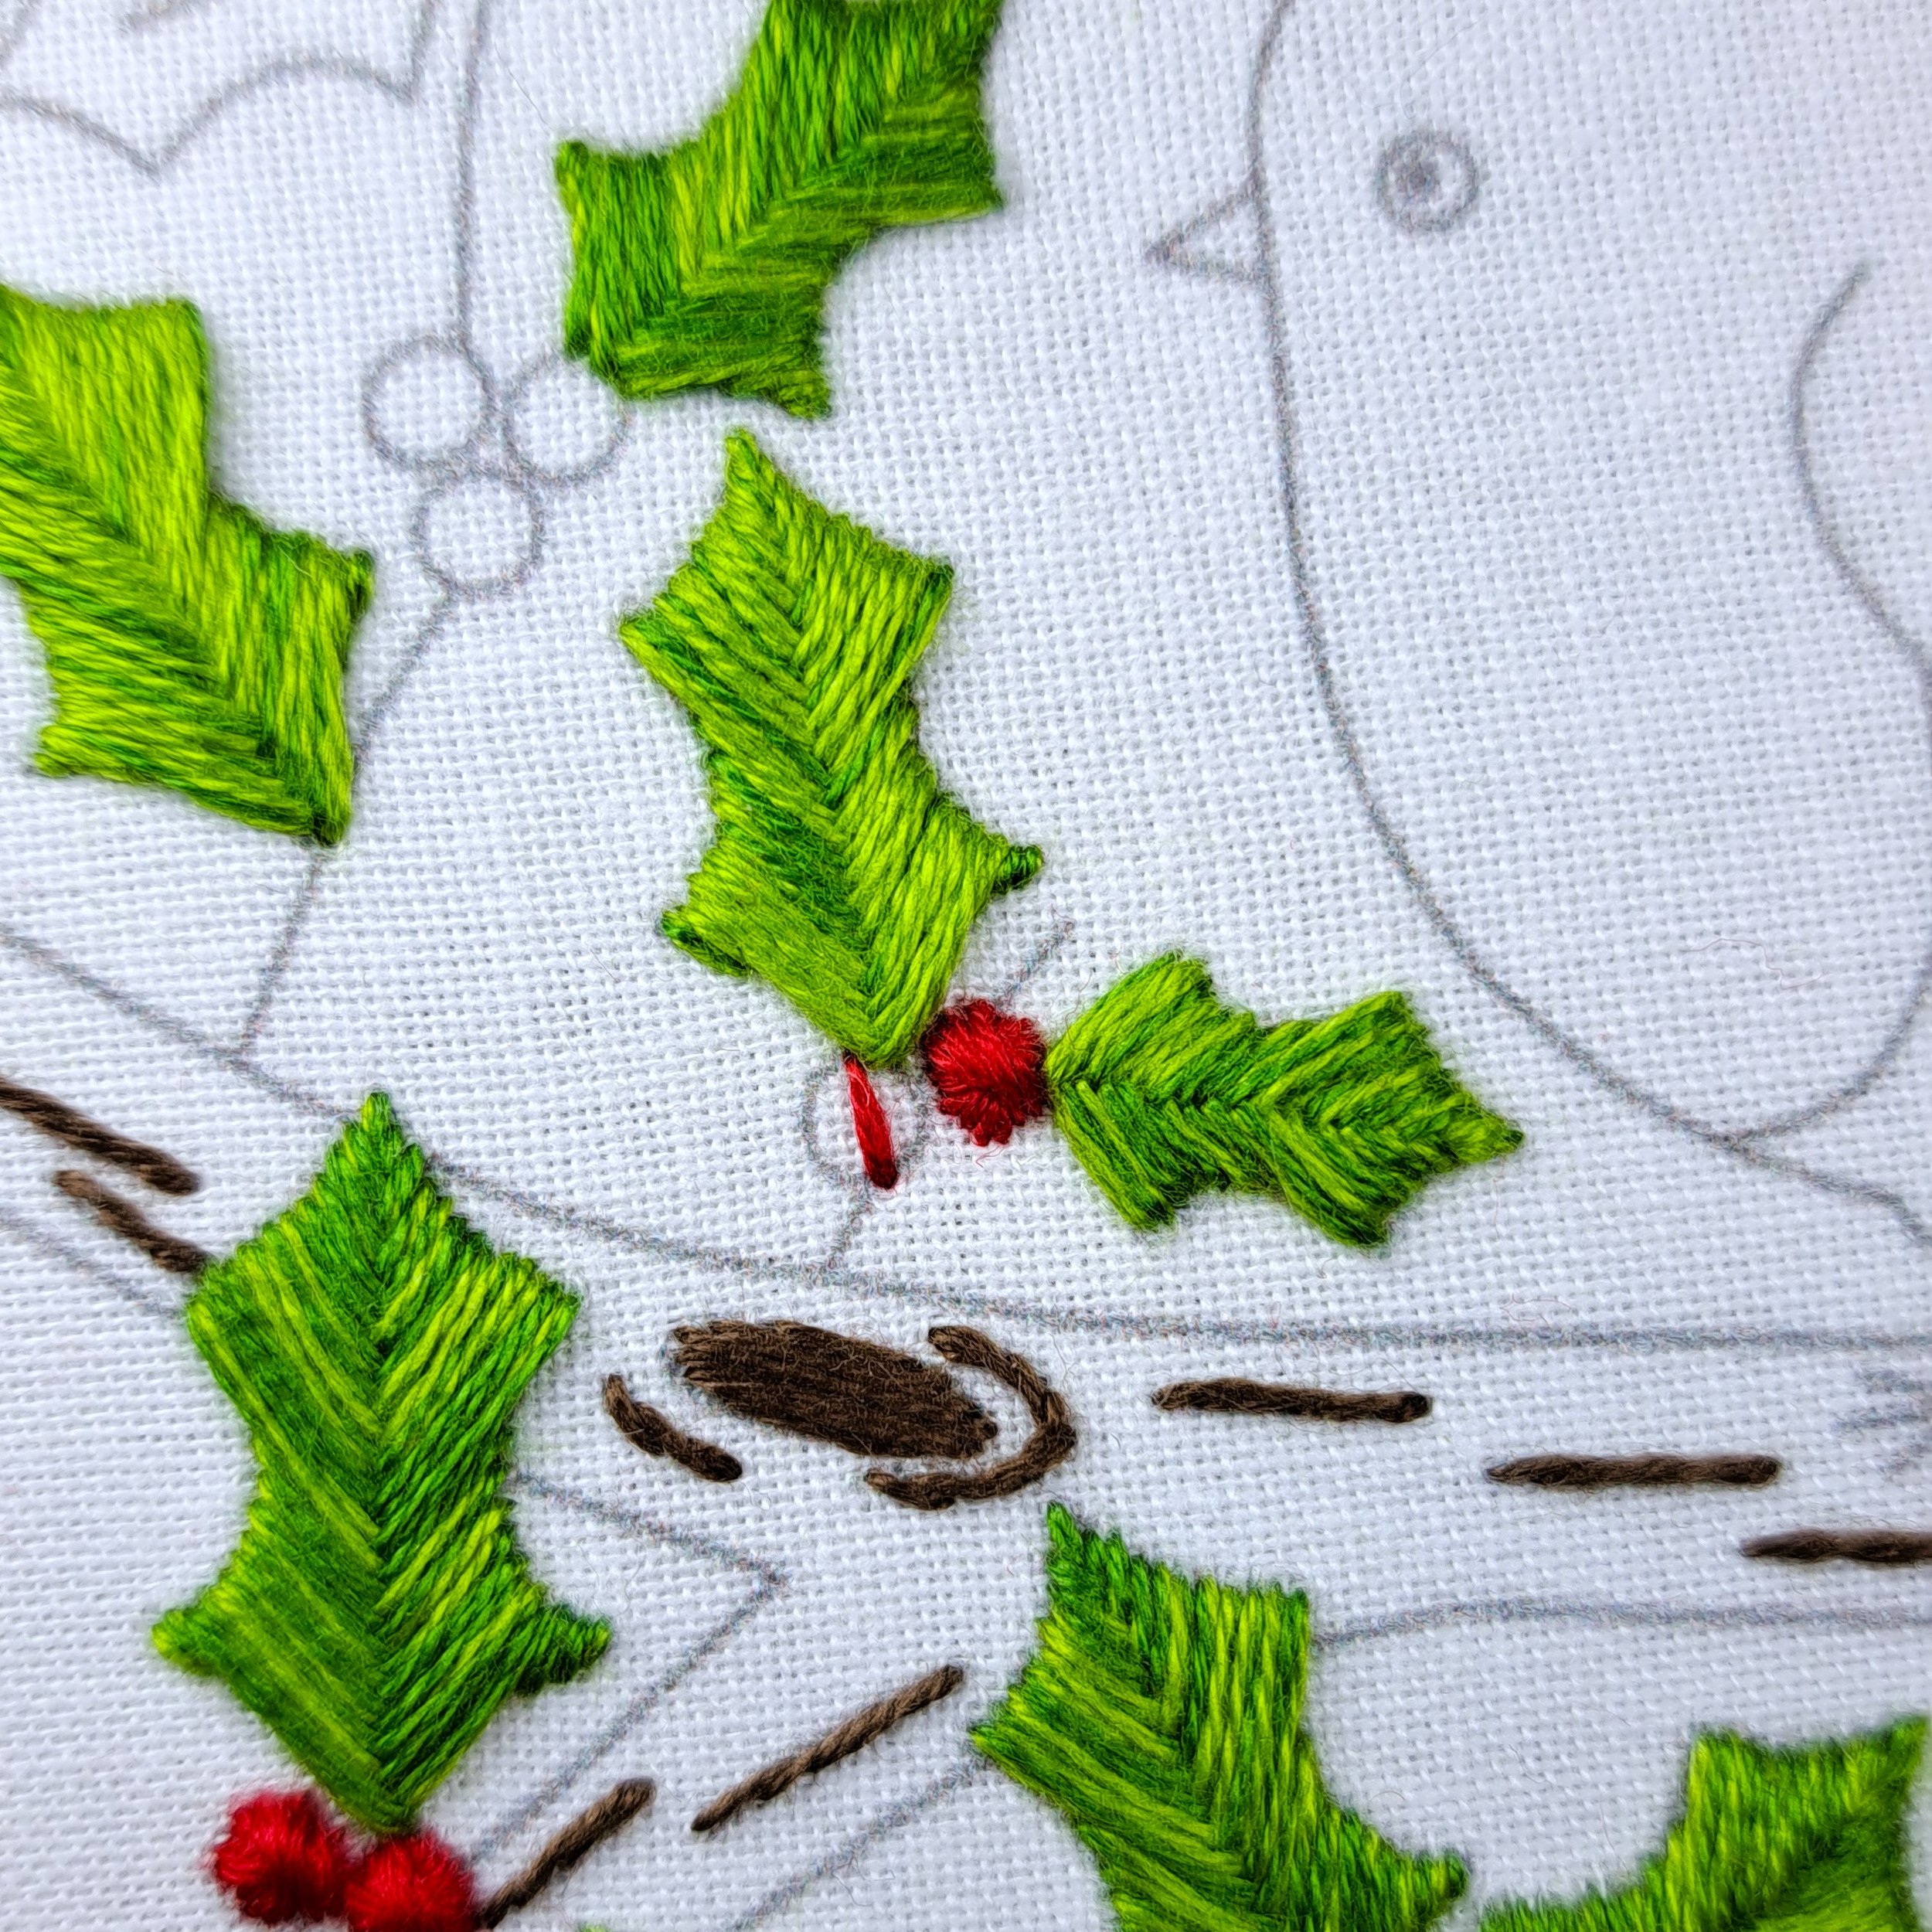
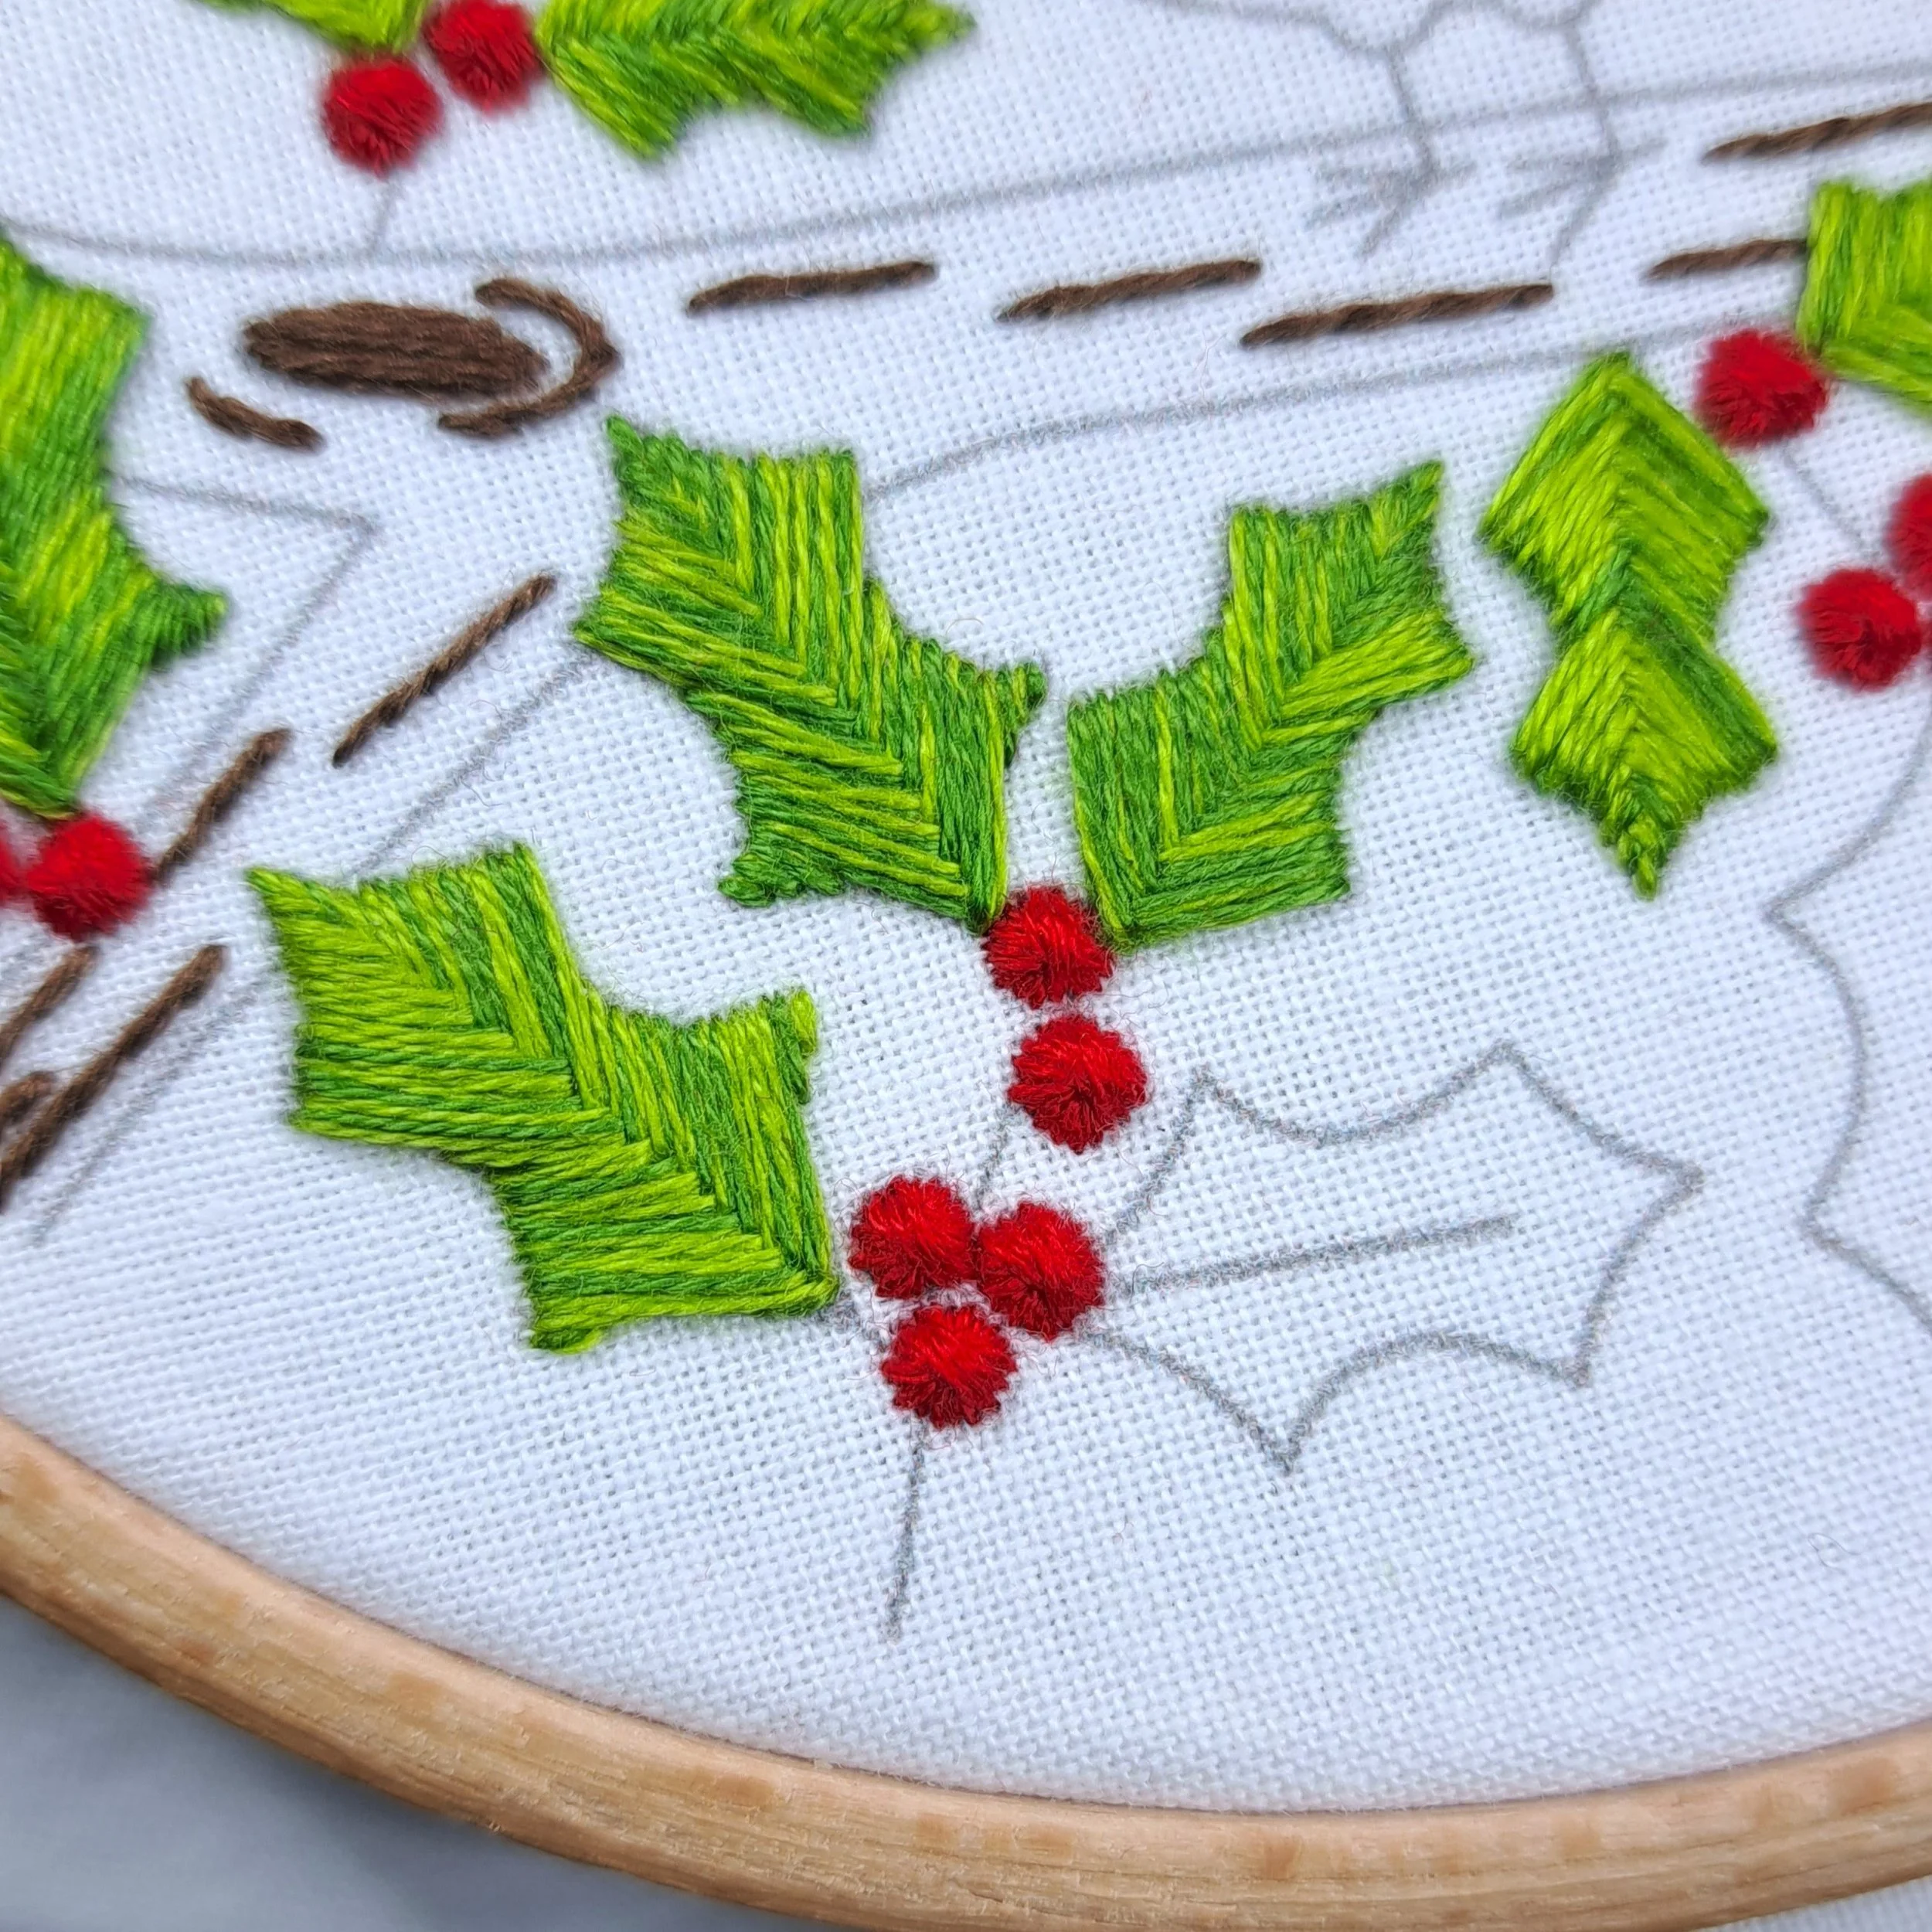
The Holly Berries
At this point, I’d stitched all of the leaves that overlap the branch (and quite a few others), so to break up the leaf stitching a bit, I decided to tackle the berries next. The shape of the berries is much easier to follow when there’s nothing else around them, so I started with the berries that overlap the main branch.
Stitch – Rhode Circle Stitch
Thread colours – Anchor 46 (Berry Red)
Number of strands – 2
Needle size – Small
✨ A little tip:
If you’d like to mix it up, these berries would also look lovely as chunky French knots or smooth Satin Stitches — feel free to play around and see which you like best!
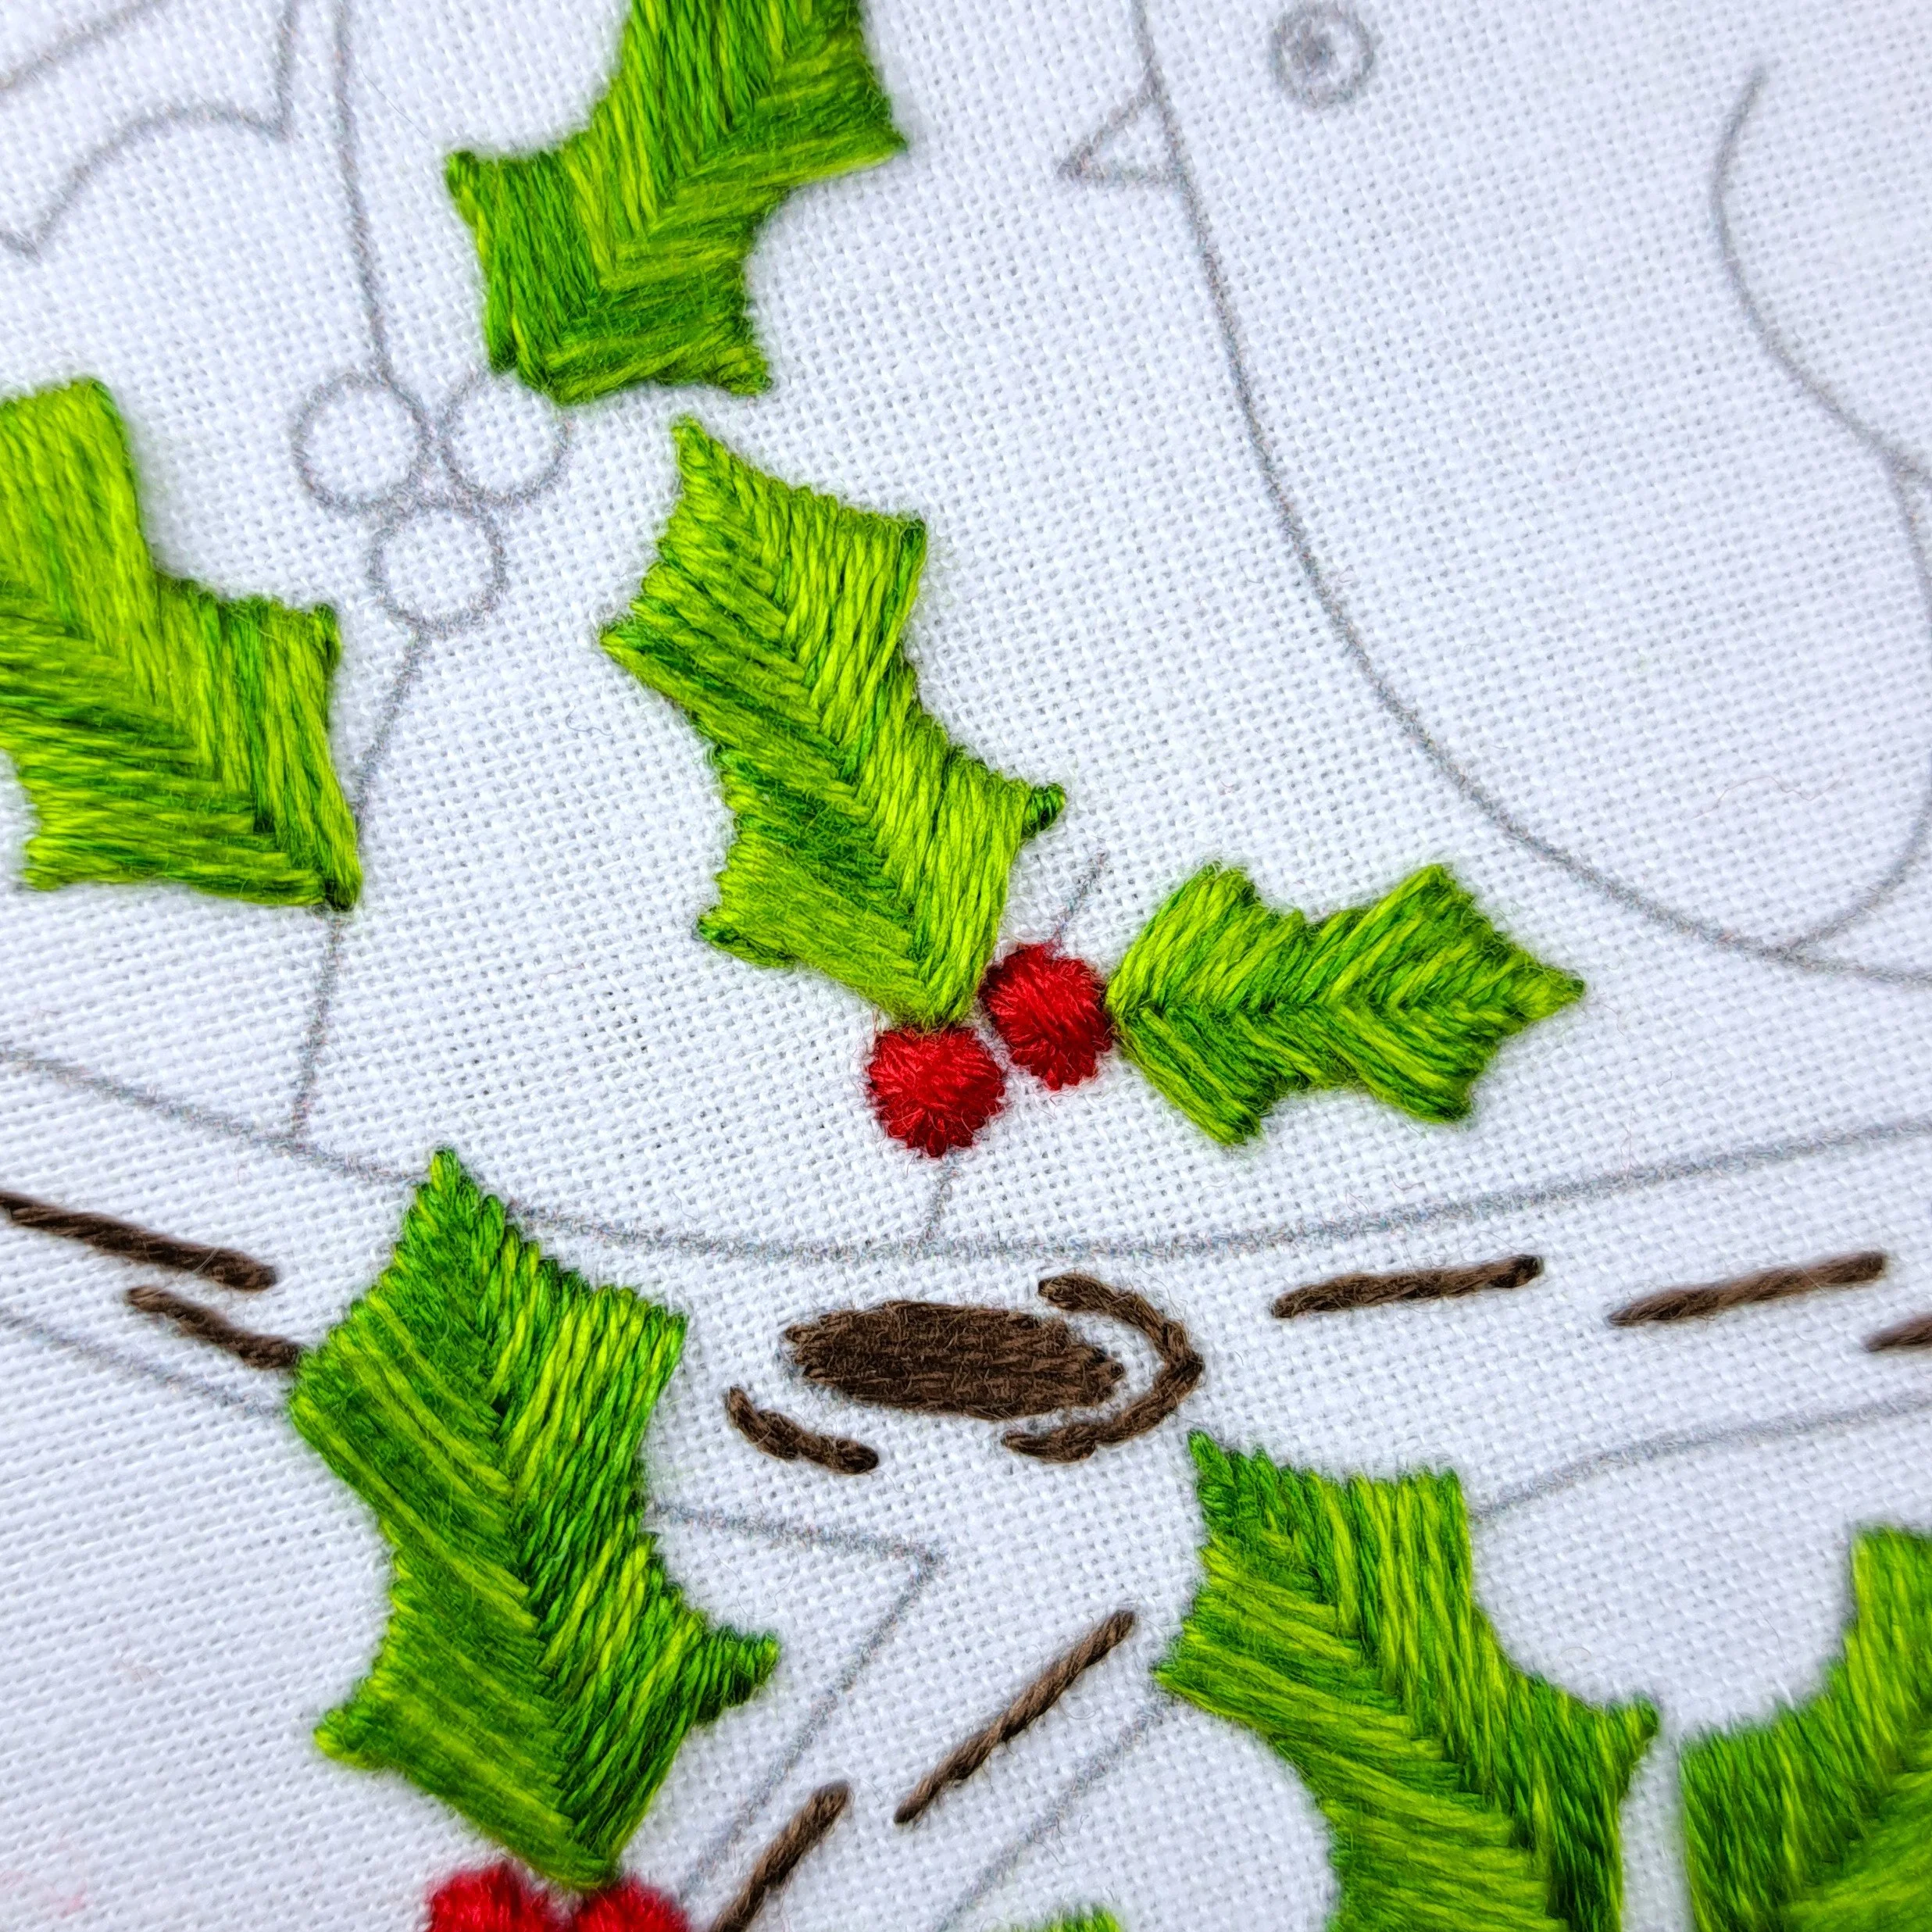
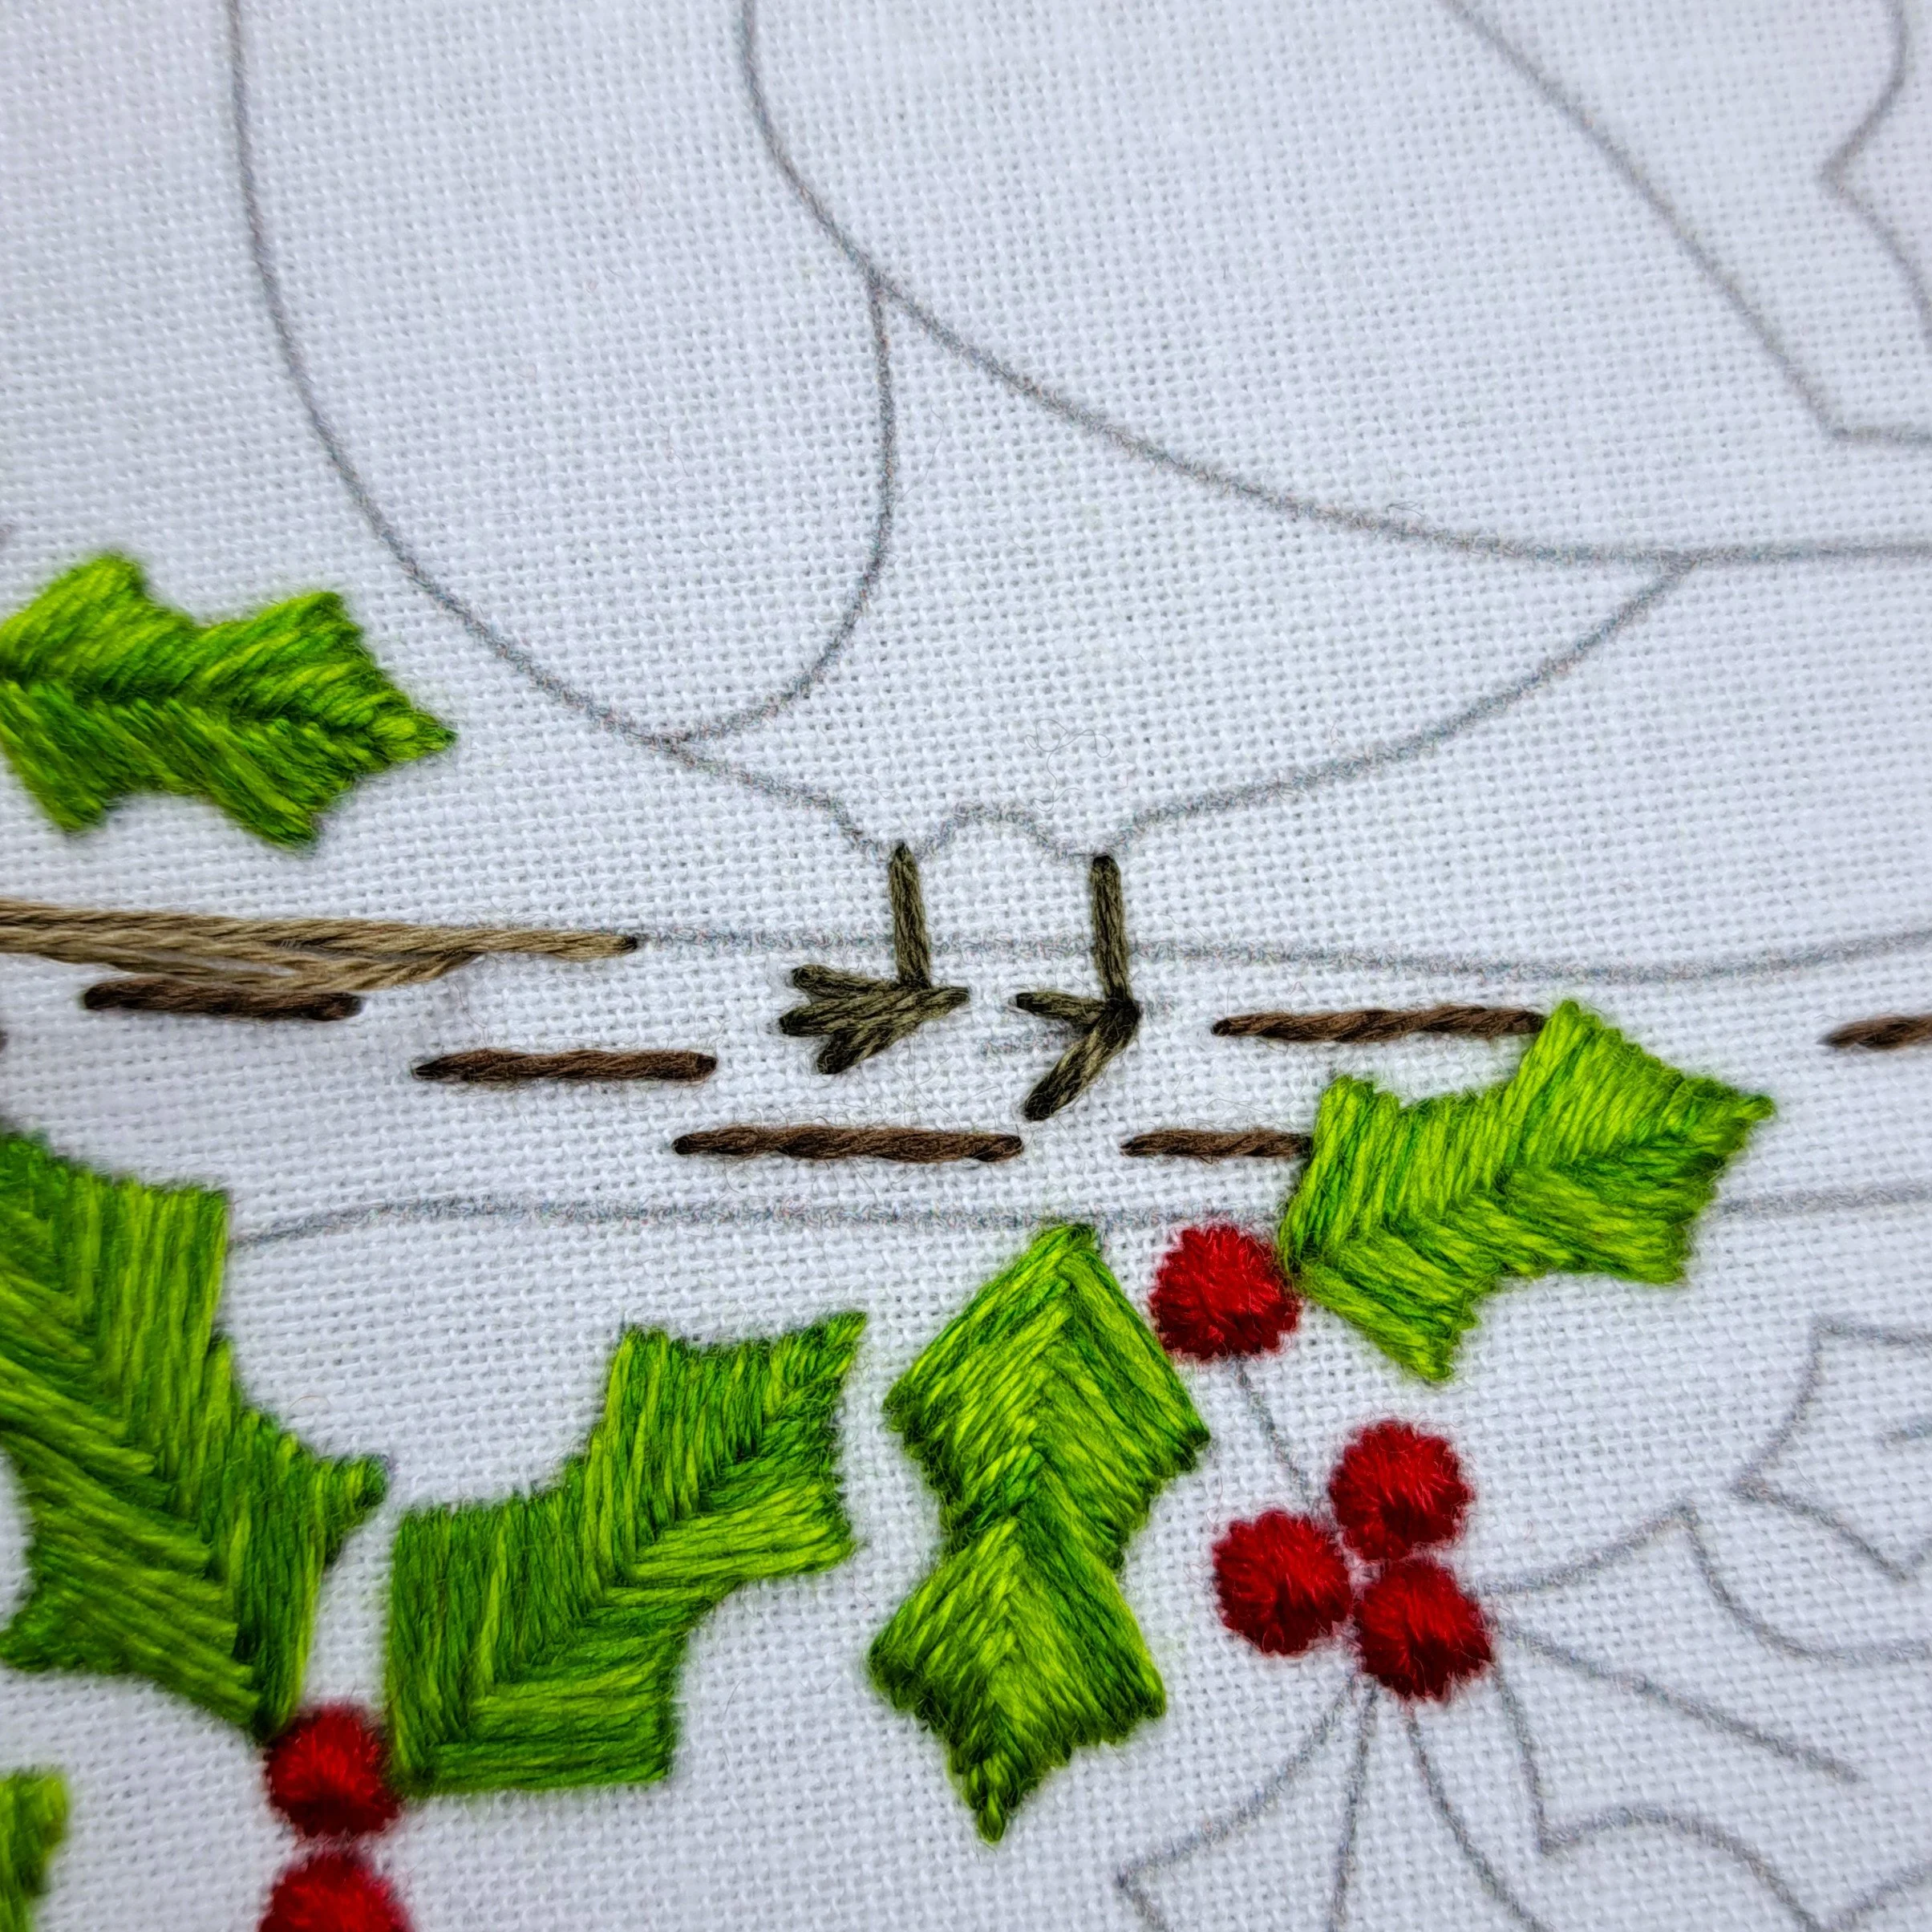
The Robins Legs and Feet
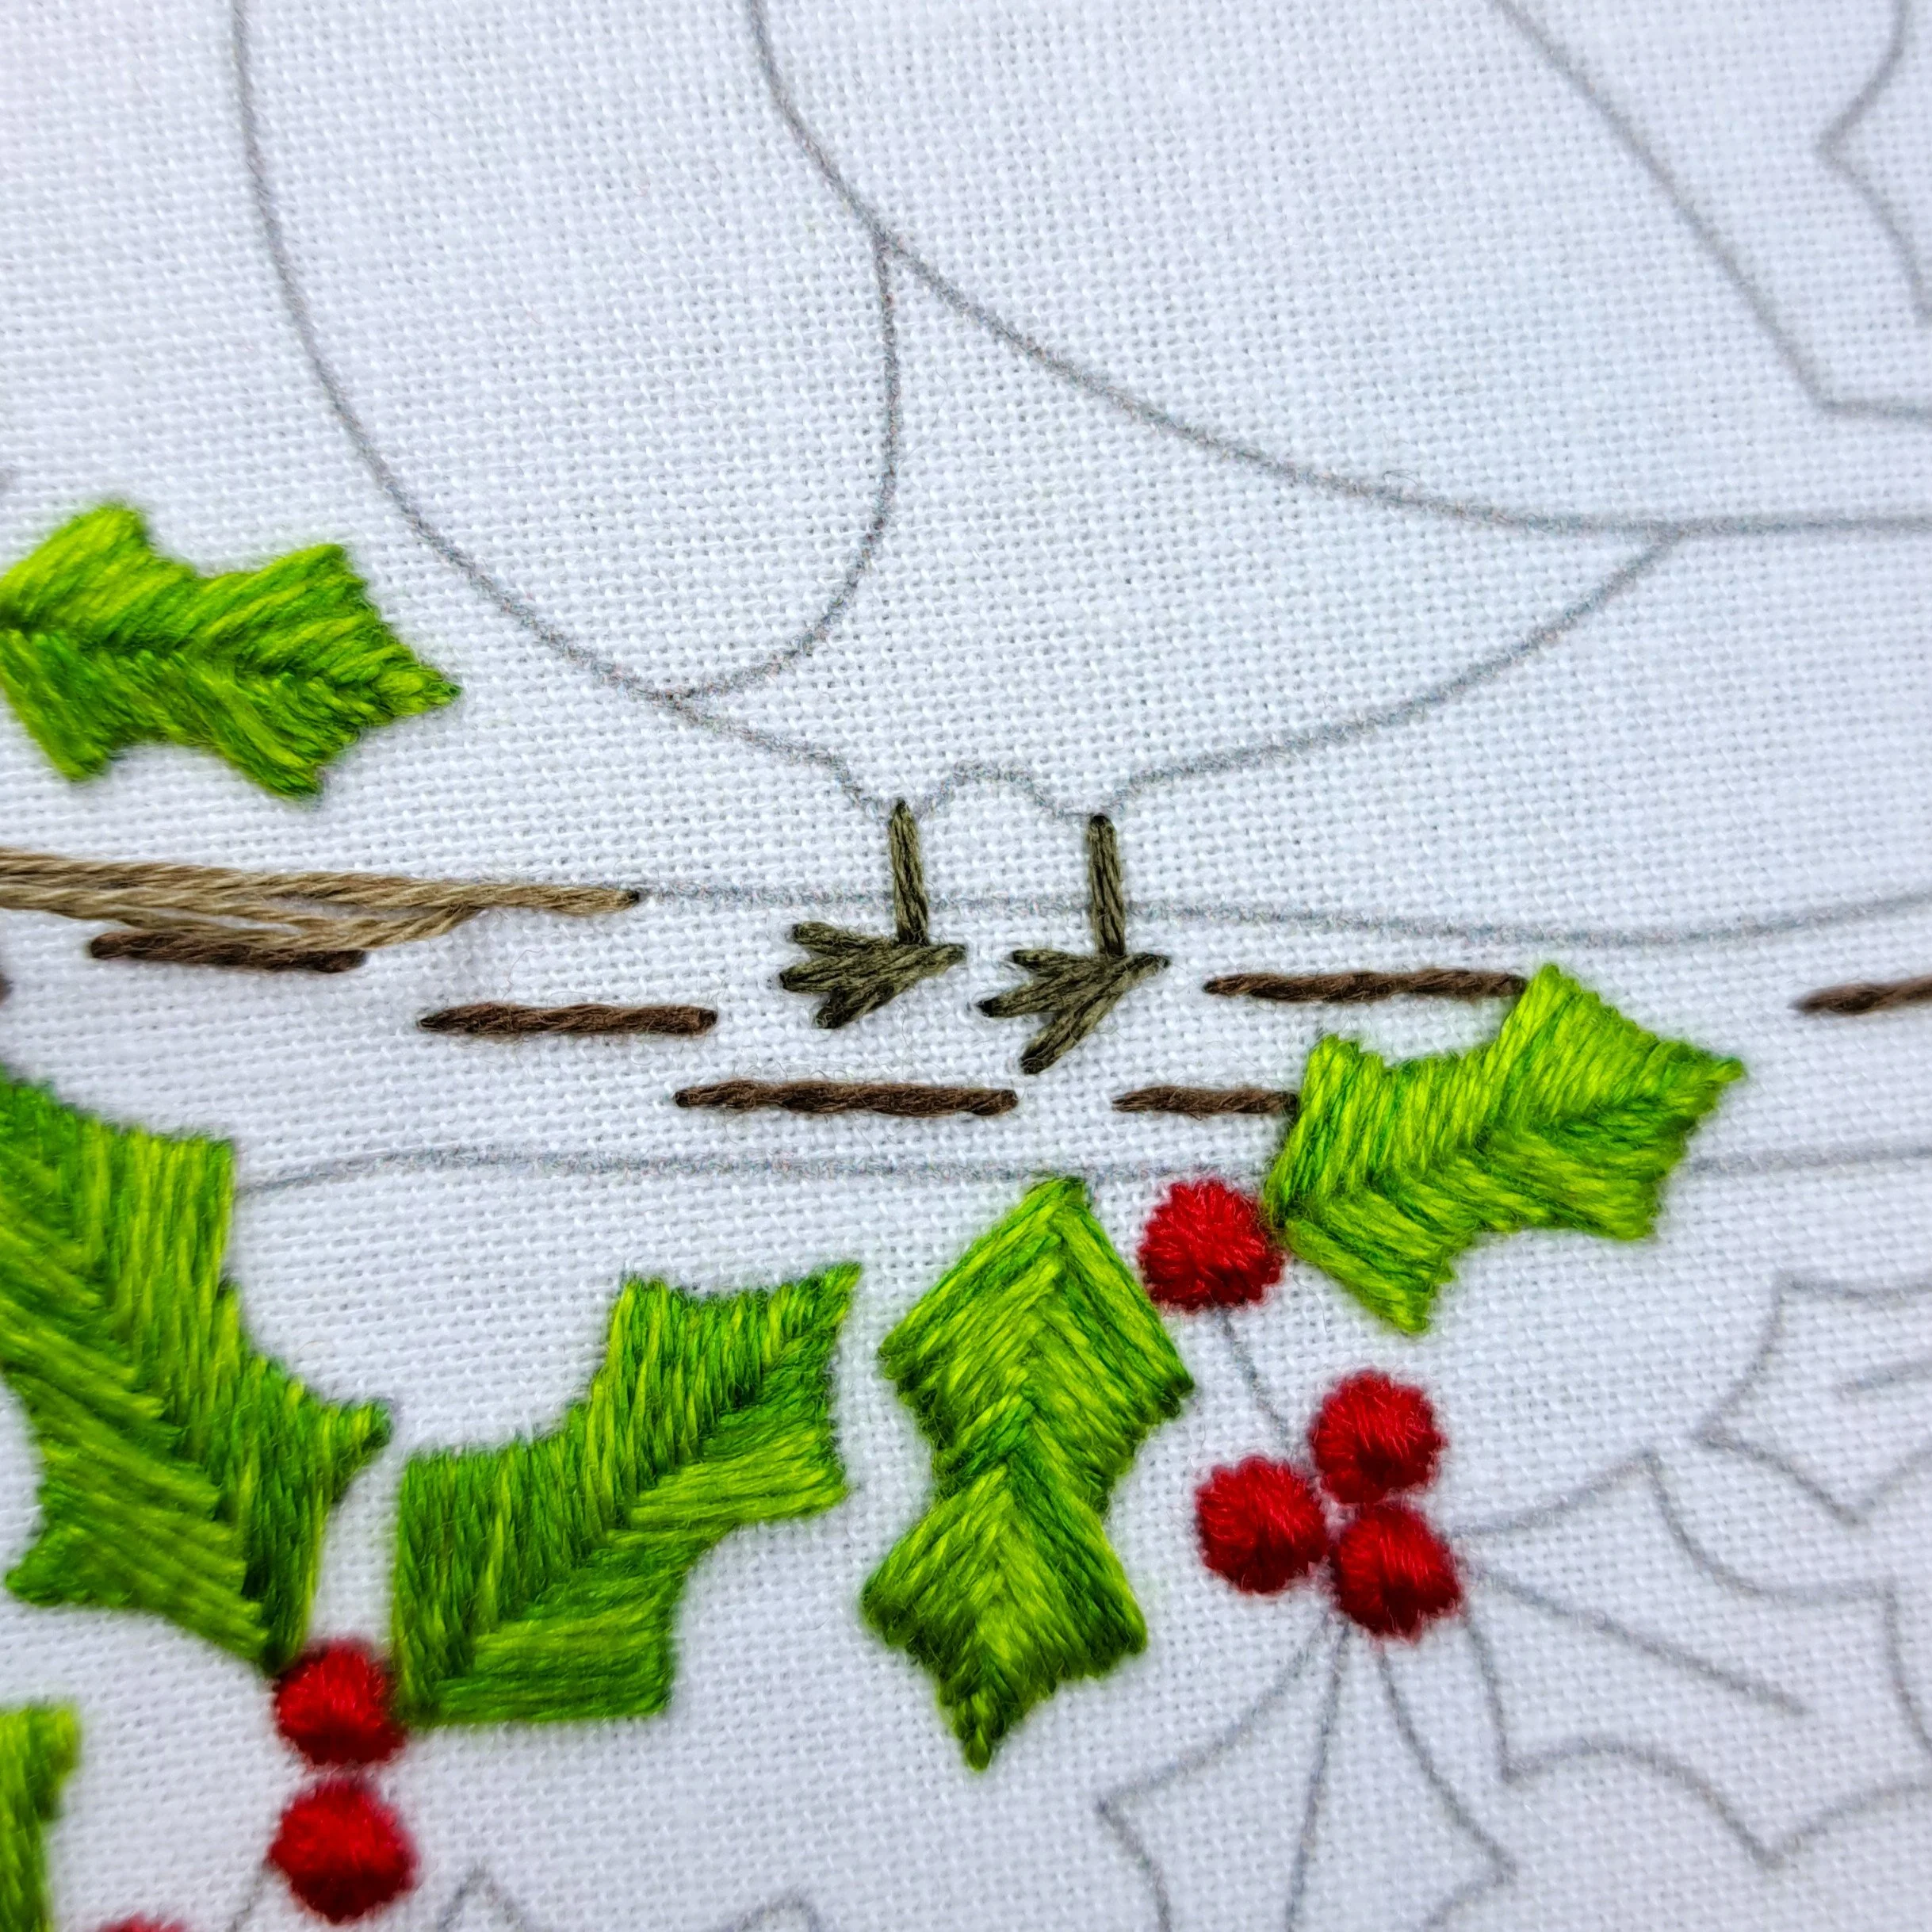
At this point, the only parts left to stitch that overlap the branch are the robin’s feet, so I decided to stitch these next using simple Straight Stitches.
I added four Straight Stitches per leg — it doesn’t really matter how, just make sure each leg matches. I stitched the middle toe last to cover where the other stitches joined.
Stitch – Straight Stitch
Thread colour – Anchor 904 (Mid Brown)
Number of strands – 3
Needle size – Medium
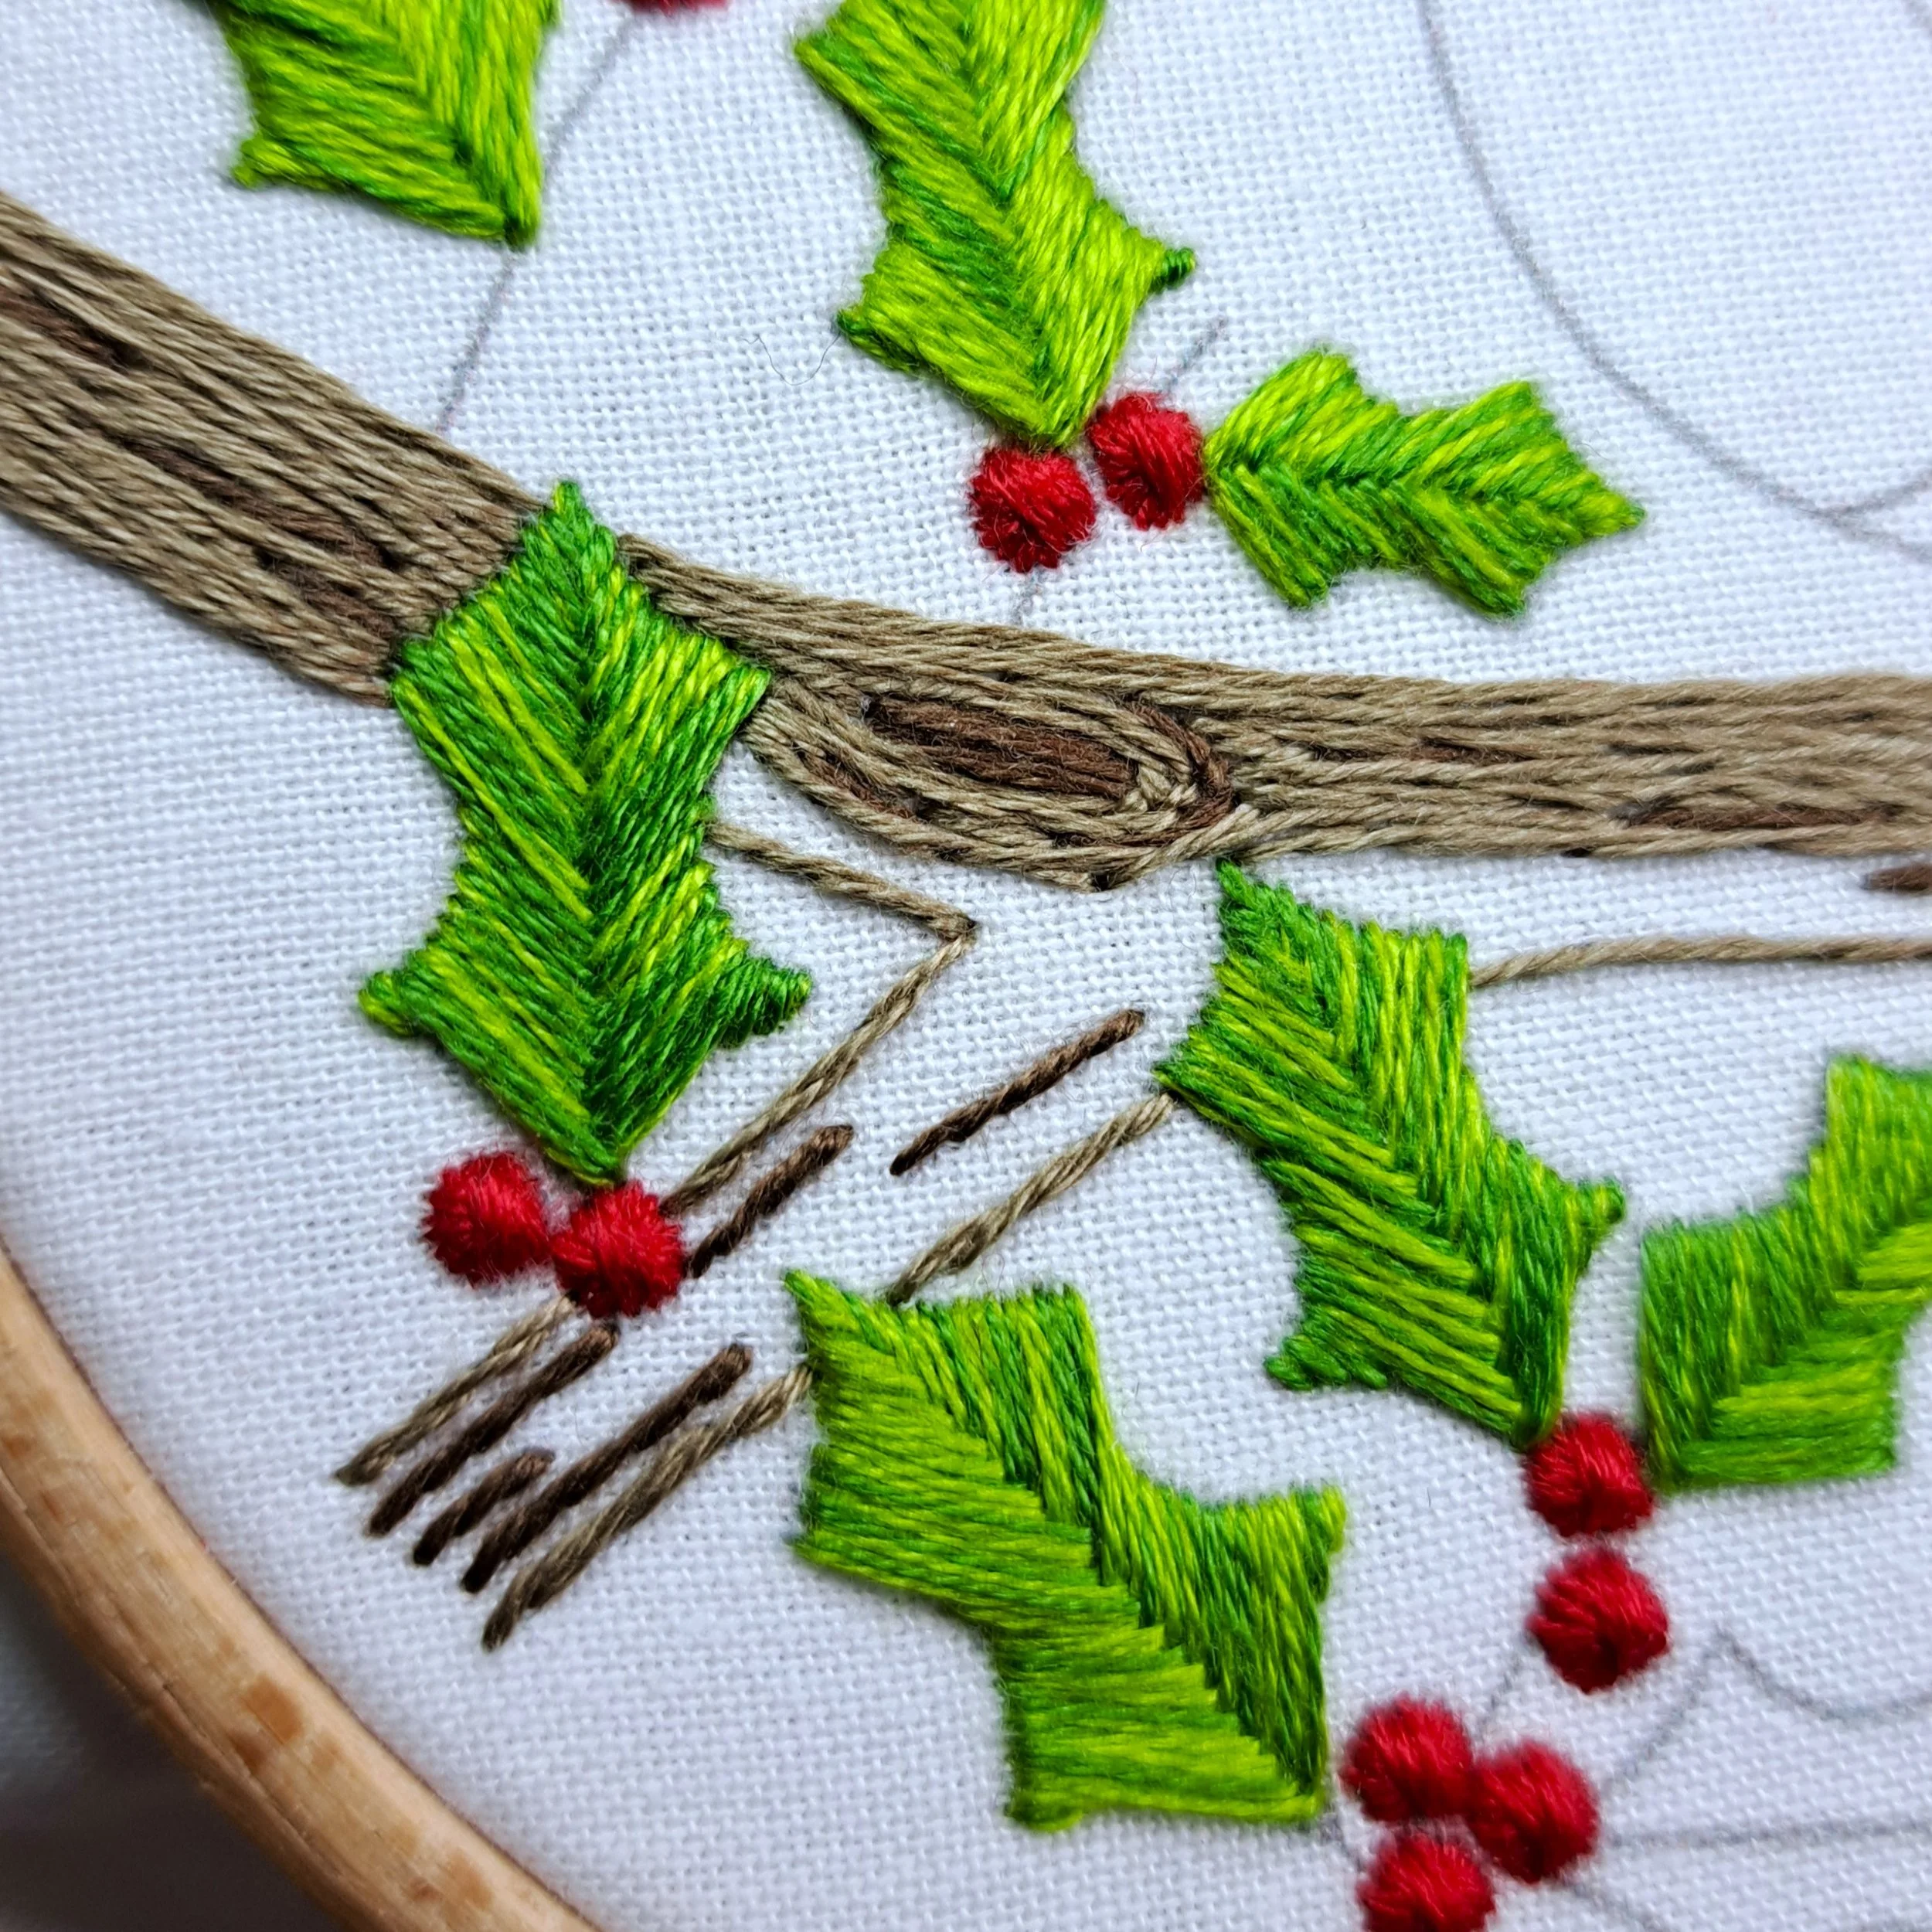
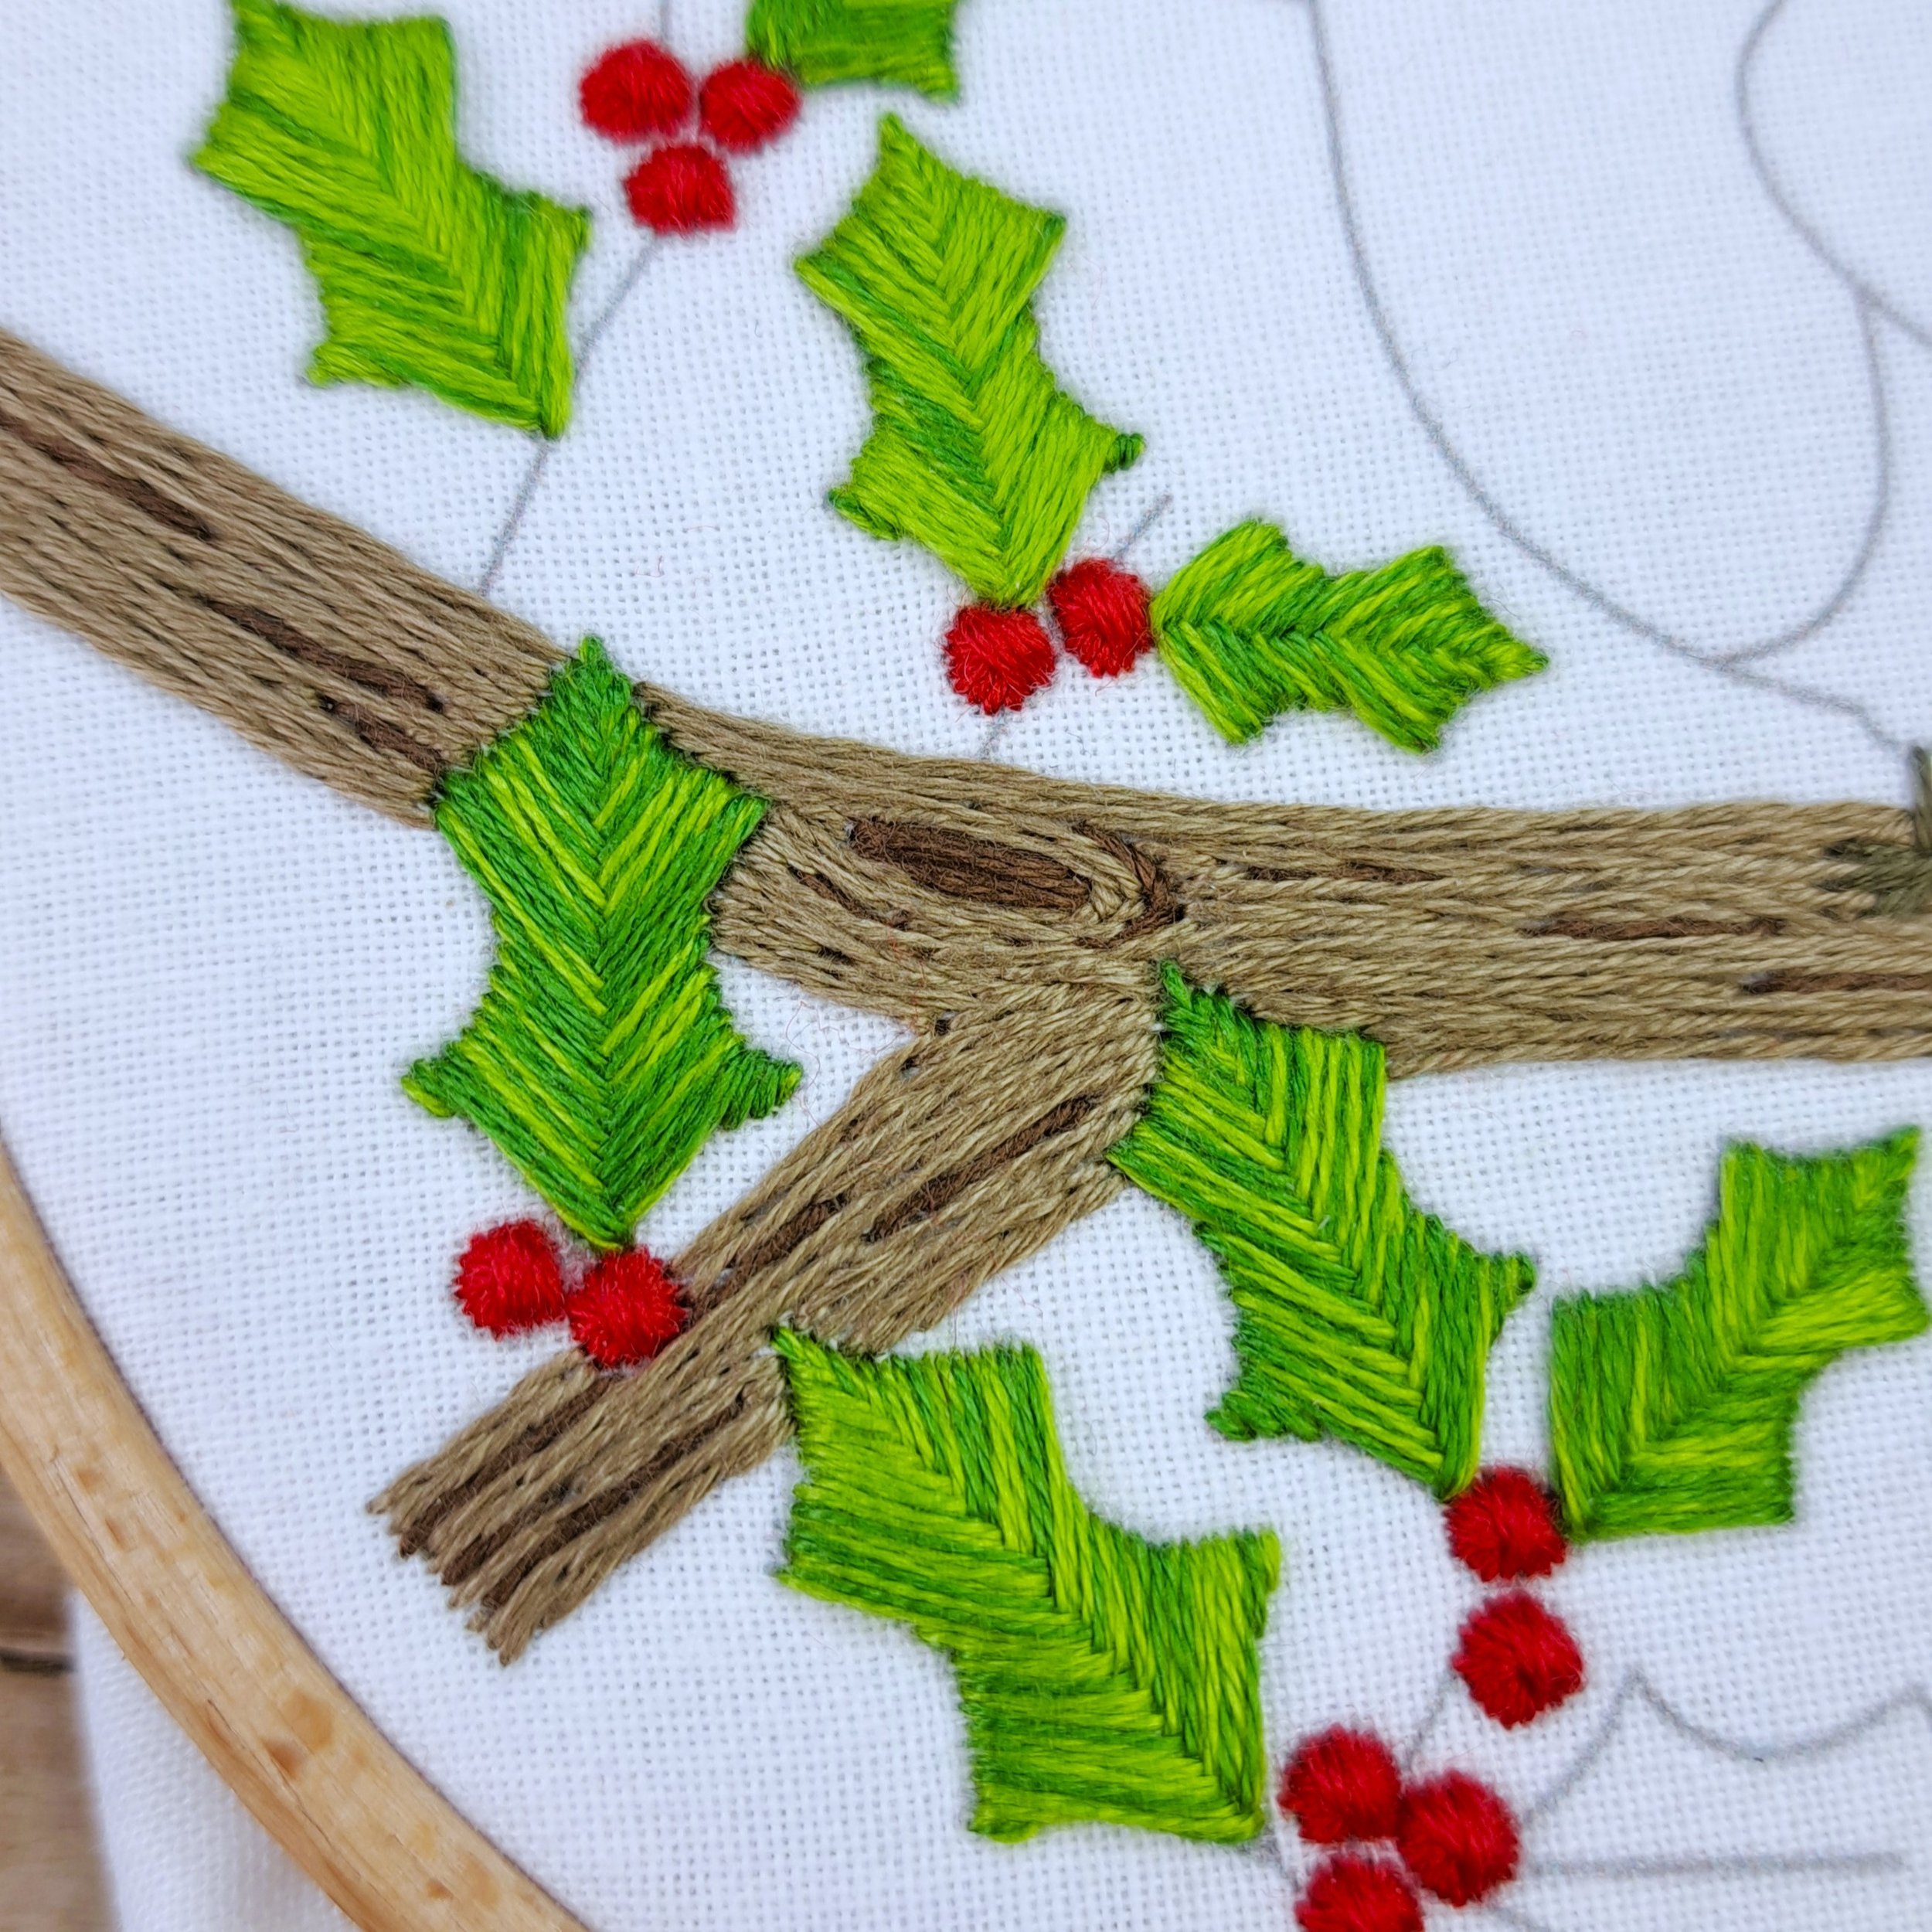
The Branch Bark
Now that I’d stitched all the bits overlapping the branch, I went back to fill it in with rows of Stem Stitch. I varied the lengths of my stitches to add texture — the shorter the stitch, the more ‘twisted’ it looks. Don’t worry about making them perfectly even; this stitch is all about creating a natural, bark-like texture.
I stitched in rows, following the lines of the detail lines we stitched at the beginning. I even added a few Straight Stitches here and there to fill tiny gaps — you really can’t tell, and it just adds to the texture.
I started with the top of the main branch, then moved onto the side branch, stitching it so it joined smoothly with the main branch.
Stitch – Stem Stitch
Thread colour – Anchor 903 (Light Brown)
Number of strands – 2
Needle size – Small
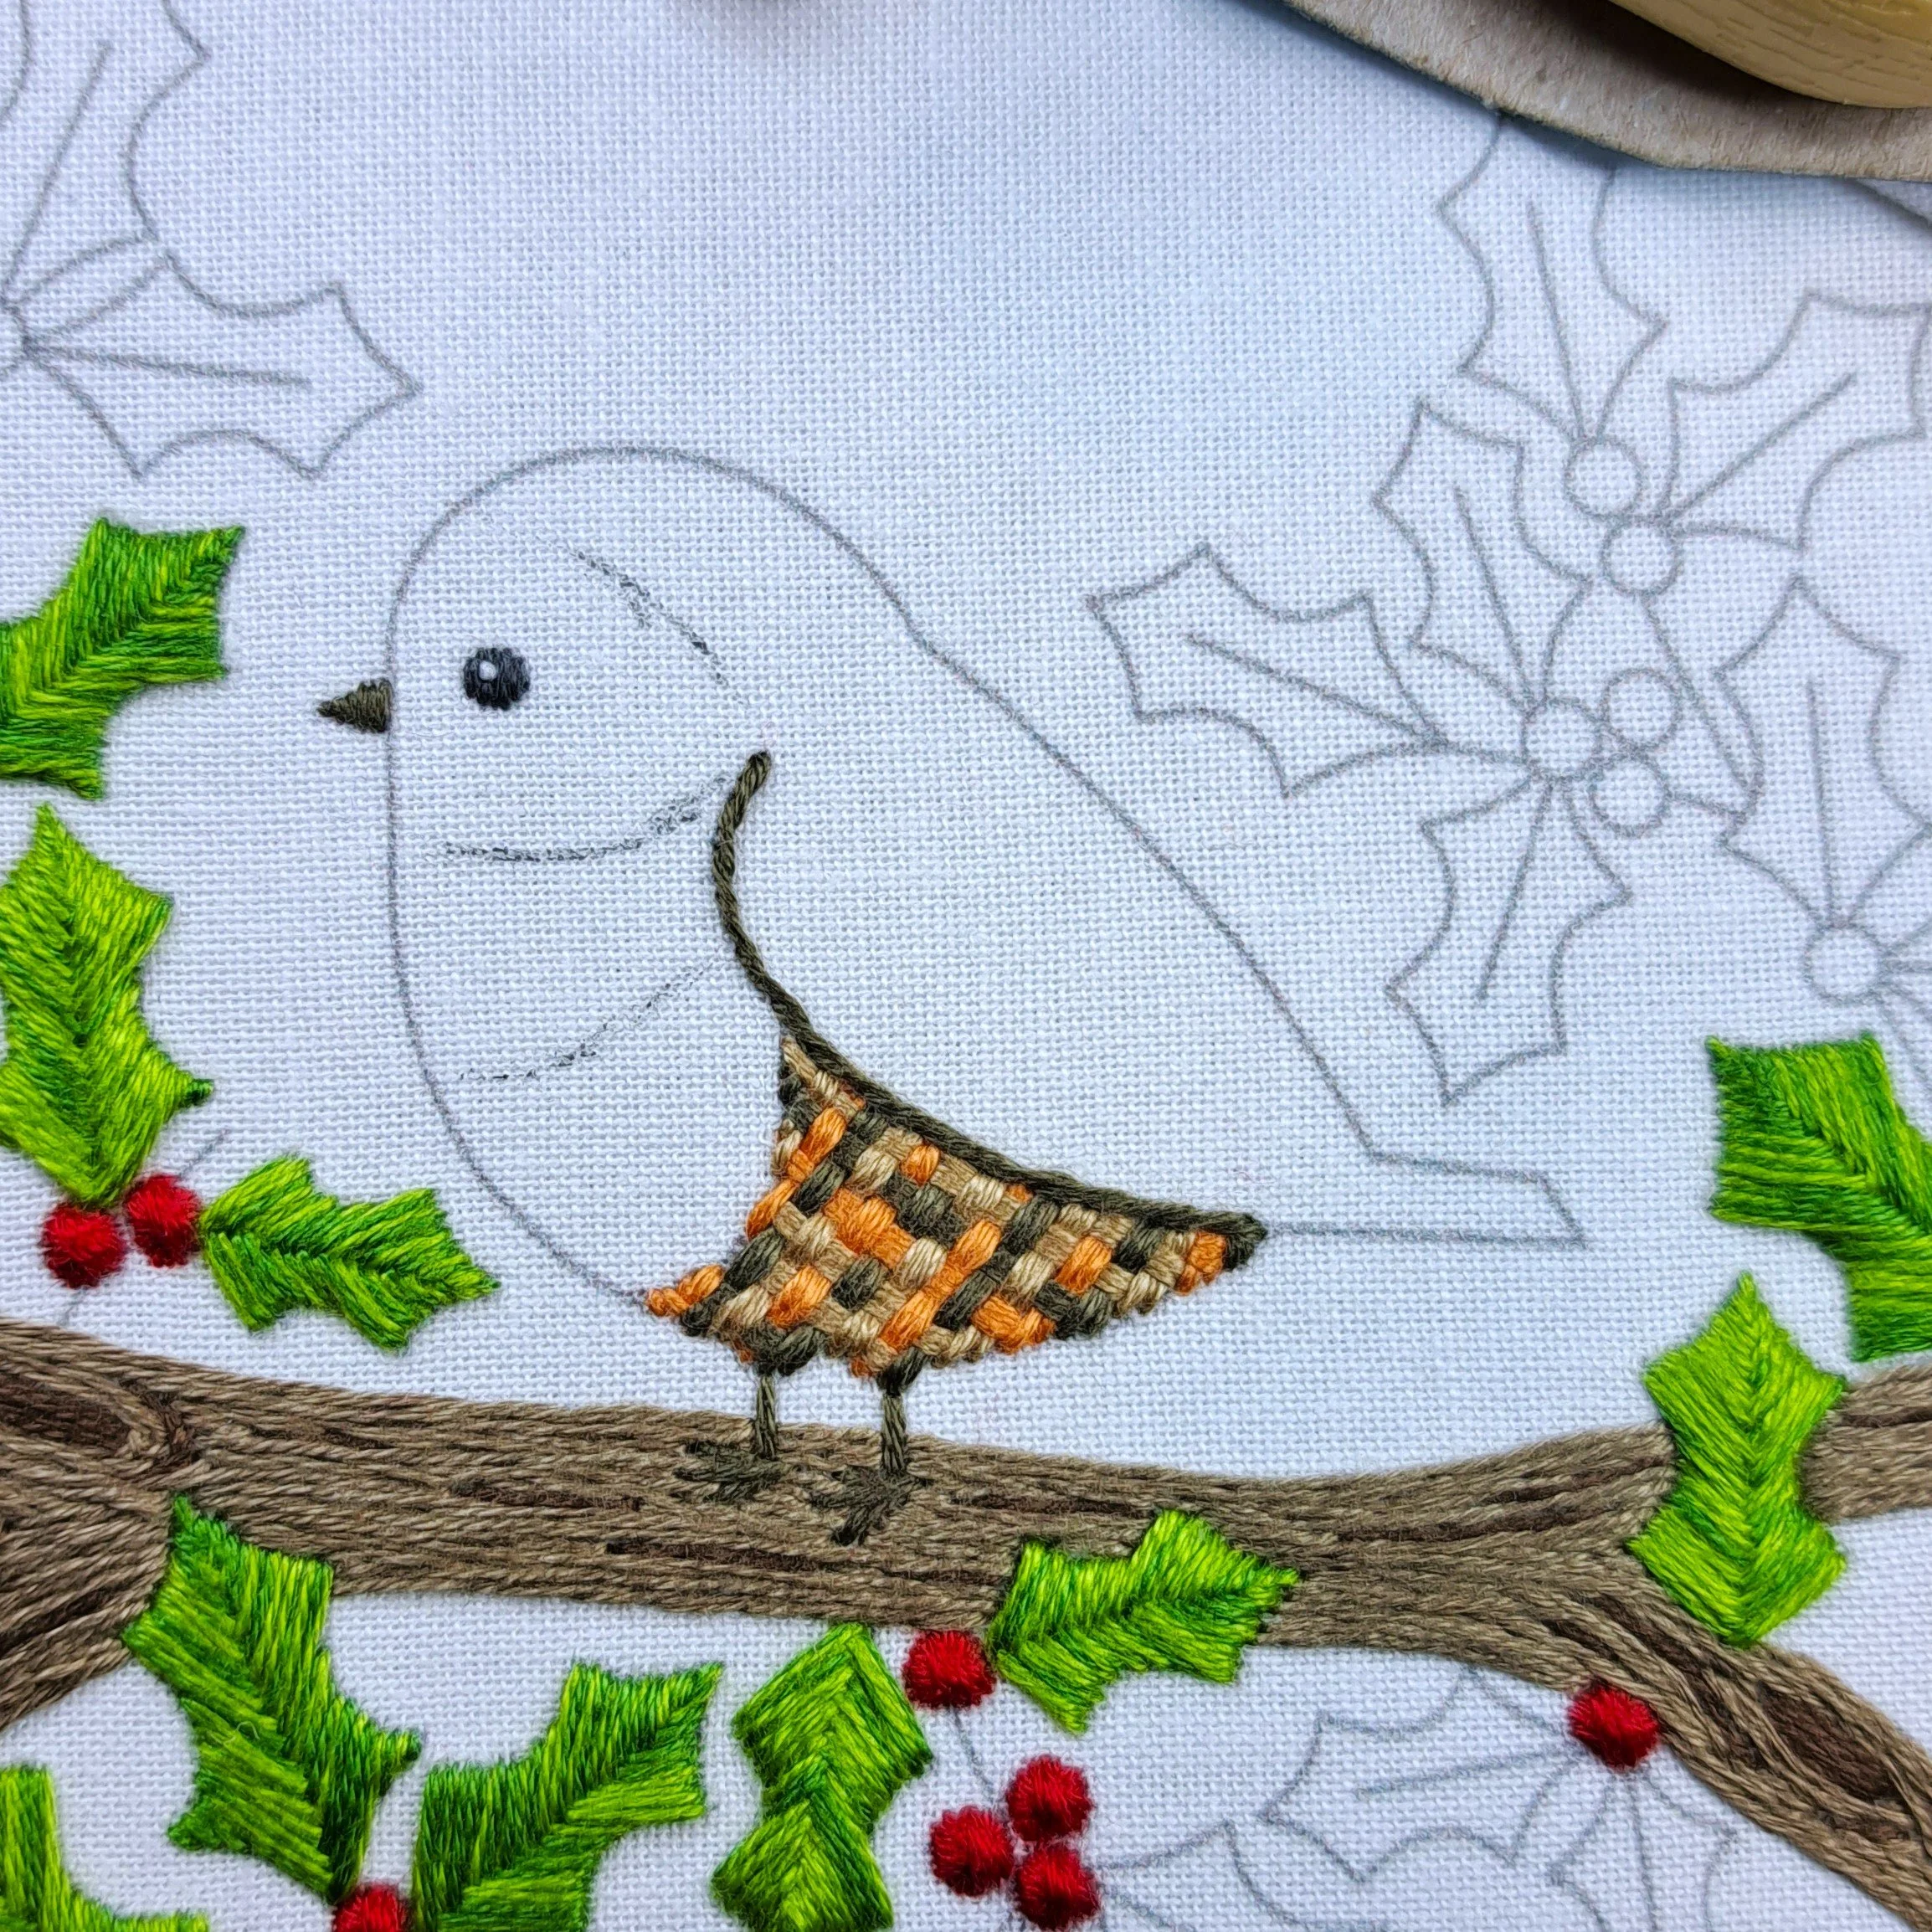
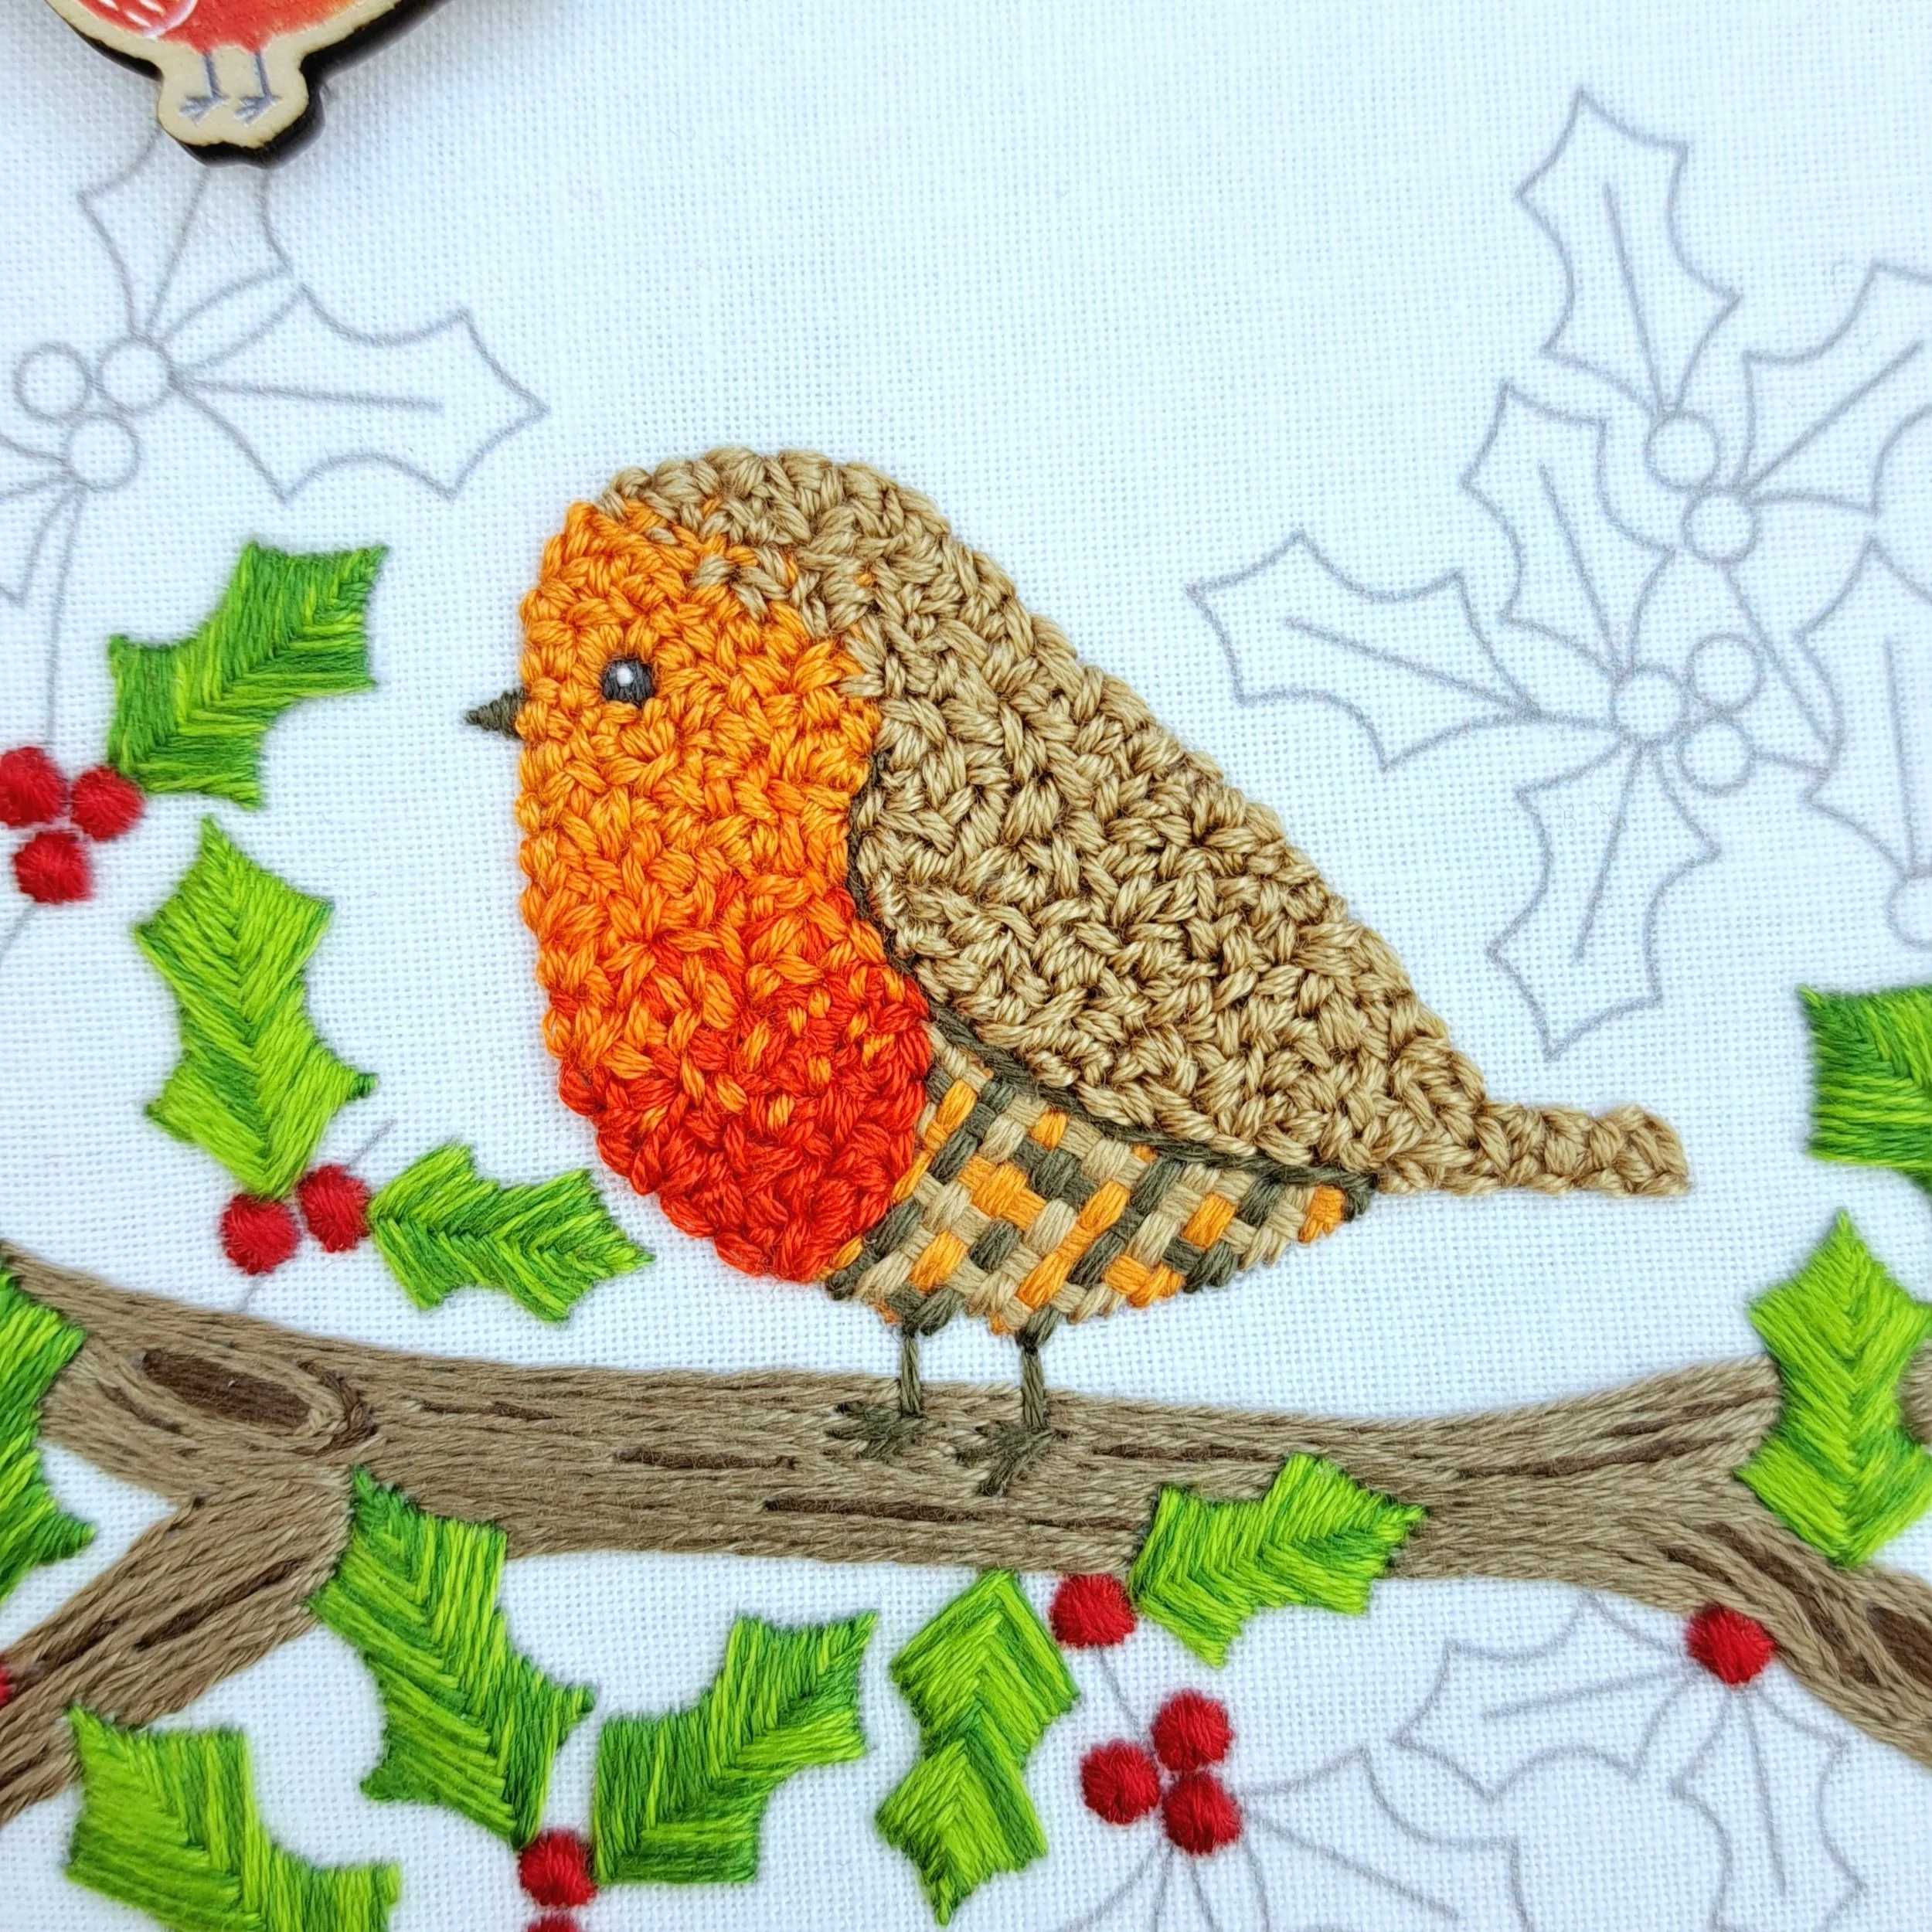
The Robins Belly
Oh, this was so much fun to stitch. I used Basket Weave Stitch here with 3 strands in three different colours — Light Orange, Mid Brown and Light Golden Brown. This is such a lovely stitch to play with. You can change the spacing, the angles, the colour order… and every version looks a little different.
Stitch – Basket Weave Stitch
Thread colours – Anchor 324 (Light Orange), Anchor 904 (Mid Brown), Anchor 373 (Light Golden Brown)
Number of strands – 3
Needle size – Medium
If you’ve never tried Basket Weave before, you might want to have a little play on some scrap fabric first — just to decide whether you prefer your stitches more vertical, horizontal, angled, chunky or spaced out. There’s no right or wrong here, just what you like the look of!
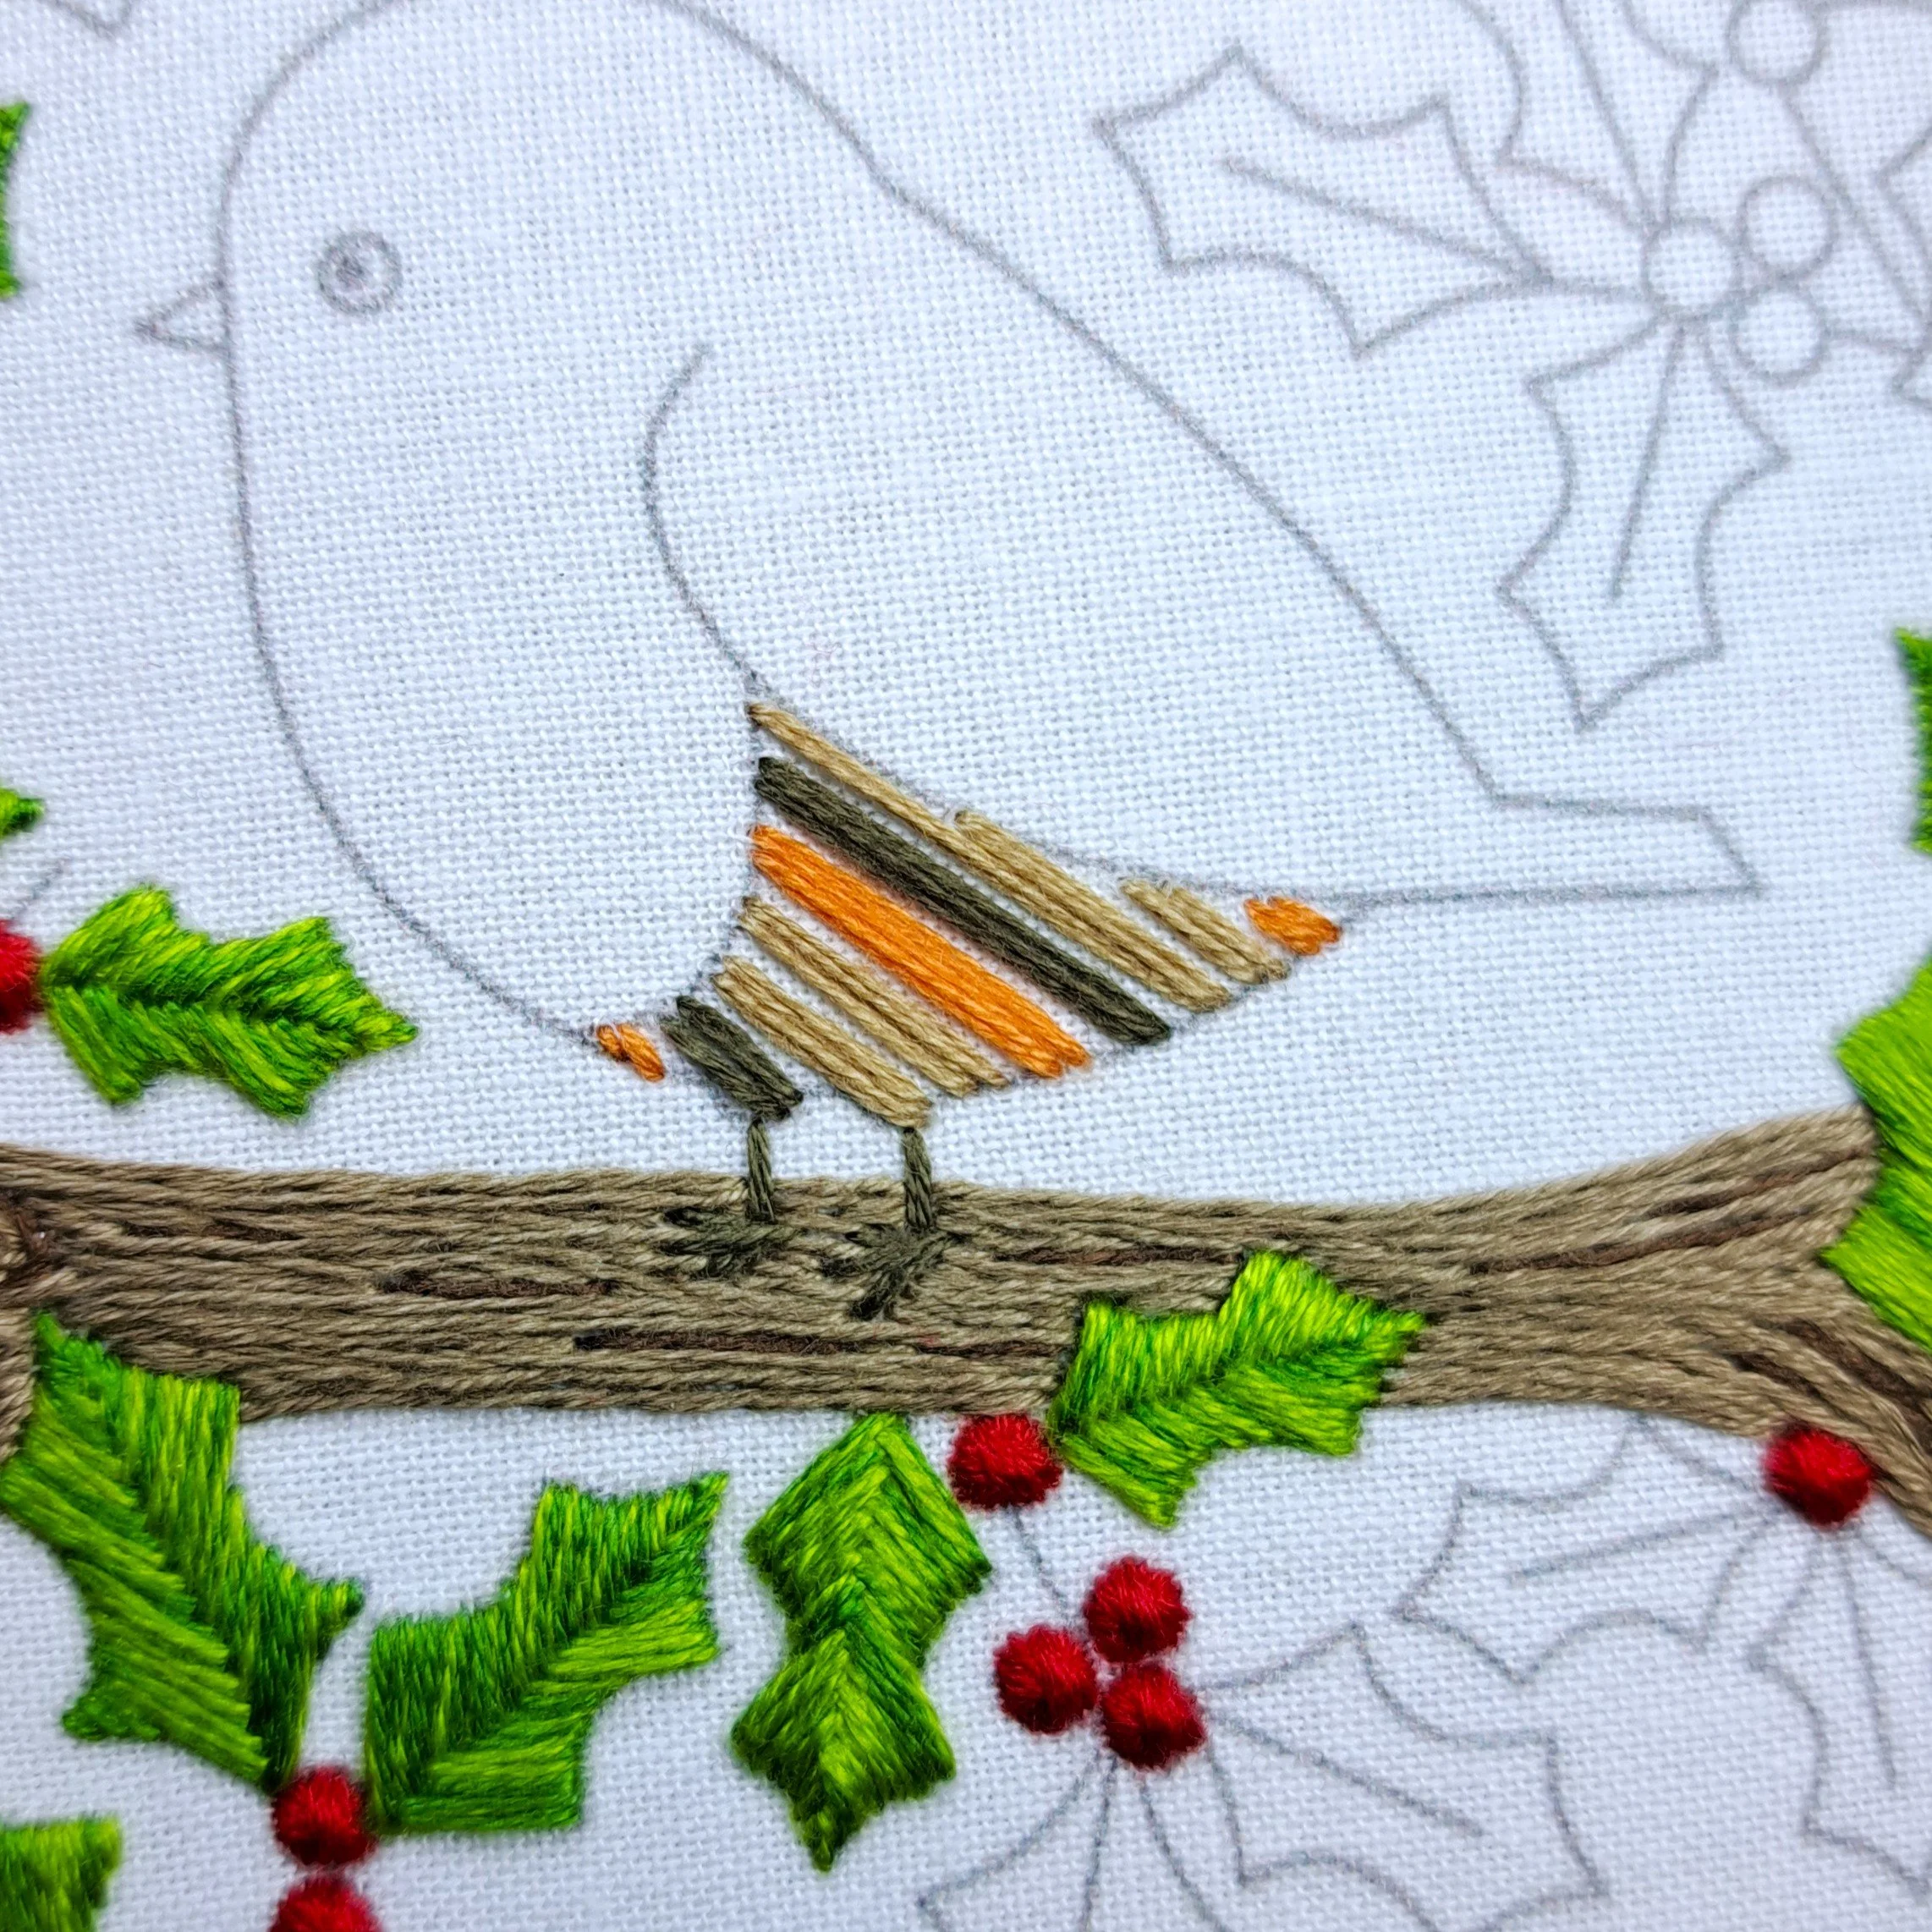
The Foundation Stitches
I stitched my foundation stitches at a slight angle, working double rows of each colour. I also thought carefully about the order of the colours, as this affects how the woven stitches look later on - I wanted to create an uneven colour pattern.
I stitched:
Anchor 324 (Light Orange)
Anchor 904 (Mid Brown)
Anchor 373 (Light Golden Brown)
Anchor 373 (Light Golden Brown)
…and repeated this pattern until the whole belly area was filled.
✨ A little tip:
Hold your thread across the shape before stitching — it helps you see the angle more clearly, keeps your stitches consistent, and will guide you as to where to put each stitch. I usually place my very first foundation stitch across the centre of the shape, then use that as my guide for the rest.
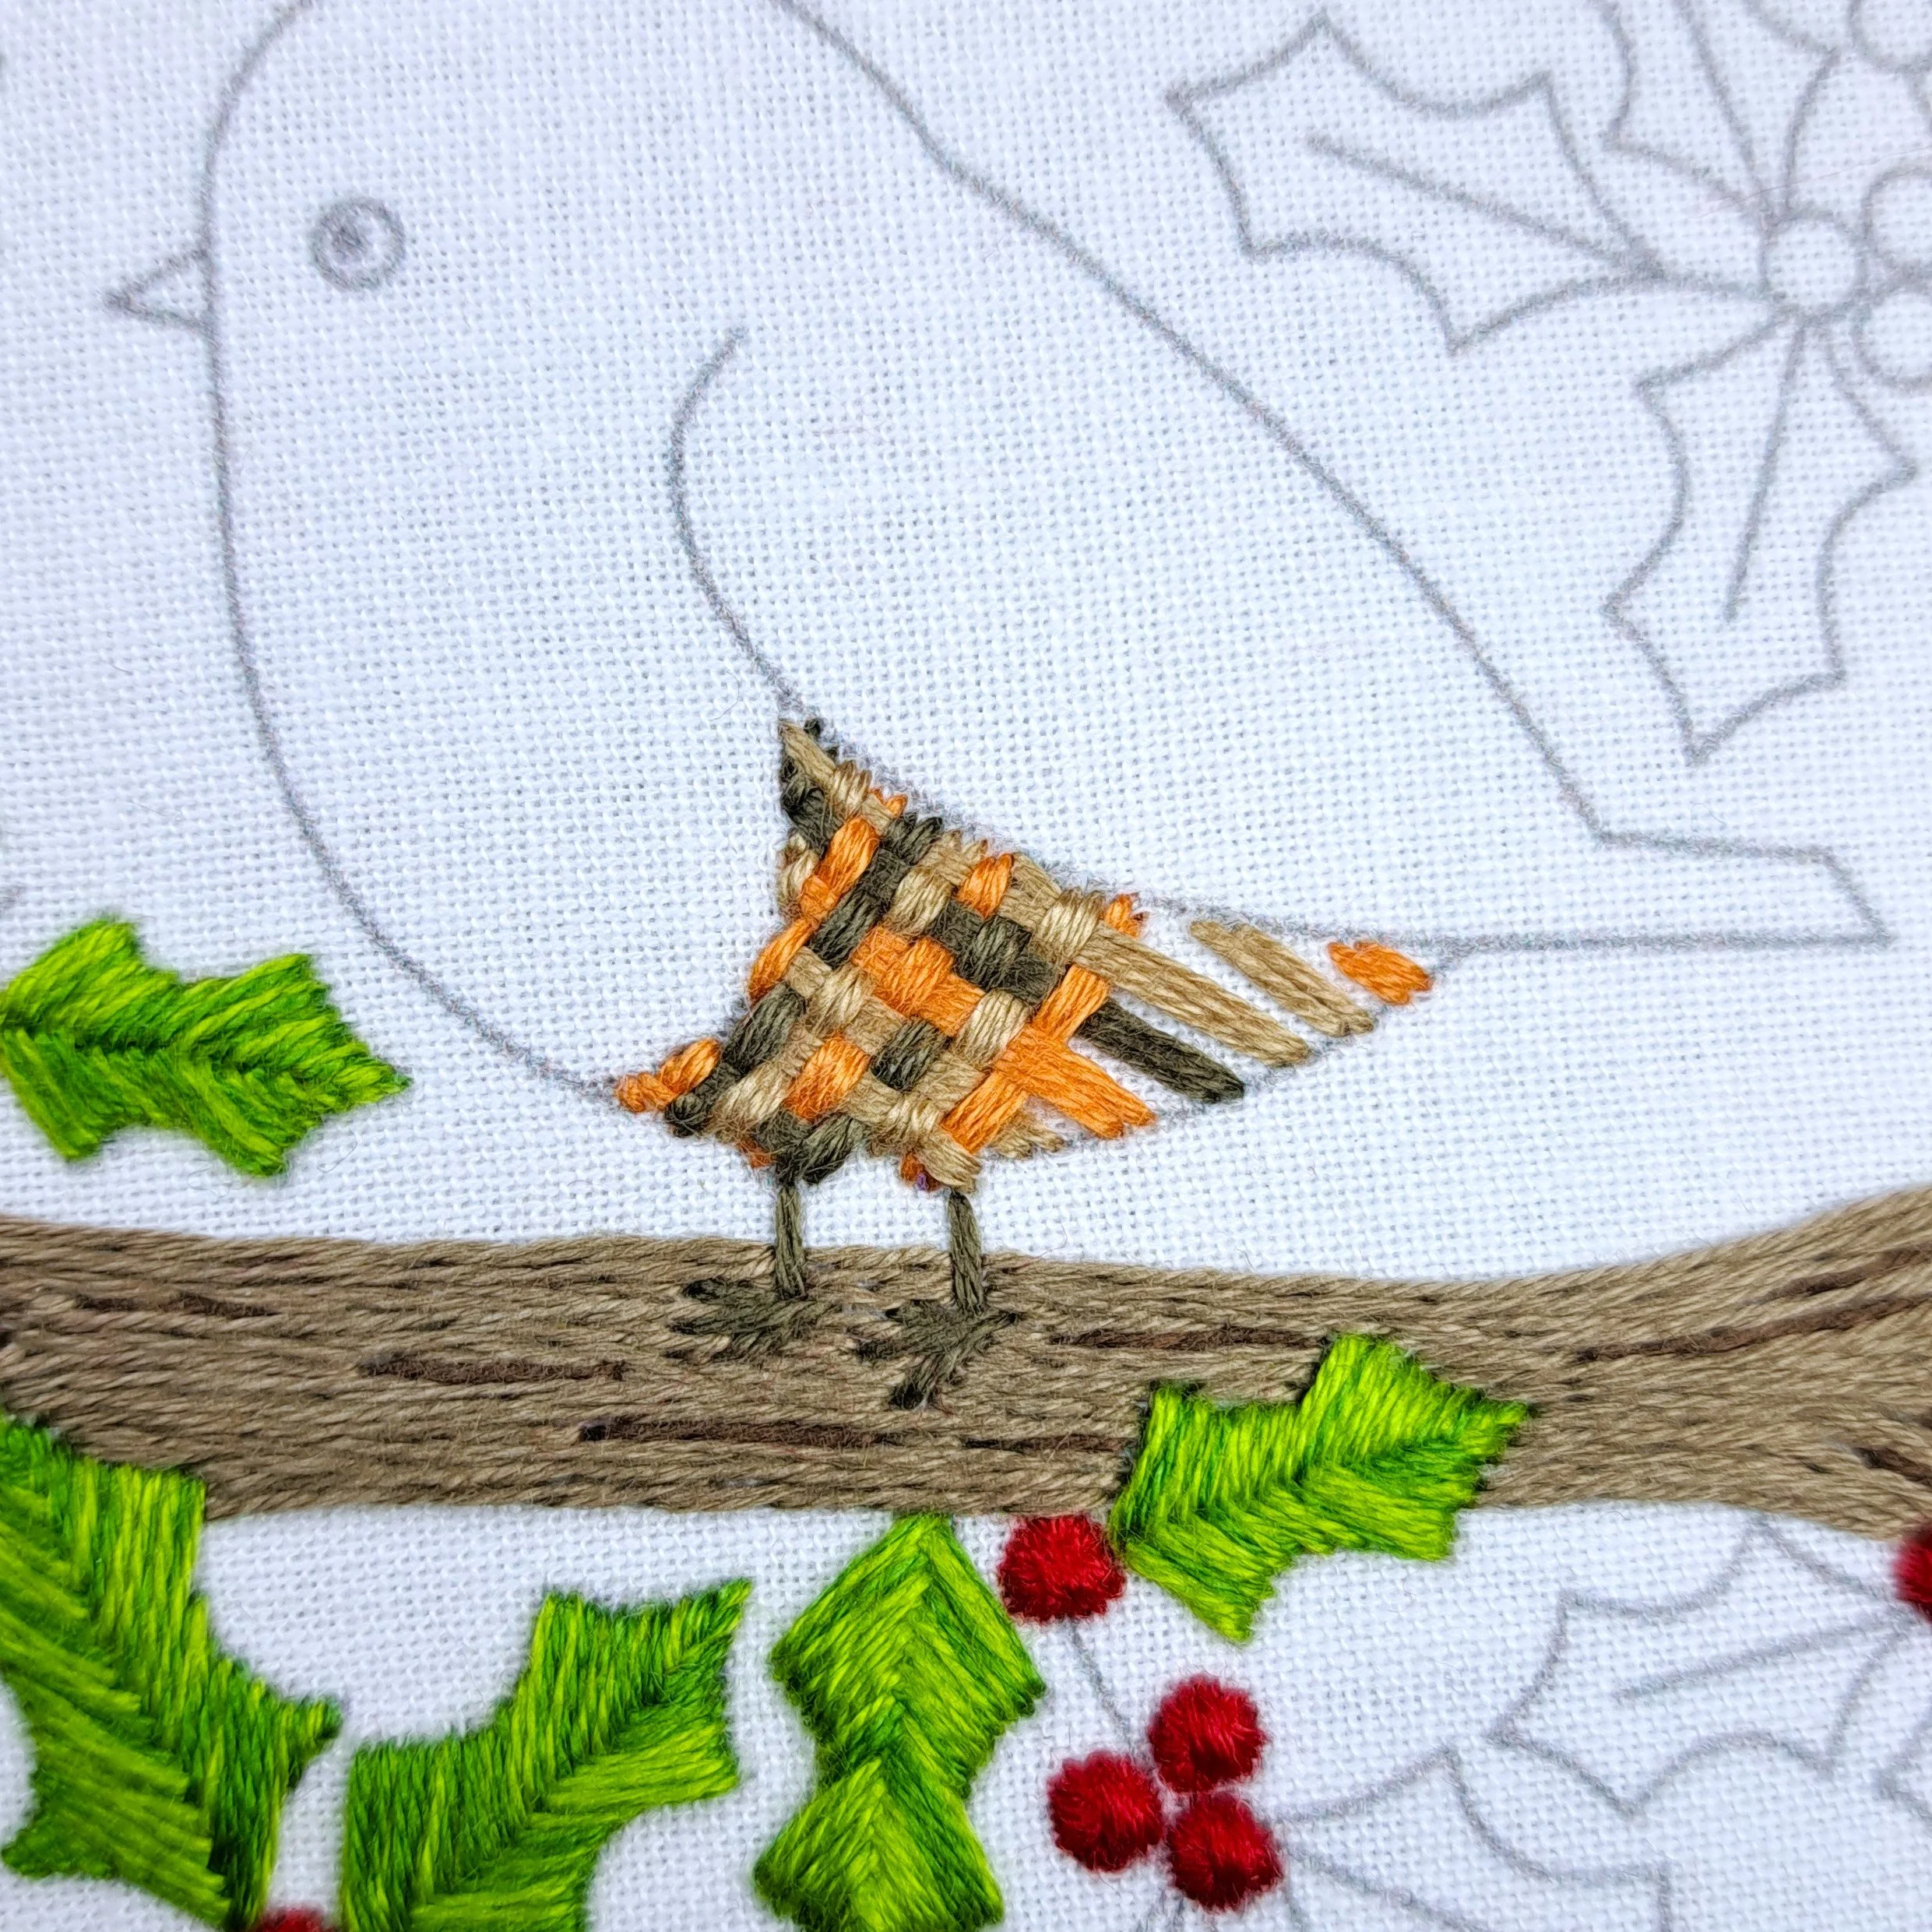
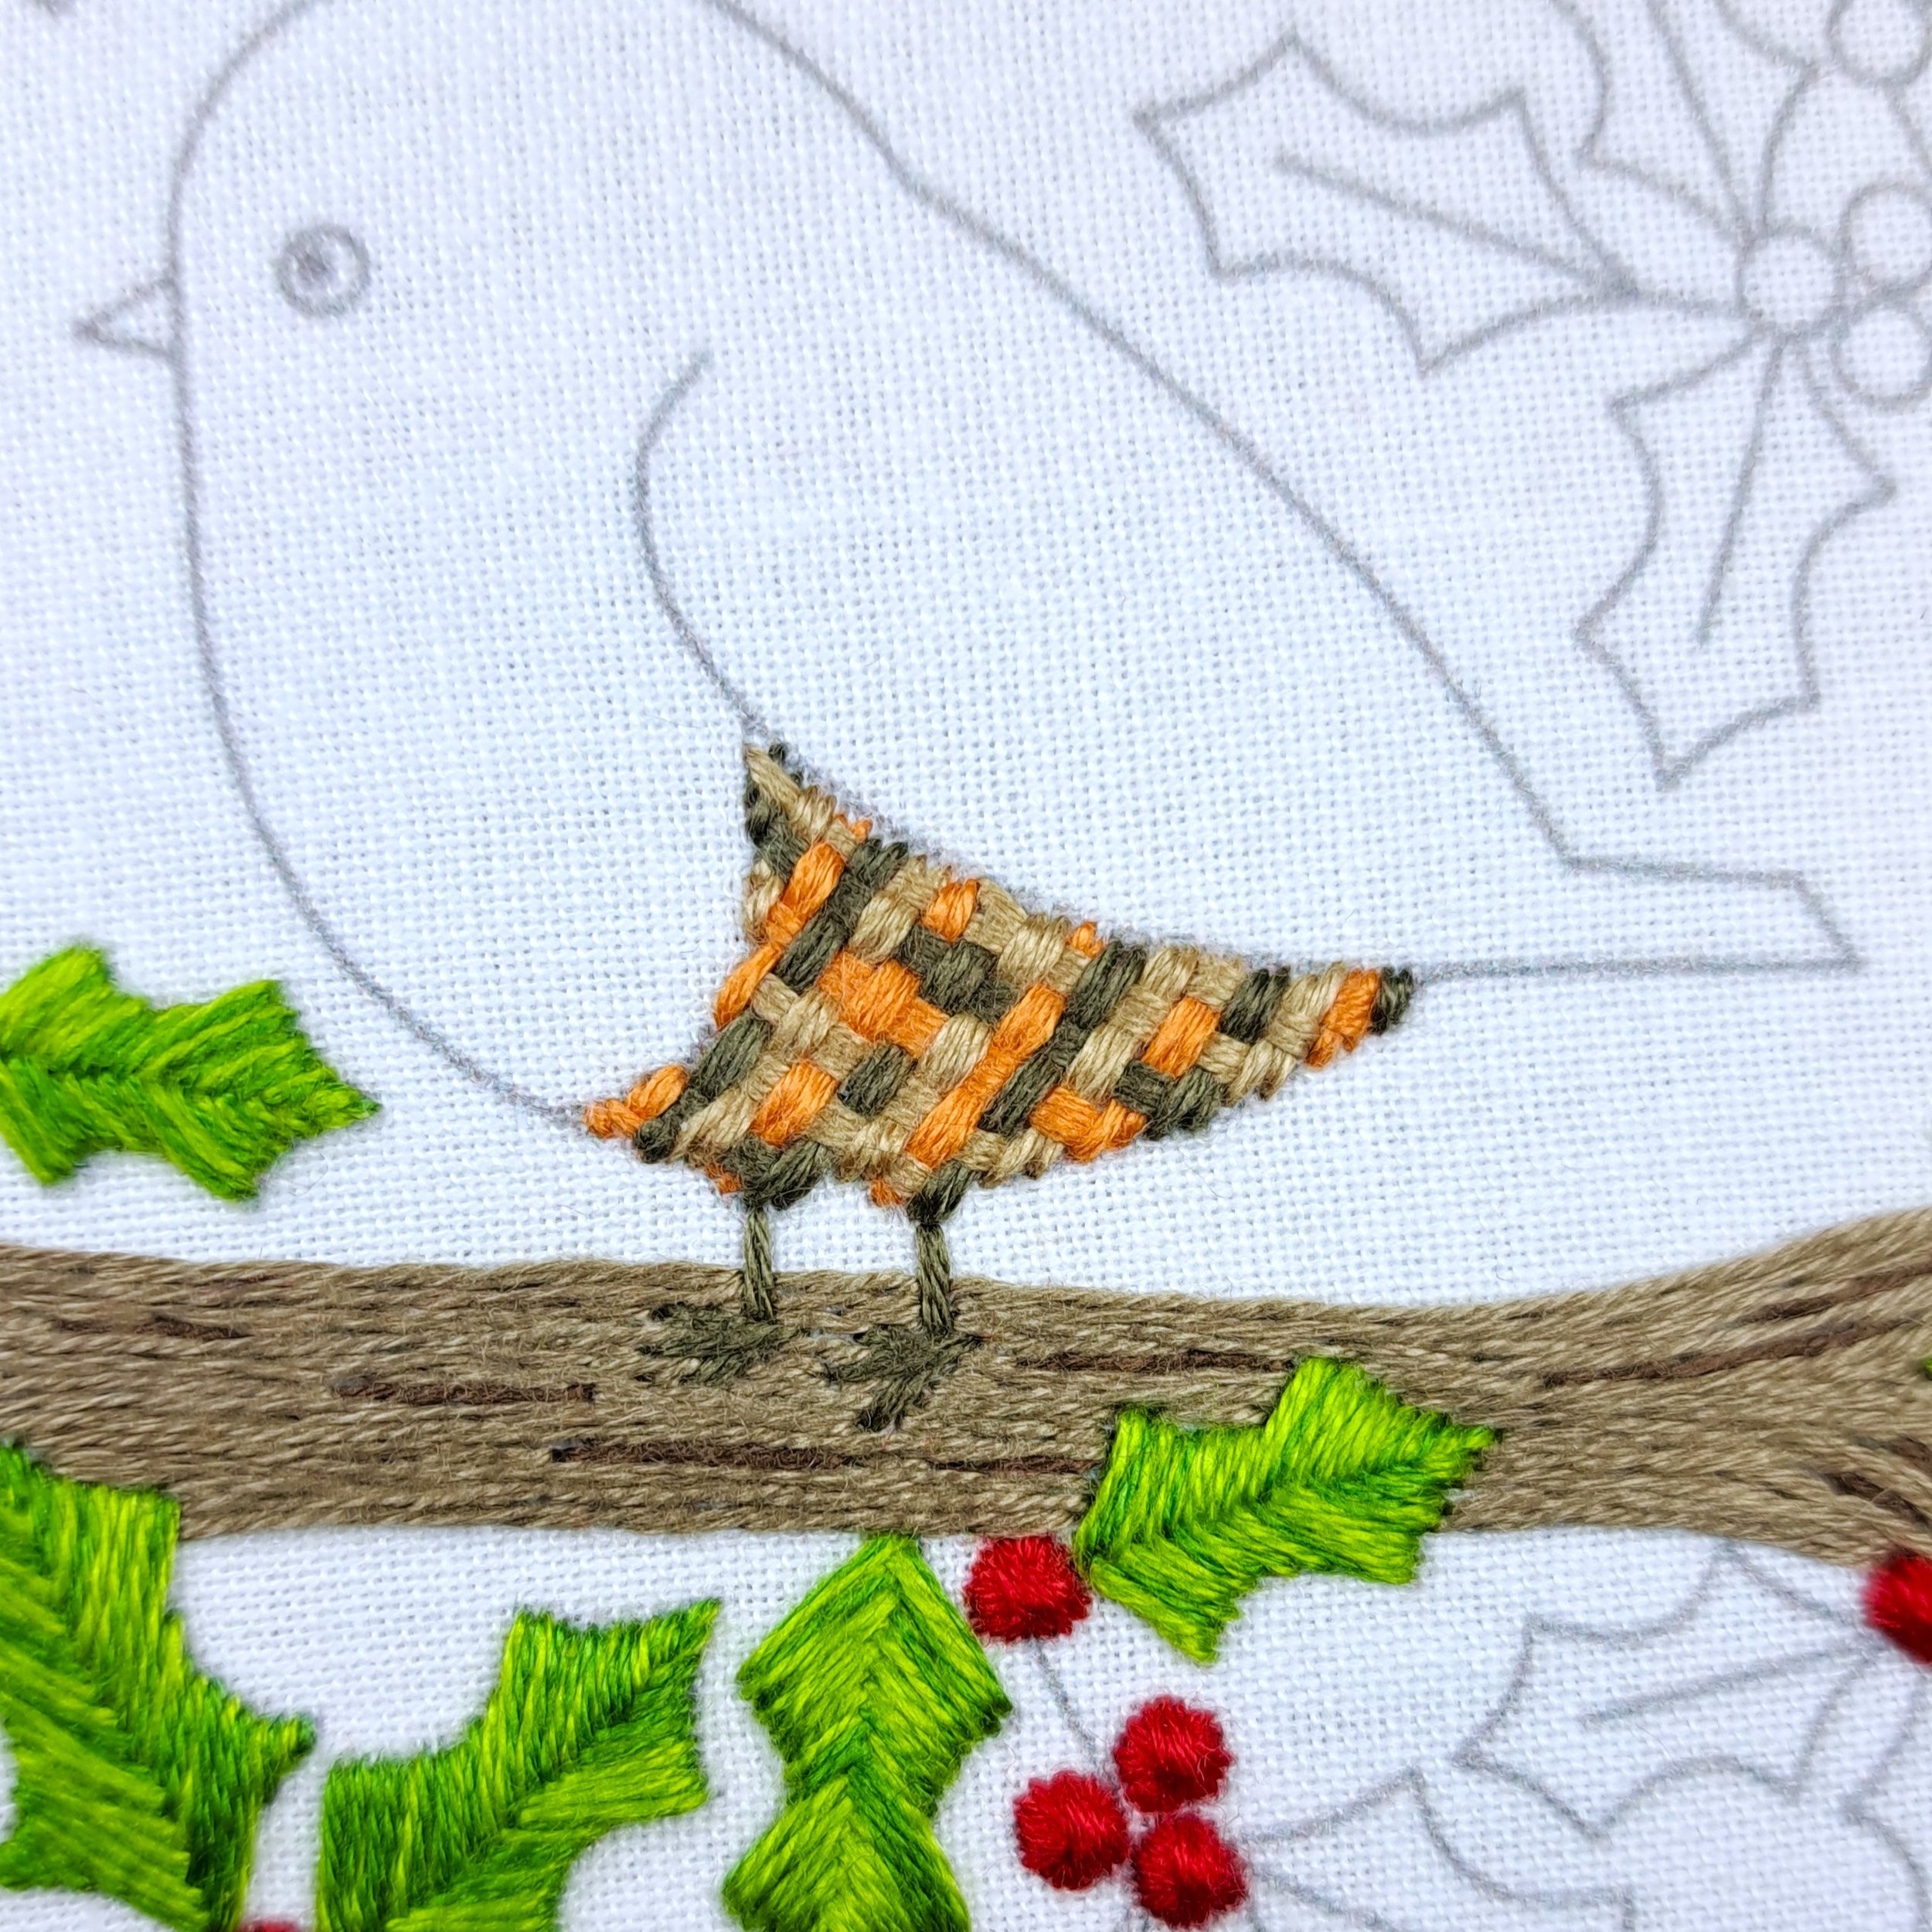
The Woven Stitches
Once my foundation stitches were in place, I added the woven stitches, working them perpendicular (ish) to the foundation rows. Again, I stitched two rows of each colour to create a slightly thicker, more textured look — but I changed the colour order this time:
Anchor 904 (Mid Brown)
Anchor 373 (Light Golden Brown)
Anchor 324 (Light Orange)
….and then repeated
Some areas get a little snug where the shape narrows, but I just slowed down, took my time, and worked my needle carefully through — and I’m really pleased with how it turned out.
✨ A little tip:
Try weaving with the eye of your needle rather than the point. It’s much easier and less likely to snag your stitches. Just remember… the sharp end is now at the other side (and the needle-pricks increase! 😅).

✨ Enjoying the blog so far?
I’ve poured a lot of time and stitches into this one, so if you’re finding it helpful and fancy leaving a little Ko-fi tip, that would be amazing — but absolutely no pressure 💛
Now back to the stitching…
The Wing Line
Next, I stitched a single row of Stem Stitch along the wing line while I could still see it nice and clearly. I made sure this line of stitches just slightly overlapped the edge of the belly’s Basket Weave — it really helps to neaten up that transition.
Stitch – Stem Stitch
Thread colour – Anchor 904 (Mid Brown)
Number of strands – 3
Needle size – Medium

The Beak
I filled the cute little beak using vertical Satin Stitches. I started at the face end and worked my way towards the point of the beak.
Stitch – Satin Stitch
Thread colour – Anchor 904 (Mid Brown)
Number of strands – 2
Needle size – Small
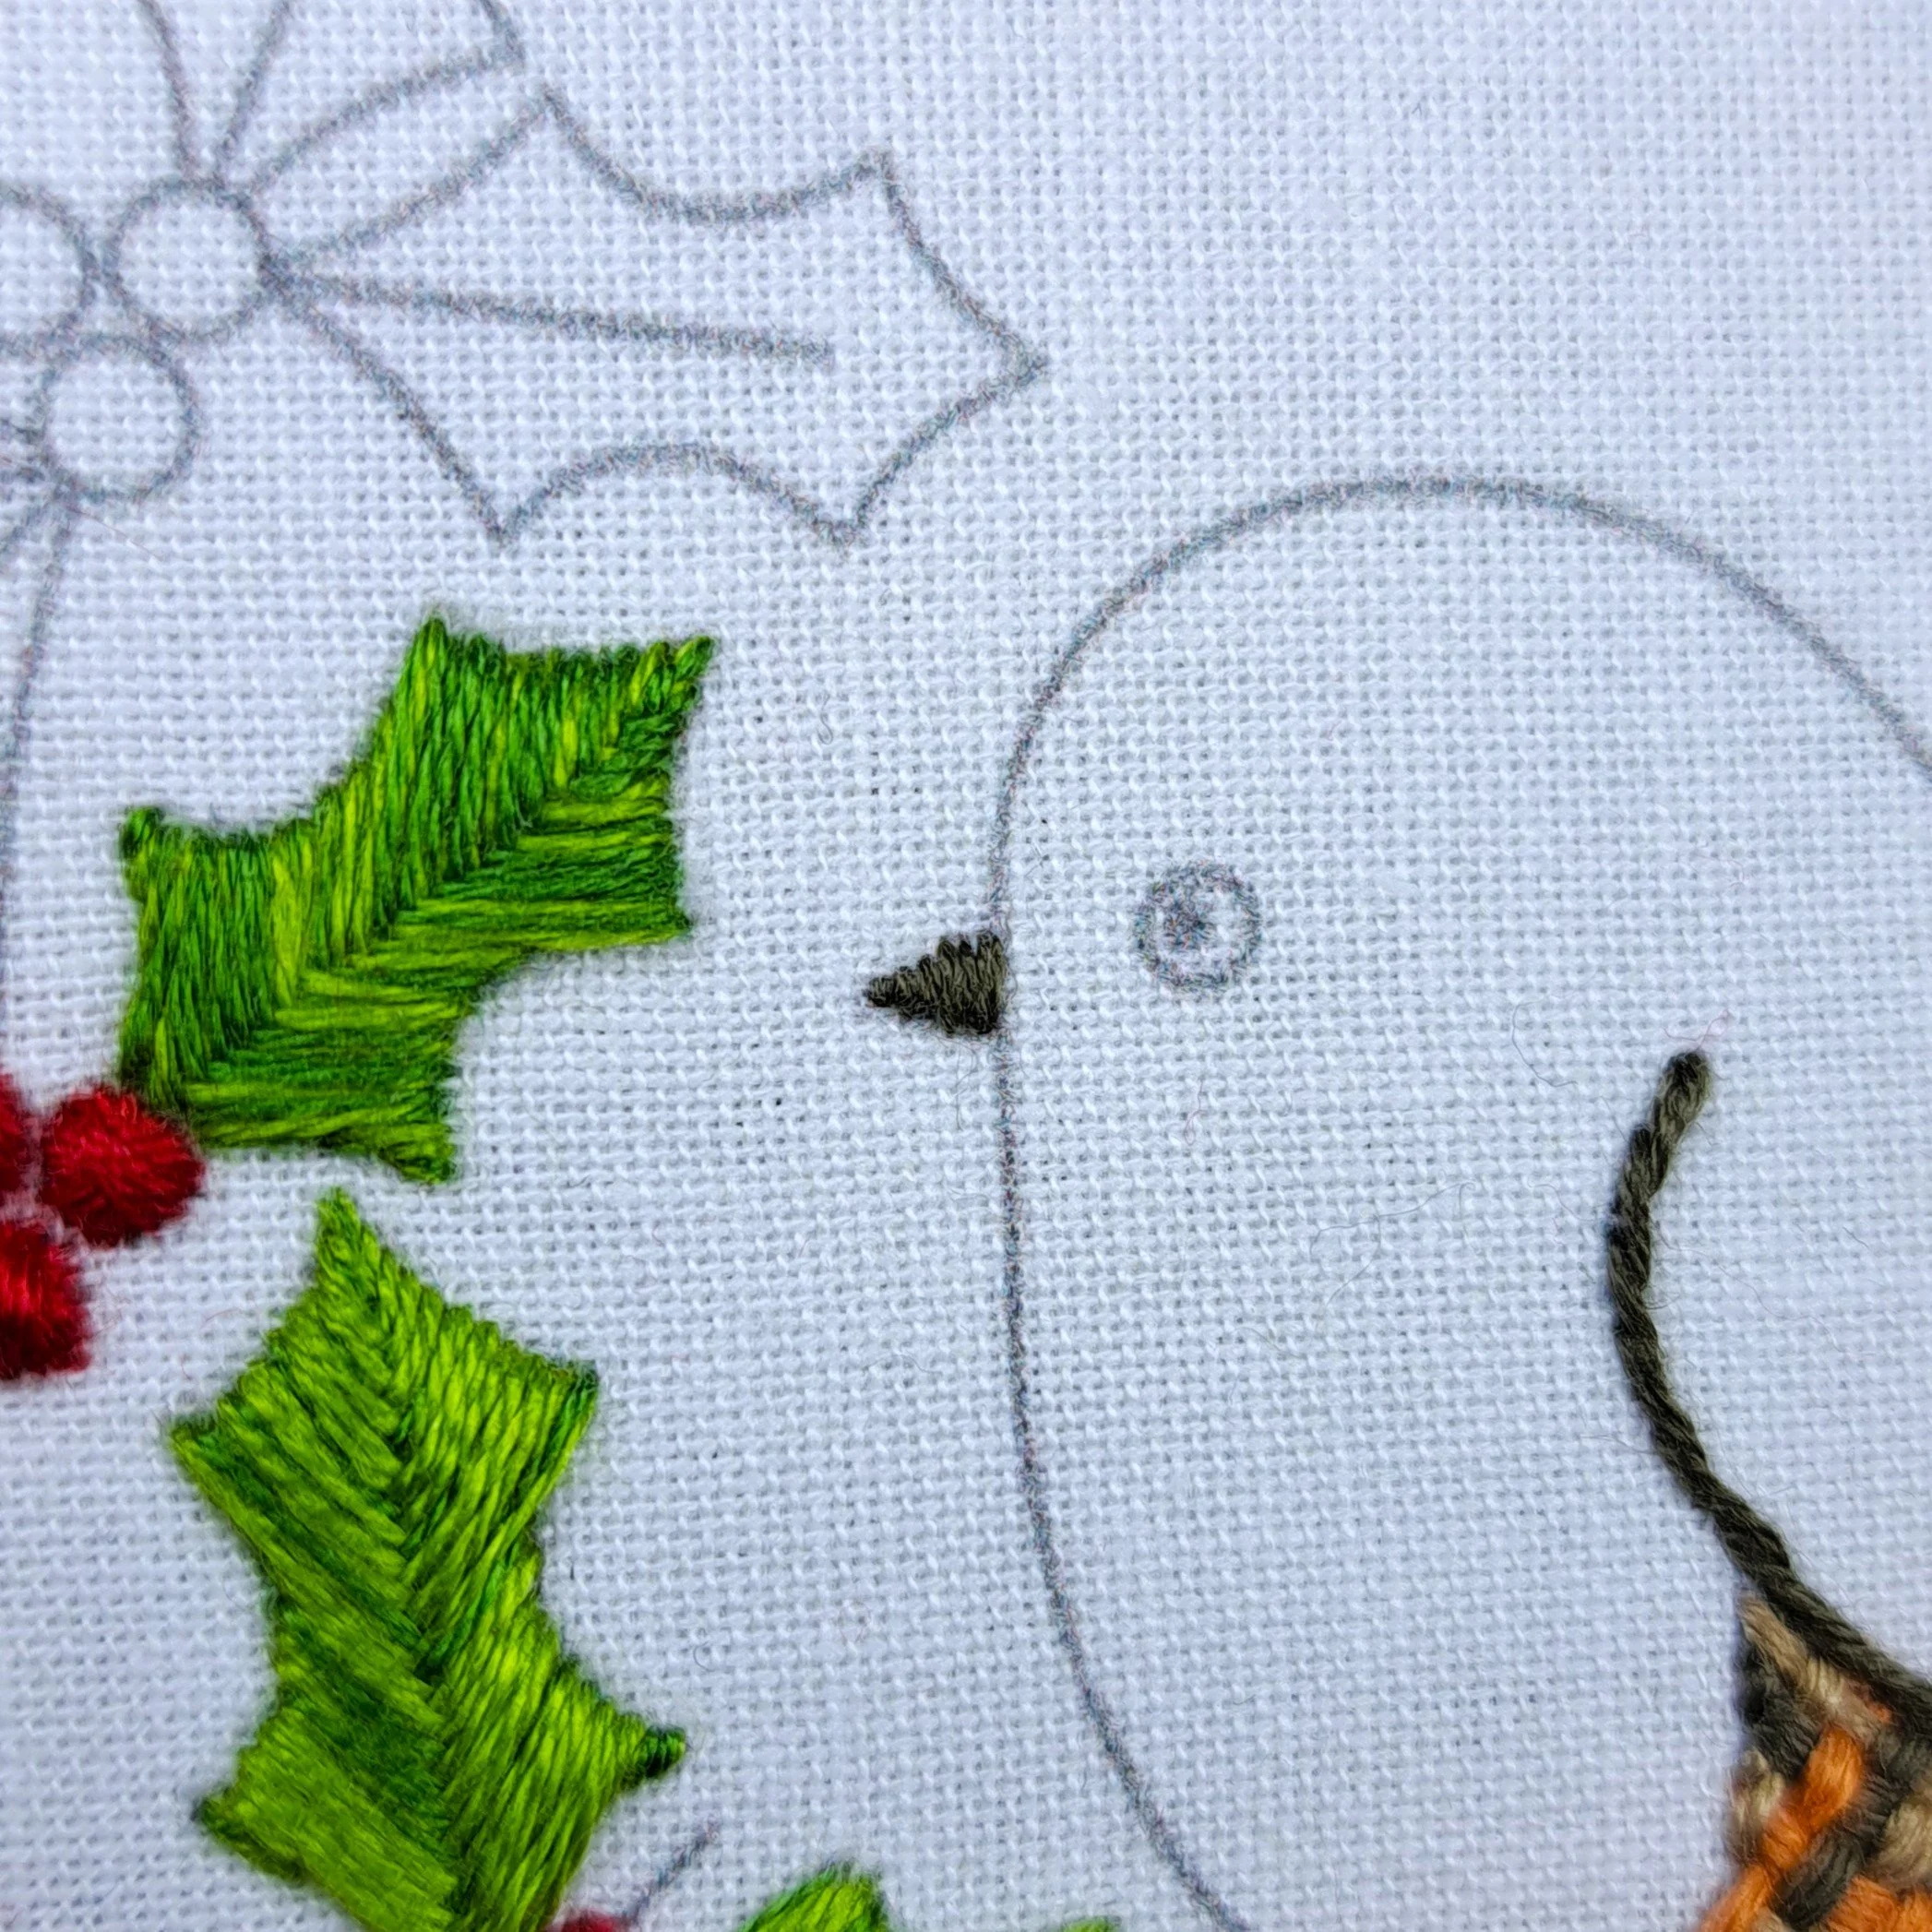
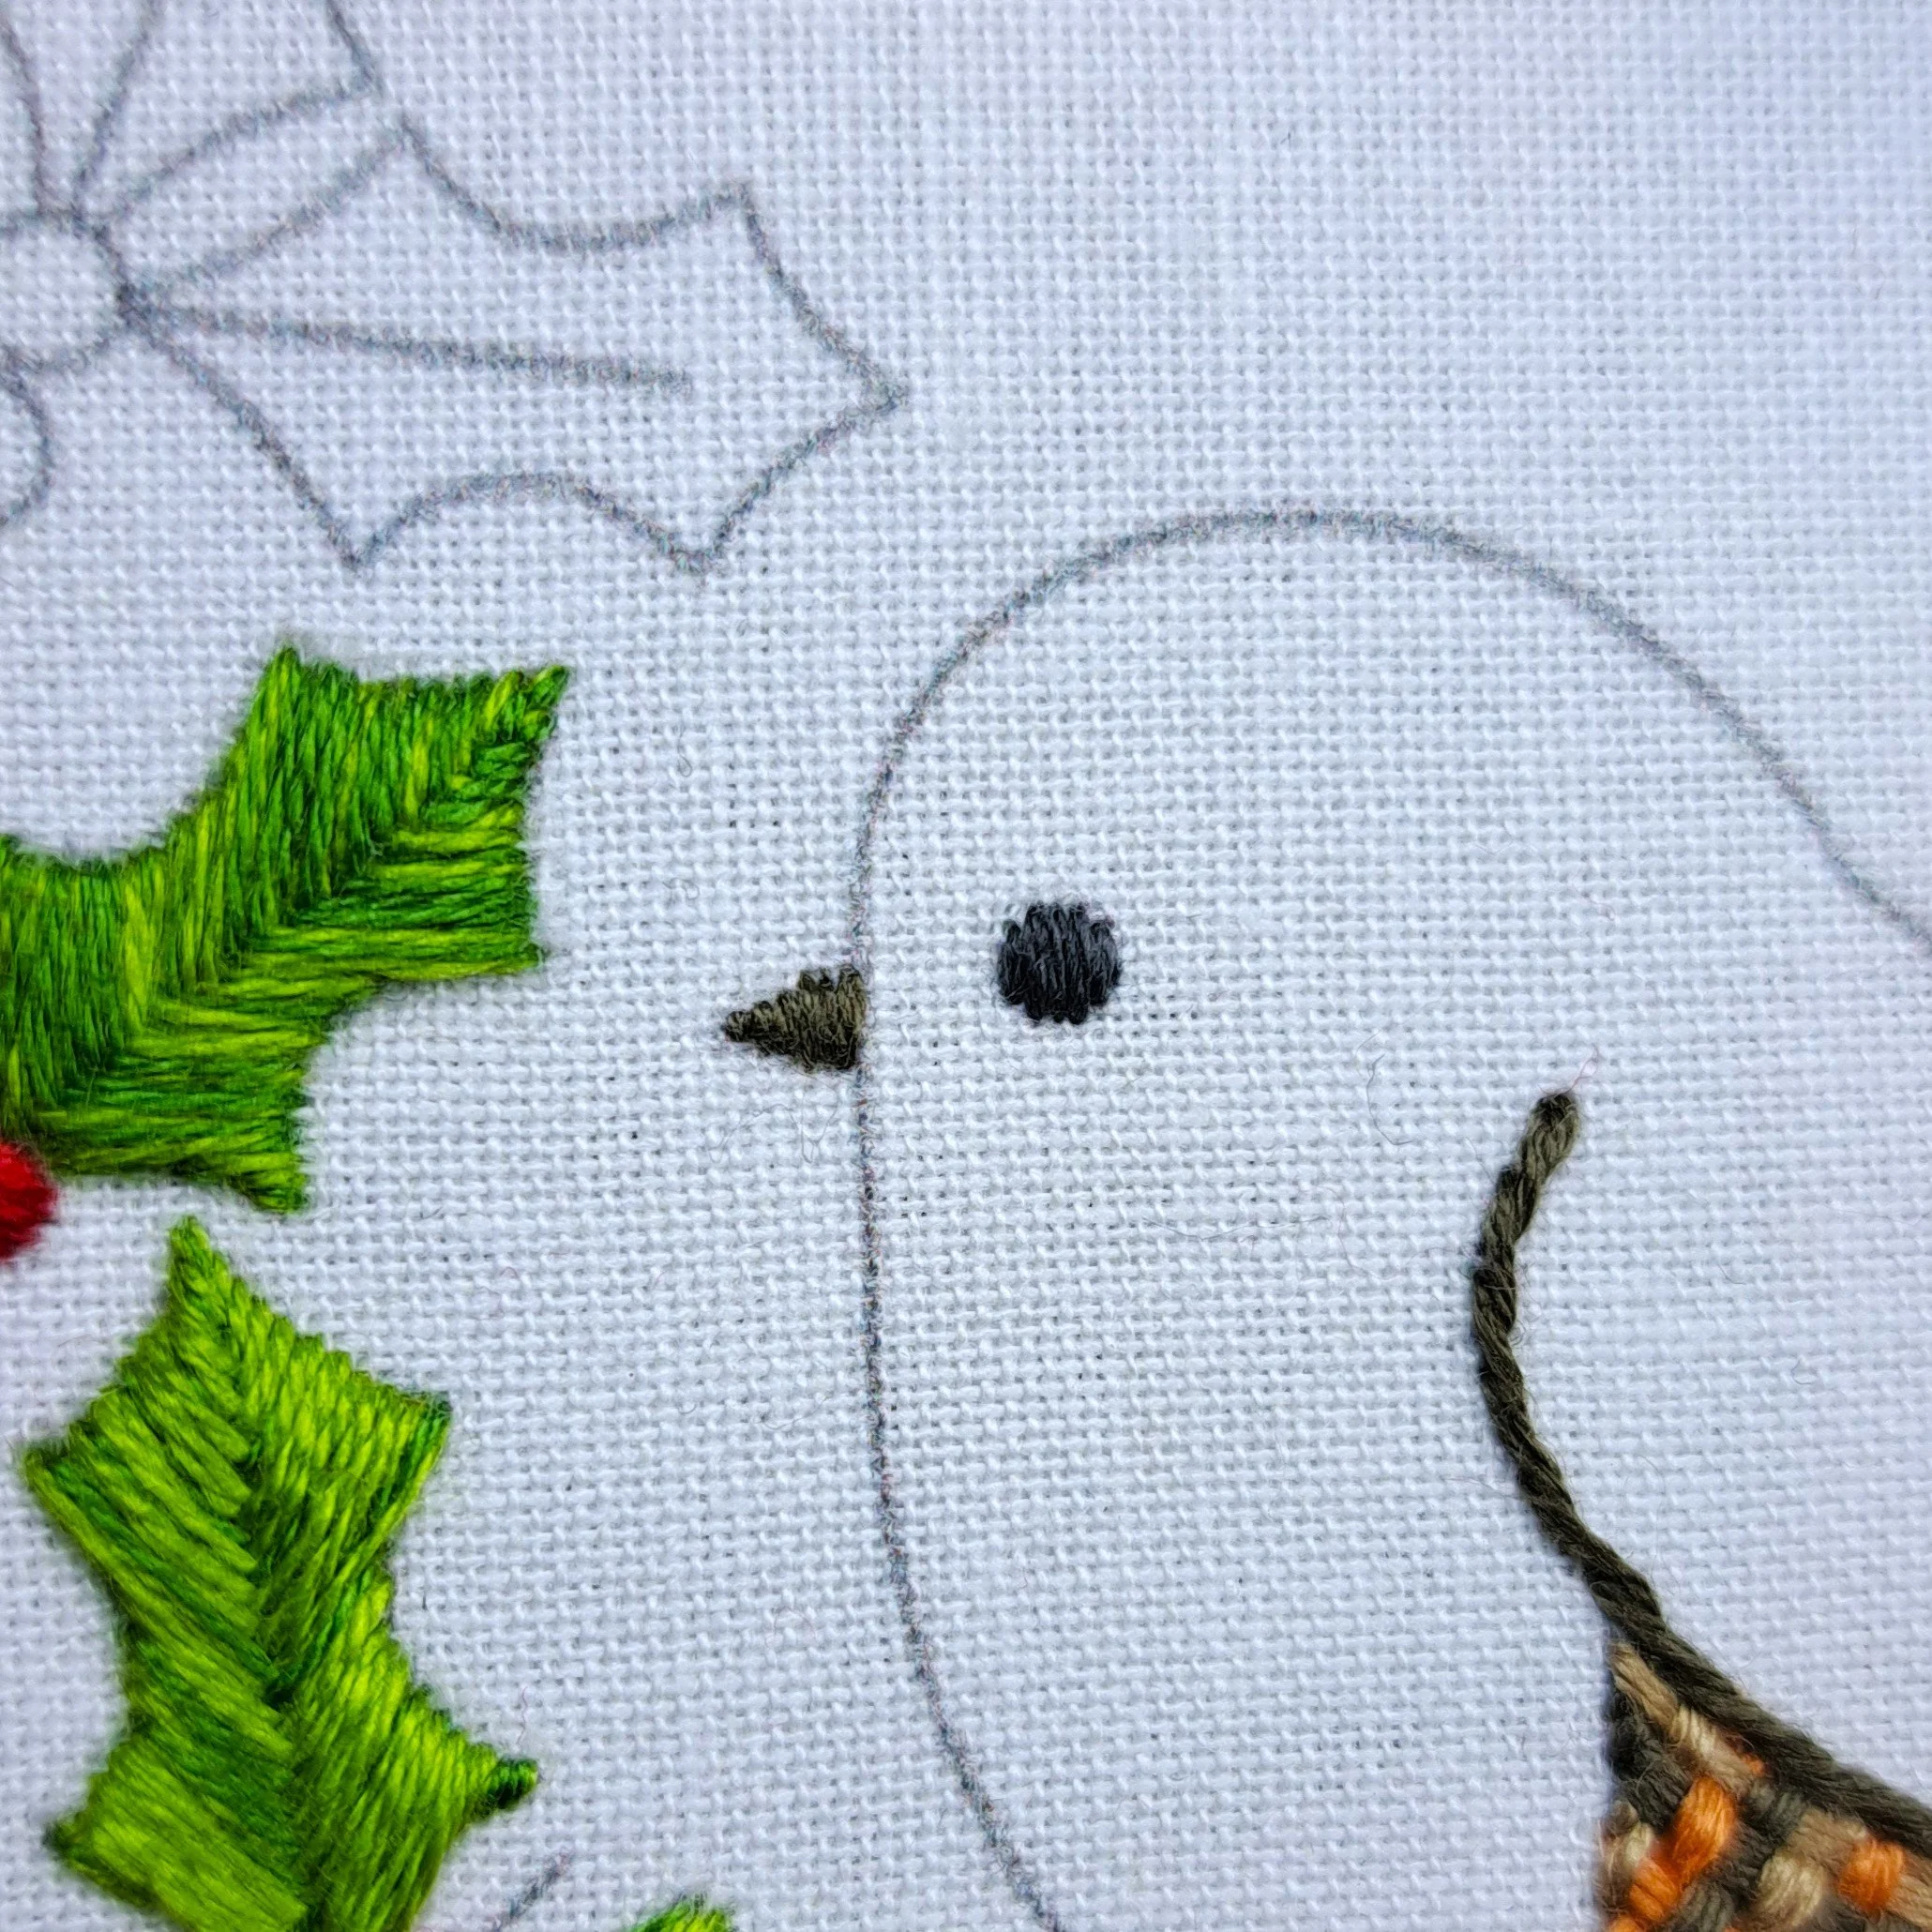
The Eye
Again, I filled the eye using vertical Satin Stitches — just 5 or 6 tiny stitches were enough to completely fill it.
Stitch – Satin Stitch
Thread colour – Anchor 401 (Dark Grey)
Number of strands – 2
Needle size – Small
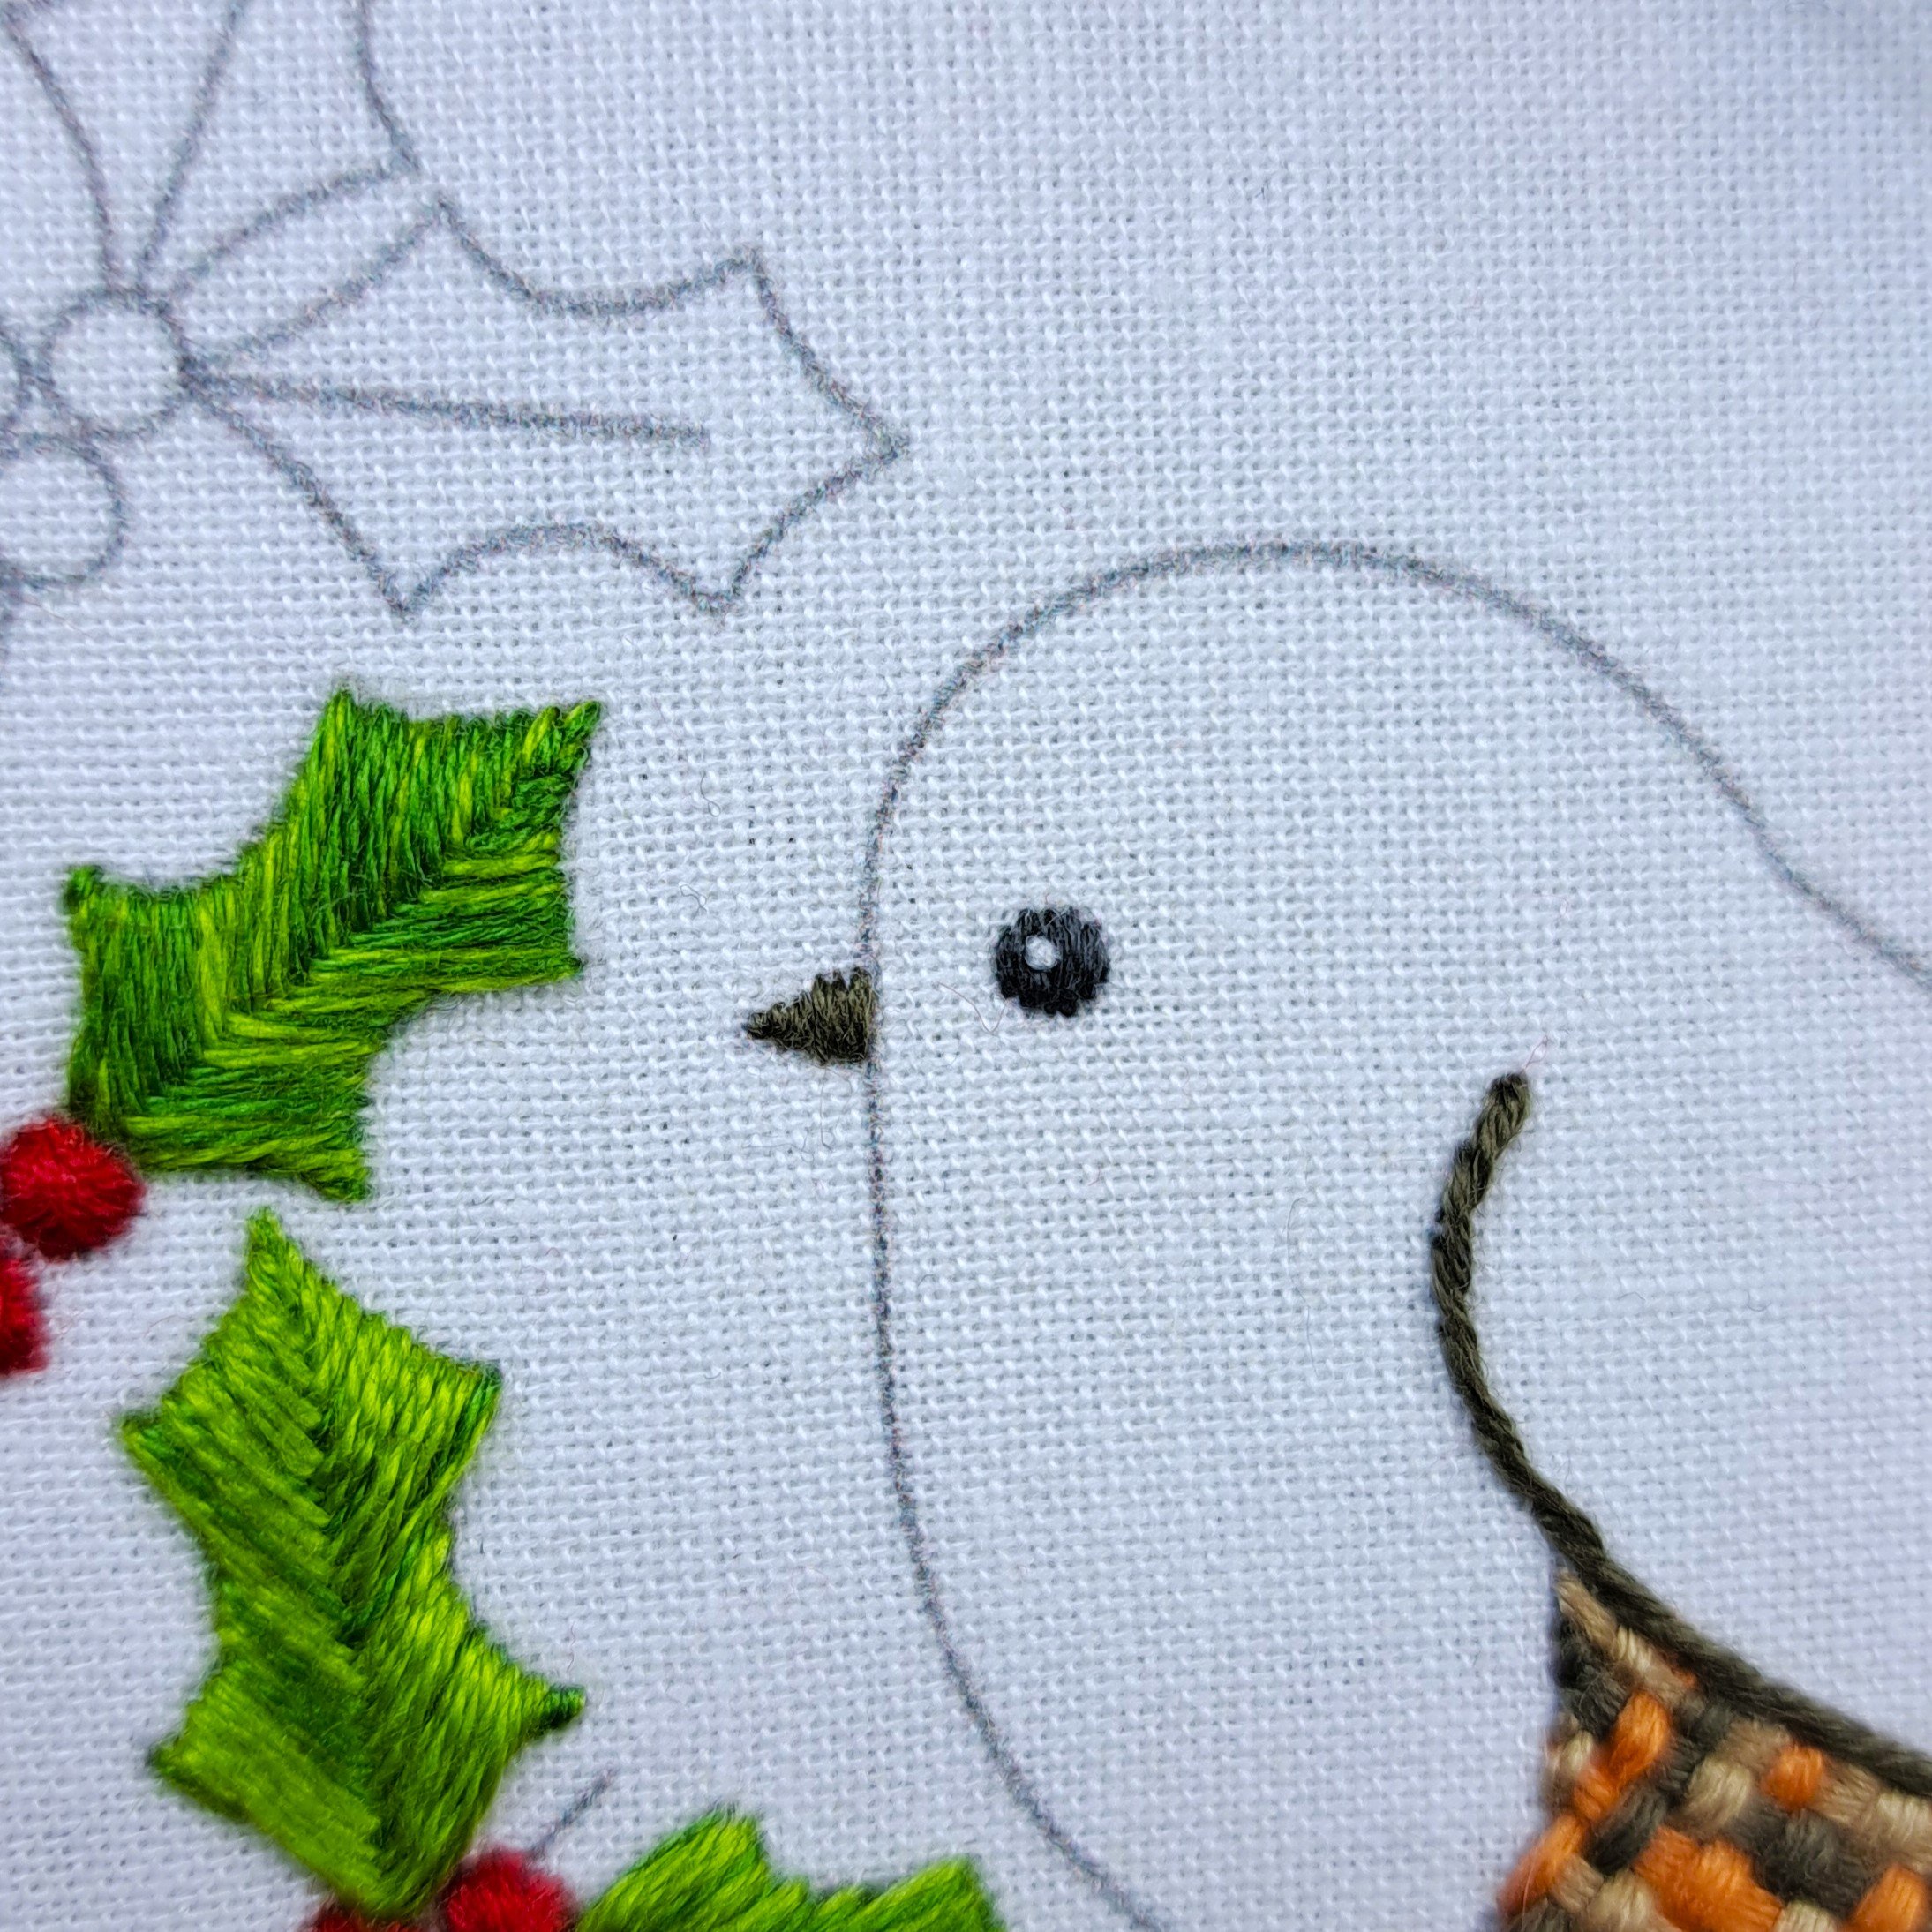
The Pupil
Oh, this bit really starts bringing the robin to life! And where you place this stitch can completely change the robin’s cute little expression and character. I added just one small Couch Stitch for the pupil - but you could make it bigger if you like.
Stitch – Couch Stitch
Thread colour – Anchor 2 (White)
Number of strands – 2
Needle size – Small
The Robin Feathers
I picked out four colours for my robin feathers — three reds/oranges and a light brown — and filled the rest of the robin with Loop Stitch.
Stitch – Loop Stitch
Thread colours – Anchor 335 (Bright Red), Anchor 330 (Dark Orange), Anchor 324 ( Light Orange), Anchor 373 (Light Brown)
Number of strands – 3
Needle size – Medium
Before I started stitching, I marked out some bands where I planned to stitch each colour — I used a fabric pen for this, but it will be completely covered so you could use a pencil if you prefer. I added three bands to blend red into orange for the breast and face, then left the rest of the robin as one light brown band.
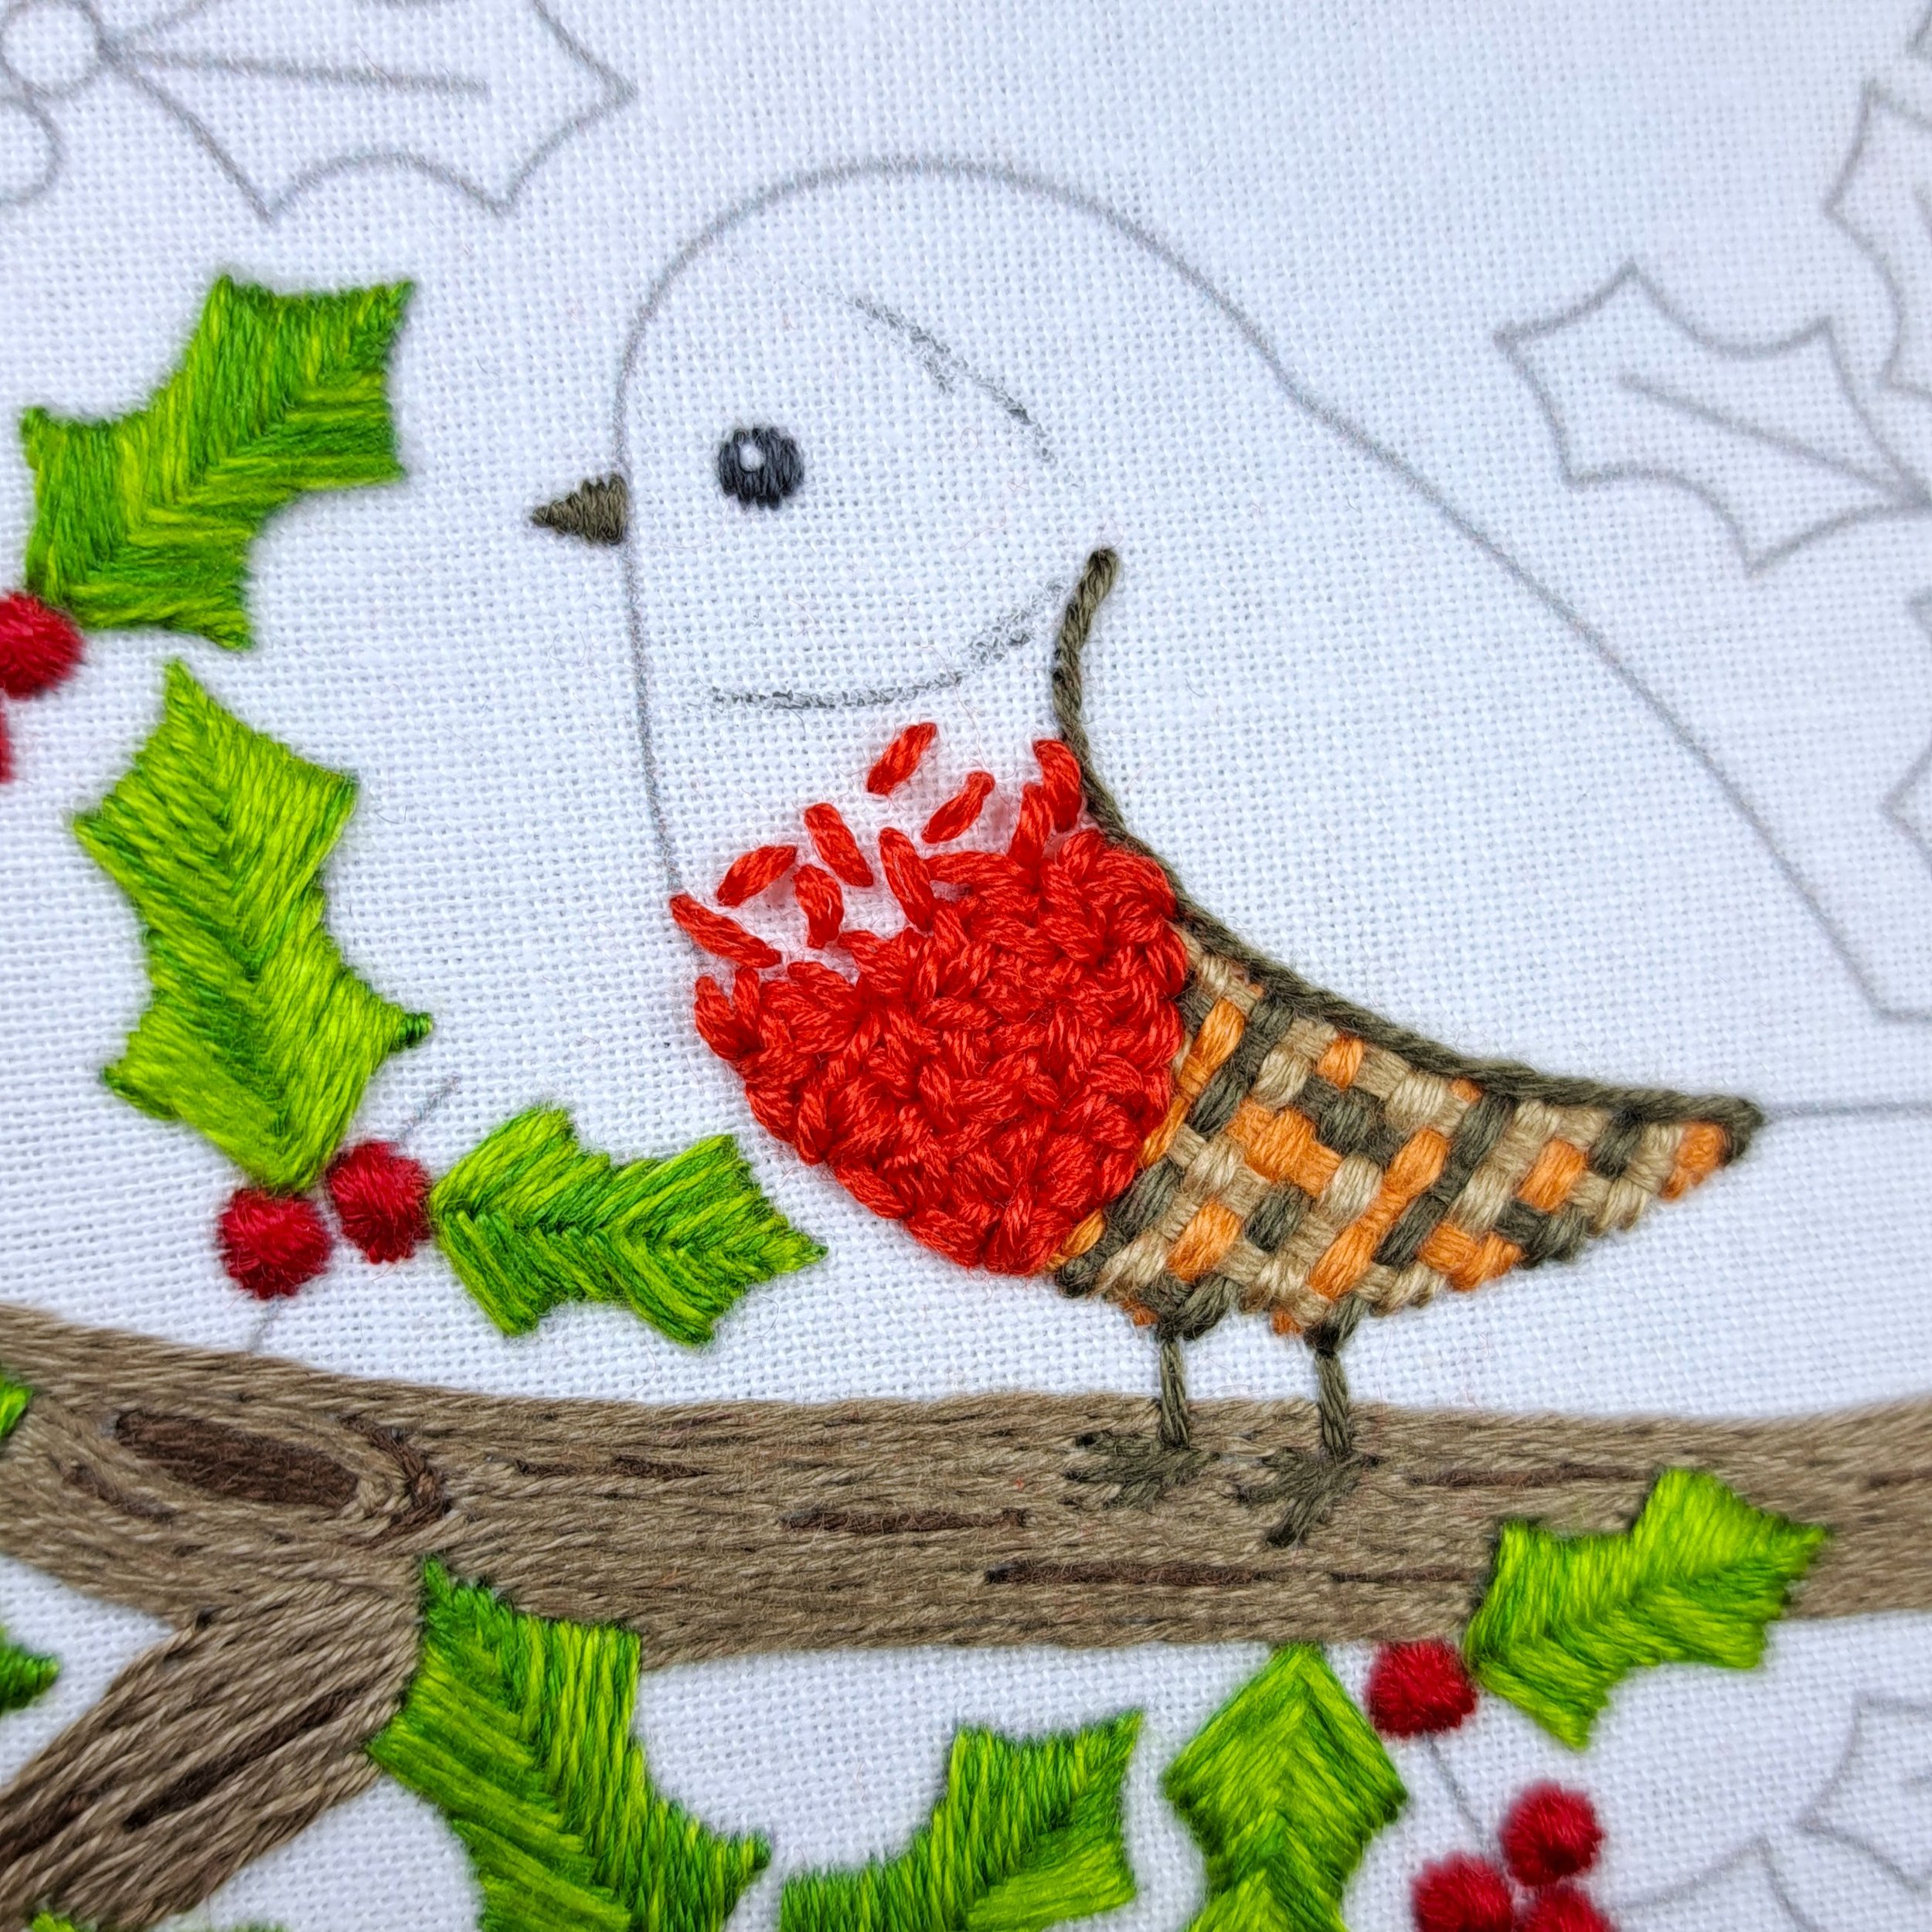
I started at the bottom of the breast with Anchor 335 (Bright Red). Finally, the classic red breast! To help this section blend into the band above, I added a few stitches into that band too.
✨ A little tip:
Start each stitch close to where you finished the previous one — it helps reduce thread on the back of the fabric and makes layering those loop stitches much easier.
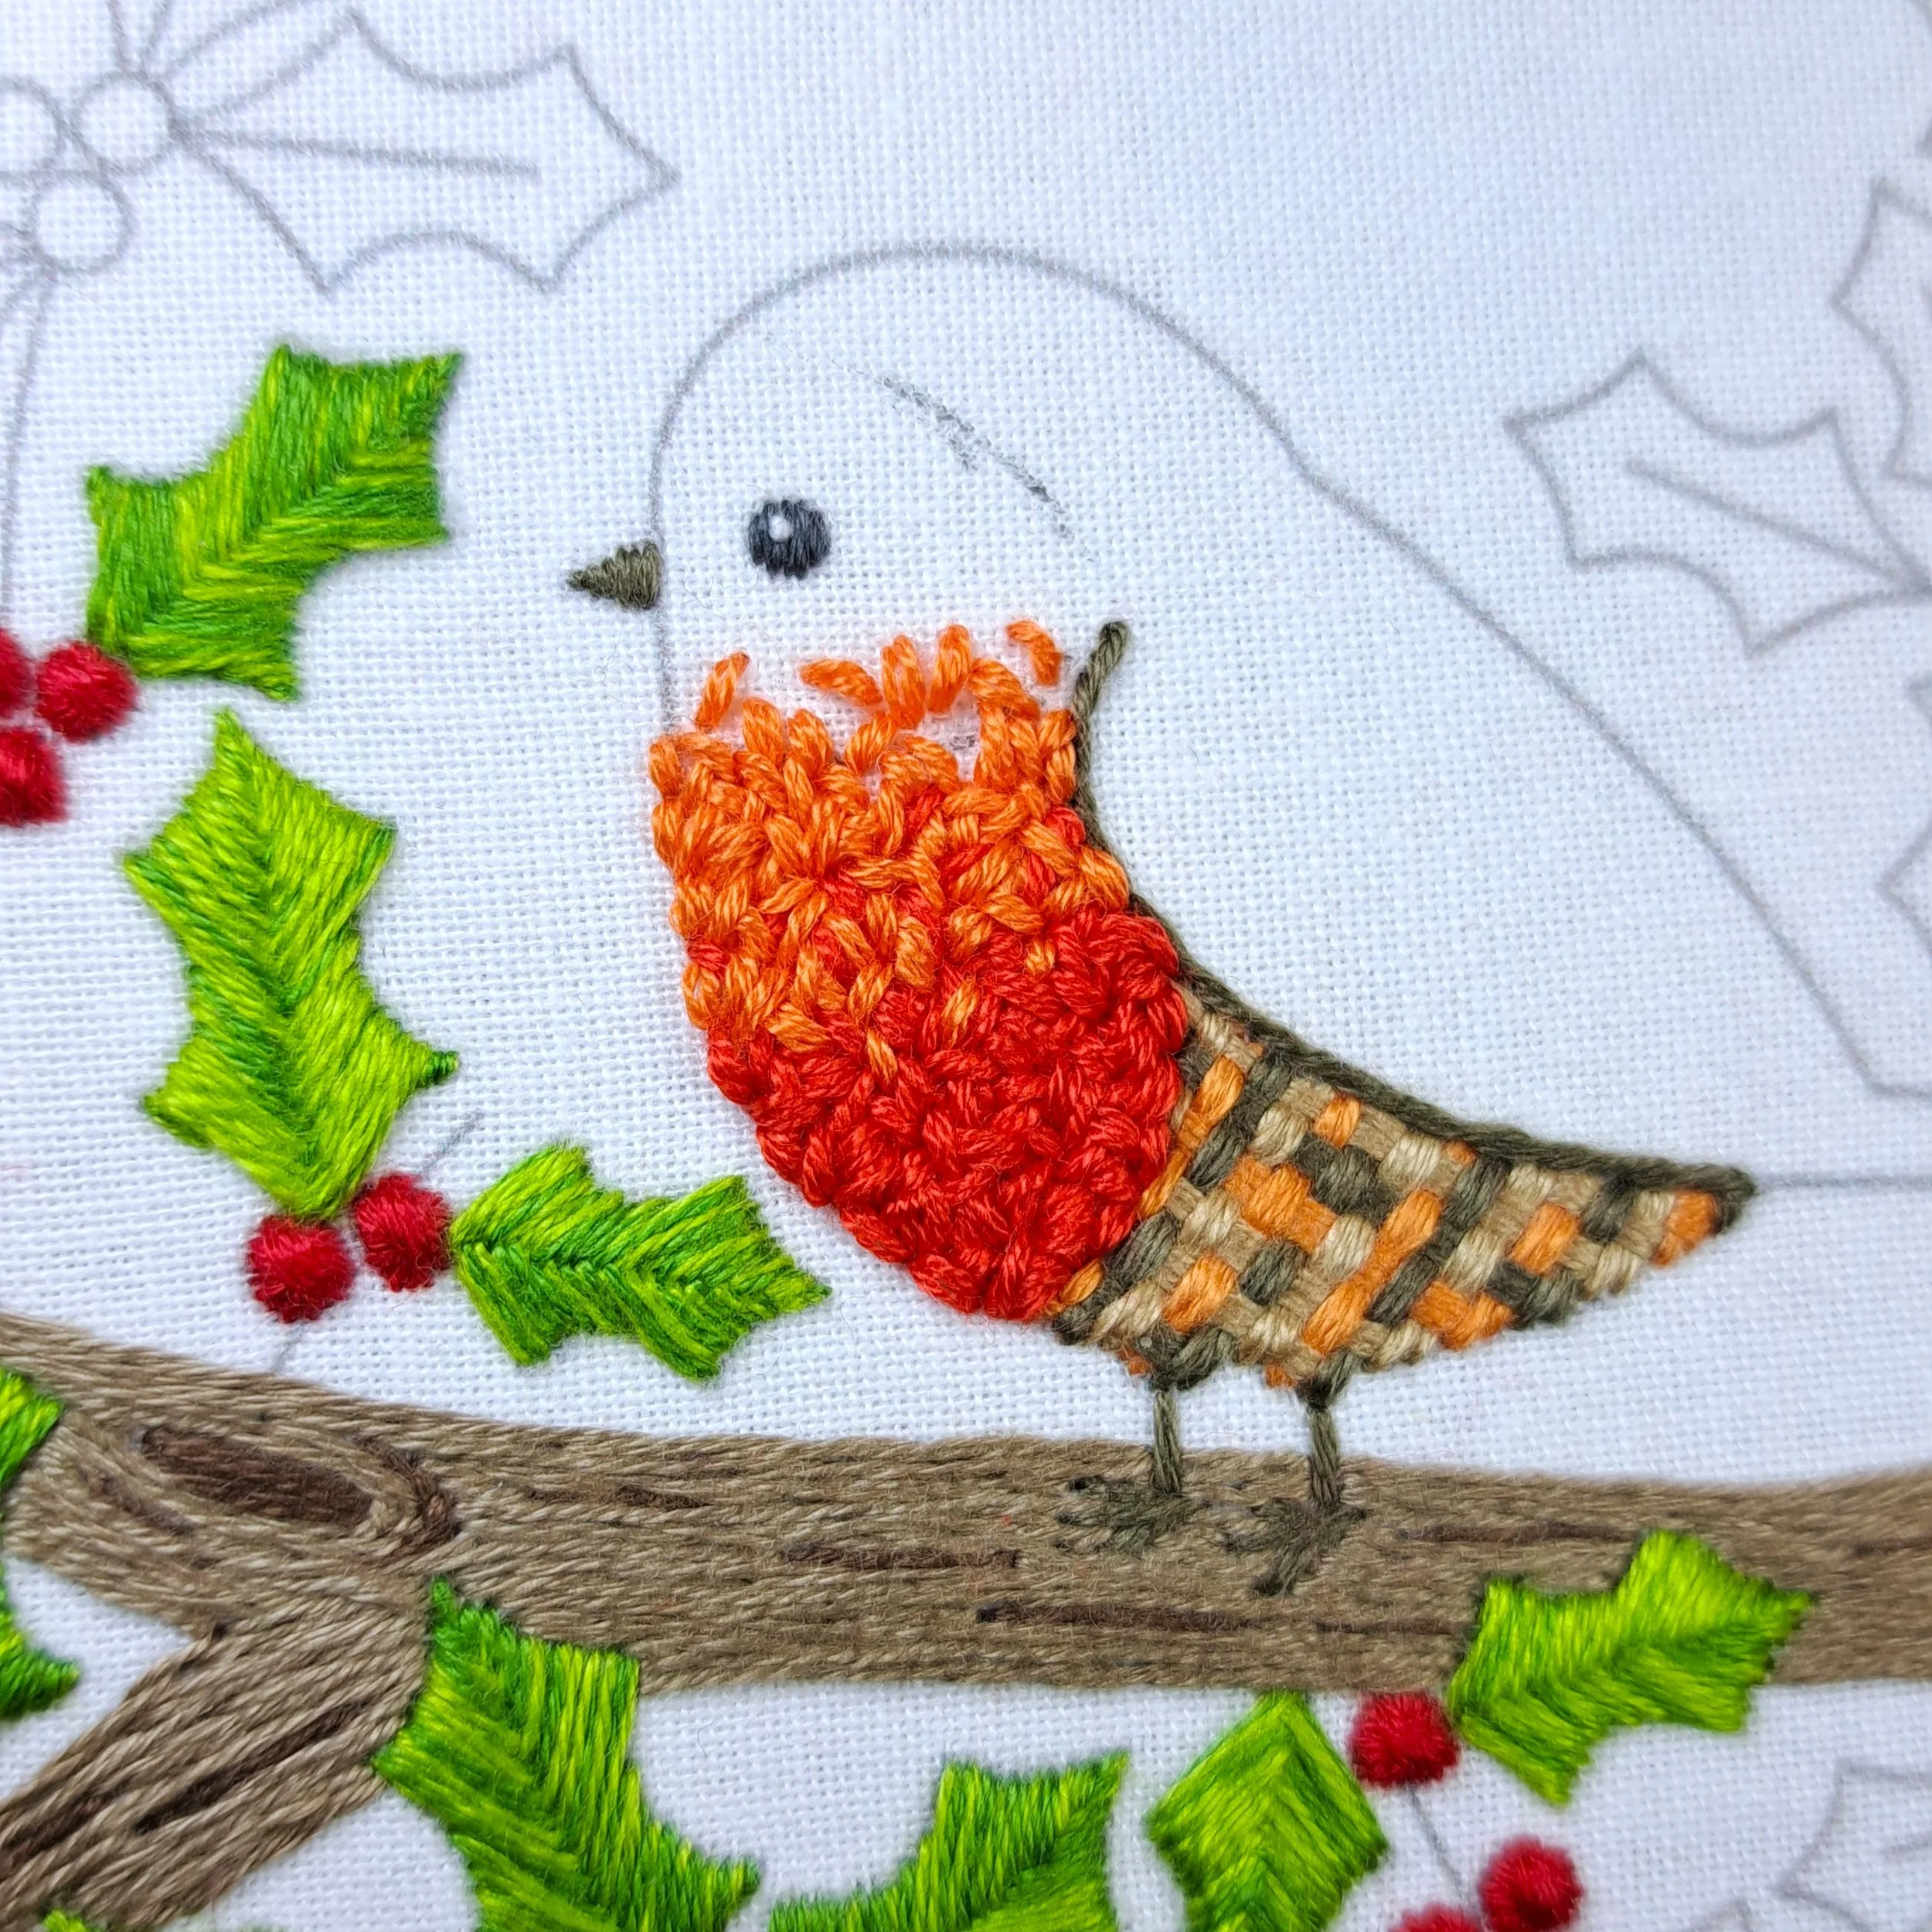
The next band up, I filled with Anchor 330 (Dark Orange). To help the colours blend, I added a few of these stitches into the red band below and into the unstitched band above — this really disguises the band lines nicely.
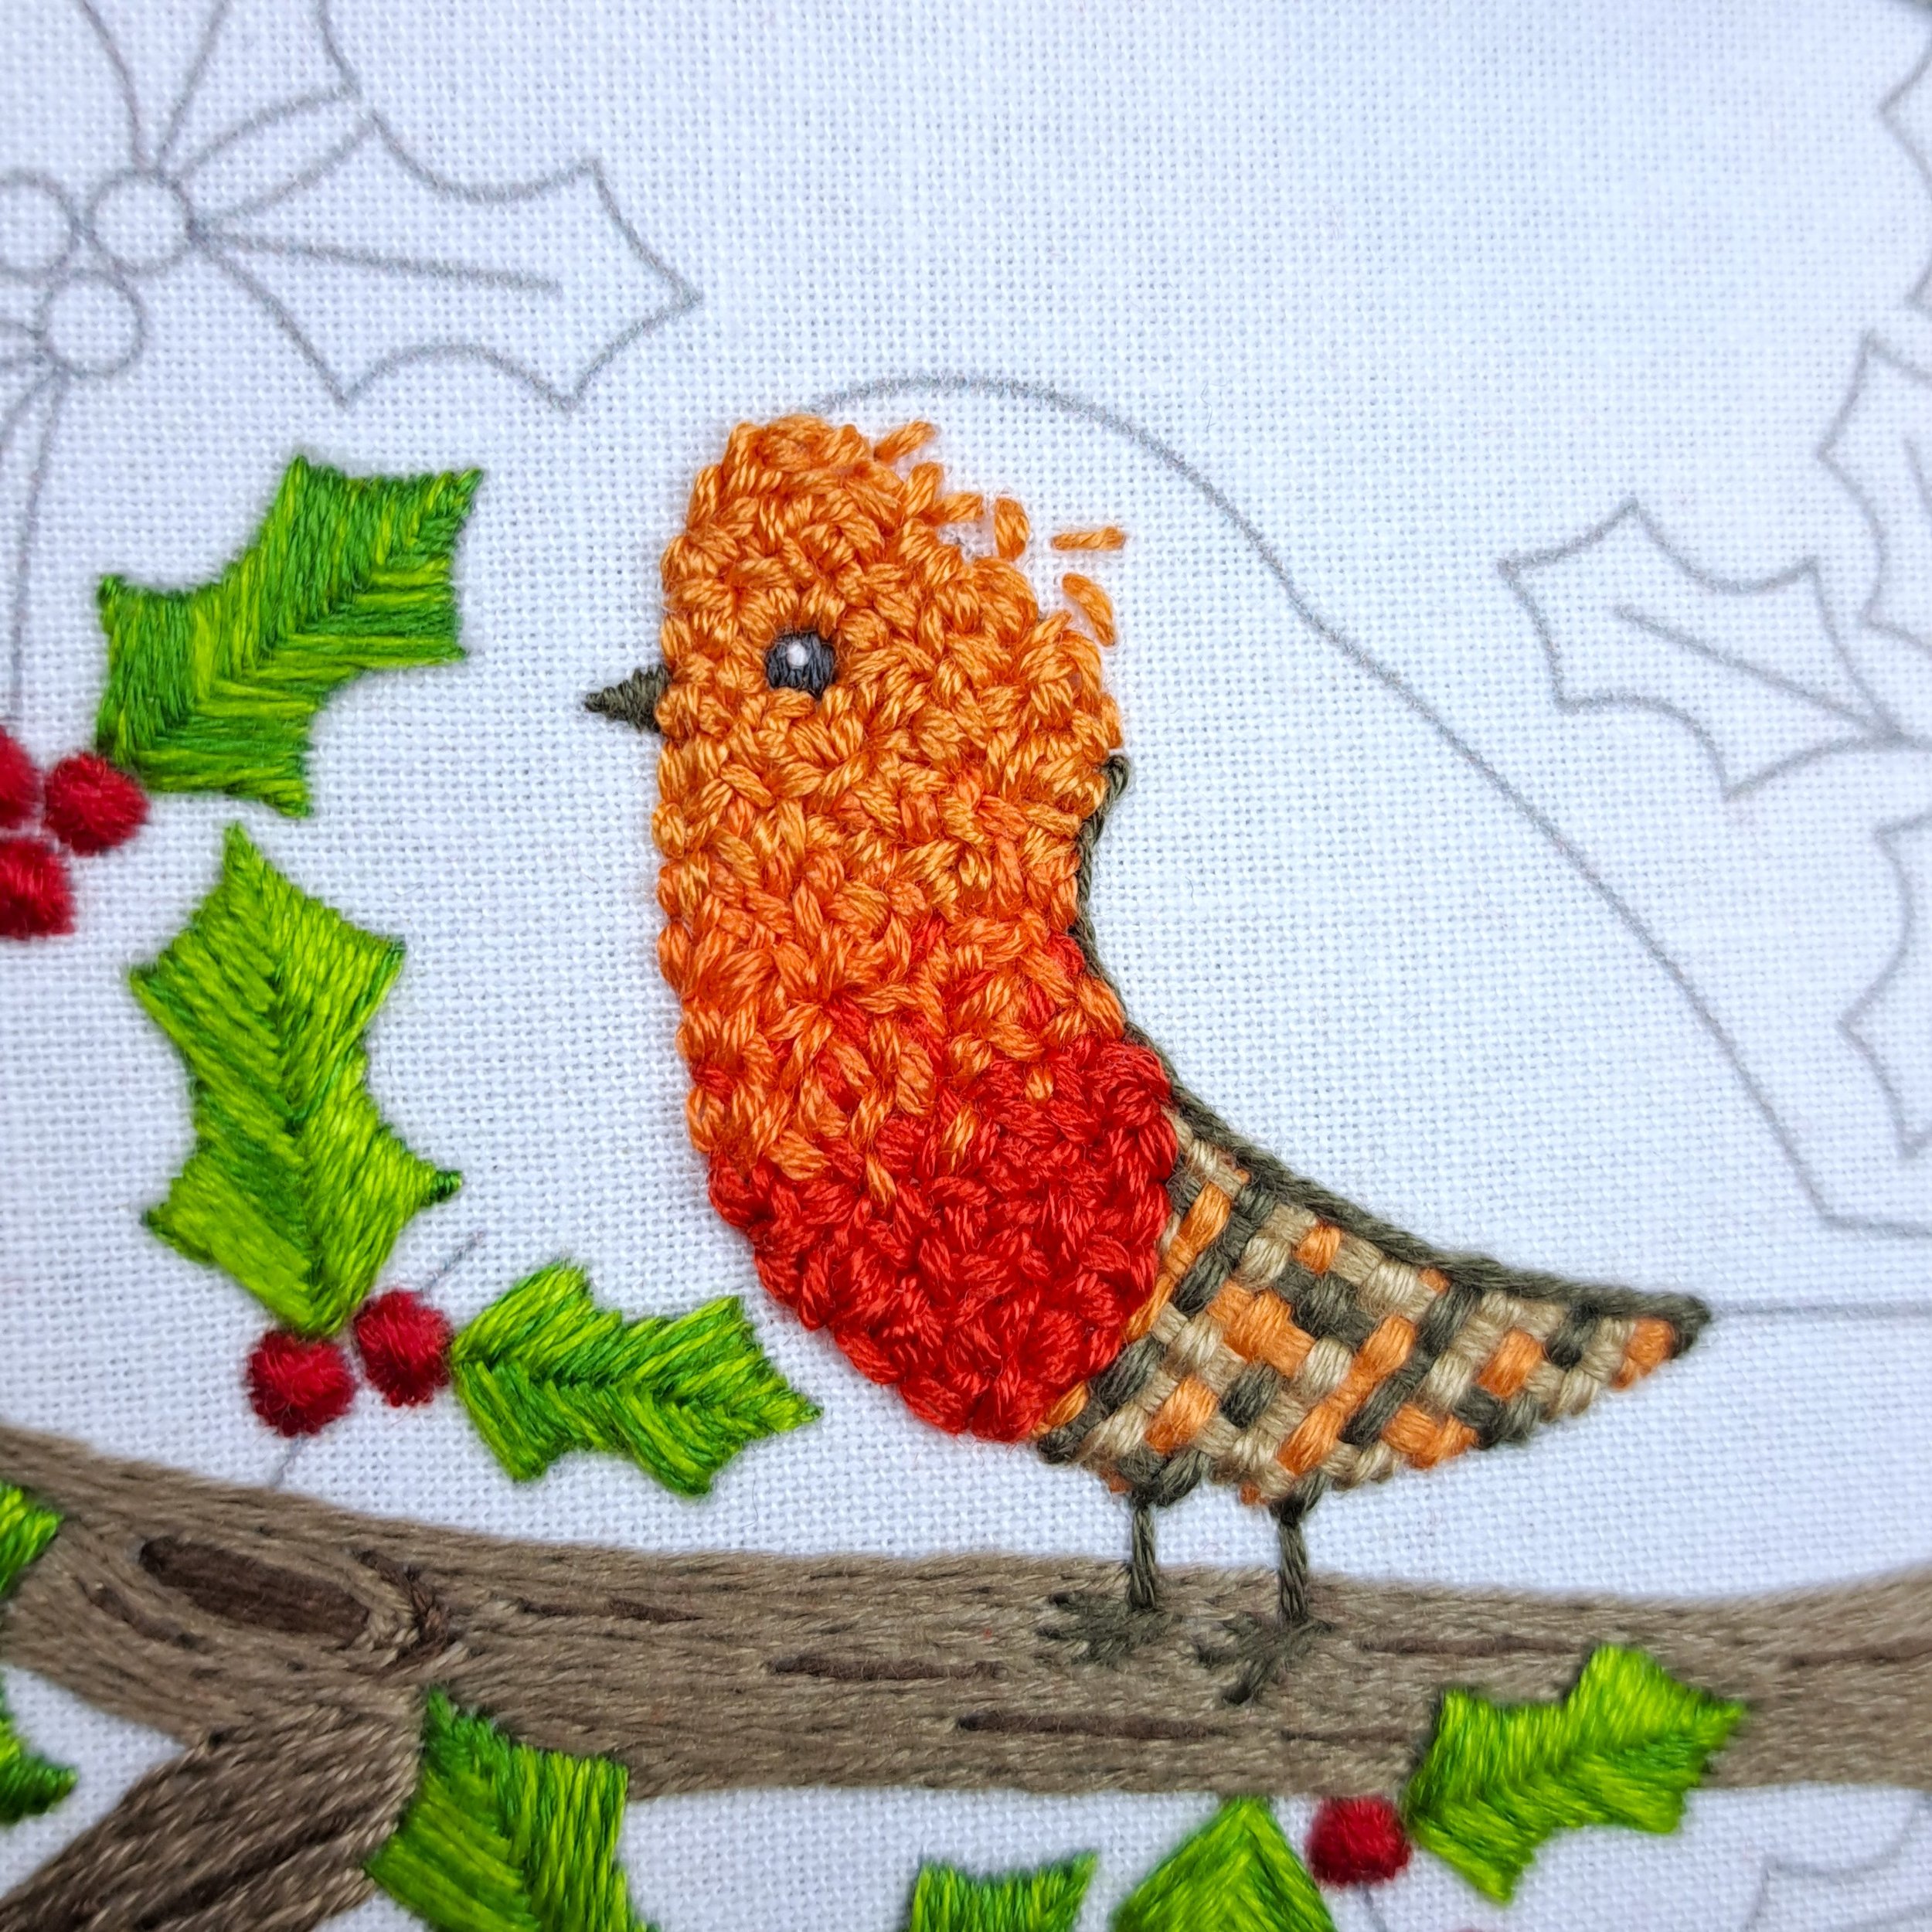
For the third band on the breast and face, I used Anchor 324 (Light Orange). I added a few stitches into the dark orange band below and into the unstitched head area. This time, I made the stitches slightly shorter and less “loopy,” especially around the eye, so they didn’t get lost among all the feathers.
Finally, I filled the rest of the robin — the back of the head, wing, and tail — with Anchor 373 (Light Golden Brown).
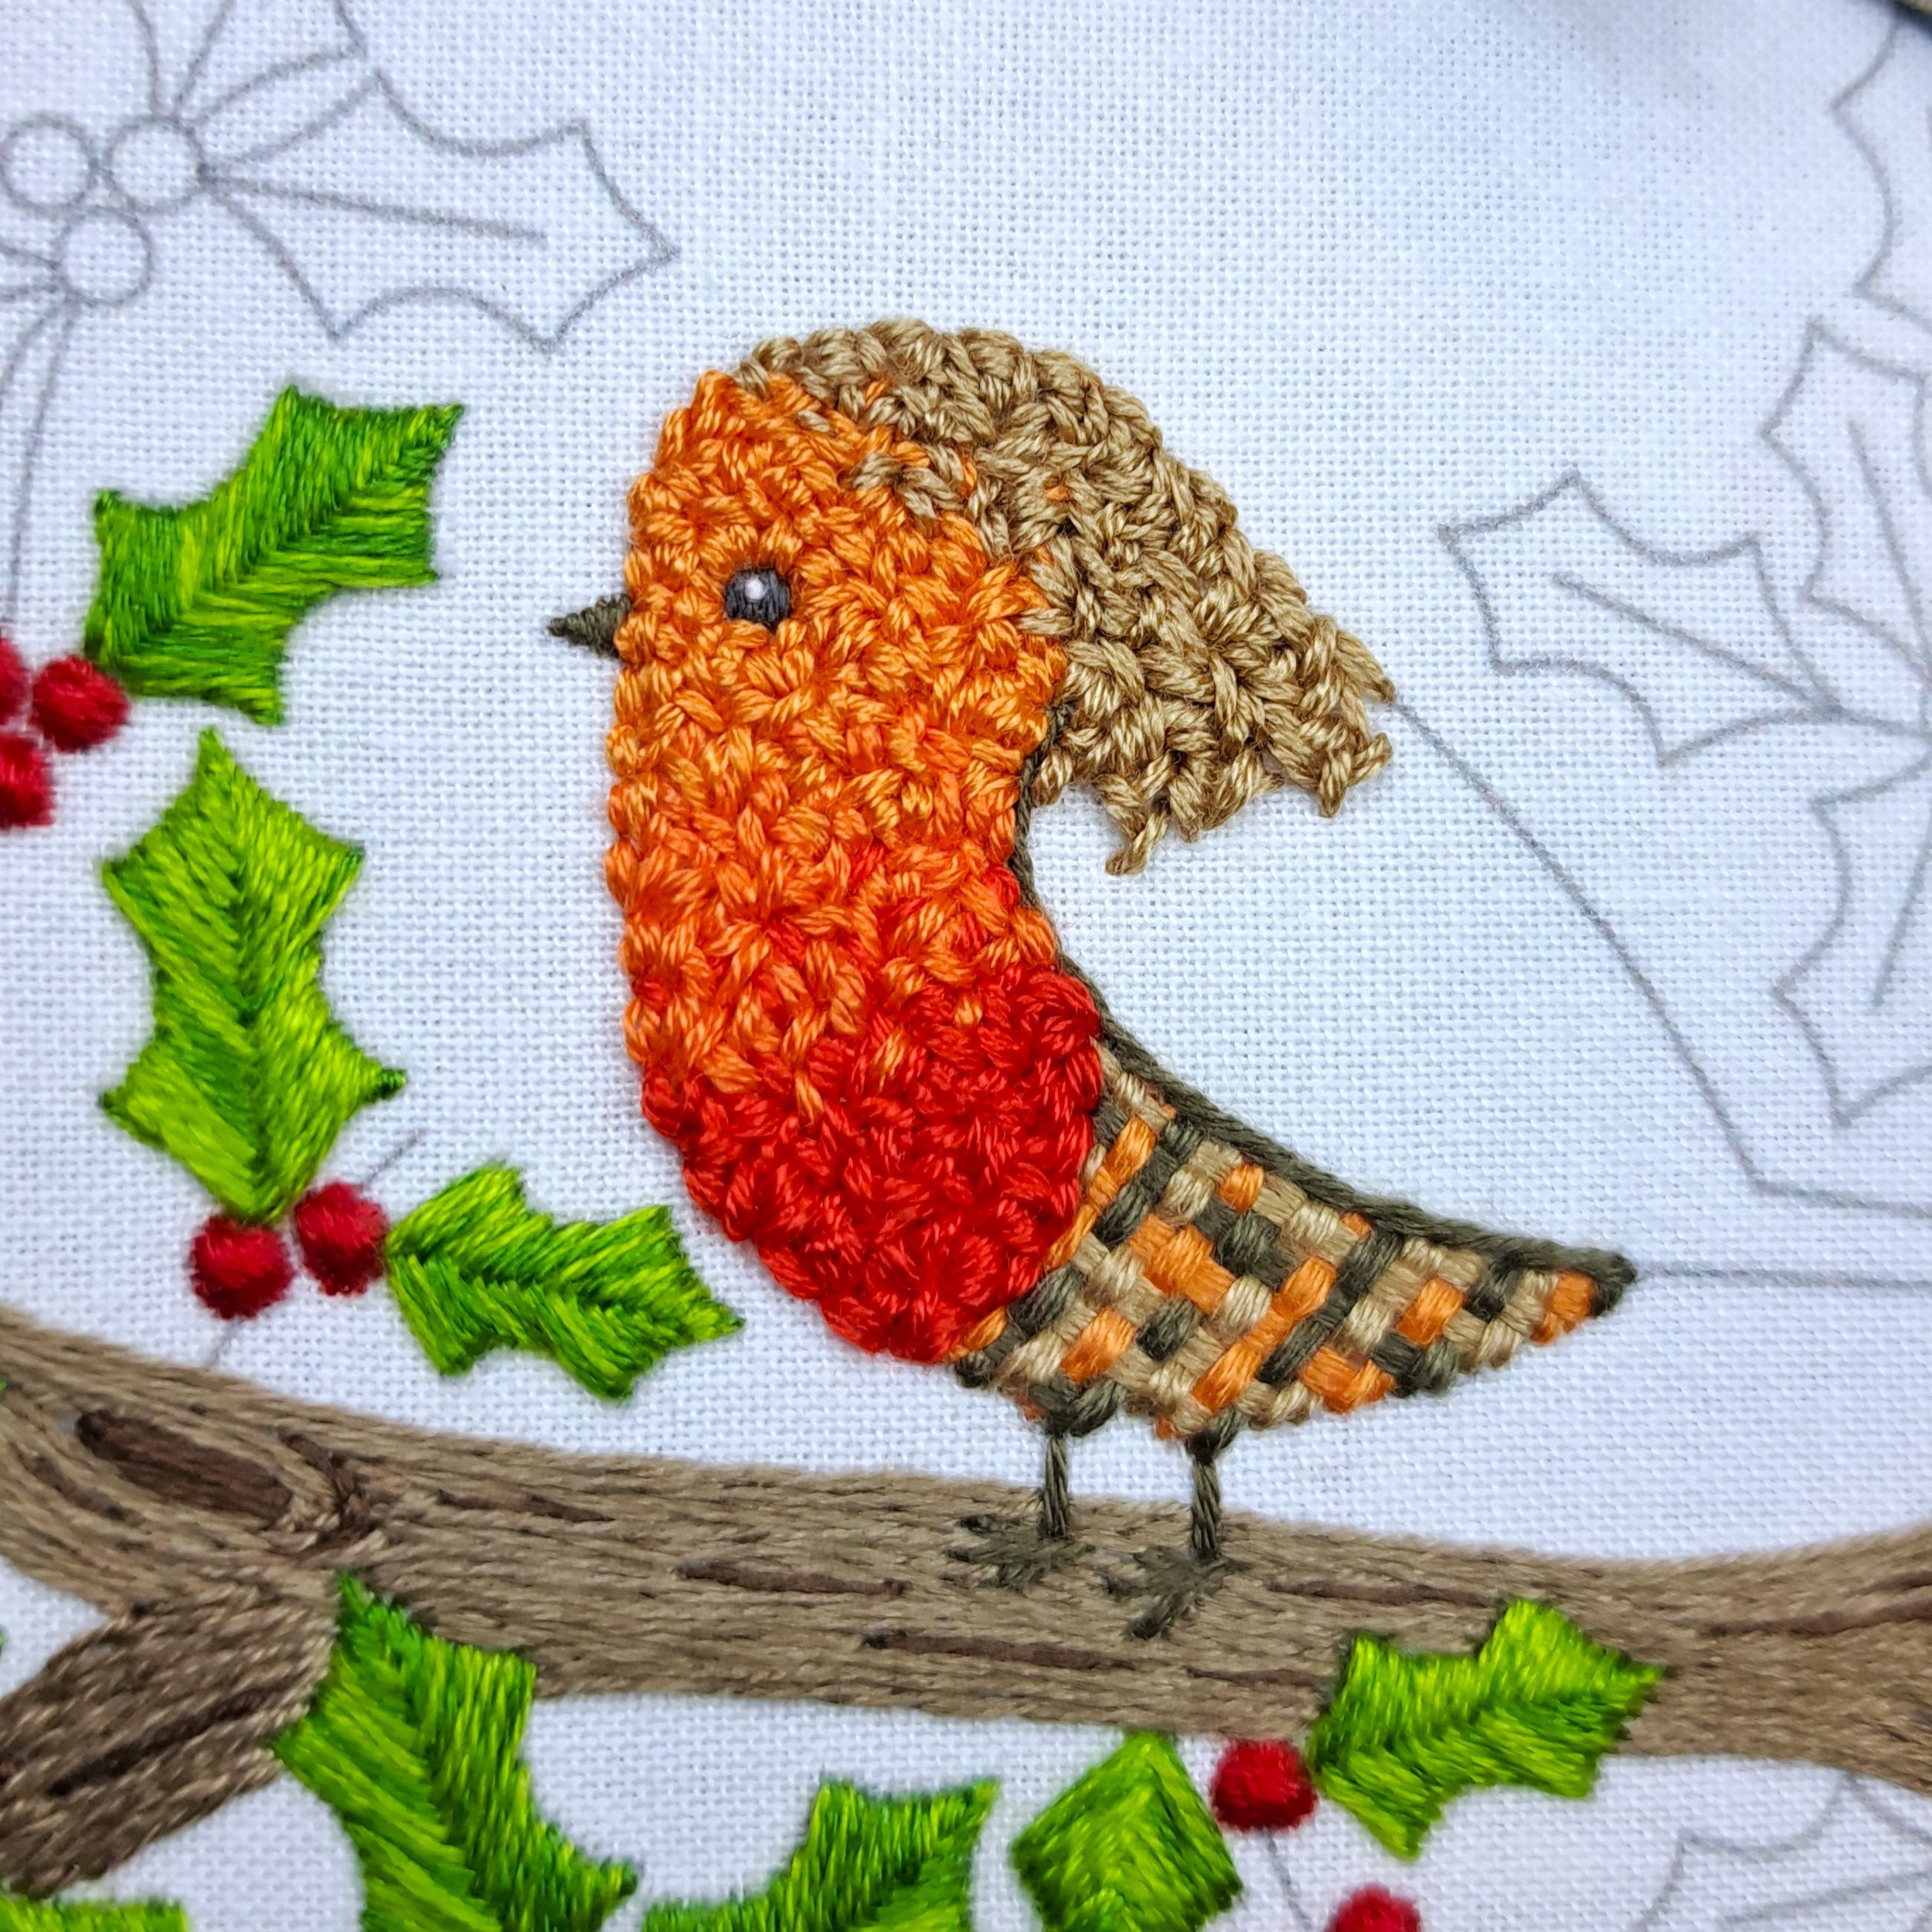
Once the robin was completely filled with lovely Loop Stitch, I went back and added a few more stitches into the breast and face to blend them together a bit more.
And we are now almost there! I still hadn’t stitched all of my leaves and berries, so I continued with that for while before the very last step.
The Stems
The very last step! I stitched a single row of Stem Stitches following along the stem lines. I nearly stitched these in one of the branch colours, but in the end, I picked out another lovely green for mine.
Stitch – Stem Stitch
Thread colour – Anchor 211 (Stem Green)
Number of strands – 1
Needle size – Small
And that’s it!
And here’s how mine is looking at the time of writing — not quite finished, but getting there with just those last few leaves, berries, and stems to go. Doesn’t he look absolutely adorable though! I’m so in love with how he’s turning out 🥰, and I think with just a few more stitching sessions, he’ll be ready to display on my dresser for Christmas 🎄.
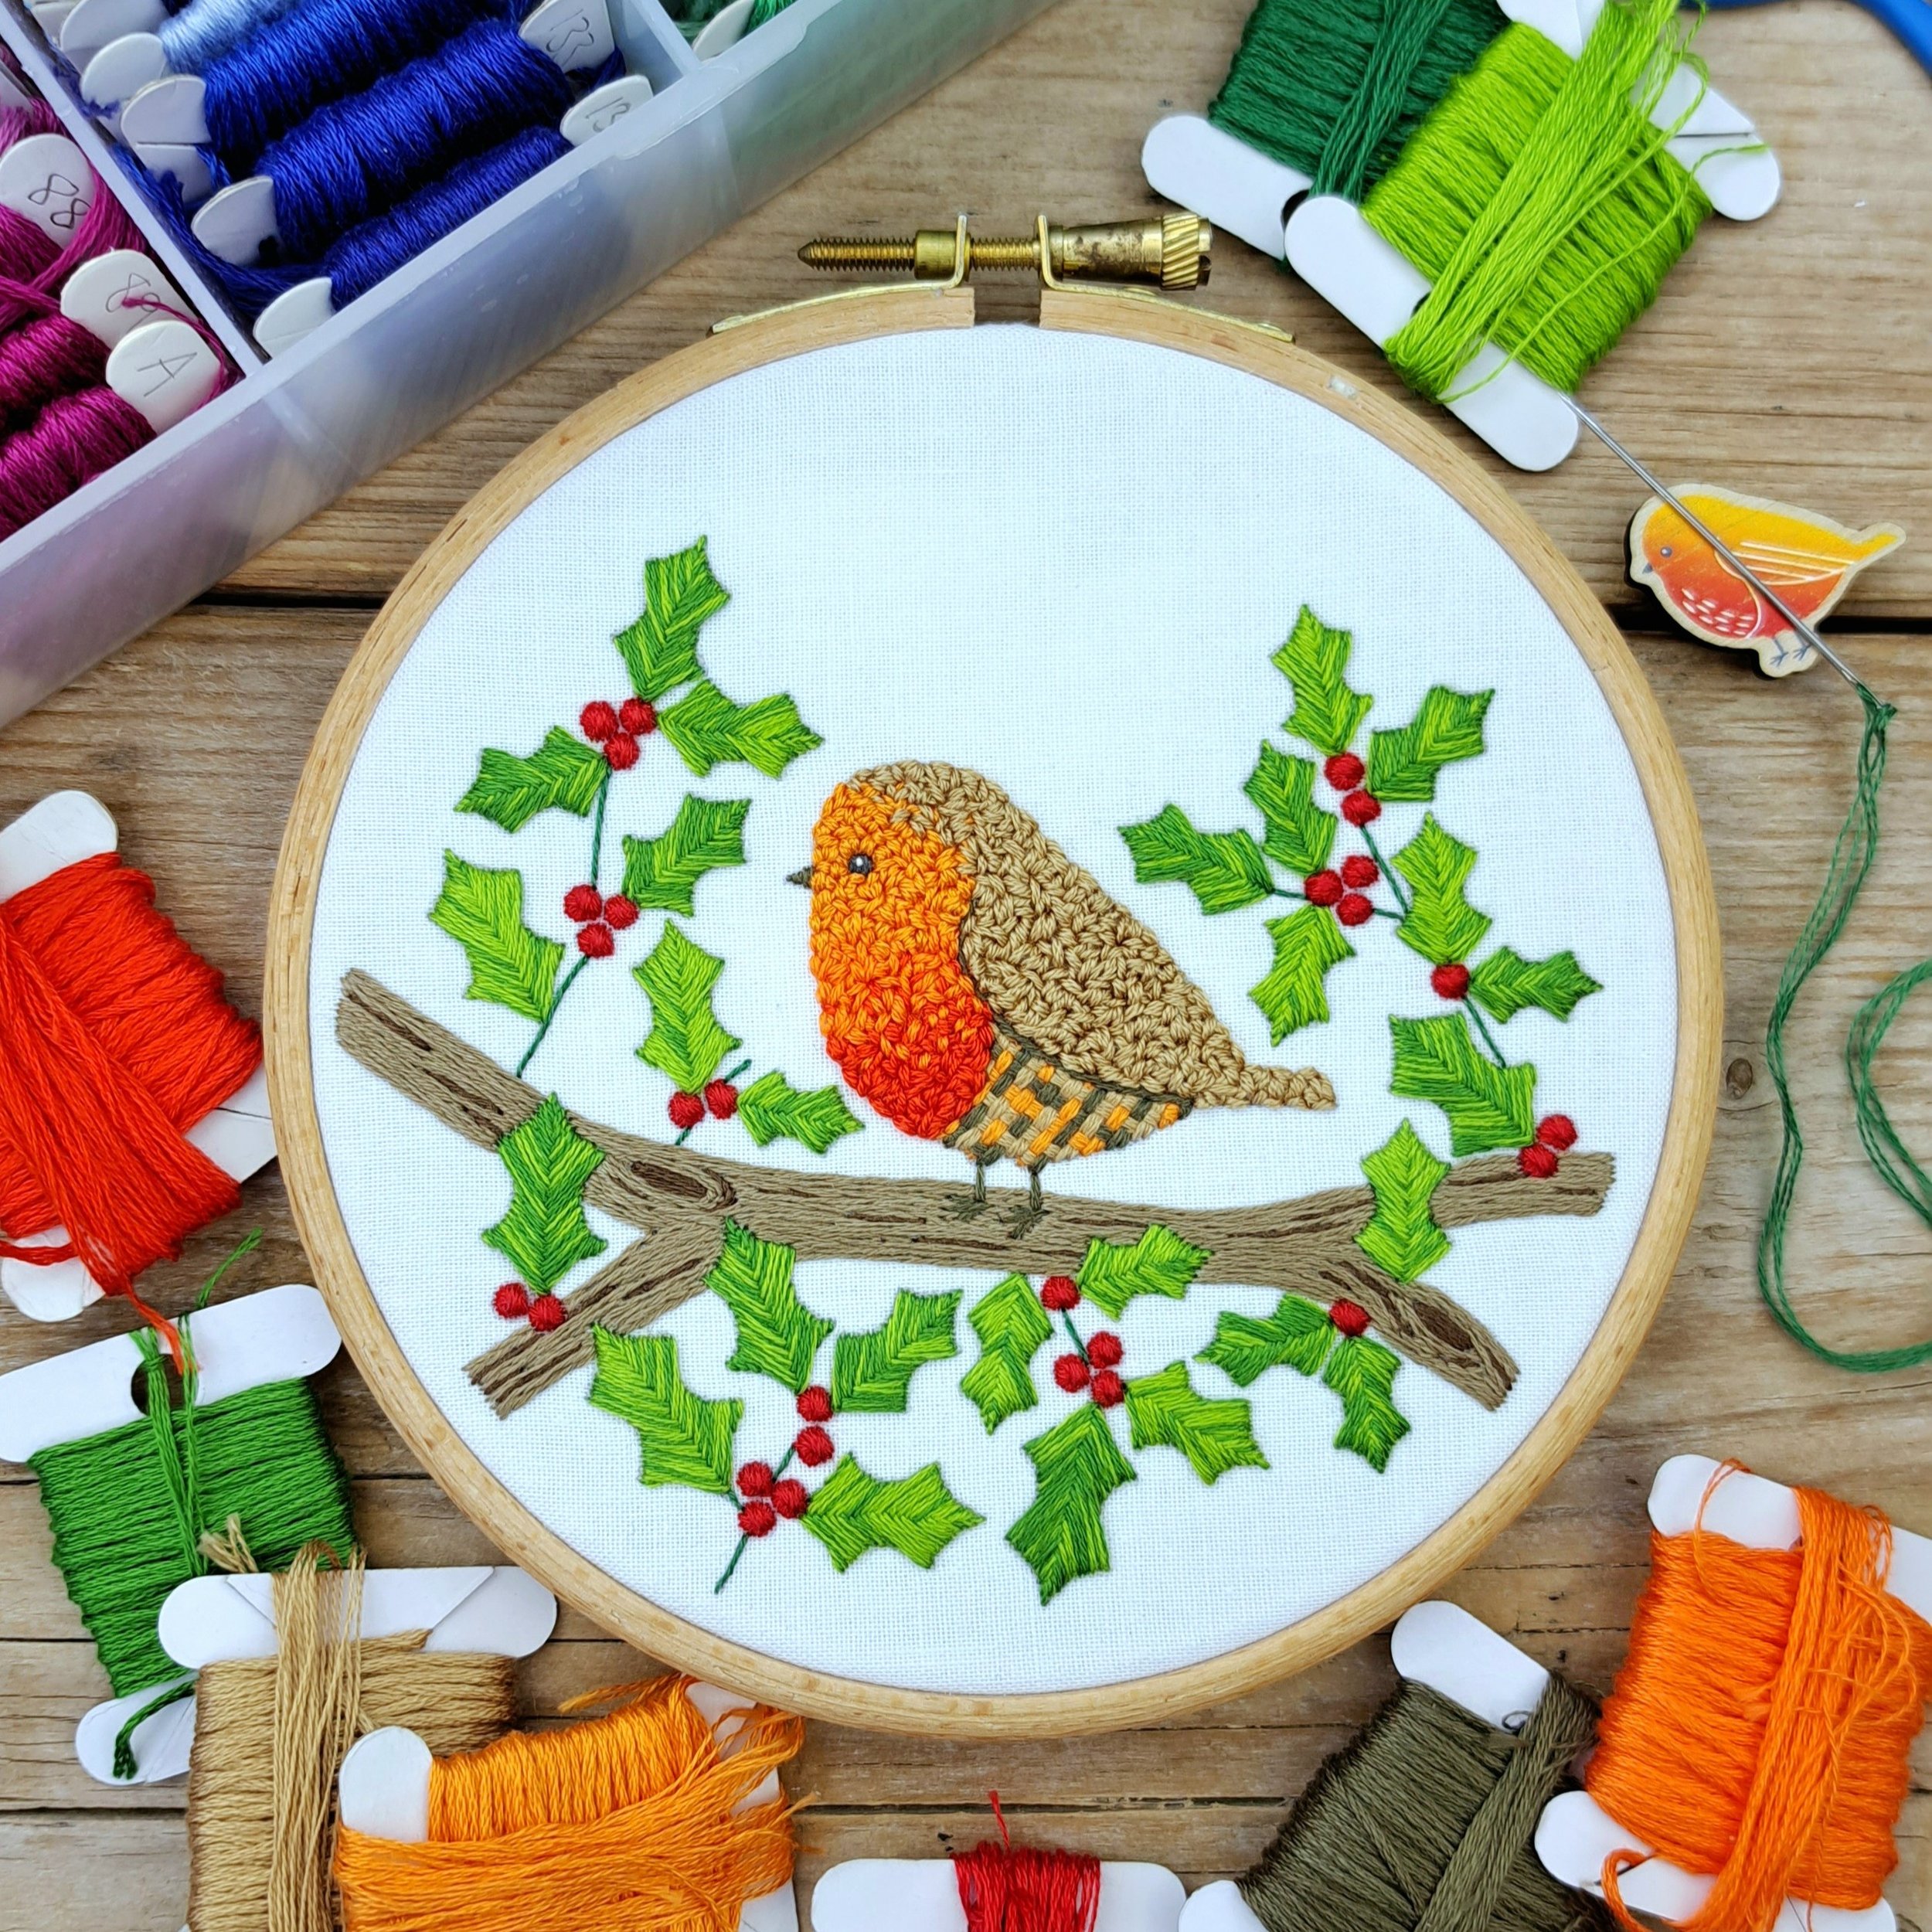
After a few more cosy evening stitching sessions, I finished stitching my robin on 10th December — here’s how he turned out! I can’t wait to pop him on my dresser in the dining room… he’s going to look so adorable there 🎄
5. Finishing and Displaying your Embroidery
You can frame your finished embroidery right in the hoop you stitched it in — one of my absolute favourite ways to display a project!
To do this, trim away the excess fabric, leaving a few centimetres all around. Then stitch a running stitch about 1 cm from the fabric edge using 6 strands of thread, leaving unknotted tails at both the start and end. Gently pull the tails to gather the fabric in, then tie them together to hold everything neatly in place.
I’ll show you how to do this in this video (it’s for a different Christmas design, but the process is exactly the same):
The best part about this method? It’s not permanent — so if you ever want to add more stitching later, you can simply unpick the running stitches and keep going until you’re happy.
Then, step back and admire your beautiful stitching!
I hope you loved this project as much as I did!
I’ll be stitching my way through all my new embroidery designs (there are 14 of them — eek!) and adding more step-by-step blog posts like this along the way. But of course, you can dive straight in and start stitching them right now!
If you’d like a bit of guidance, the Panel Packs come with a stitch suggestion sheet, and many of the techniques from my hand-printed panels still apply to the new designs.
You can find them all here……….
And don’t forget to tag me on social media when you show off your beautiful work - I’d love to see it!

If you enjoyed this blog and would like to support my work, feel free to visit my Ko-fi and leave a tip - every little bit helps keep the creativity flowing! 🌸
Enjoy your stitching!
Until next time,
Liz x