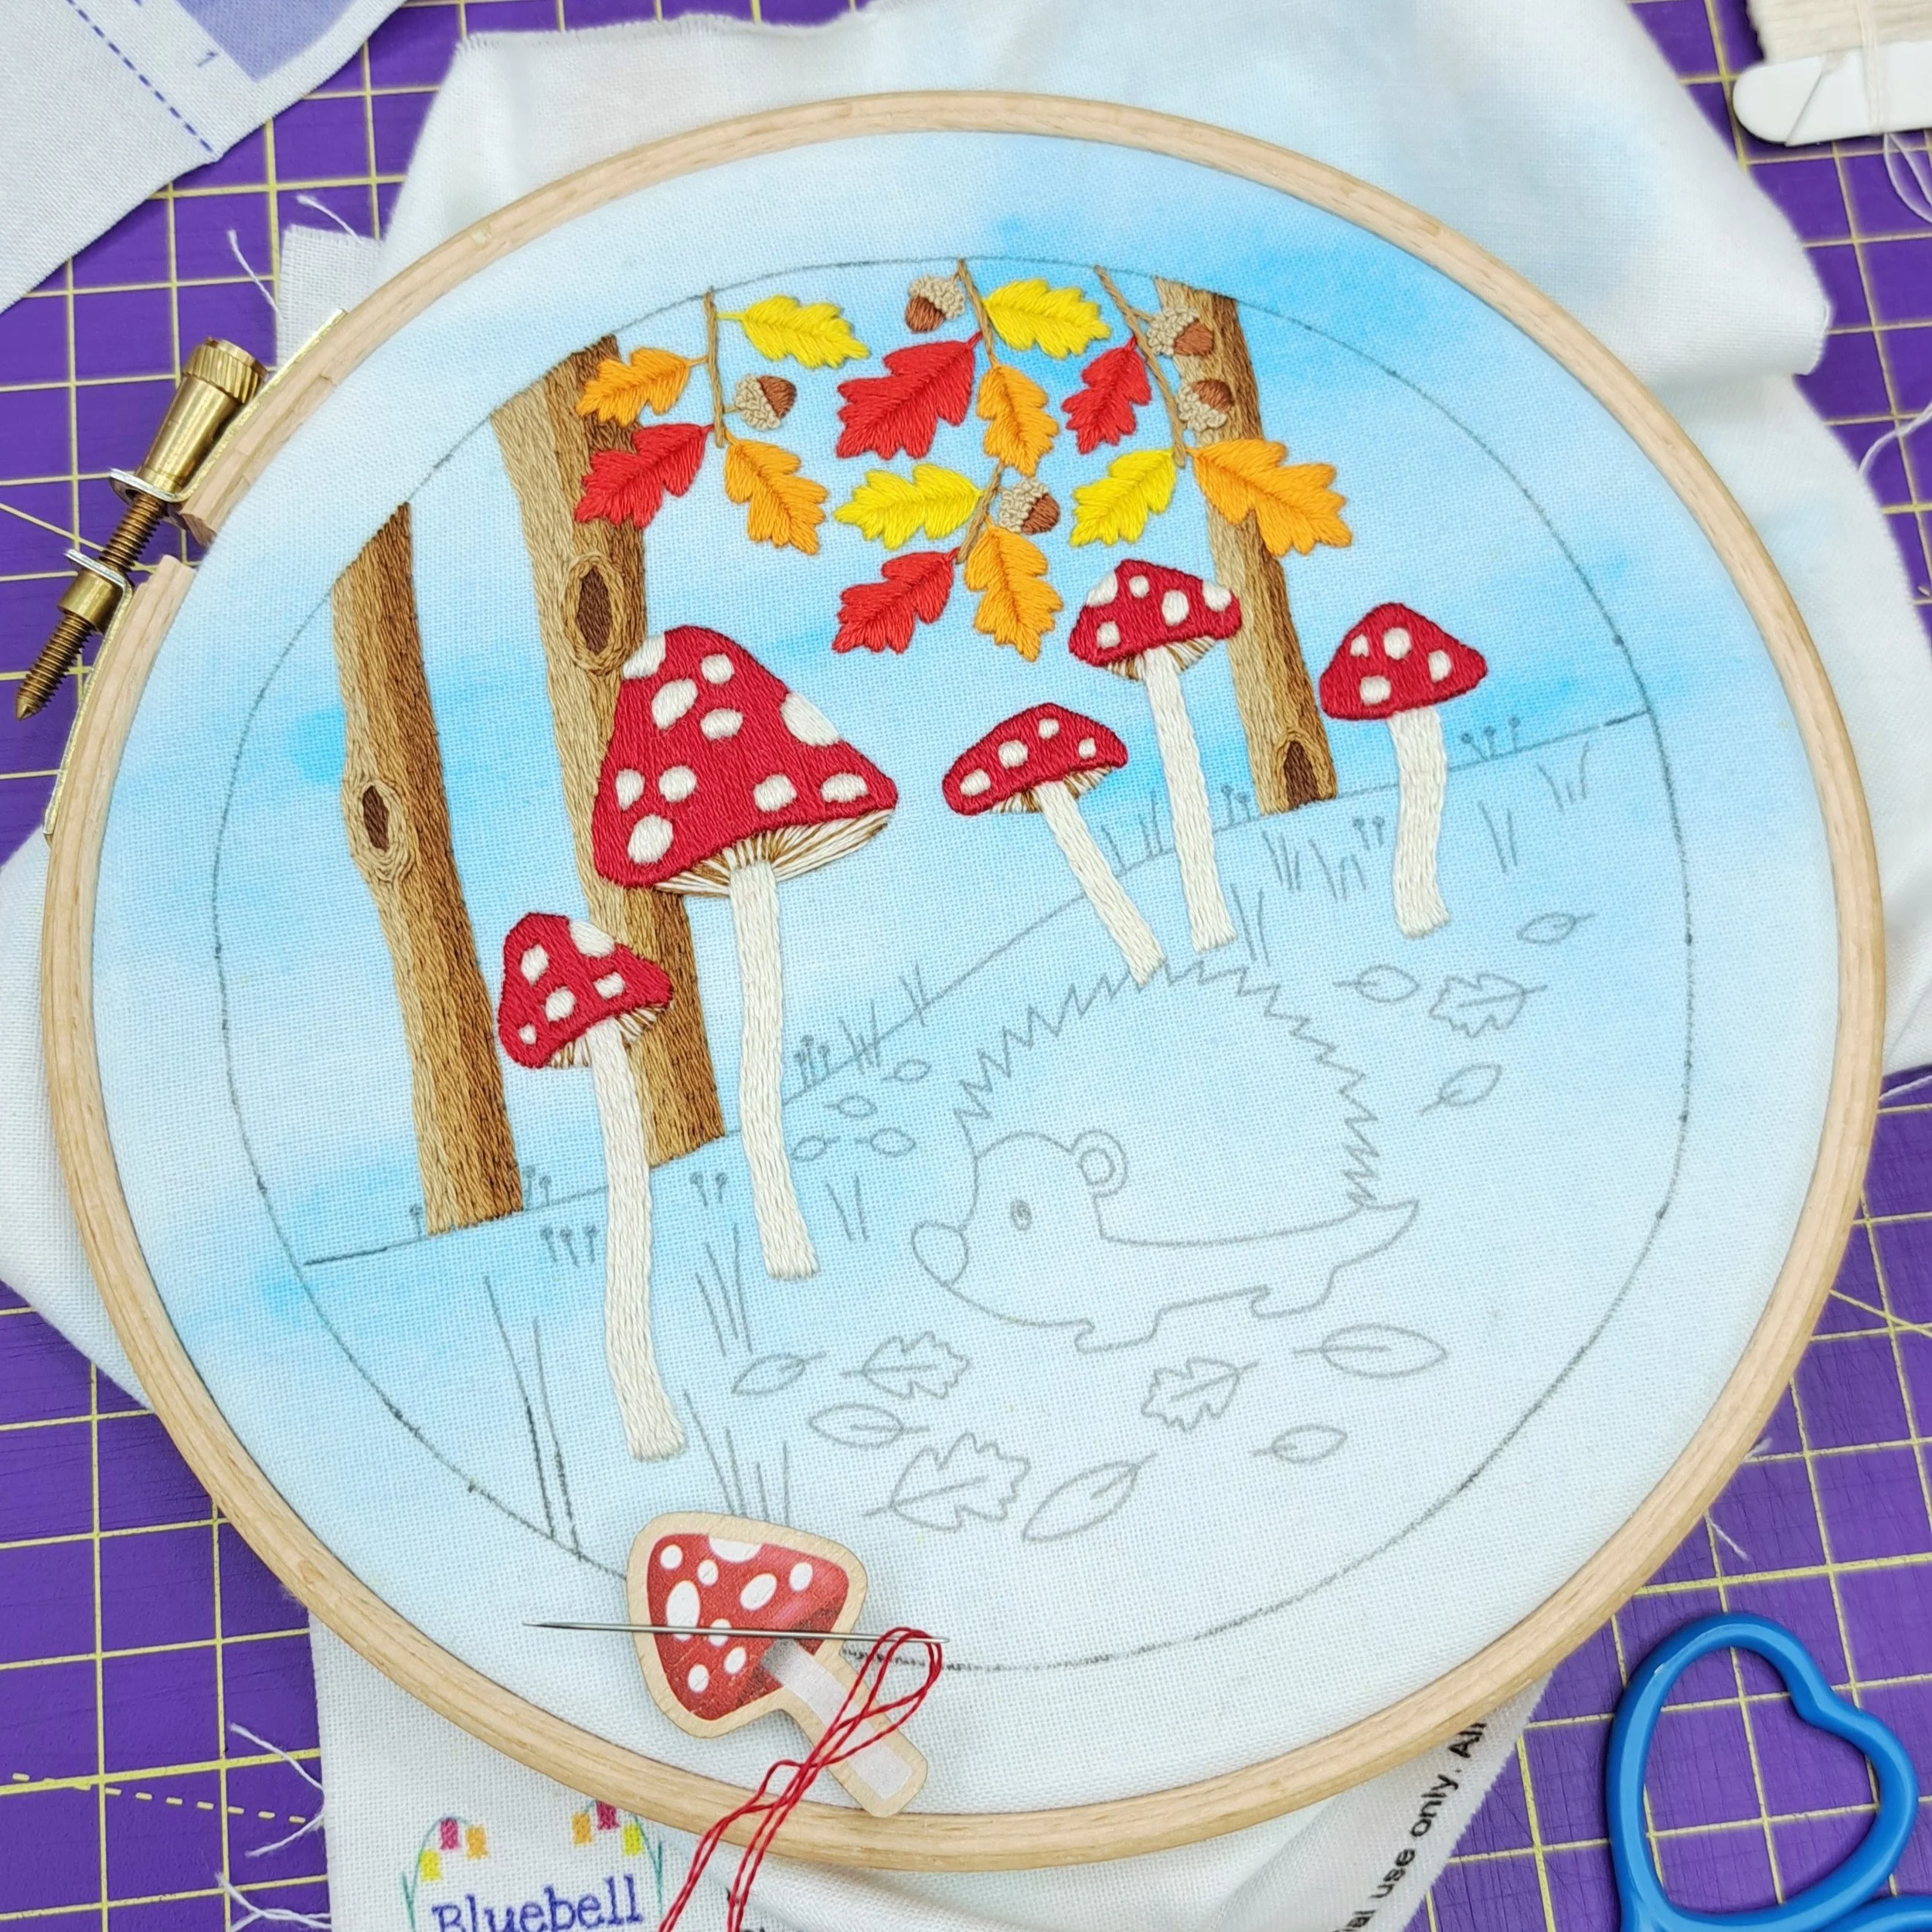
I very nearly stitched this one last year – I was this close to starting it! But after testing some paints that aren’t my usual go-to and questioning how I was going to stitch it… autumn turned to Christmas, and my excitement turned to my robin panel instead!
I’m really pleased though, because I think the way I’m stitching it now (which is different to how I was going to stitch it last year) is turning out really cute and colourful 😍
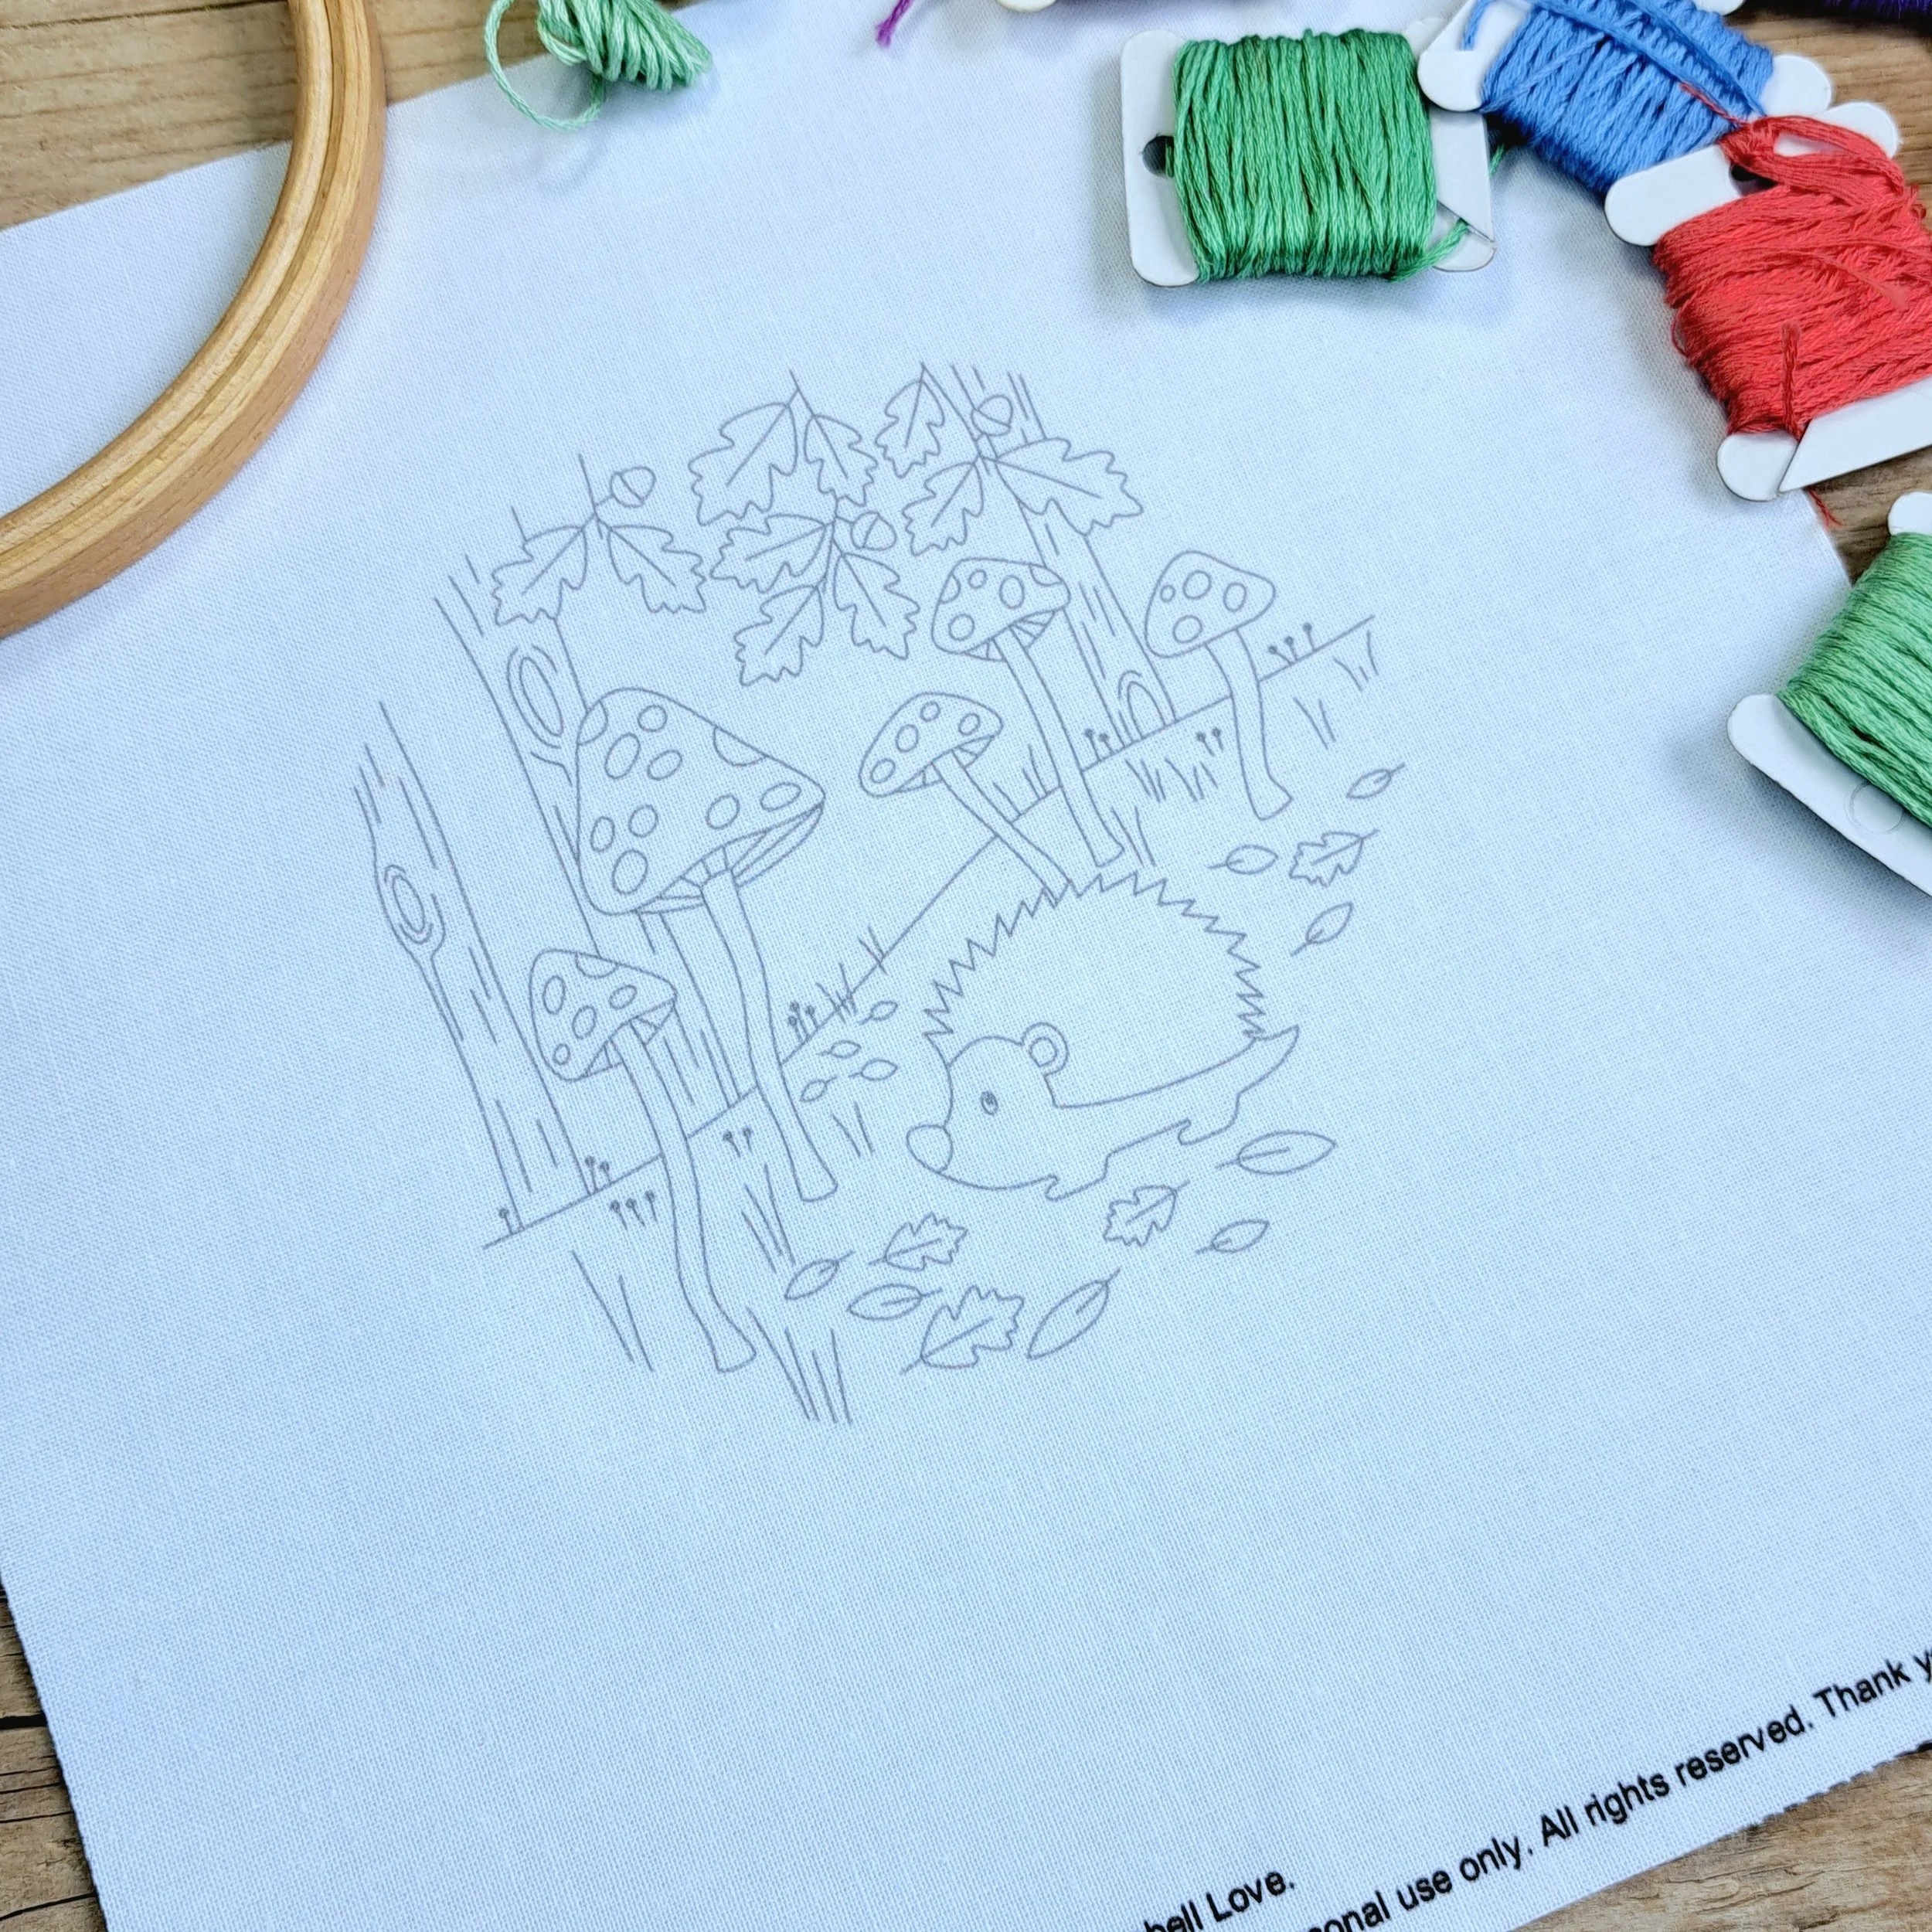
If you’ve just stumbled across me and my embroidery panels - hello and welcome! I’m Liz -the illustrator, maker and stitcher behind Bluebell Love. I’ve been stitching for many, many years now, and like most stitchers, I’ve collected quite the stash of embroidery threads. Some I bought because I just had to have the colour (magpie instincts), others are leftovers from kits, some were gifts, and a few I’m convinced just magically appeared 😏. And if you’re anything like me, I’m guessing you’ve got a good stash growing too!
That’s exactly why I created these embroidery panel designs - they’re pre-printed, so you can pop them straight into a hoop and get stitching, using all those lovely threads that deserve to be seen (not hidden away in a box!).
And just like with all of my embroidery panels… there are no rules 😄. Use your favourite colours, your favourite stitches, and stitch as much or as little as you like. Just the outlines, a few pops of colour, or go full-on and cover the whole panel.
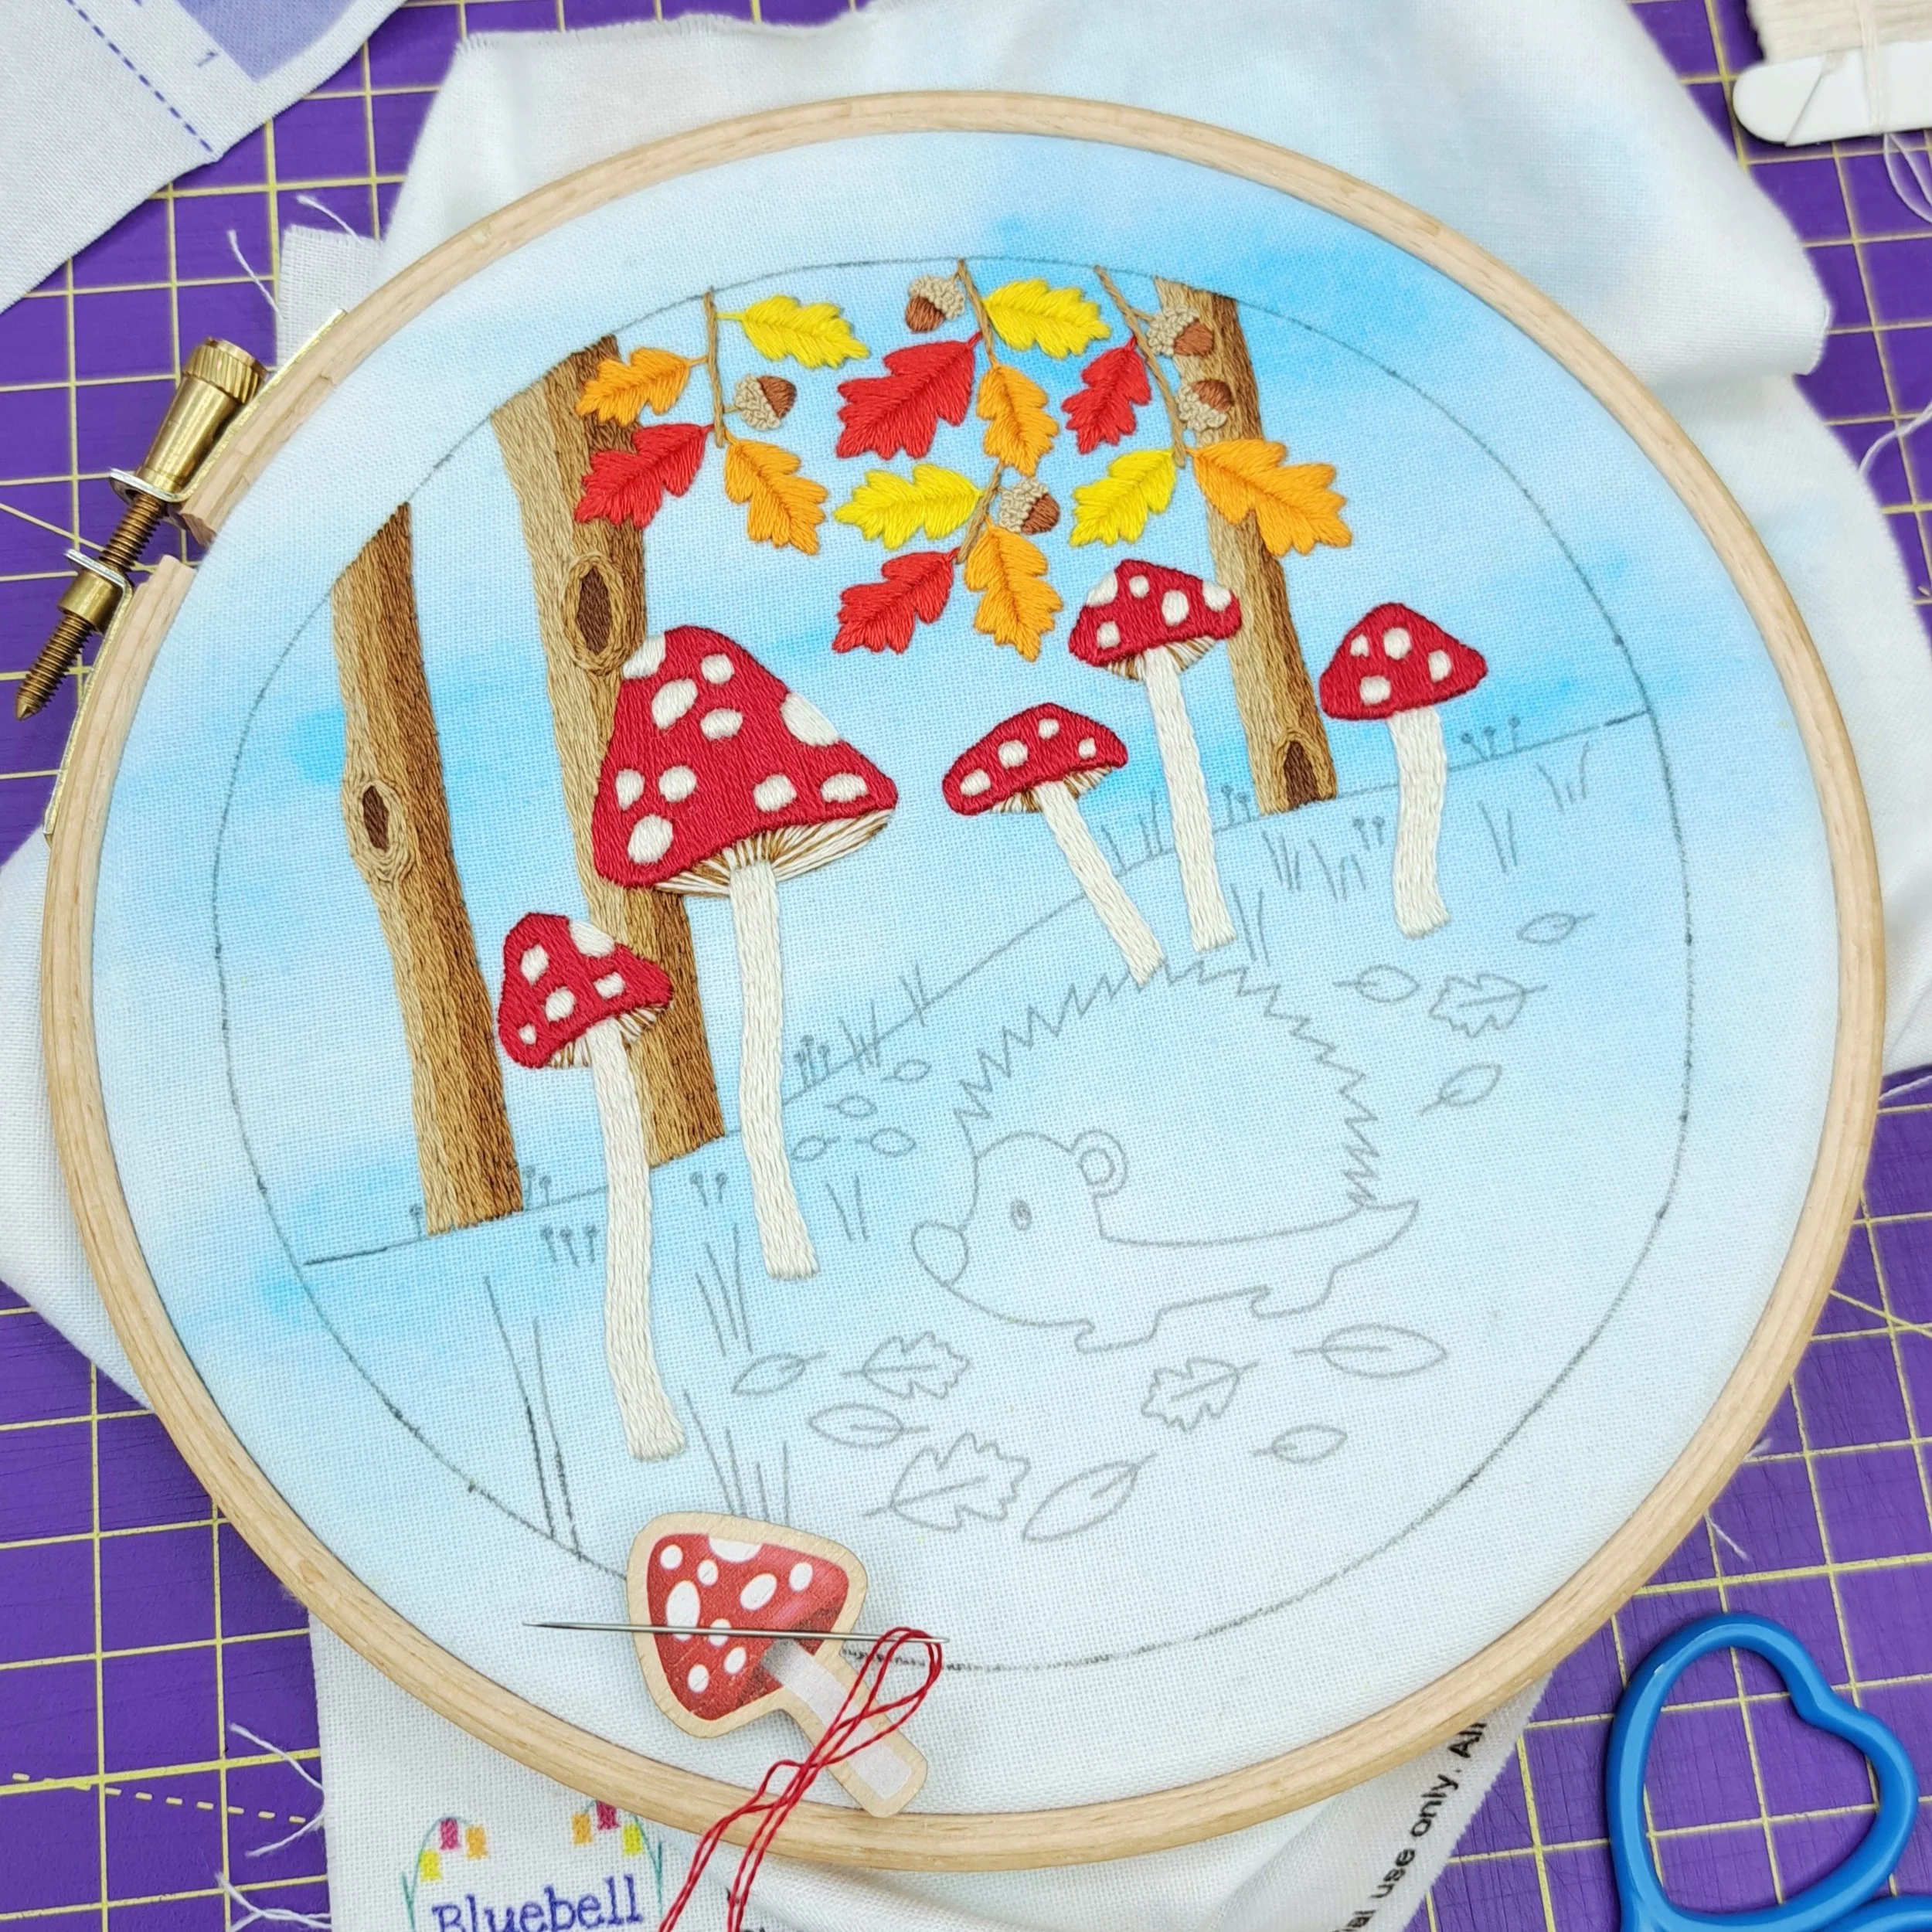
At the moment, this one is still very much a work-in-progress! Usually, I write these blogs once I’ve completely finished. But they do take some time (the stitching and the writing) so this time round I’ve decided to make a start and then I’ll be adding to this blog as I finish stitching each section.
For this embroidery, currently I’ve used 11 thread colours from my stash (I know – 11 already! 😄). You absolutely don’t need all of them - it’ll look lovely with fewer colours too. Unusually for me I have been using a lot of browns - but I’ve been having lots of fun using them for some shading effects on my tree trunks.
Now that I’ve made a good start on this hoop, I’ll walk you through exactly how I did it in this step-by-step guide. I’ll cover the stitches, threads, needles, techniques, and a few little handy tips along the way. I also played around with adding watercolour paint to the fabric before I started stitching - it’s a fun way to add more colour without stitching the whole hoop. I’ll show you how I did that too, but if it’s not your thing, feel free to skip ahead to the stitching part.
Let’s get stitching! 🪡
What You’ll Need
Time to gather your supplies! Here’s everything you’ll need to get started on your Hedgehog embroidery panel:
A Hedgehog and Mushroom embroidery panel
A 5” embroidery hoop
A 6” embroidery hoop
Some extra white fabric to double up inside your hoop
Embroidery needles
A selection of embroidery threads
A pair of sharp scissors
Watercolour paints
Paintbrushes
A cup of water (for the paints)
A plastic sheet to protect your surface (I used a bin liner – anything waterproof will do!)
Heat erasable fabric pen
And of course… a nice hot cuppa ☕ (and even some biccies!) 🤭
Don’t worry - I’ll talk through each of these in more detail below so you know exactly what I used and why.
A Hedgehog and Mushroom Embroidery Panel
First up, you’ll need one of my Hedgehog and Mushroom embroidery panels. This design was illustrated by me and printed onto 100% cotton fabric using eco-friendly, water-based pigment inks – all made right here in the UK 🌿
You can grab your panel from my shop here:
I also offer this design as part of a Panel Pack, which includes a 5” hoop and extra backing fabric – perfect if you’re just getting started or want everything bundled together 😊
Embroidery Hoops (5” and 6”)
I always recommend using hardwood hoops – they’re more durable and hold a more consistent tension while stitching.
Wooden hoops sometimes have little natural imperfections, but in my experience, hardwood ones grip the fabric better and have fewer gaps.
This design (as with all my panels) fits snugly in a 5” hoop. Usually I would just pop the panel into a 5” hoop, and stitch and display my finished project in that same hoop.
But for this one, I want my stitching to go right to the edge of the 5” hoop, with no fabric border around the edge. So I’ve sized up to a 6” hoop for the stitching, then I’ll transfer the finished panel into the smaller 5” hoop for displaying.
Extra White Fabric
I highly recommend doubling up your fabric in the hoop!
I didn’t do this when I stitched the Rabbit Panel - and honestly, I really wish I had 😬 For this hedgehog panel, I added an extra layer of plain white cotton behind the printed panel, and it makes such a difference. Especially if you’re leaving your background fabric white, this helps it stay crisper and prevents thread tails from showing through.
Even though I added watercolour to this one, I still doubled up - it helps keep the tension nice and firm, and I didn’t want to risk the same mistakes again.
So if you can, definitely go with two layers!
Embroidery Needles
TThe right needle can make a huge difference in how easy it is to stitch and how tidy your stitches turn out.
Embroidery needles come in different sizes - here’s what to keep in mind:
Larger needles: They create bigger holes in the fabric, so if you’re using fewer strands, your stitches might shift of leave gaps.
Smaller needles: If you use them with too many strands, it can be tricky to pull the thread through smoothly.
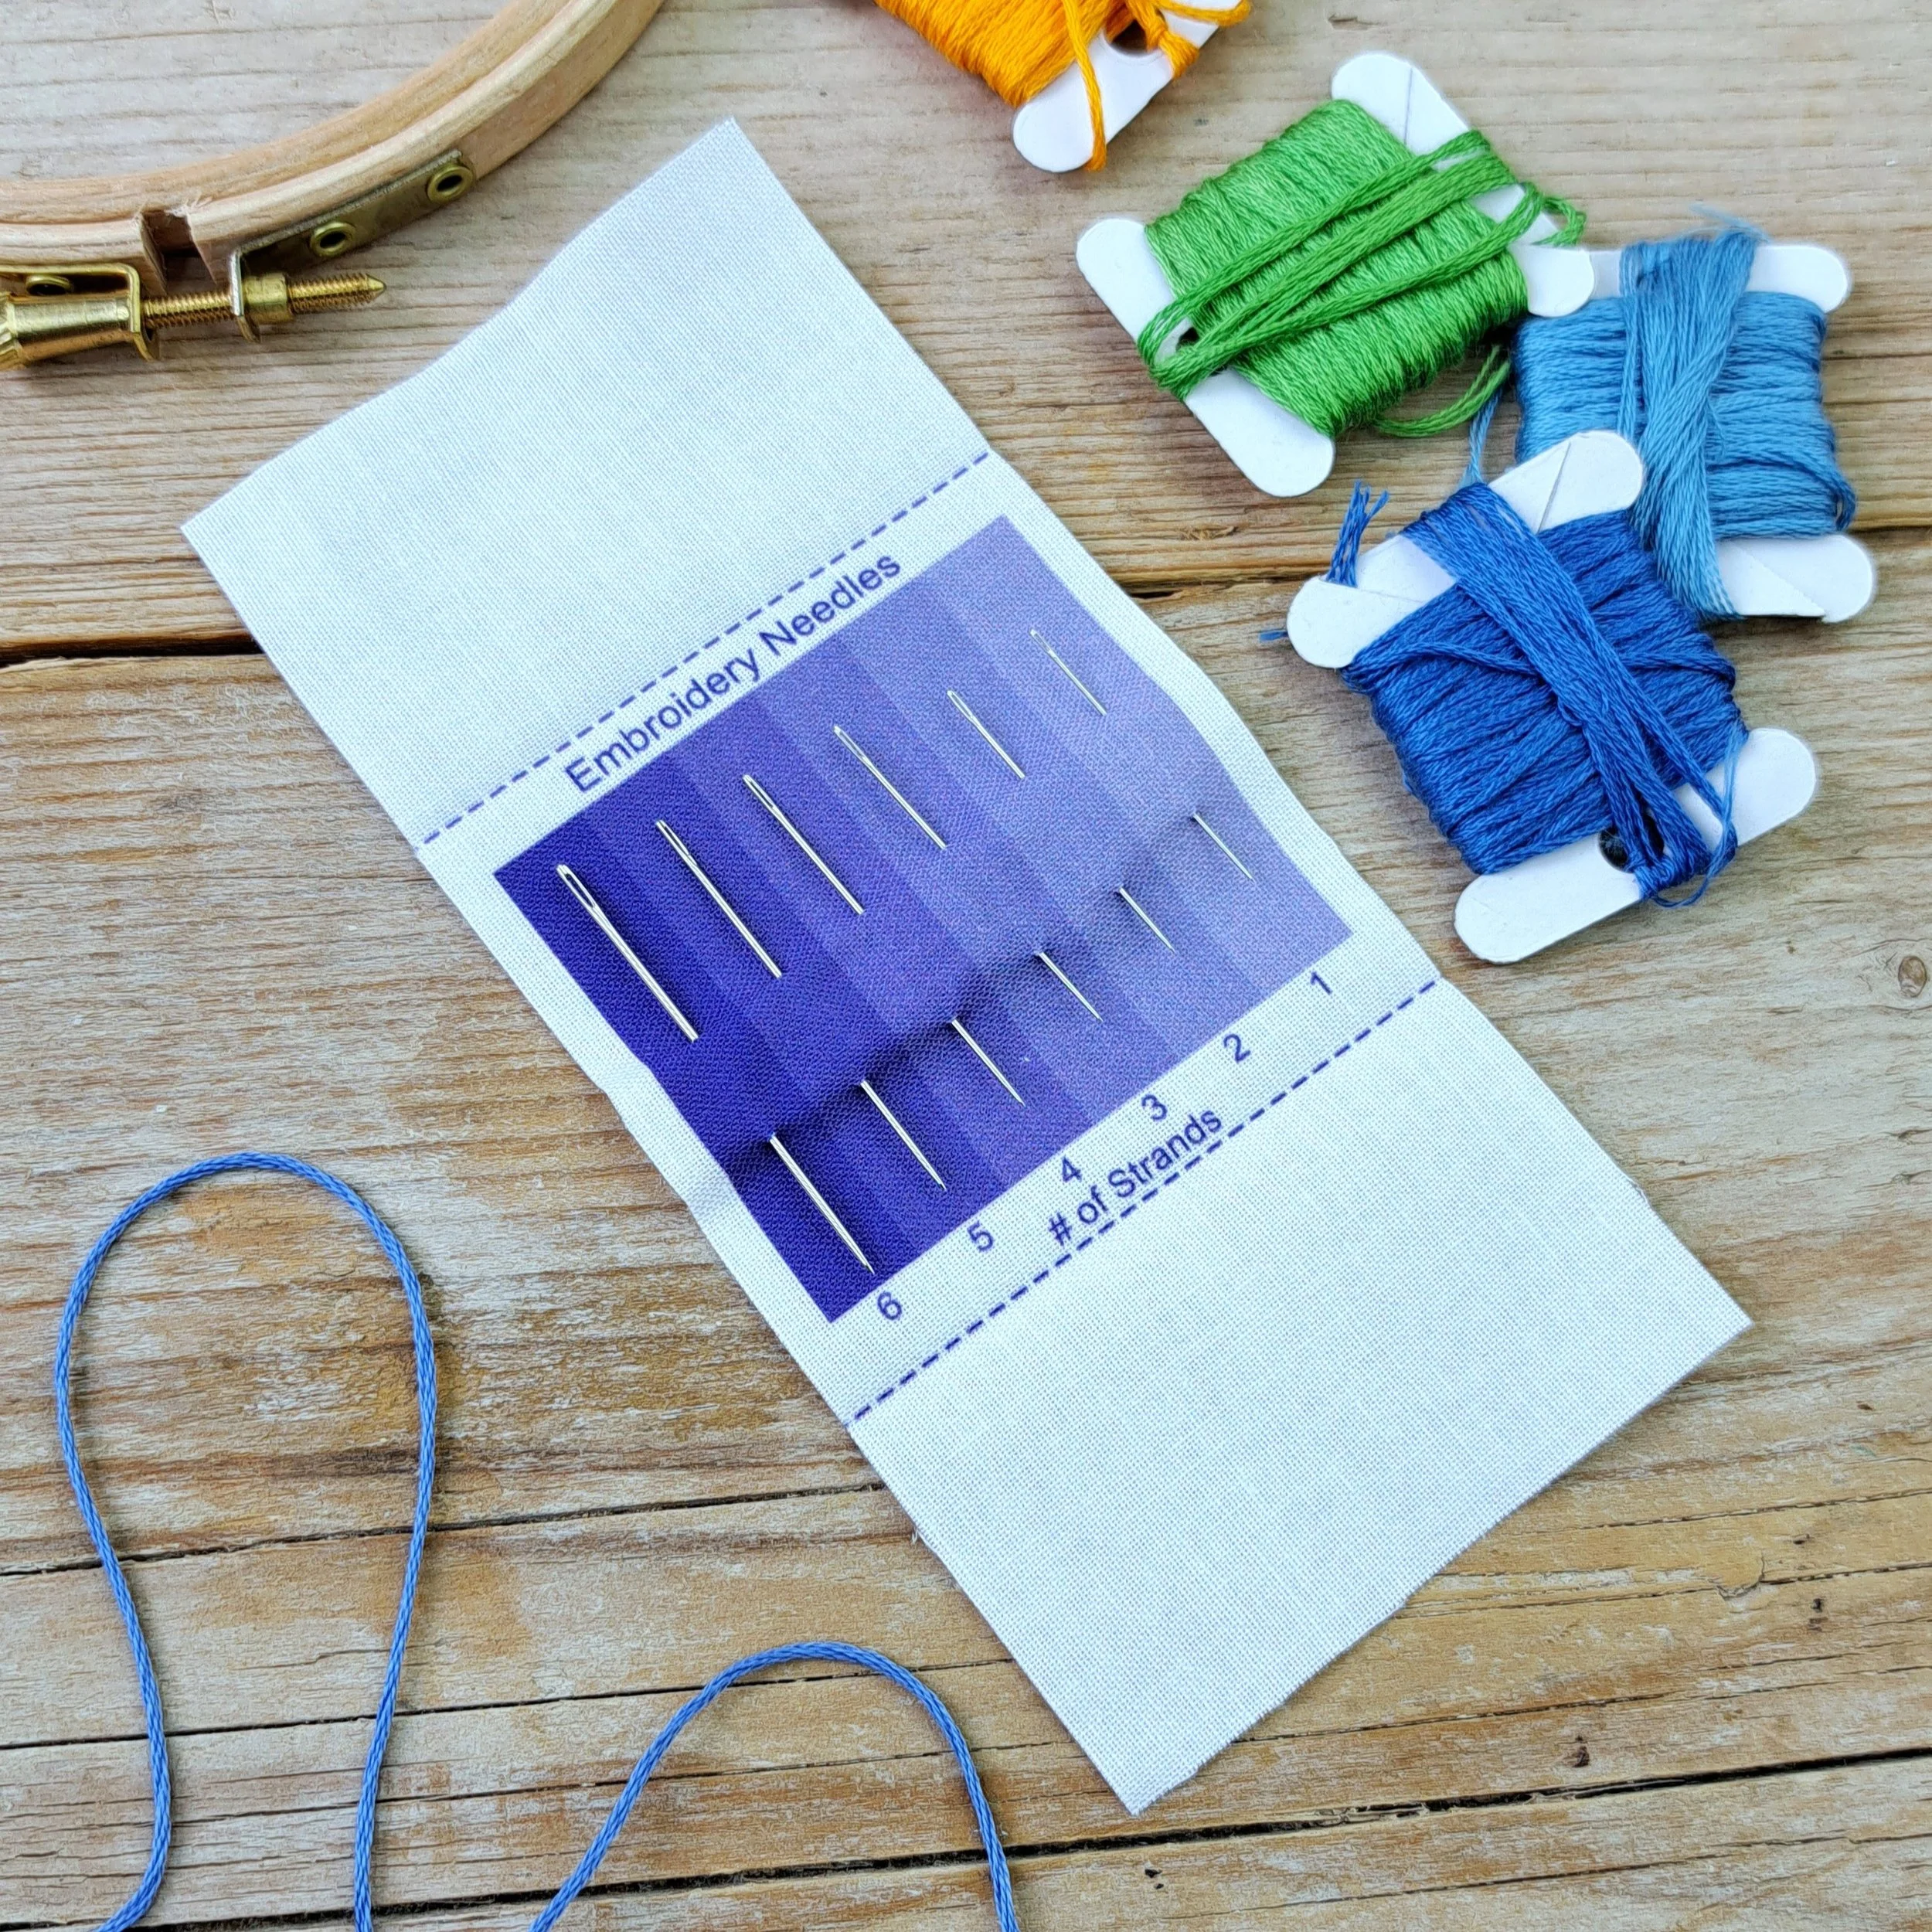
I use one of the needle packs from my shop - these are my absolute favourite to use when stitching with 6-stranded embroidery cotton on my embroidery panels. Just a little heads up - they're sharp!
The packs contain 6 needles tucked into a fabric envelope. Each needle is suited to a different number of thread strands, as indicated on the fabric.
🧵 You can grab a needle pack from my shop here:
Embroidery Threads
For this project, I’ve used Anchor 6-stranded cotton threads, from my stash. They’re a brilliant quality brand, with vibrant colours that hold up beautifully over time – one of my go-to brands of thread.
I picked my colours from my (very full!) thread stash - but feel free to choose colours that you love. A rough colour plan can be handy before you start, but don’t be afraid to change your mind as you go. I change my mind all the time once I start stitching!
Here’s the current list of the 11 colours I used so far (I'll add to this as I work through the rest of the panel):
Browns: Anchor 371, Anchor 373, Anchor 374, Anchor 944, Anchor 355, Anchor 358
Ecru: Anchor 926
Reds: Anchor 9046, Anchor 47
Yellow: Anchor 298
Orange: Anchor 304
Anchor threads are numbered for easy reference, so if you’d like to match the colours I used exactly, just look for these numbers. But honestly - this is your project! Choose the colours that make you happy.
Scissors
Any sharp scissors will do the trick, but embroidery scissors are ideal. Their small, pointed blades make it much easier to trim threads neatly and get into tight spaces.
If you don’t have embroidery scissors, no stress – any small, sharp pair from your sewing kit will work just fine.
Watercolour Paints
For this panel, I used a palette of watercolour paint blocks I picked up at my local craft shop. It has a lovely mix of colours – perfect for creating soft, blended backgrounds.
You can use whatever watercolours you like: blocks, tubes, or even pencils. Just have fun with your colour choices and mix them to create the effect you want.
I definitely recommend testing your paints on some scrap fabric first though. It really helps you get a feel for how the colour behaves on fabric.
Paintbrushes
I used two brushes for this project:
– A larger round brush to wet the fabric
– A mid-sized brush for adding the paint
You don’t need anything fancy – just use what you’ve got! A round brush is great for soft washes, and anything with a finer tip will help with smaller details.
Cup of Water
Just a little container for rinsing your brush between colours – I use an old mug. Just try not to accidentally drink from it instead of your tea… but hey, it happens to the best of us 😏
A Plastic Sheet
Painting on fabric can be a bit messy - the water and paint will soak through.
I’d definitely recommend protecting your table with a waterproof sheet of some sort.
I just cut up a bin liner and taped it down to my desk – nothing fancy, but it works perfectly!
A Nice Hot Cuppa
I’m a tea girl… but you do you! 😊☕
2. Painting the Background
Watercolours are super simple to use and so much fun to play with. That said, they aren’t permanent - so they will wash out. This can be both a blessing and a bit of a curse!
On one hand, if something doesn’t go to plan, you can wash it out or layer over it with more paint and water to change it. But on the other hand, it’s not ideal if you’re planning to wash your embroidery once it’s finished - so mine is staying happily in its hoop on the wall.
For this panel, my rough plan was to just watercolour paint the sky (a nice sunny blue autumnal sky) and then fully stitch everything else in the design. But you can completely change the look and feel of your panel depending on the colours you choose.
For some of my other designs, I’ve used different techniques to create effects like pretty sunrises or coastlines (check out those blogs for how I painted those) - so if you fancy getting extra creative here, please do! 😃
✨ A Few Watercolouring Tips
Protect your table with a plastic sheet (I used a bin liner).
Wipe down the plastic sheet - paint and water can pool underneath the fabric and affect your paint
Keep holding your embroidery hoop over your fabric to check you’ve painted all the areas you want to include.
Avoid oversaturating your paints. Too much pigment can stiffen the fabric, which makes stitching trickier. Keep your paints watered down for a smoother application.
Watercolours always dry lighter than they look when wet, so I highly recommend testing your colours on a scrap piece of fabric first. It’s a great way to experiment with blends and get a feel for how they’ll behave on fabric.
The Process
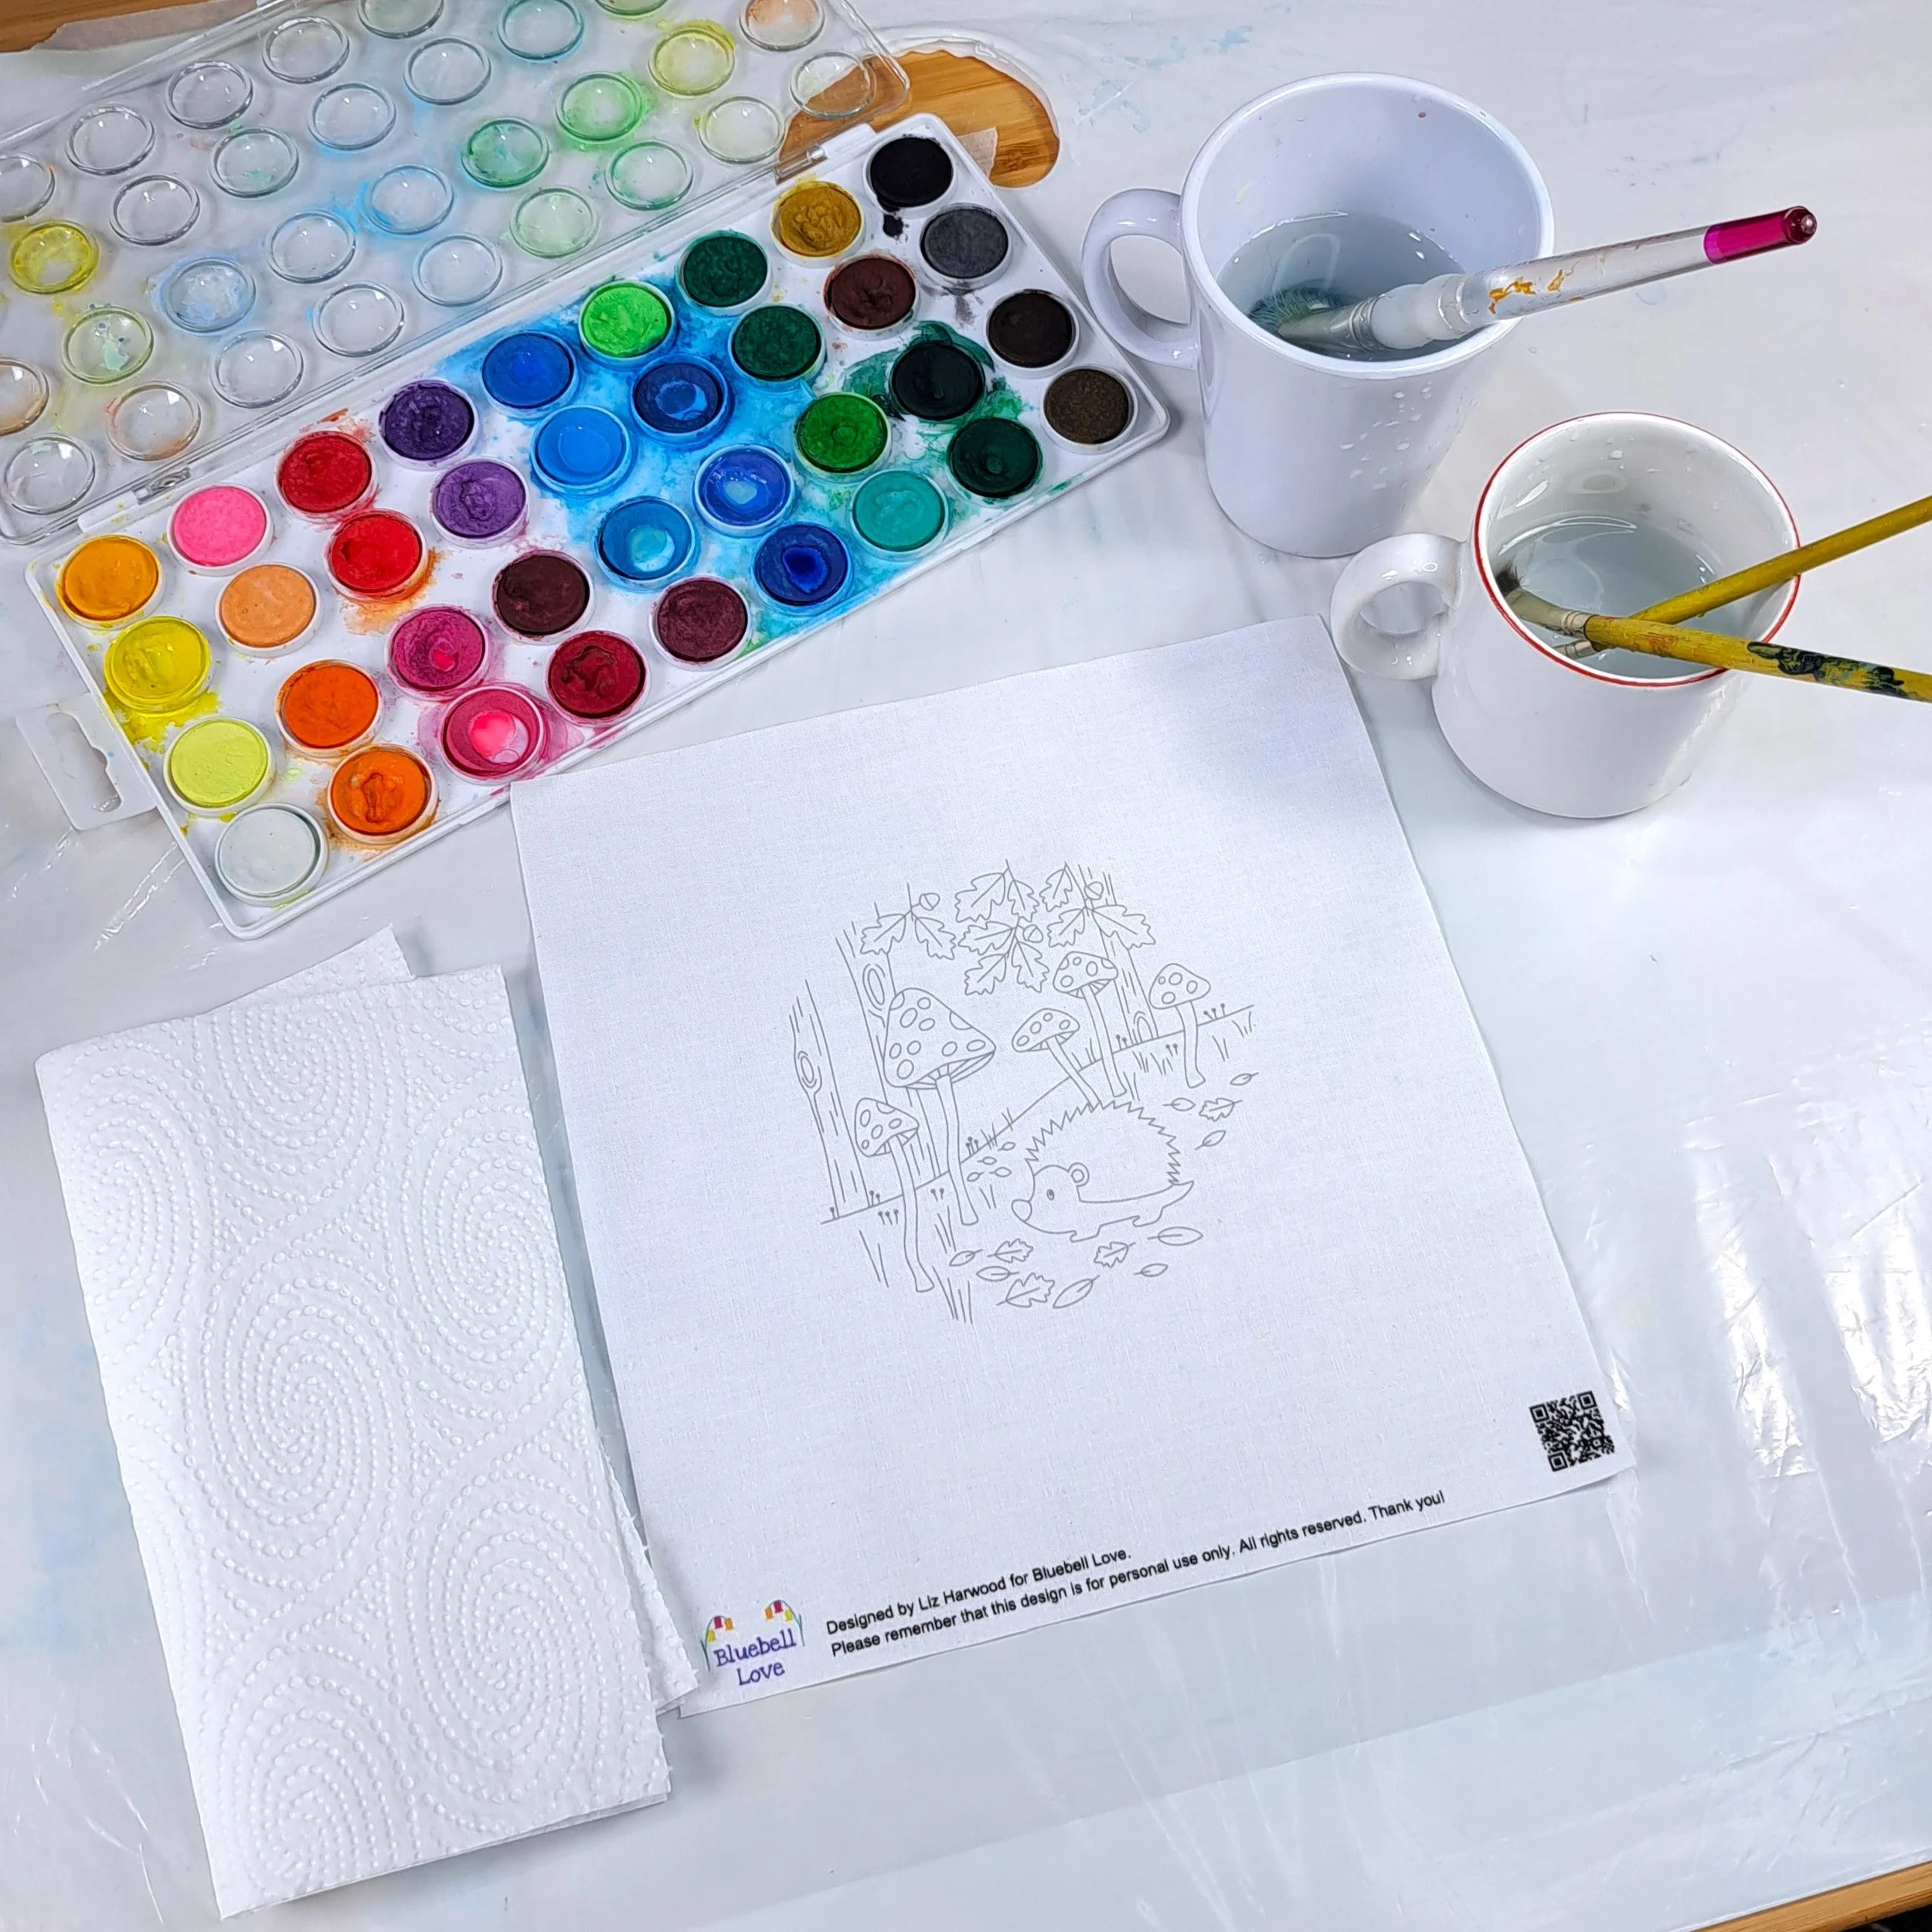
First things first: protect your table.
I used a bin liner cut open and taped it tightly to my desk with masking tape. Pulling it taut helps avoid any wrinkles that could trap water or paint. Then I laid the embroidery panel on top, ready to go.
Have a Rough Plan
For this one, I kept things simple - just a sunny blue sky. I’d already planned to completely stitch everything else, so I wasn’t worried about any bleeding or painting over any of the design lines.
The Techniques
There are a few different ways to use watercolours on fabric. The two I use most often are:
Wet on Wet - paint onto wet fabric for a soft, blended look.
Wet on Dry - paint onto dry fabric for more control over where the paint goes.
For this hedgehog panel, I used the wet on wet technique for one blended sky wash.
The Painting
First, I used my large round brush to wet the majority of the panel (all of the sky and well beyond) with clean water - just brushing it on like you would paint until the entire panel is wet through.
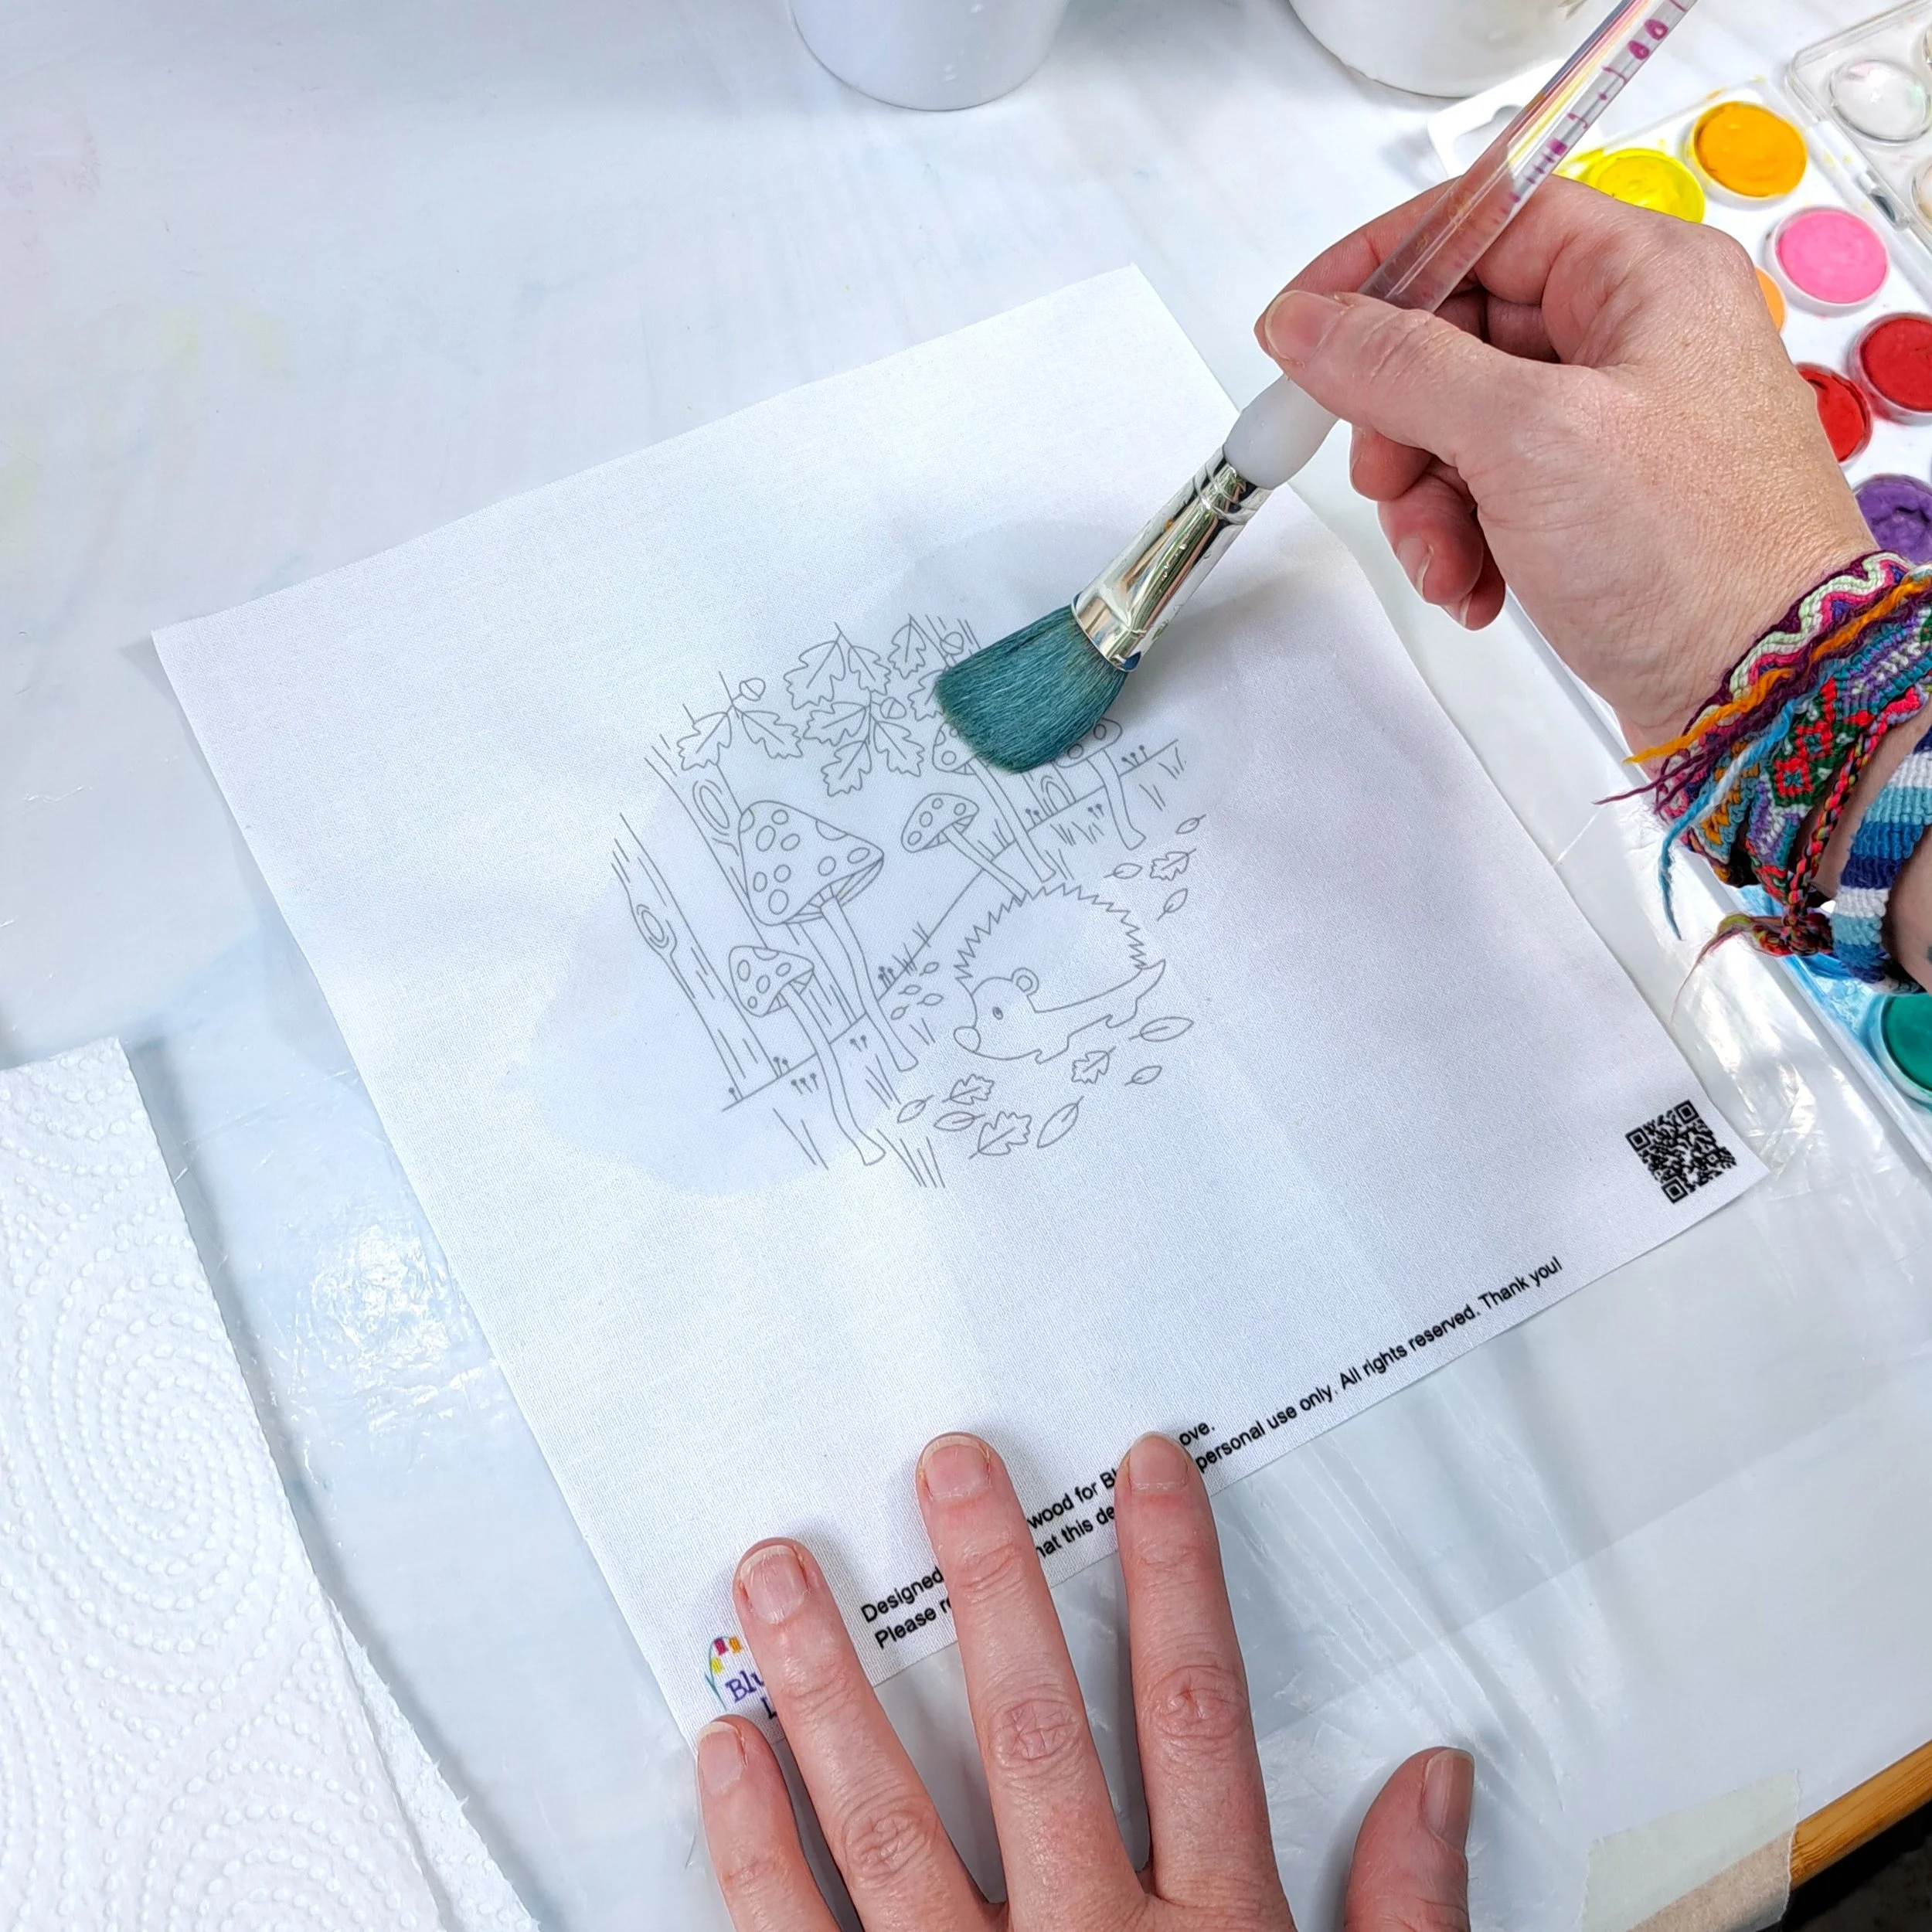
Then I picked up some blue paint with my smaller brush and gently started brushing it on the fabric. As soon as the paint touches the wet surface, it begins to spread and bleed out - which is exactly what you want with this technique.
Each brush stroke softens and blends into the next, creating that lovely blended wash effect.
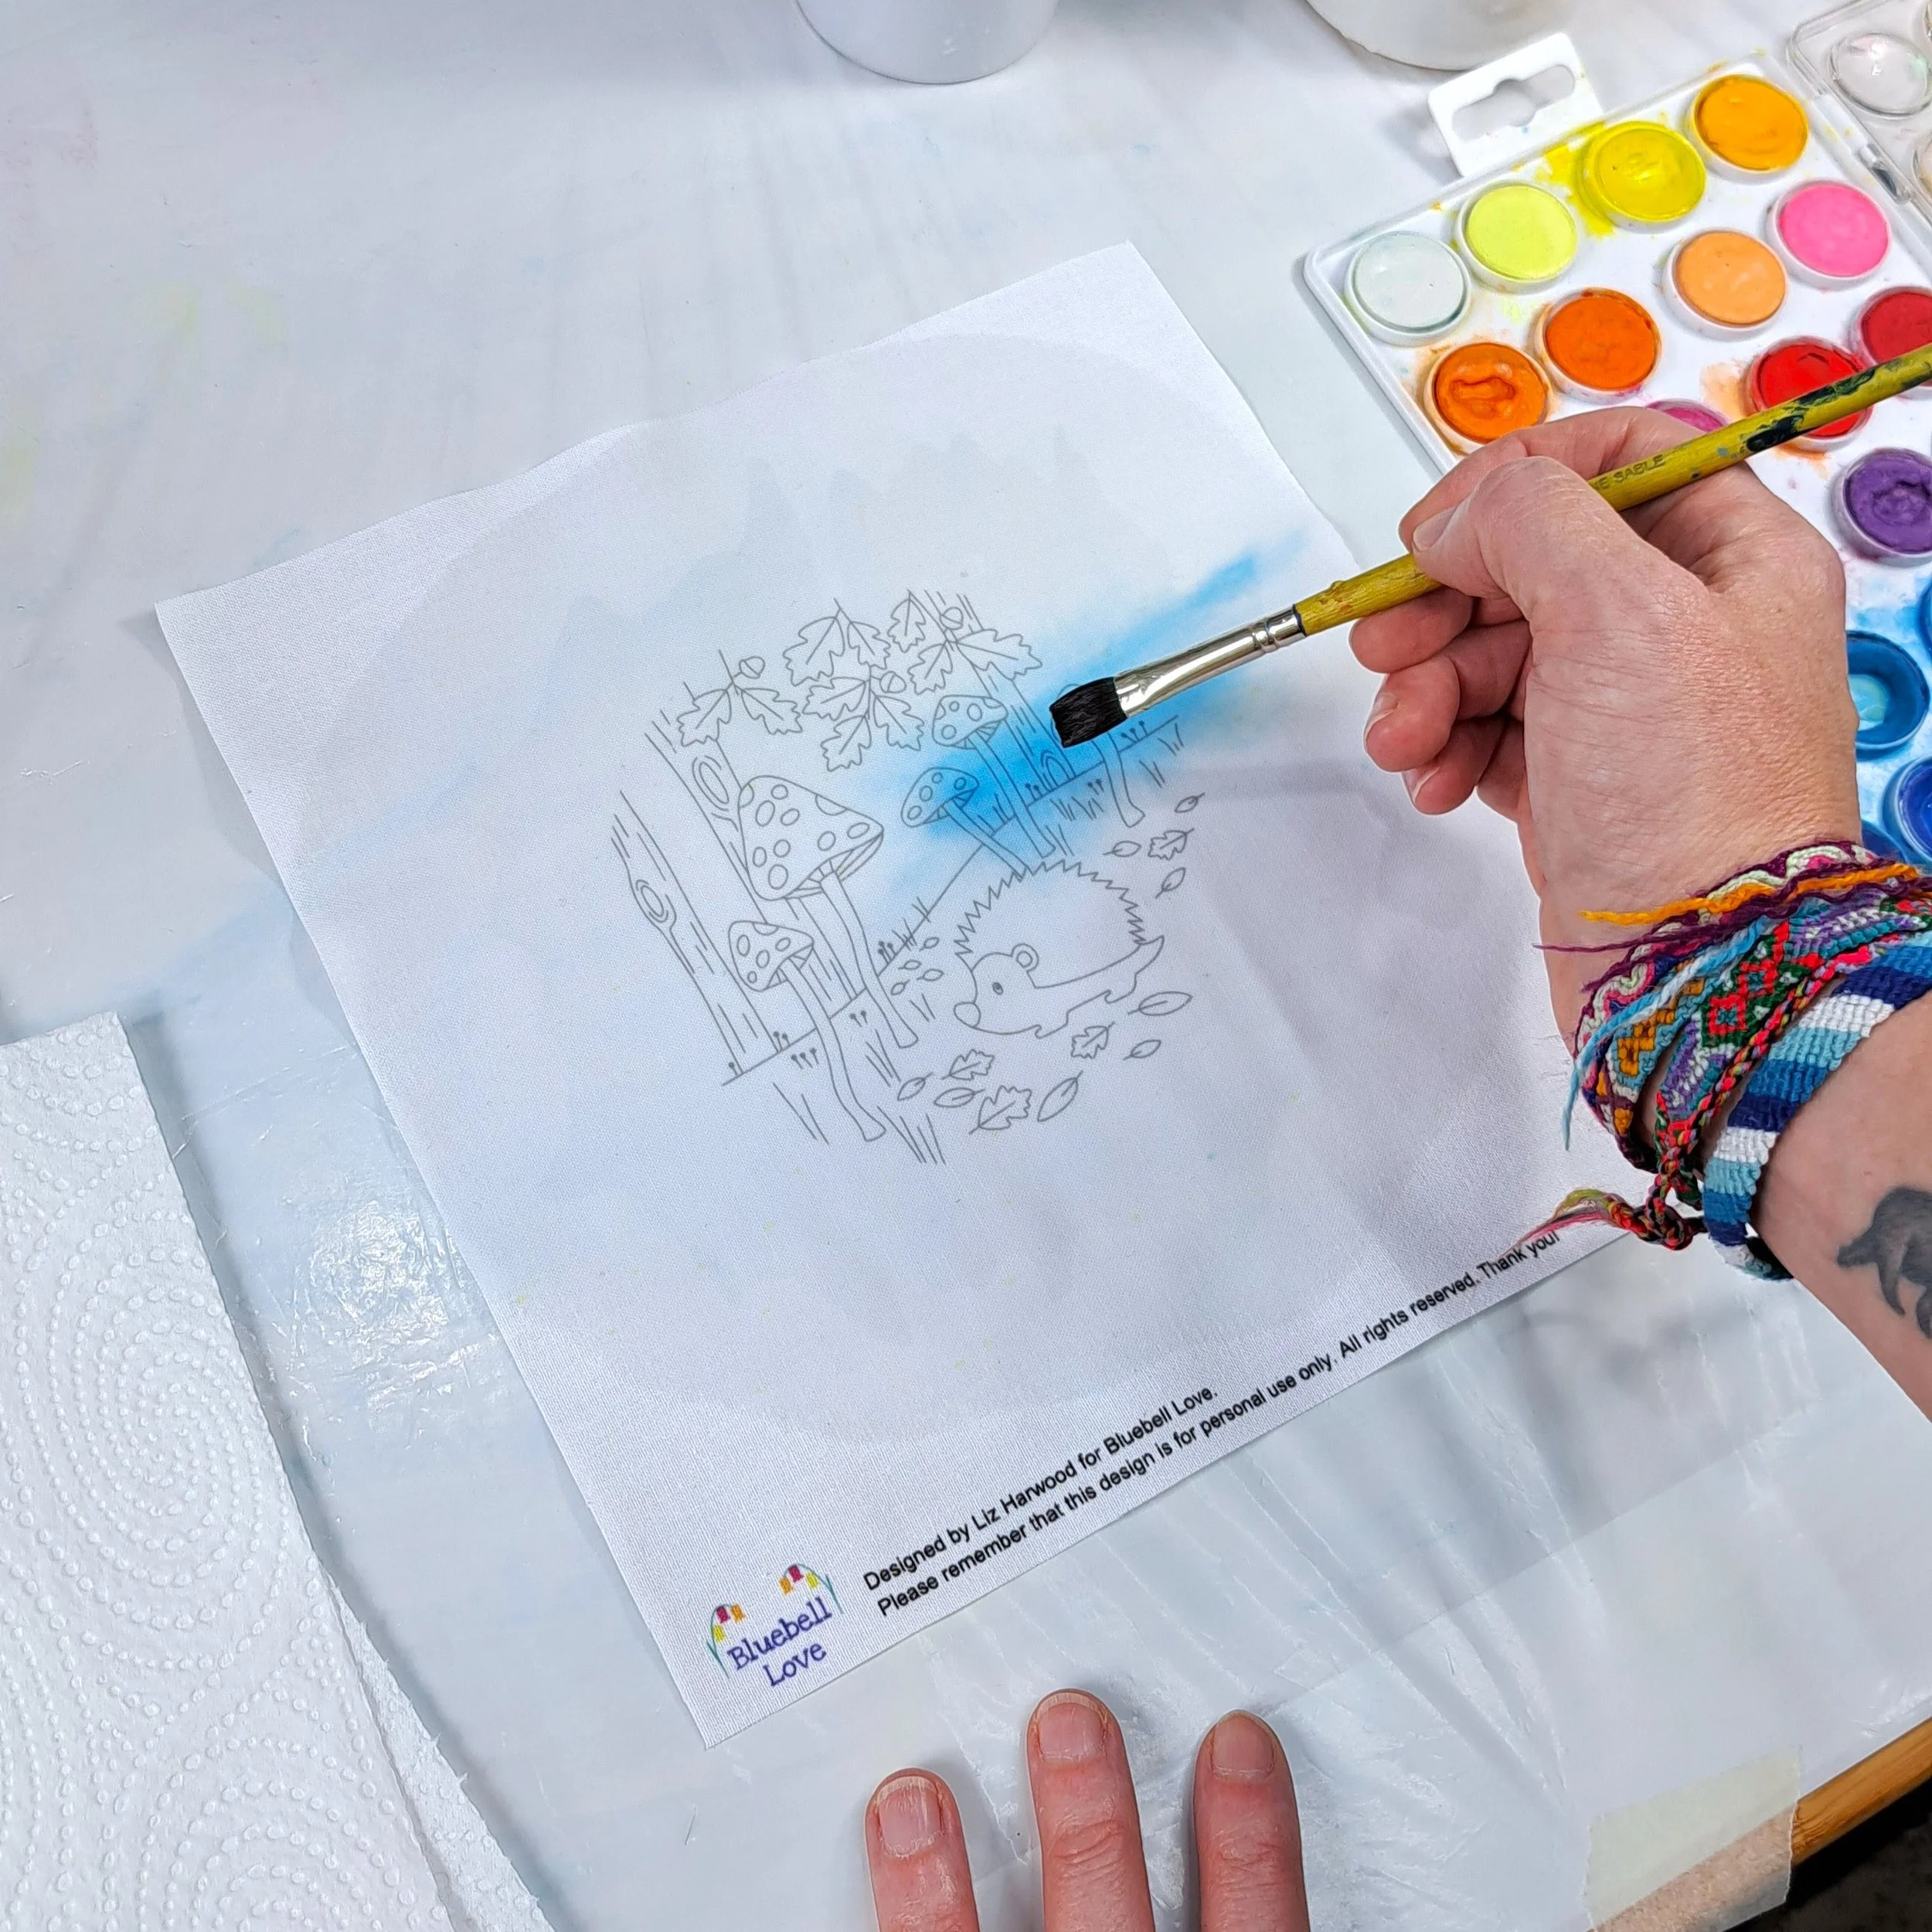
And that’s really all there is to it! I used a couple of different shades of blue paints and went for a patchier cloudier sky this time by not adding paint evenly and leaving a couple of areas completely. I kept going until the whole area (and slightly beyond where my hoop would sit) was covered.
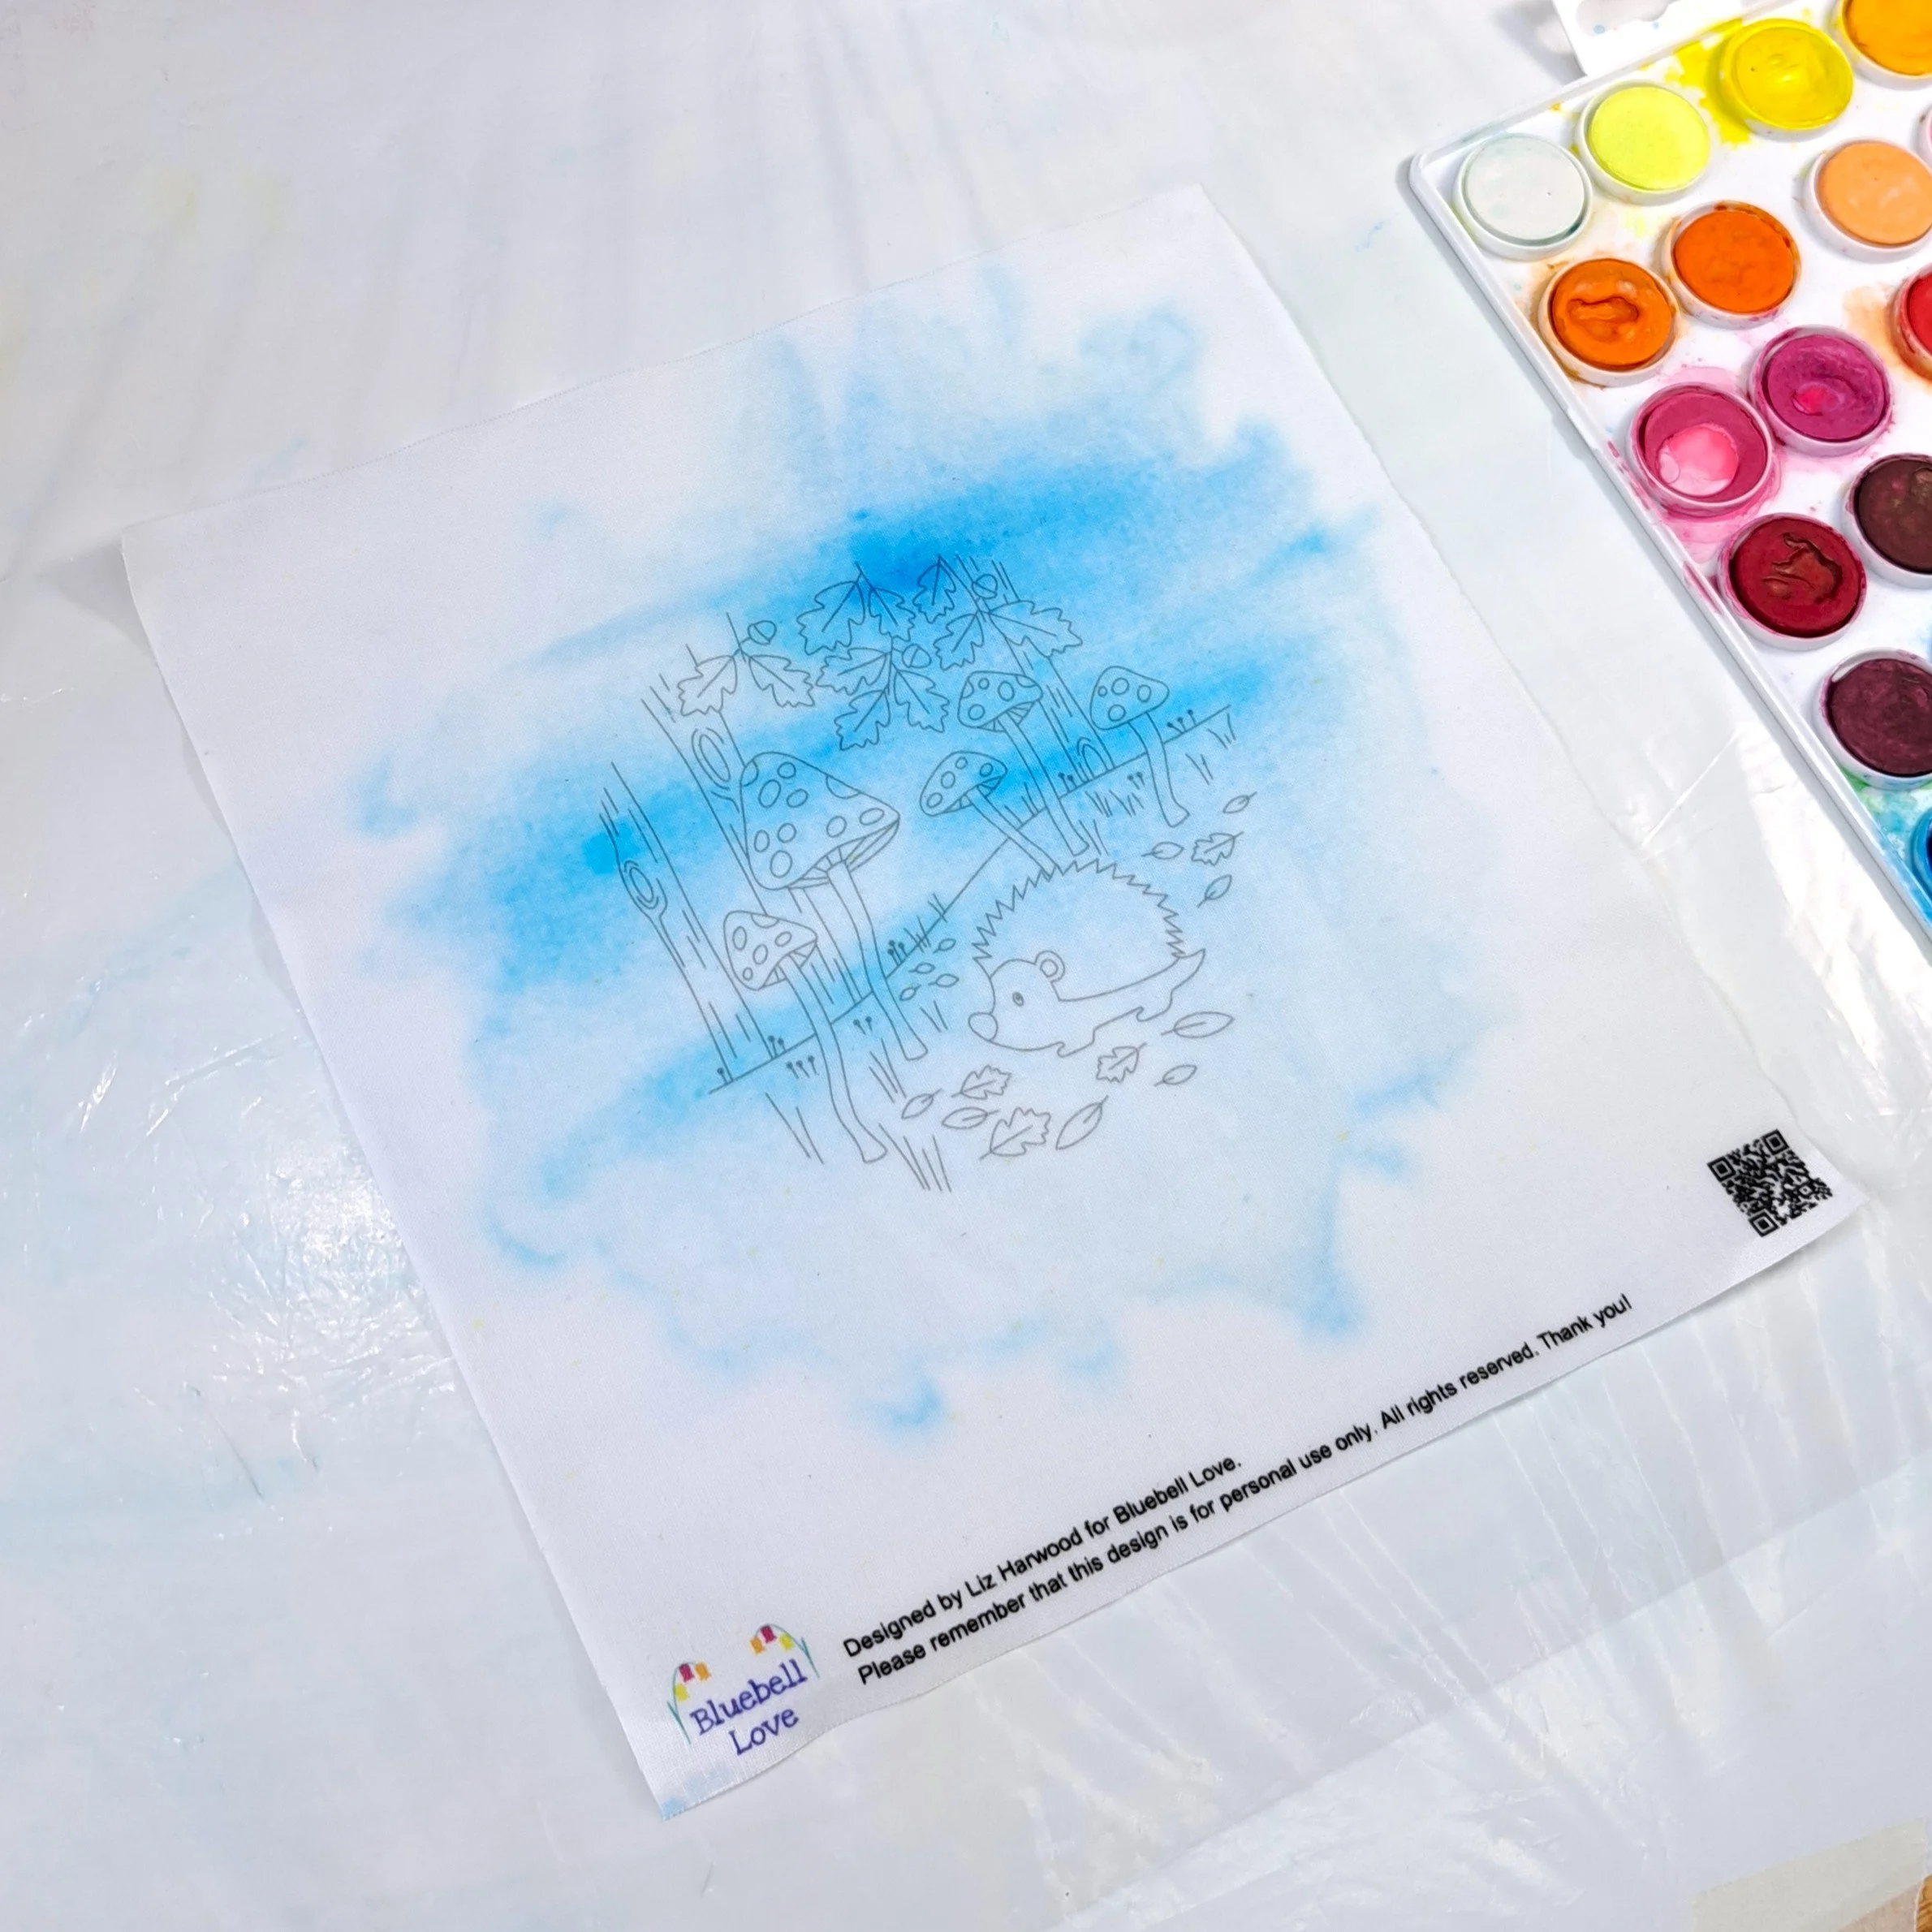
Don’t forget you can really have fun and play with different effects to make your panel your own. I just used blues this time, but you could play with bands of colours - horizontal bands, circular blends, off-centre colour bursts, a few soft clouds, or even a leafy background. There are so many ways you can make it your own using this simple technique.
✨ A Little Tip:
Keep holding your hoop over the fabric as you go - it’s the easiest way to make sure you haven’t missed any edges. I’ve lost count of how many times I thought I was finished, only to spot a tiny white corner at the end!
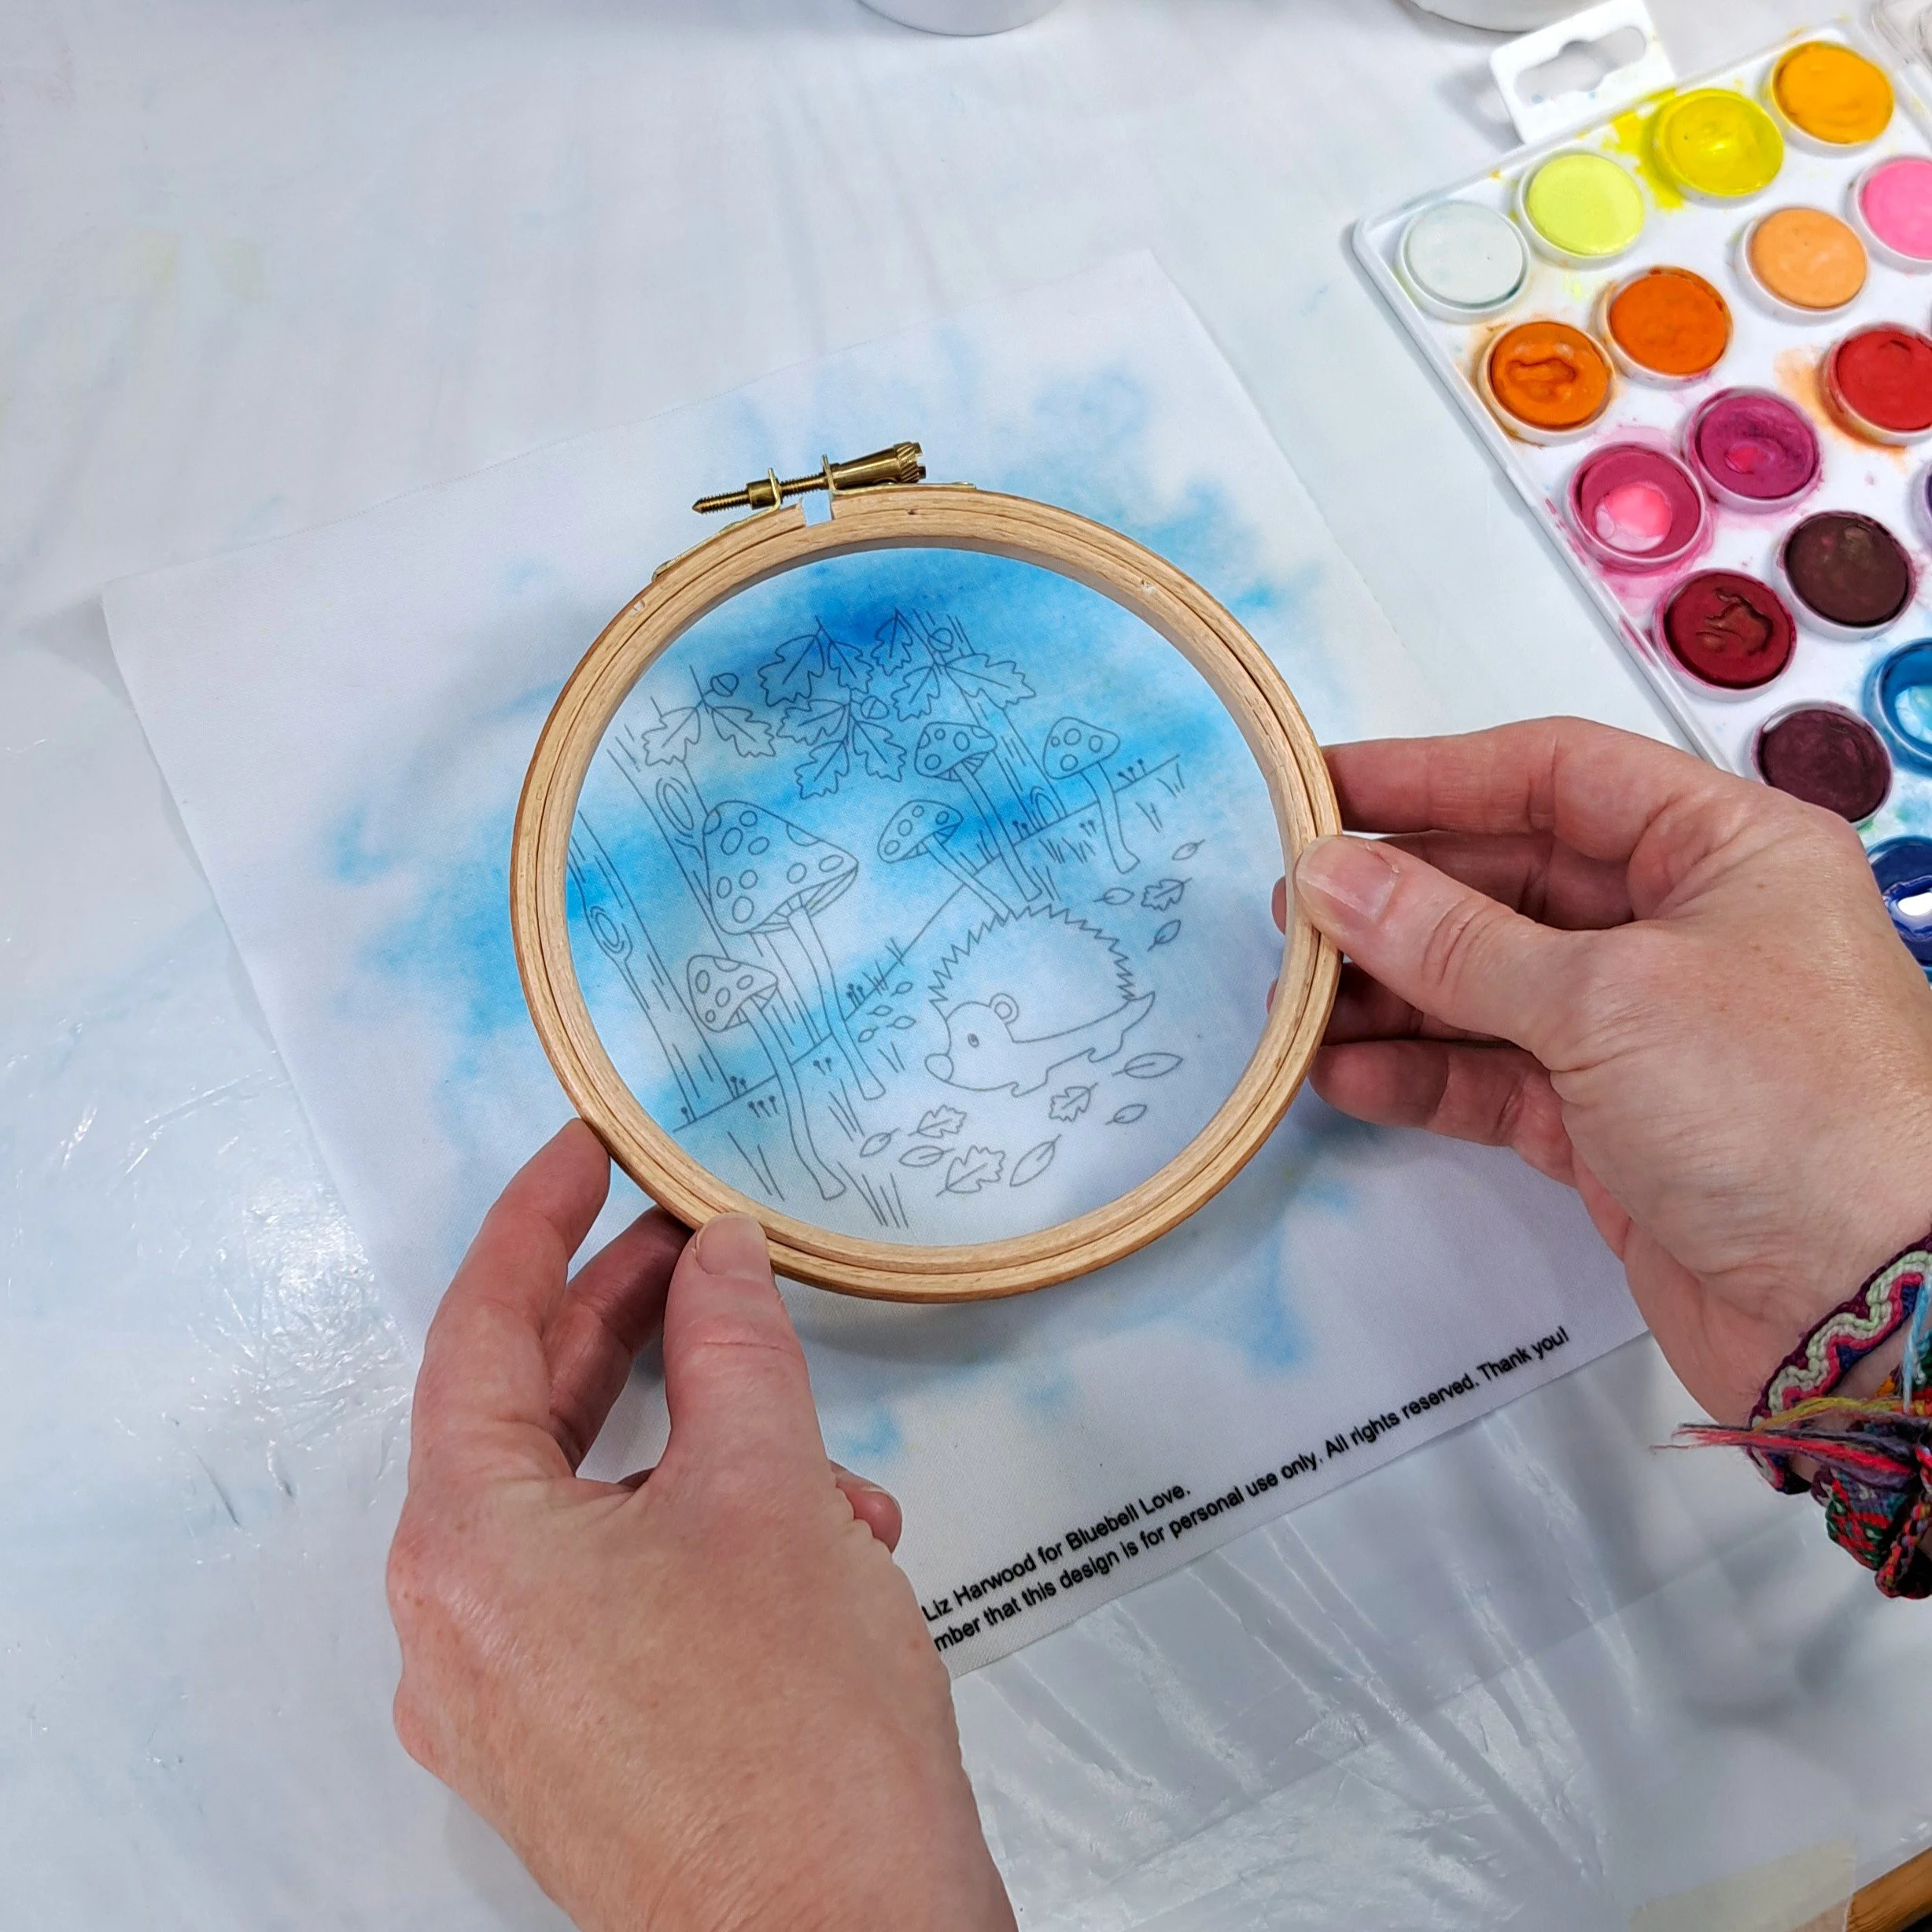
Drying the fabric
Once I was happy with the painting, I let it dry completely. I’m not very patient, so I used a hairdryer 😅 Just make sure you keep the panel flat while it dries - if you hang it up while it’s still damp, the paint might run.
And don’t forget to wipe any paint puddles from your plastic sheet underneath before moving your fabric - it’s amazing how sneaky those can be!
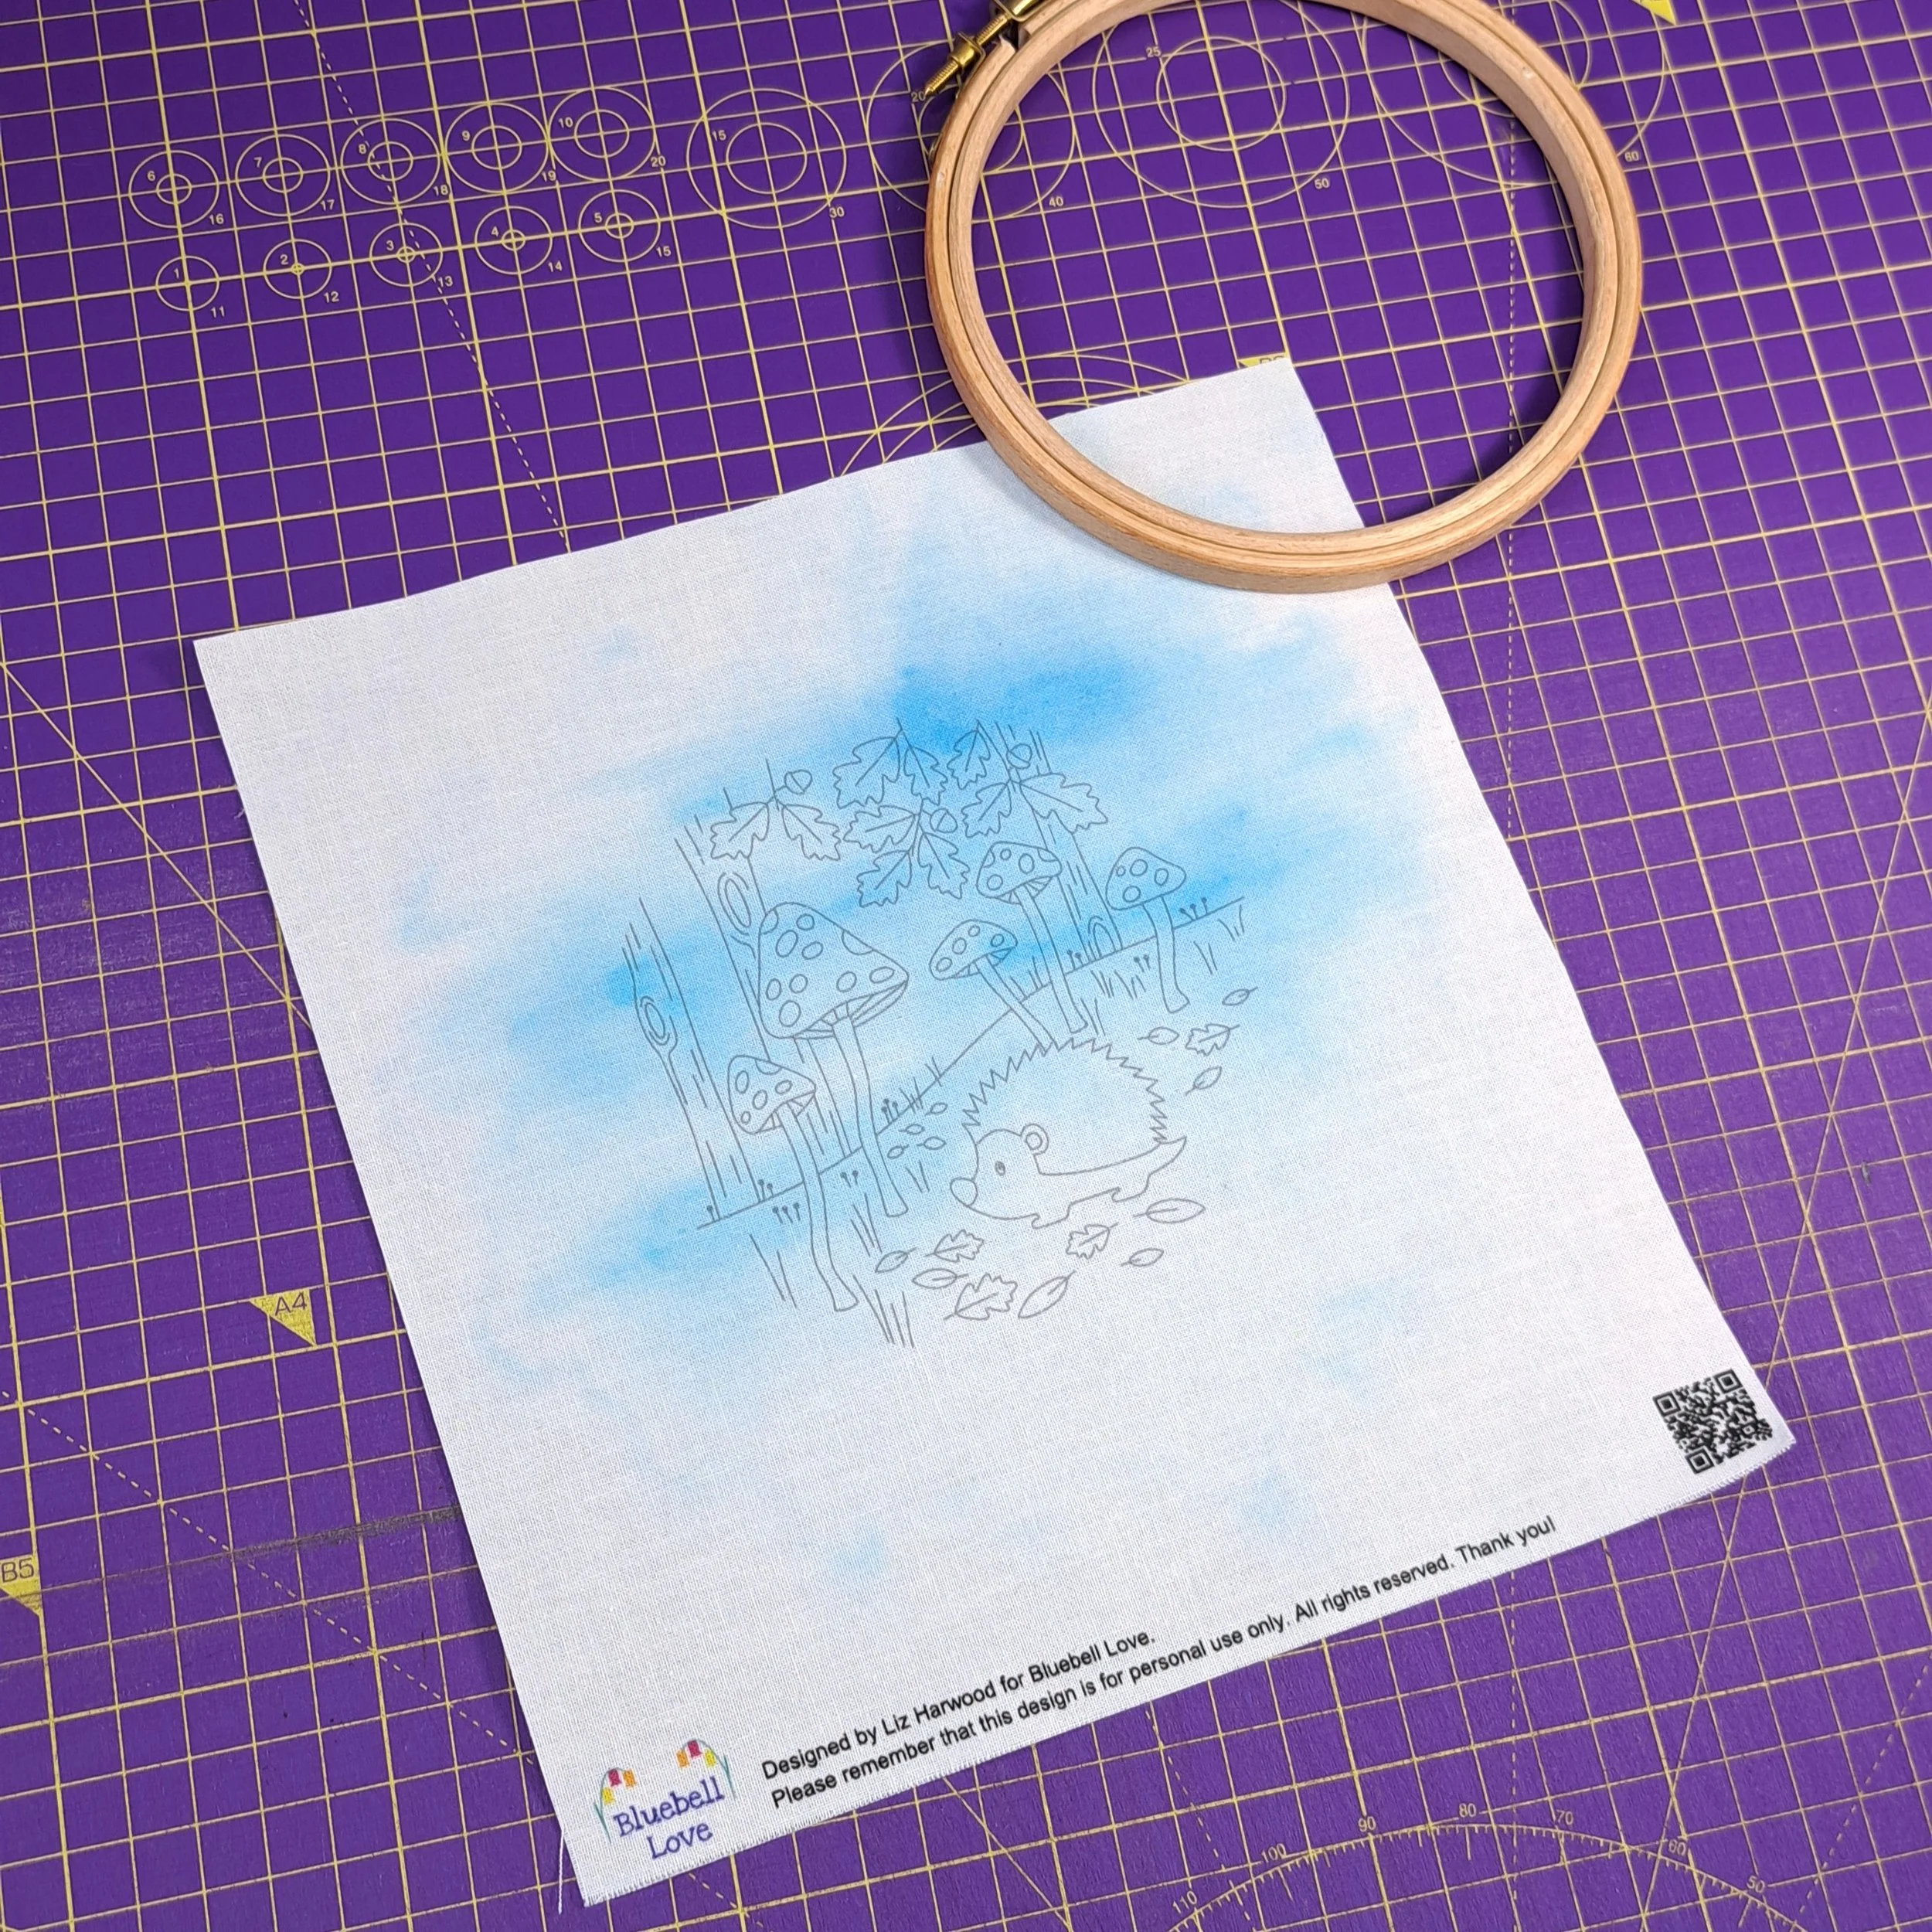
Give it a little Iron
Once everything was dry, I gave the panel a quick press with the iron (no steam!). I find it softens the paint slightly and makes stitching that little bit easier. Just remember - water will wash the paint out, so definitely no steam here!
3. Expanding the Design to Meet the Edge of the 5” Hoop
I decided that because I only watercolour painted the sky, it would look super neat if my stitched grass and tree trunks go right to the edge of the 5” hoop (with no fabric border). So I’m doing all of my stitching in a larger 6” hoop. This does mean that I need to draw on a ‘stitching edge’ line and expand the design a little.
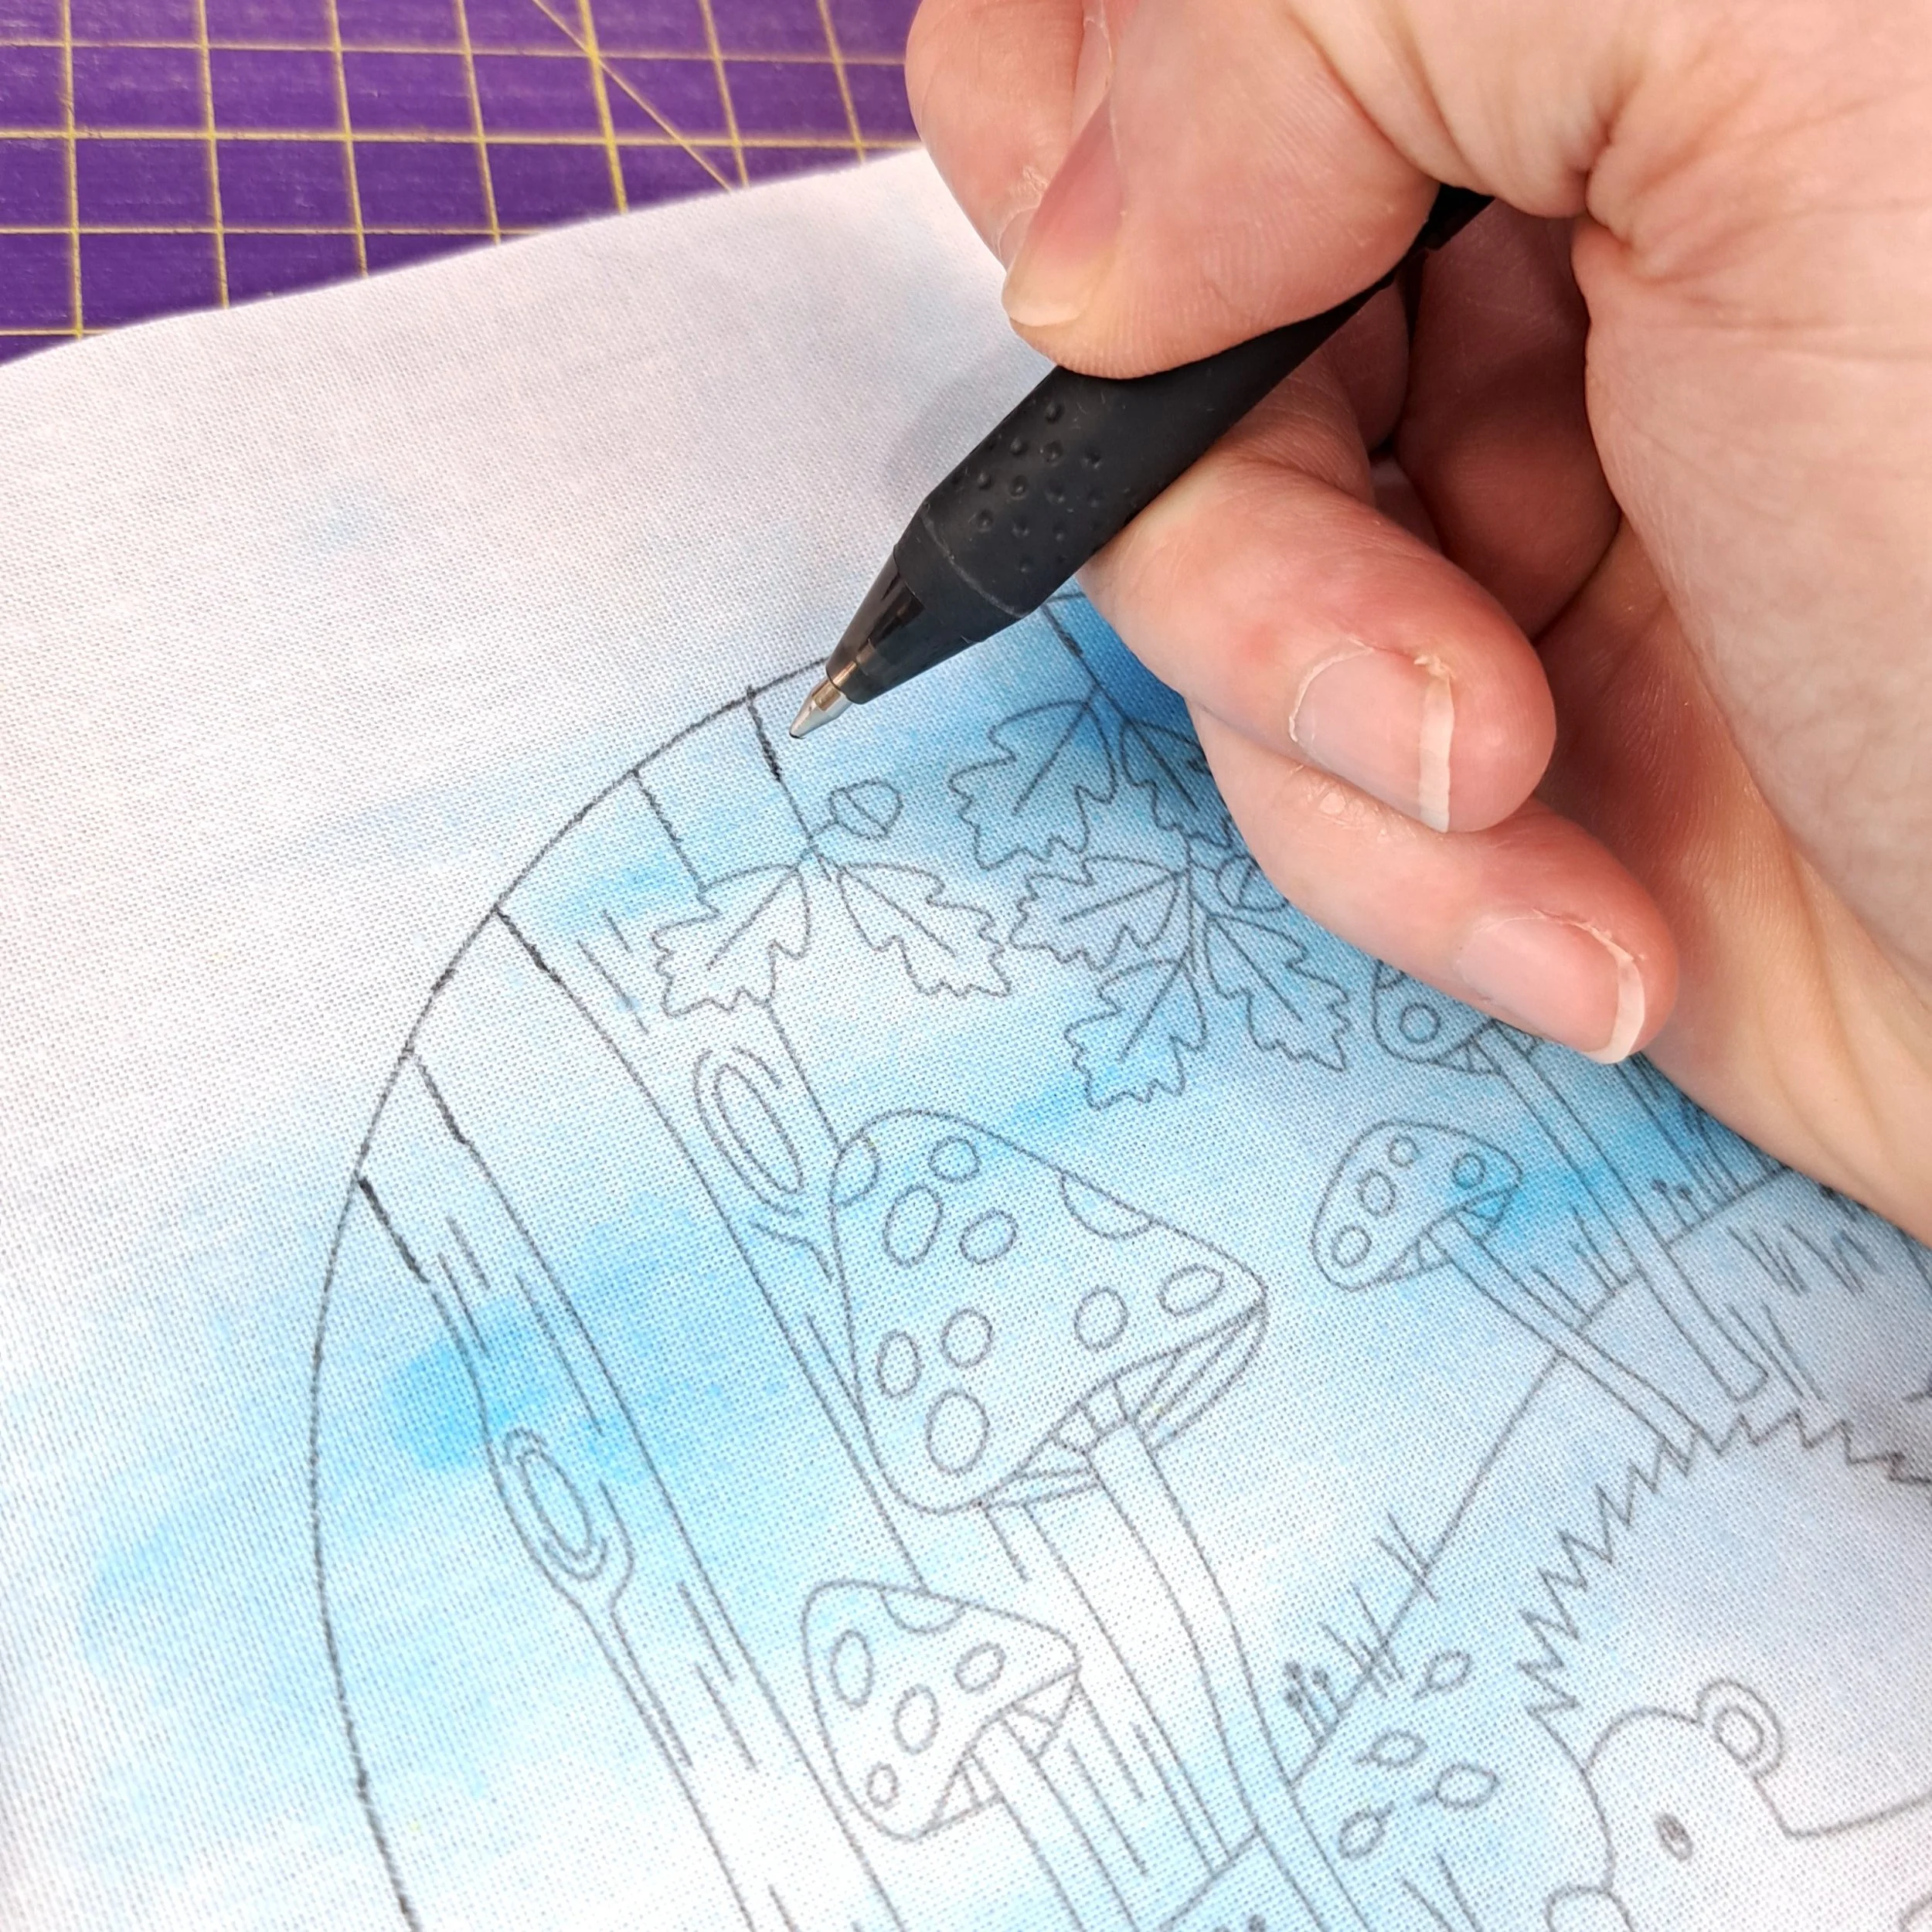
I start by placing the inner hoop of the 5” embroidery hoop on top of the panel, and line up the design inside. Then I draw around the outside edge of that inner hoop using a heat erasable fabric pen. This circle is the ‘stitching edge’ that I’ll want all my stitched areas to meet.
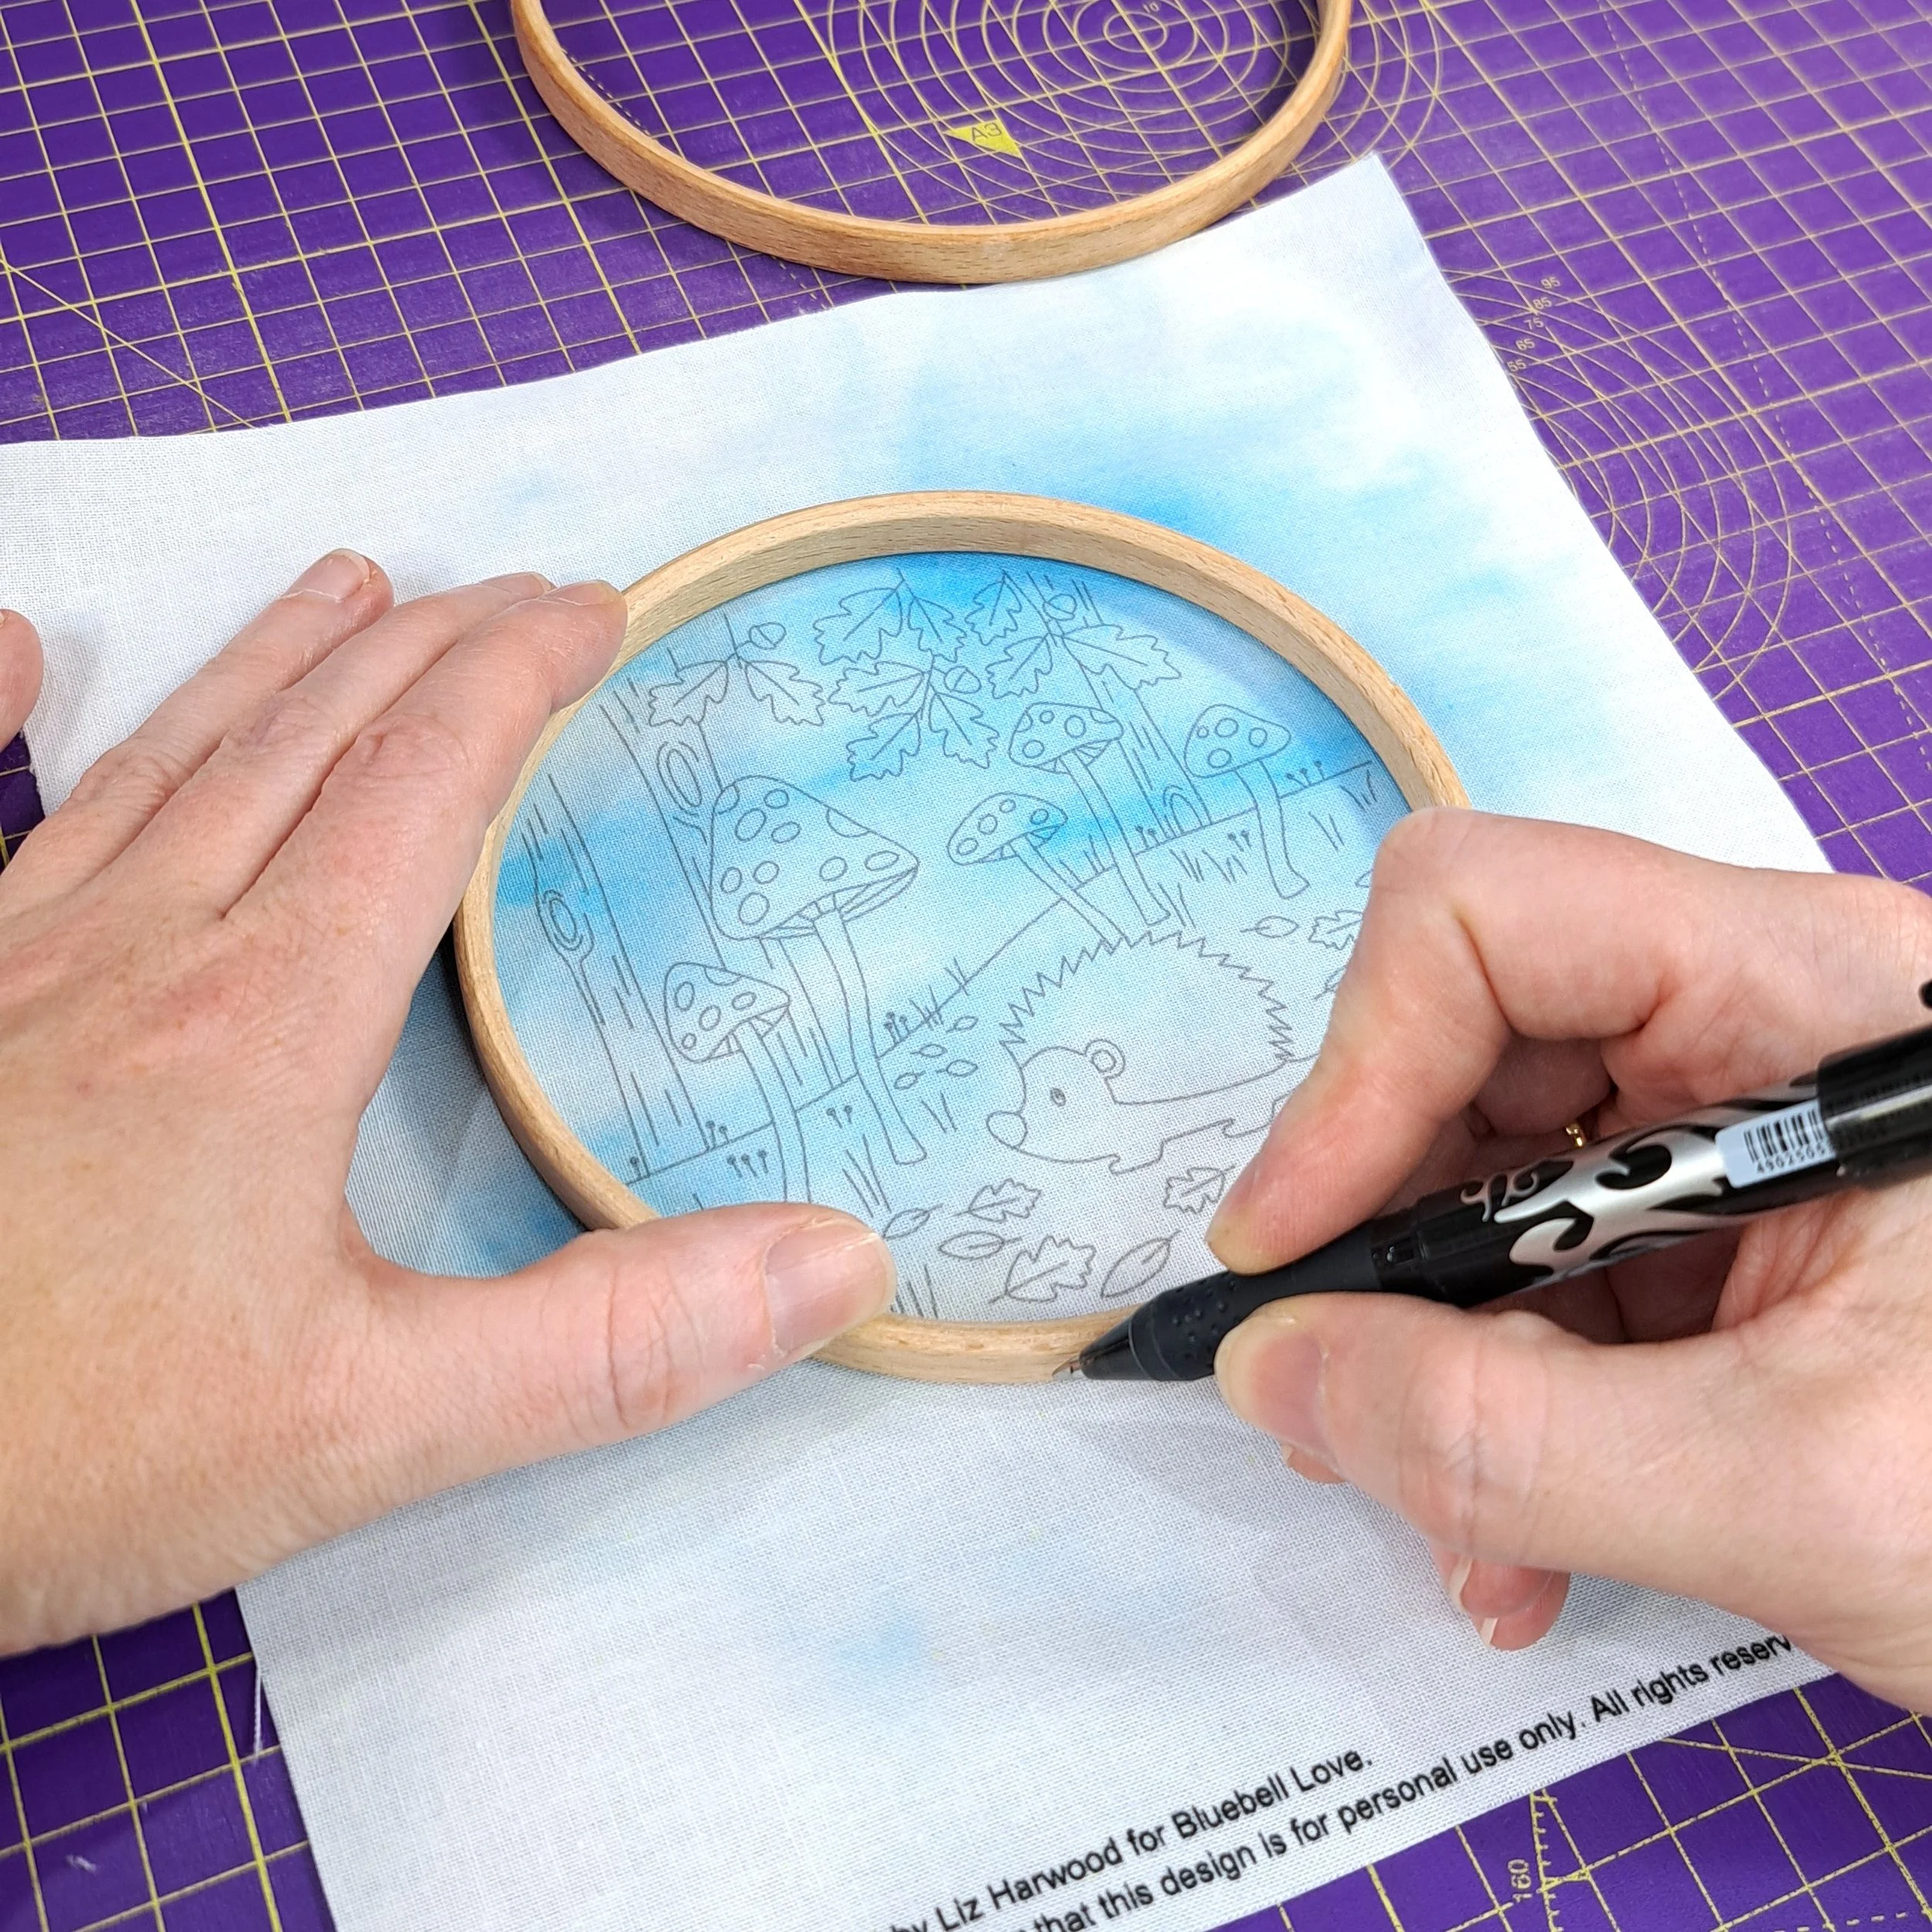
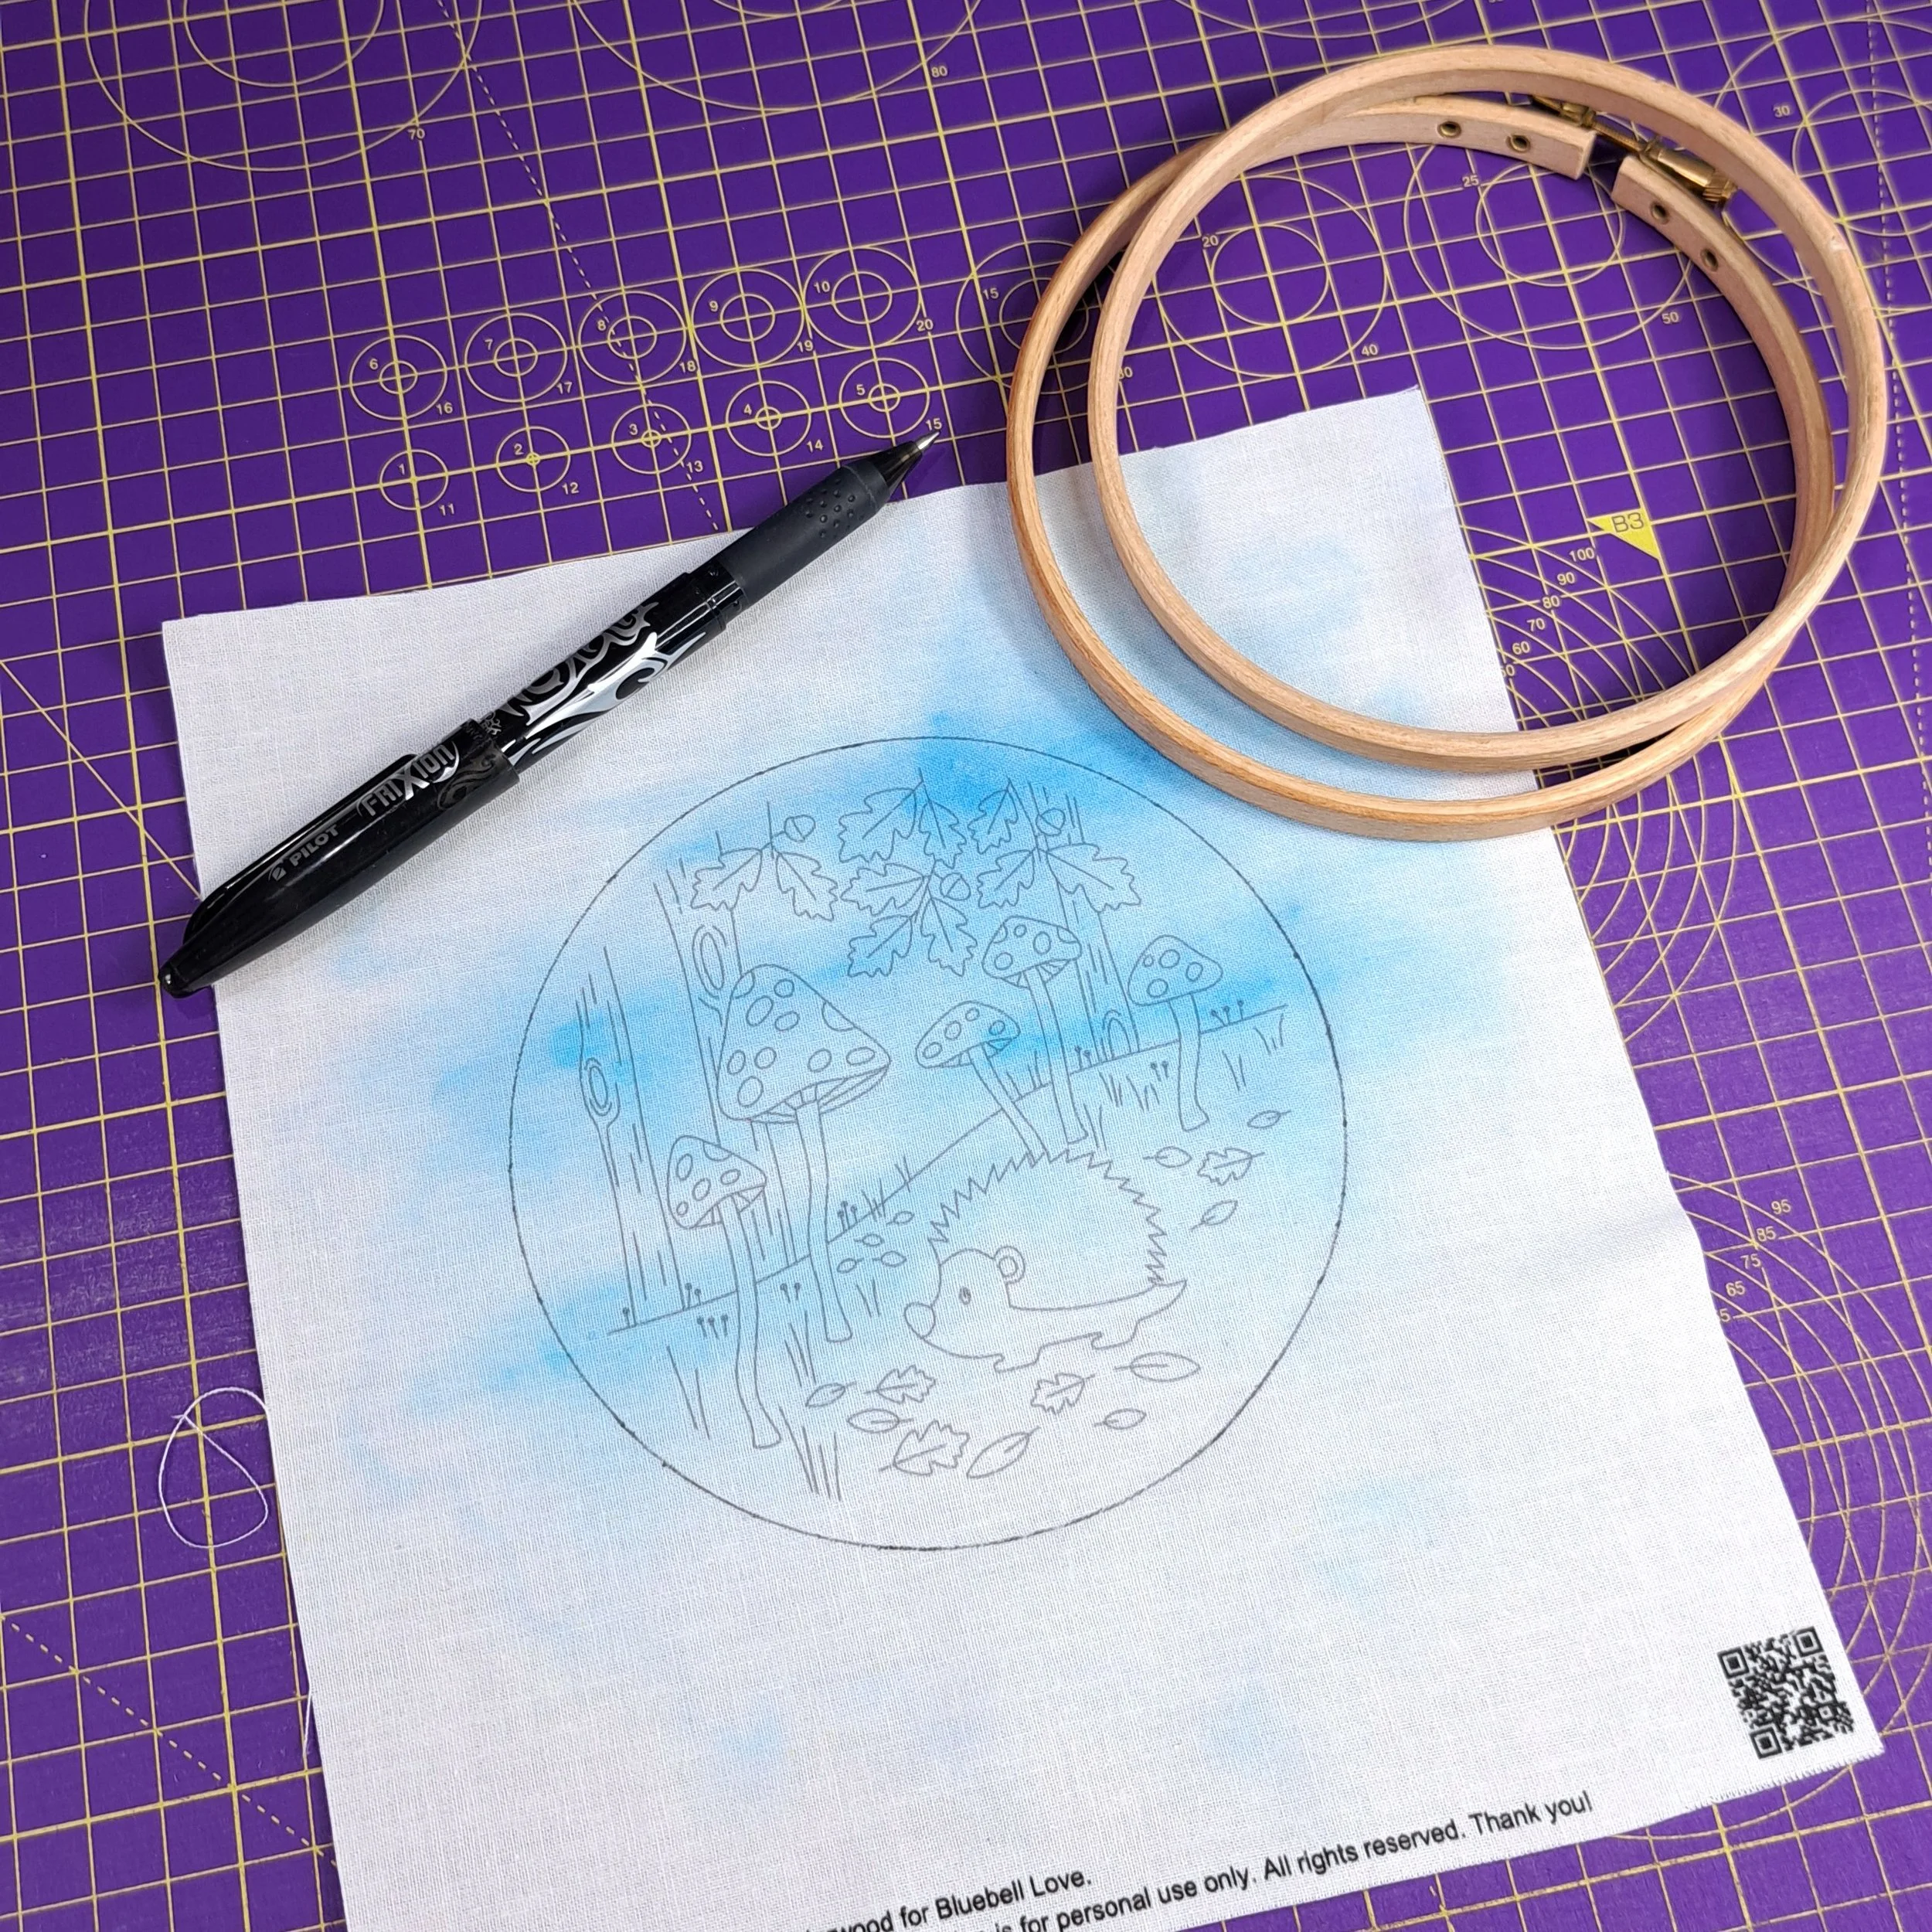
Then I extended a few bits of the design to meet the ‘stitching edge’ – the trees, the horizon line and a few grasses. I didn’t seem to do the neatest job here – I think I’m due a new pen 😄
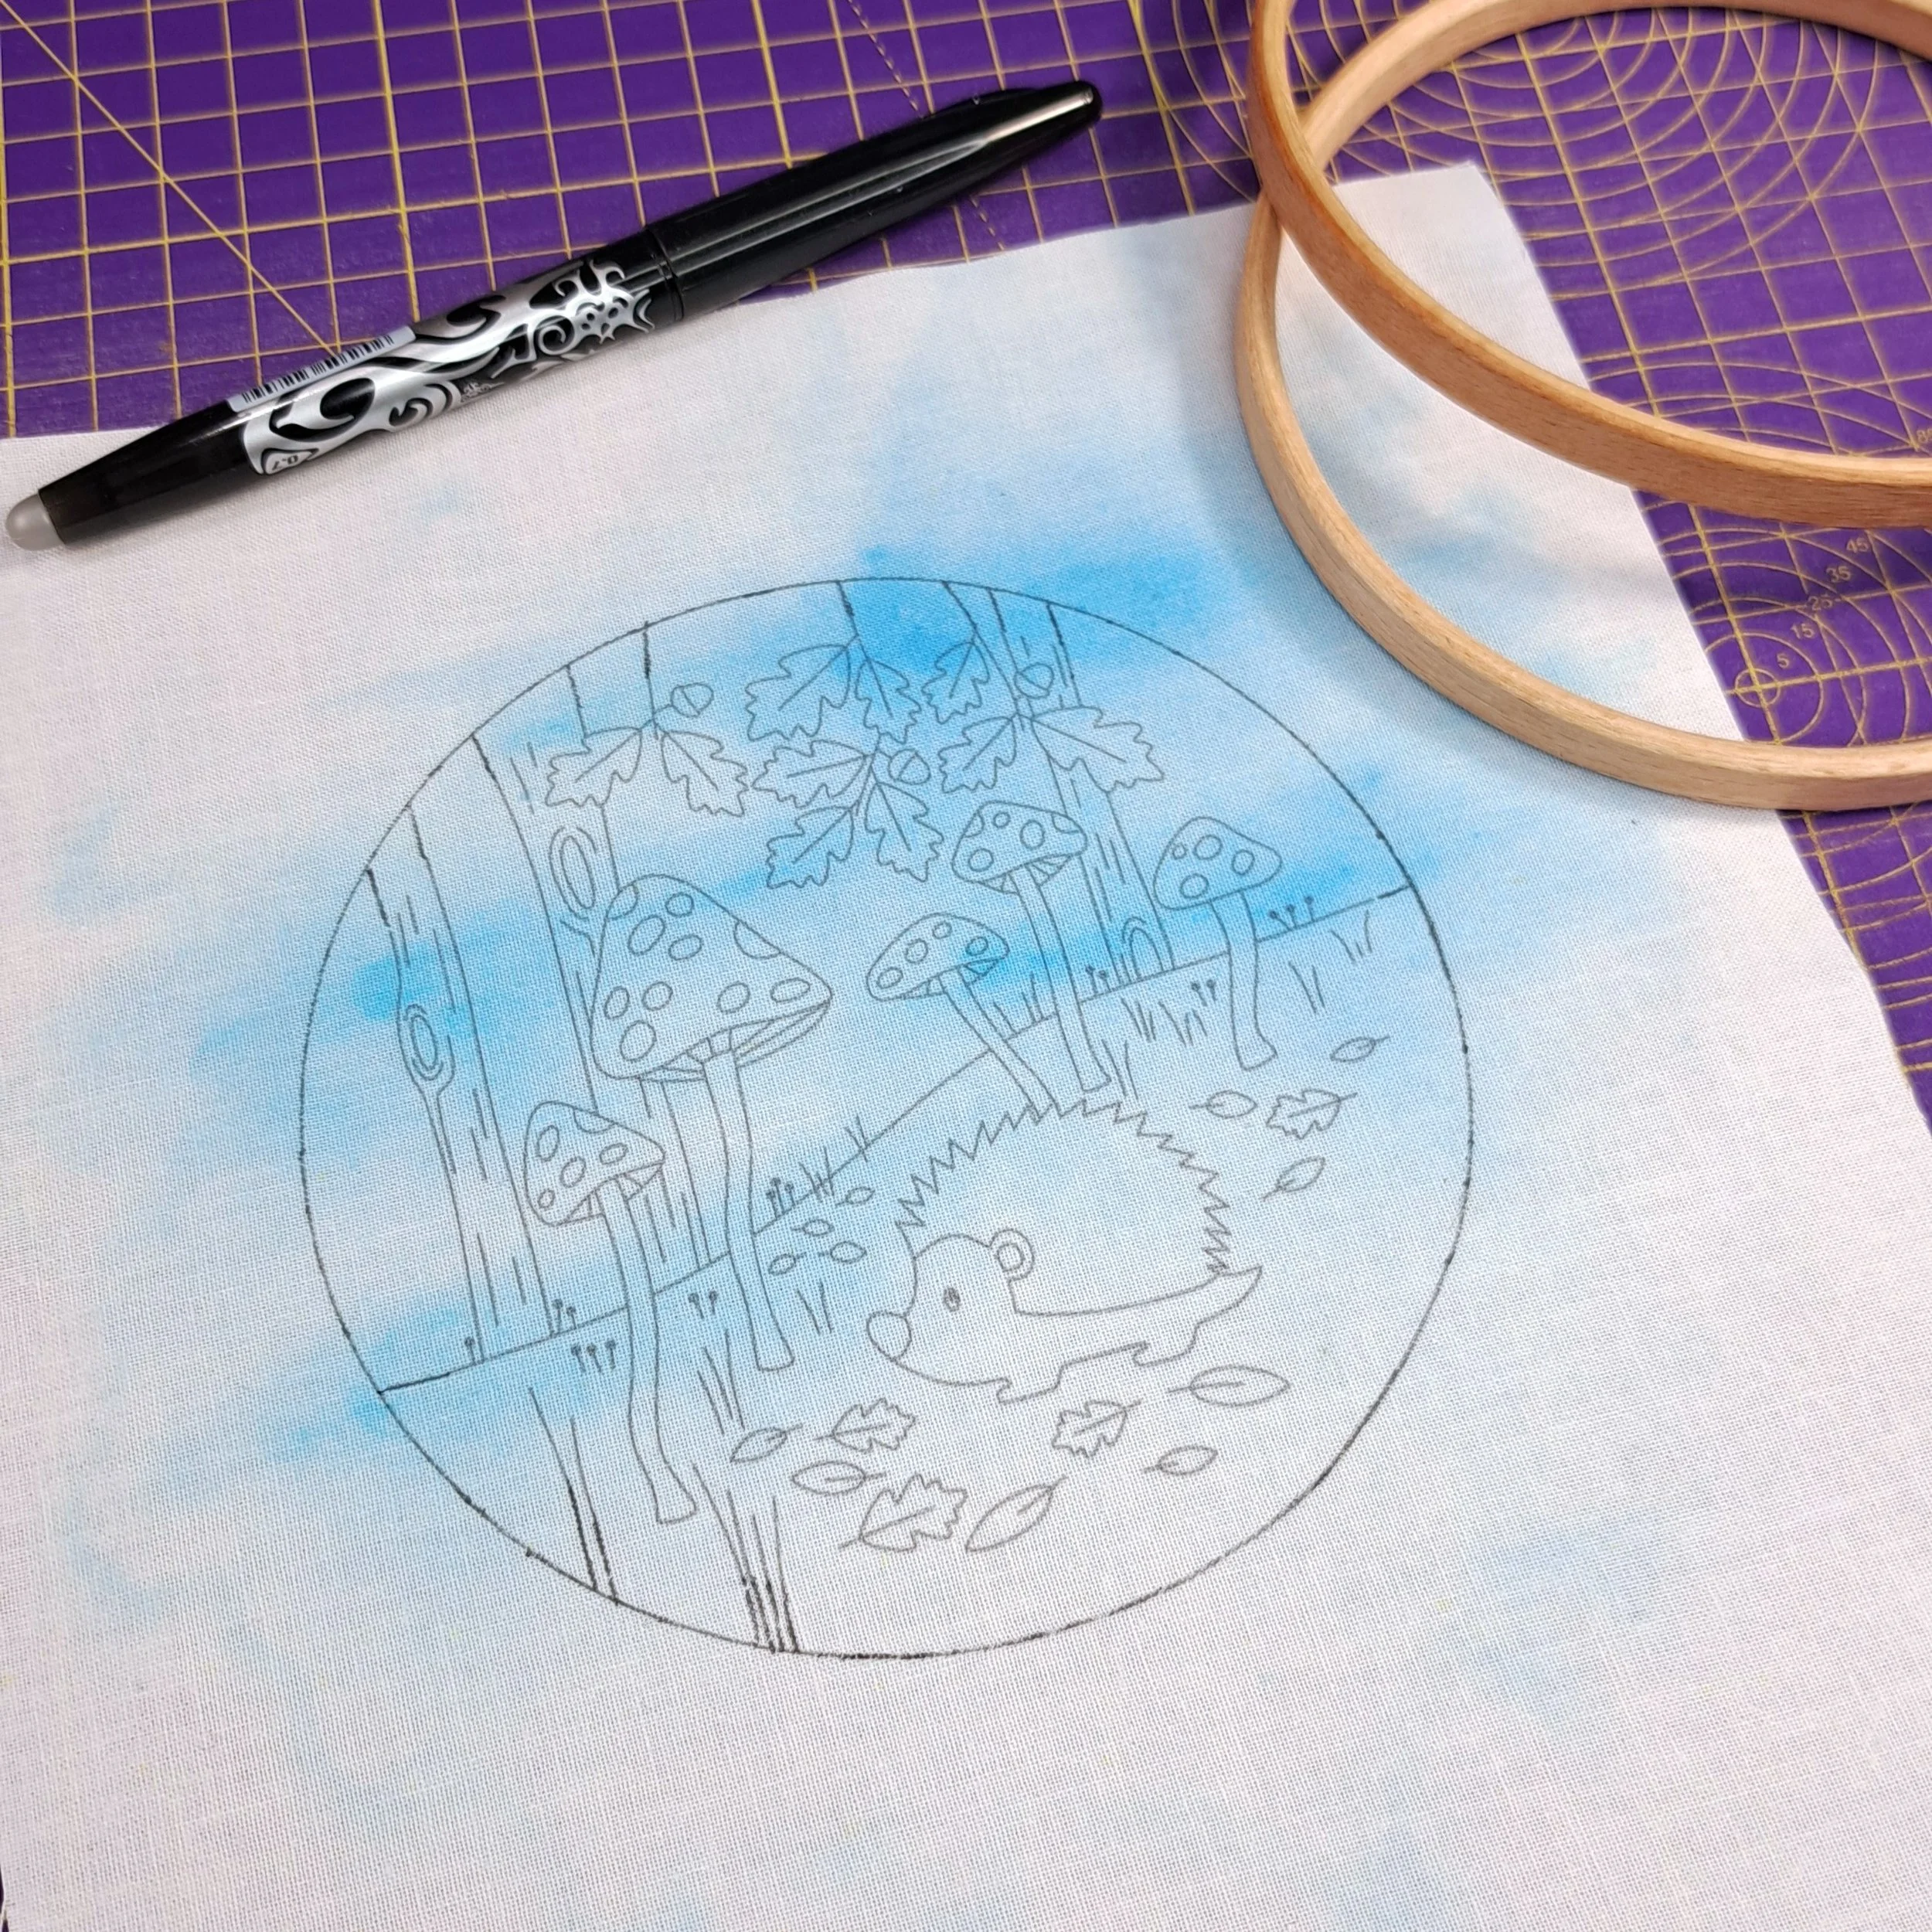
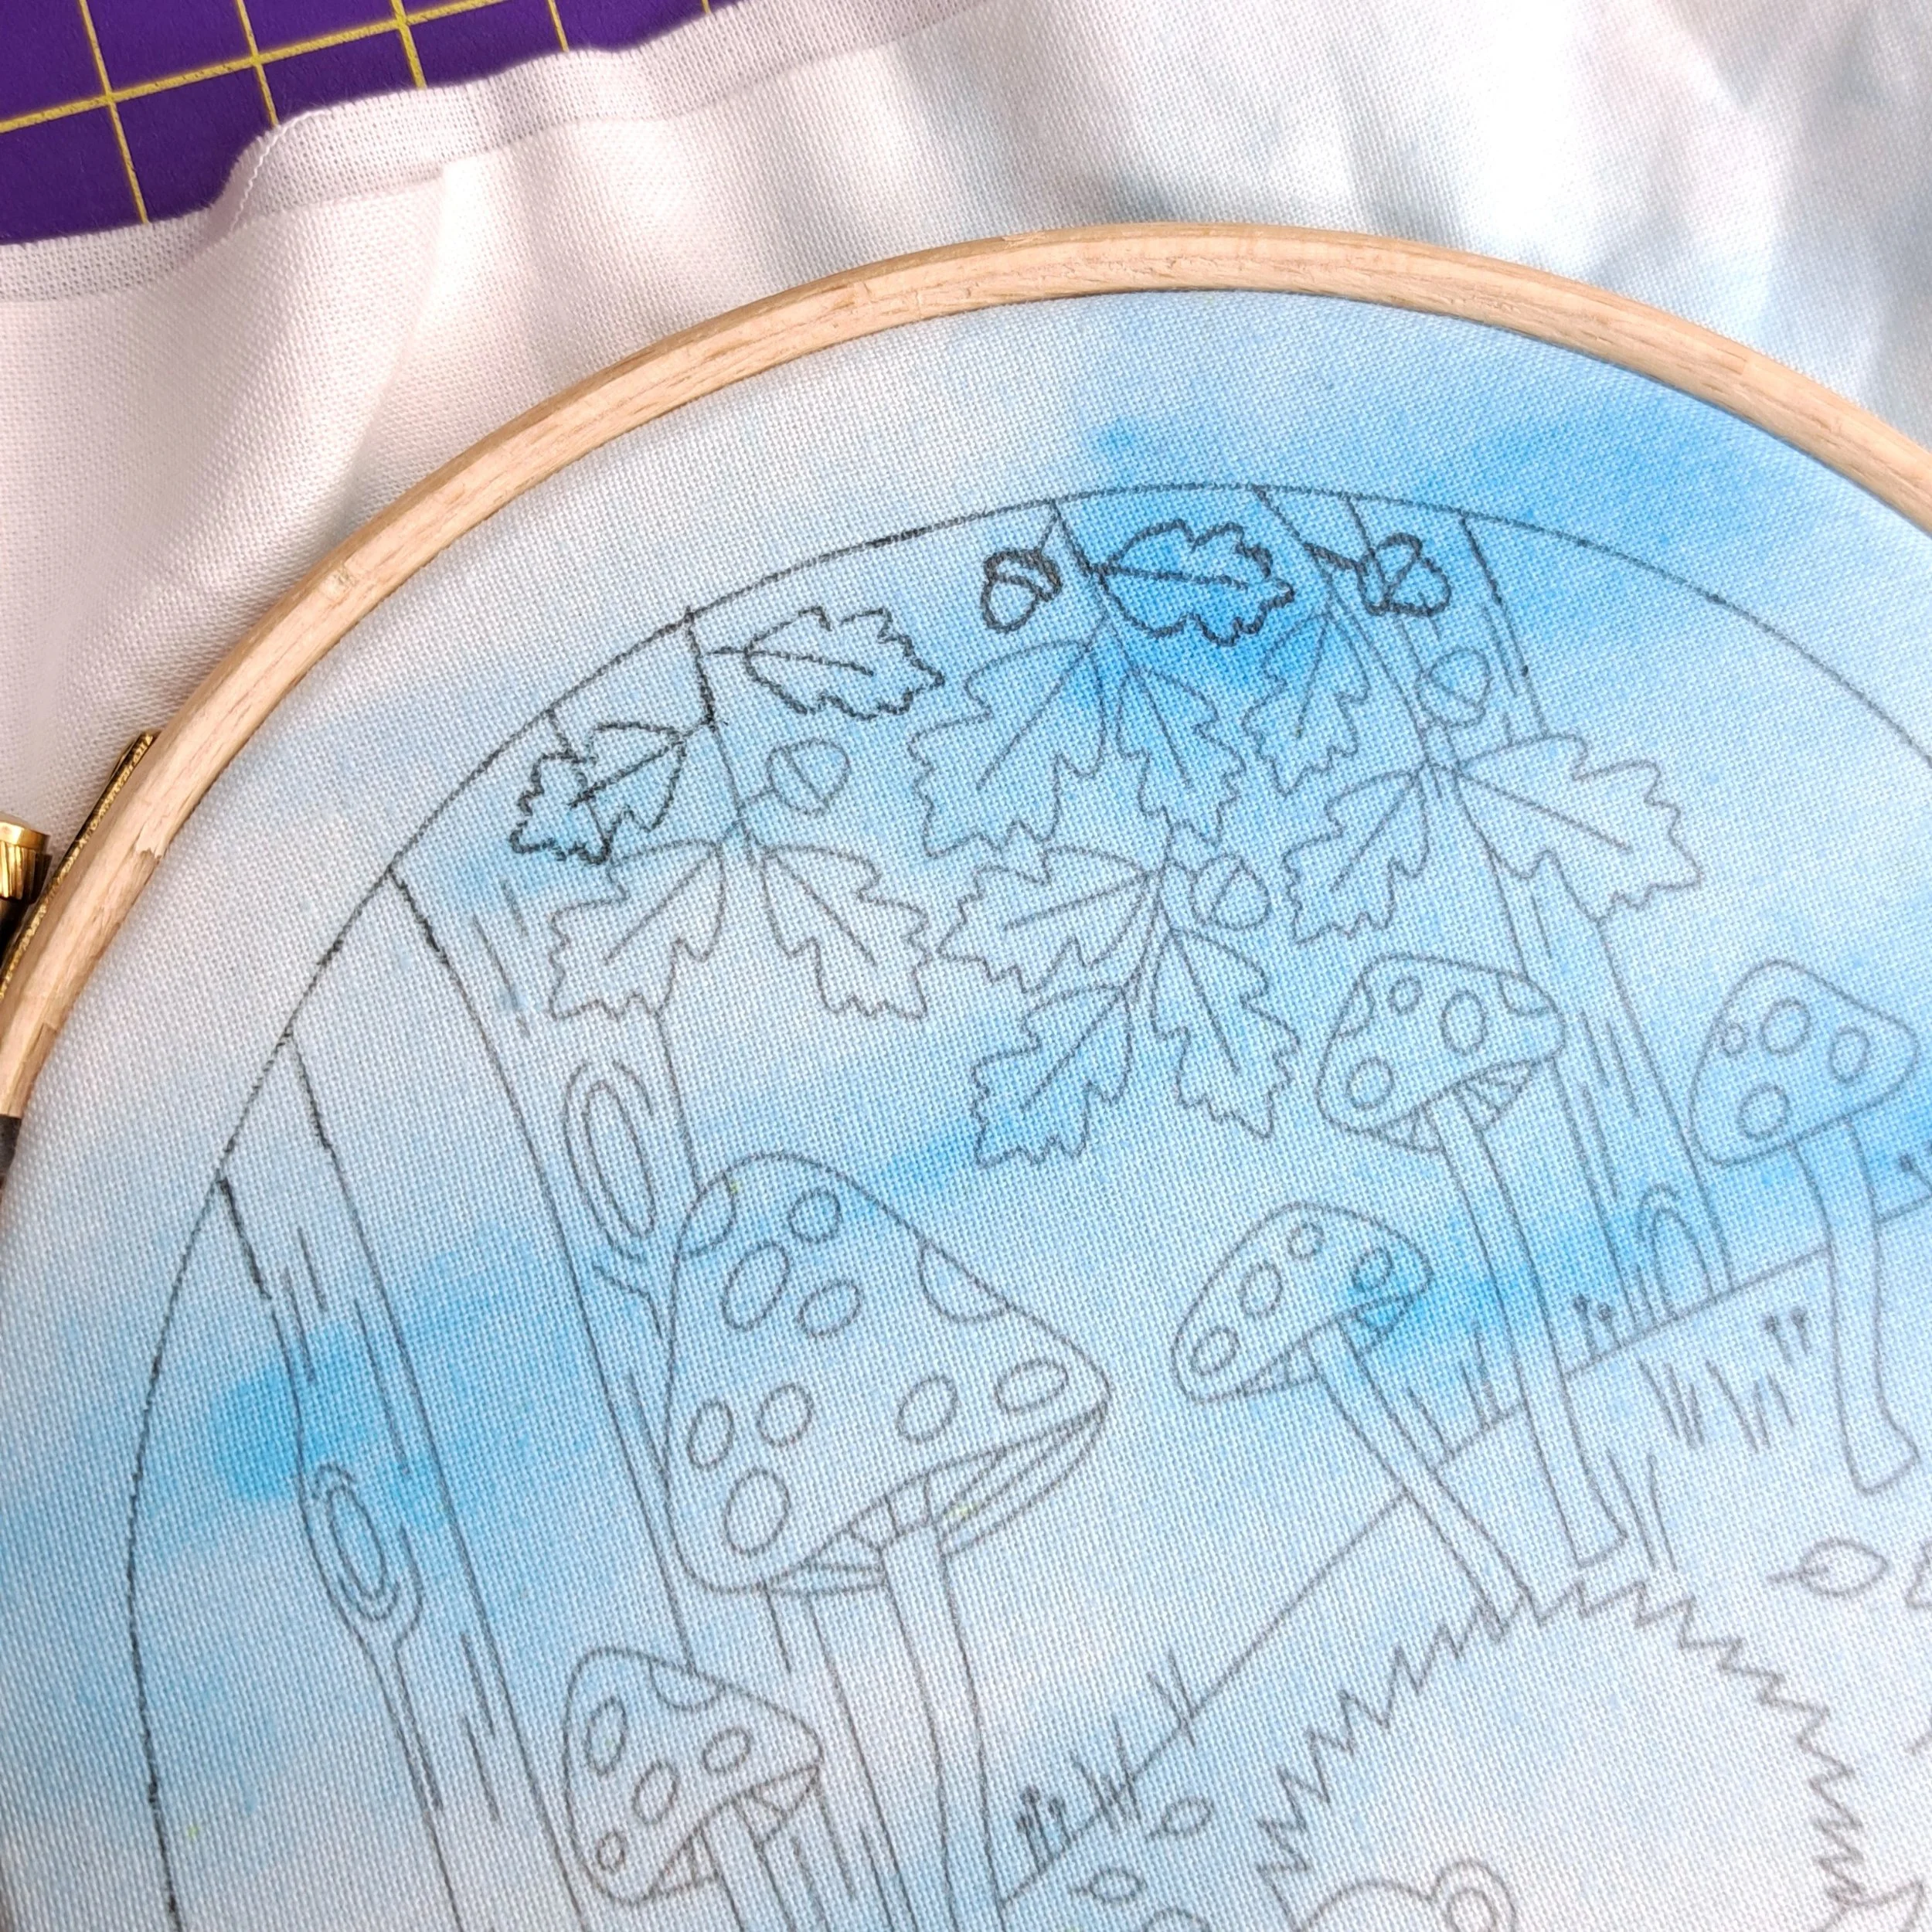
That evening when I sat down to start stitching, I realised the top looked a little strange to me. It was just missing a few leaves and acorns at the top from where I extended the design. So, I decided to draw a few extra in. I freehand drew mine (which is why they’re a bit skew whiff) but you could trace elements of the panel onto paper, then tape the paper to the back of the fabric and retrace onto the fabric if you weren’t confident to freehand.
4. Pop the Panel Into the 6” Hoop
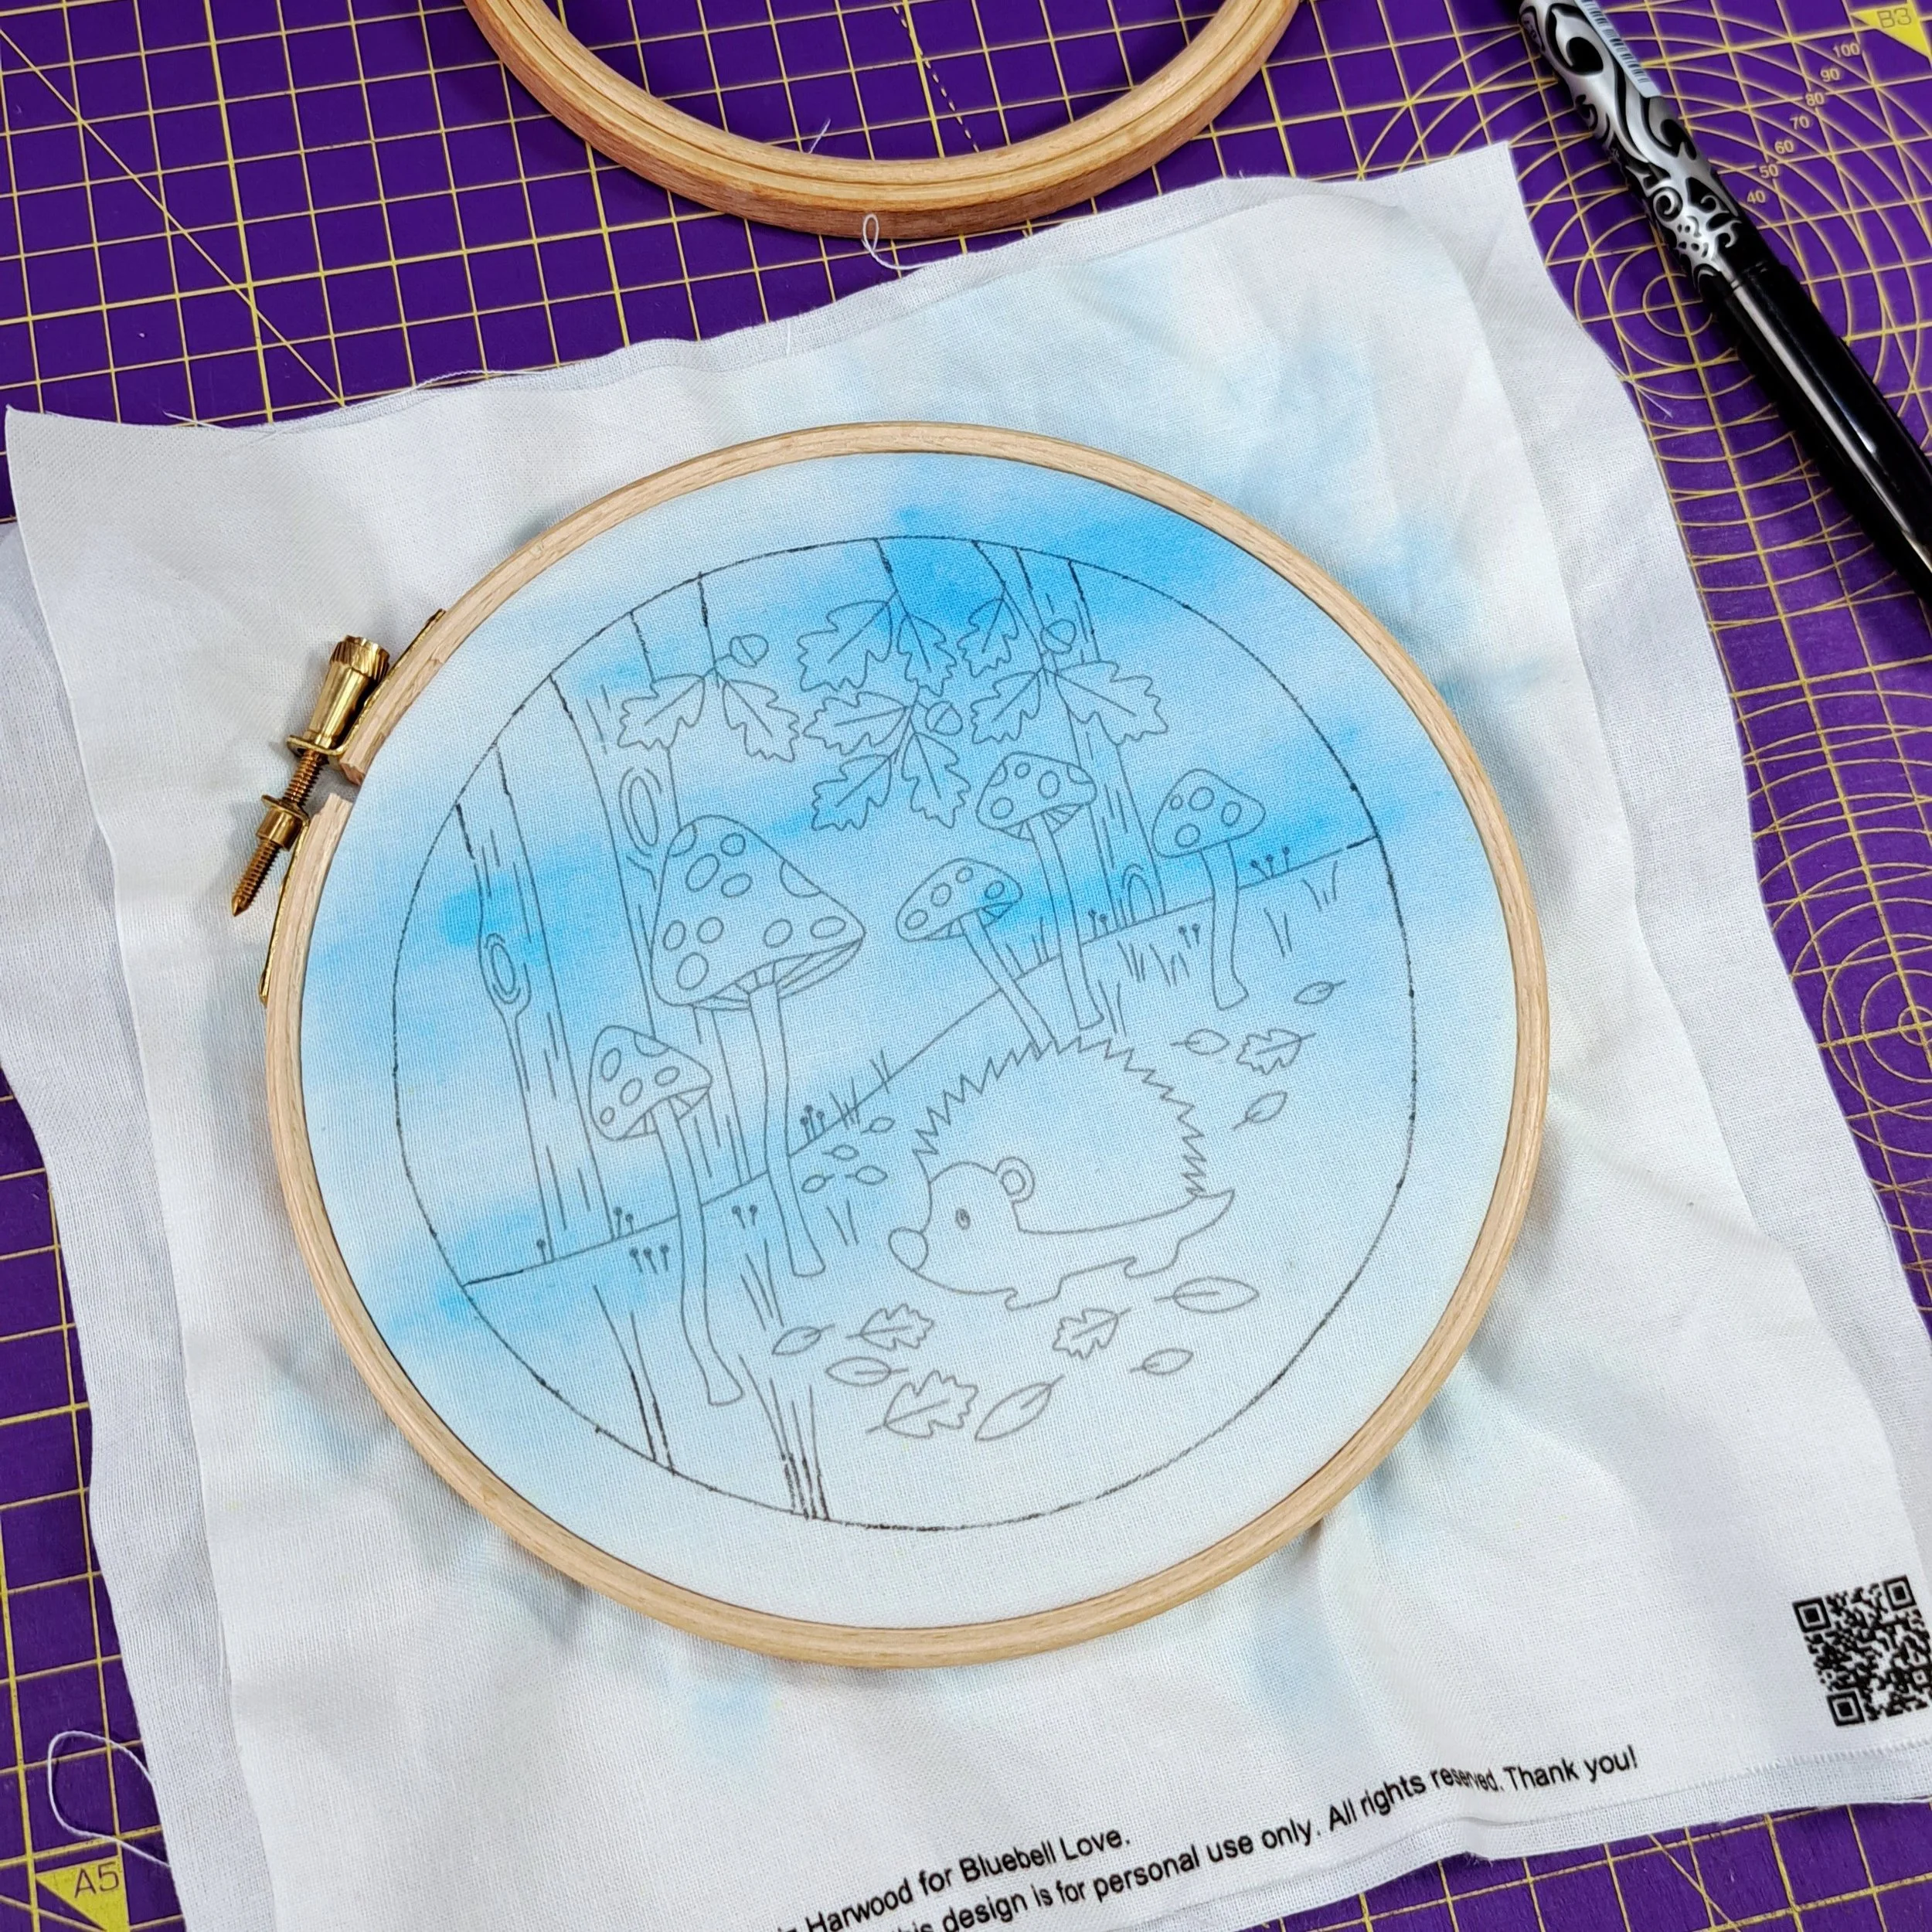
Now its time to pop the panel (with that extra backing fabric) into the 6” hoop ready for stitching. I always aim for a satisfying drum-like tension - it helps keep stitches neat and stops the fabric puckering.
How to Get That Drum Tension:
Lay the fabric (the panel on top with the extra fabric underneath) over the inner hoop, then press the outer hoop down on top.
Gently pull the edges of the fabric outside the hoop to smooth out any wrinkles or bumps.
Tighten the screw mechanism until the hoop feels secure.
Give the fabric around the edges one final little tug to tighten it up even more.
Your fabric should now feel tight like a drum - perfect and ready for stitching!
💡 Tip: Tension can loosen as you stitch. If that happens, pause and tighten the hoop again before carrying on
5. The Stitches
For this hedgehog panel I used:
Satin Stitch
Couch Stitch
Stem Stitch
Leaf Stitch
French Knots
You absolutely don’t need to use all (or any!) of these. I love mixing stitches to bring texture, but if there’s one you don’t enjoy… life’s too short to be stitching things we don’t love 💙
So feel free to swap in stitches you do love. Or, if you’re feeling adventurous, add a few extras! Most importantly - have fun with it. 😊
If you’d like a little extra help, check out my Stitch of the Week page - it’s my growing library of tutorial videos. Not every stitch may be up yet, but I add new ones regularly.
Lets start stitching!
5. Step-by-Step Stitching Guide
You can start stitching wherever you like - if a particular part makes you excited, just dive in! I usually recommend working from the back forwards, so that foreground elements sit neatly on top of the ones behind them. It’s not a hard rule, though.
Seeing as this design has a few overlapping bits, I’ll mostly follow that ‘starting at the back’ approach. But for some sections, I’ll find it easier to stitch the foreground element first, then tuck any stitches behind it to keep that overlaying appearance.
There are quite a few elements in this design, but don’t worry - I’ll walk you through how I stitched each one, step by step.
Okay, onto the stitching!
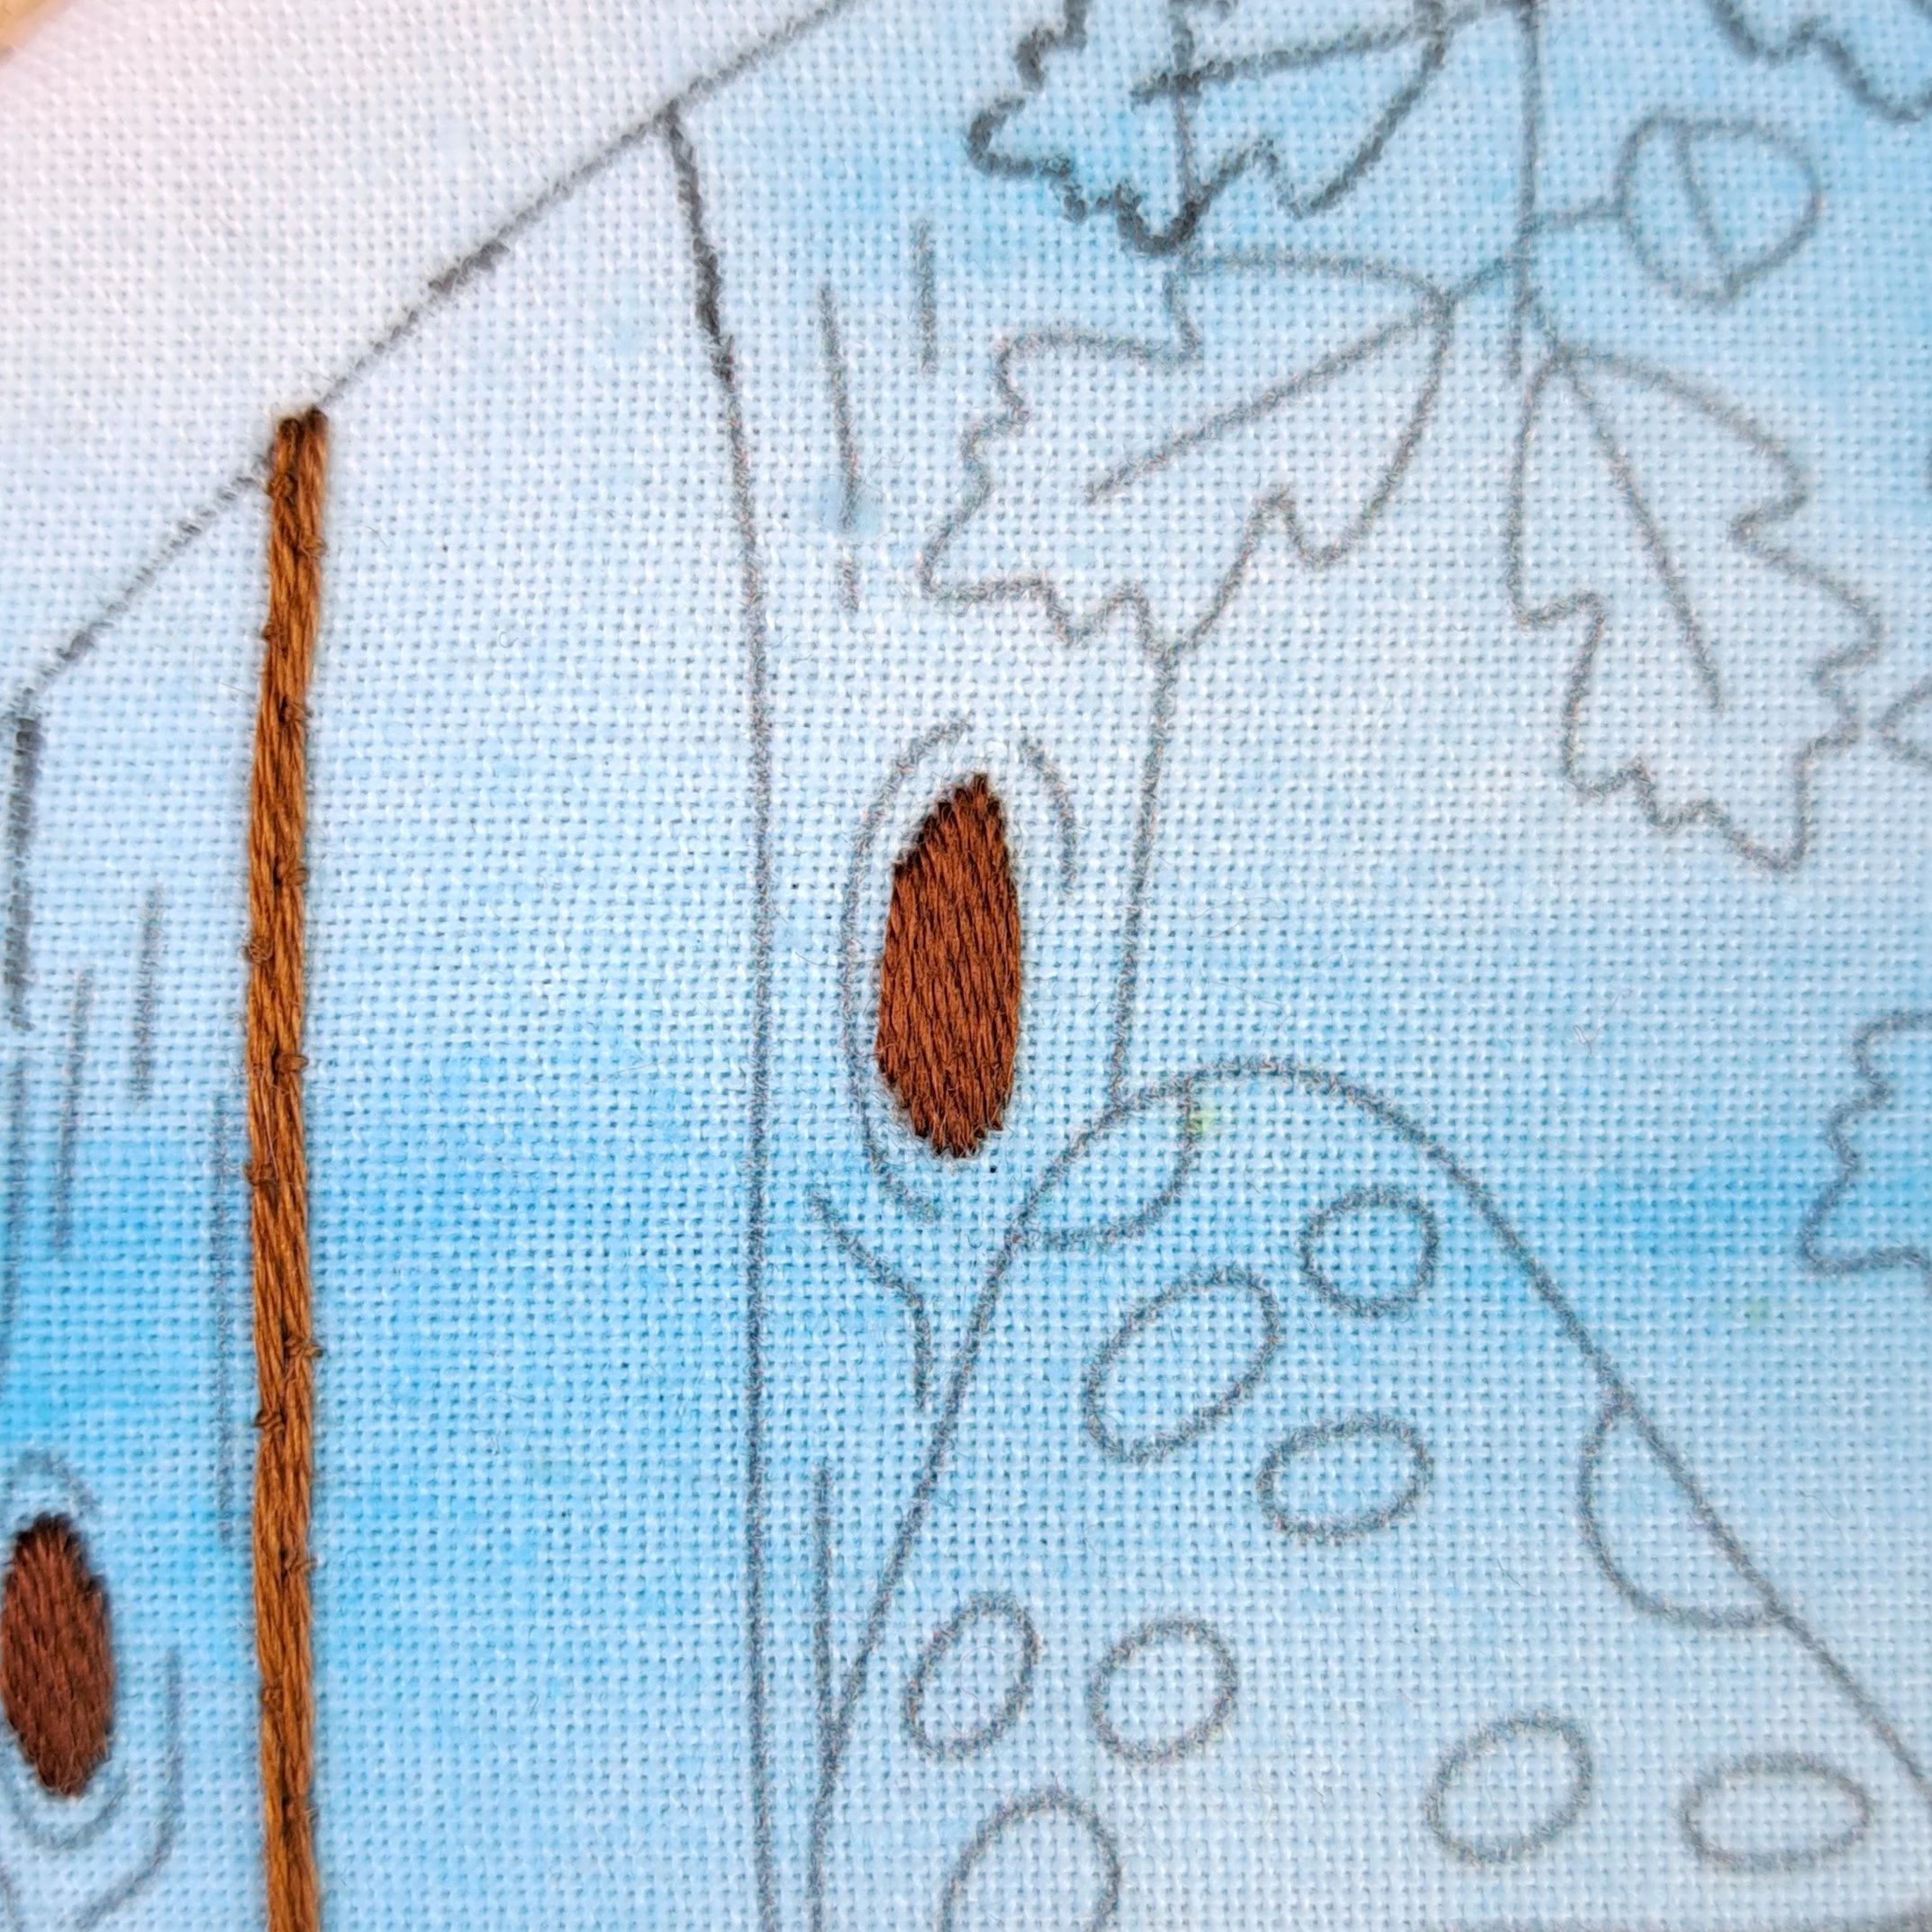
The Tree Trunk Knots
This seems like a bit of dull place to start! 😆 They’re nice little details though.
I filled each knot with vertical Satin Stitch using 1 strand of Anchor 358.
✨ A little tip:
I like to place my very first Satin Stitch right down the centre of the shape, then stitch outwards one side at a time. It really helps keep the stitches at a consistent angle.
Stitch - Satin Stitch
Thread colour - Anchor 358
Number of strands - 1
The Tree Trunks
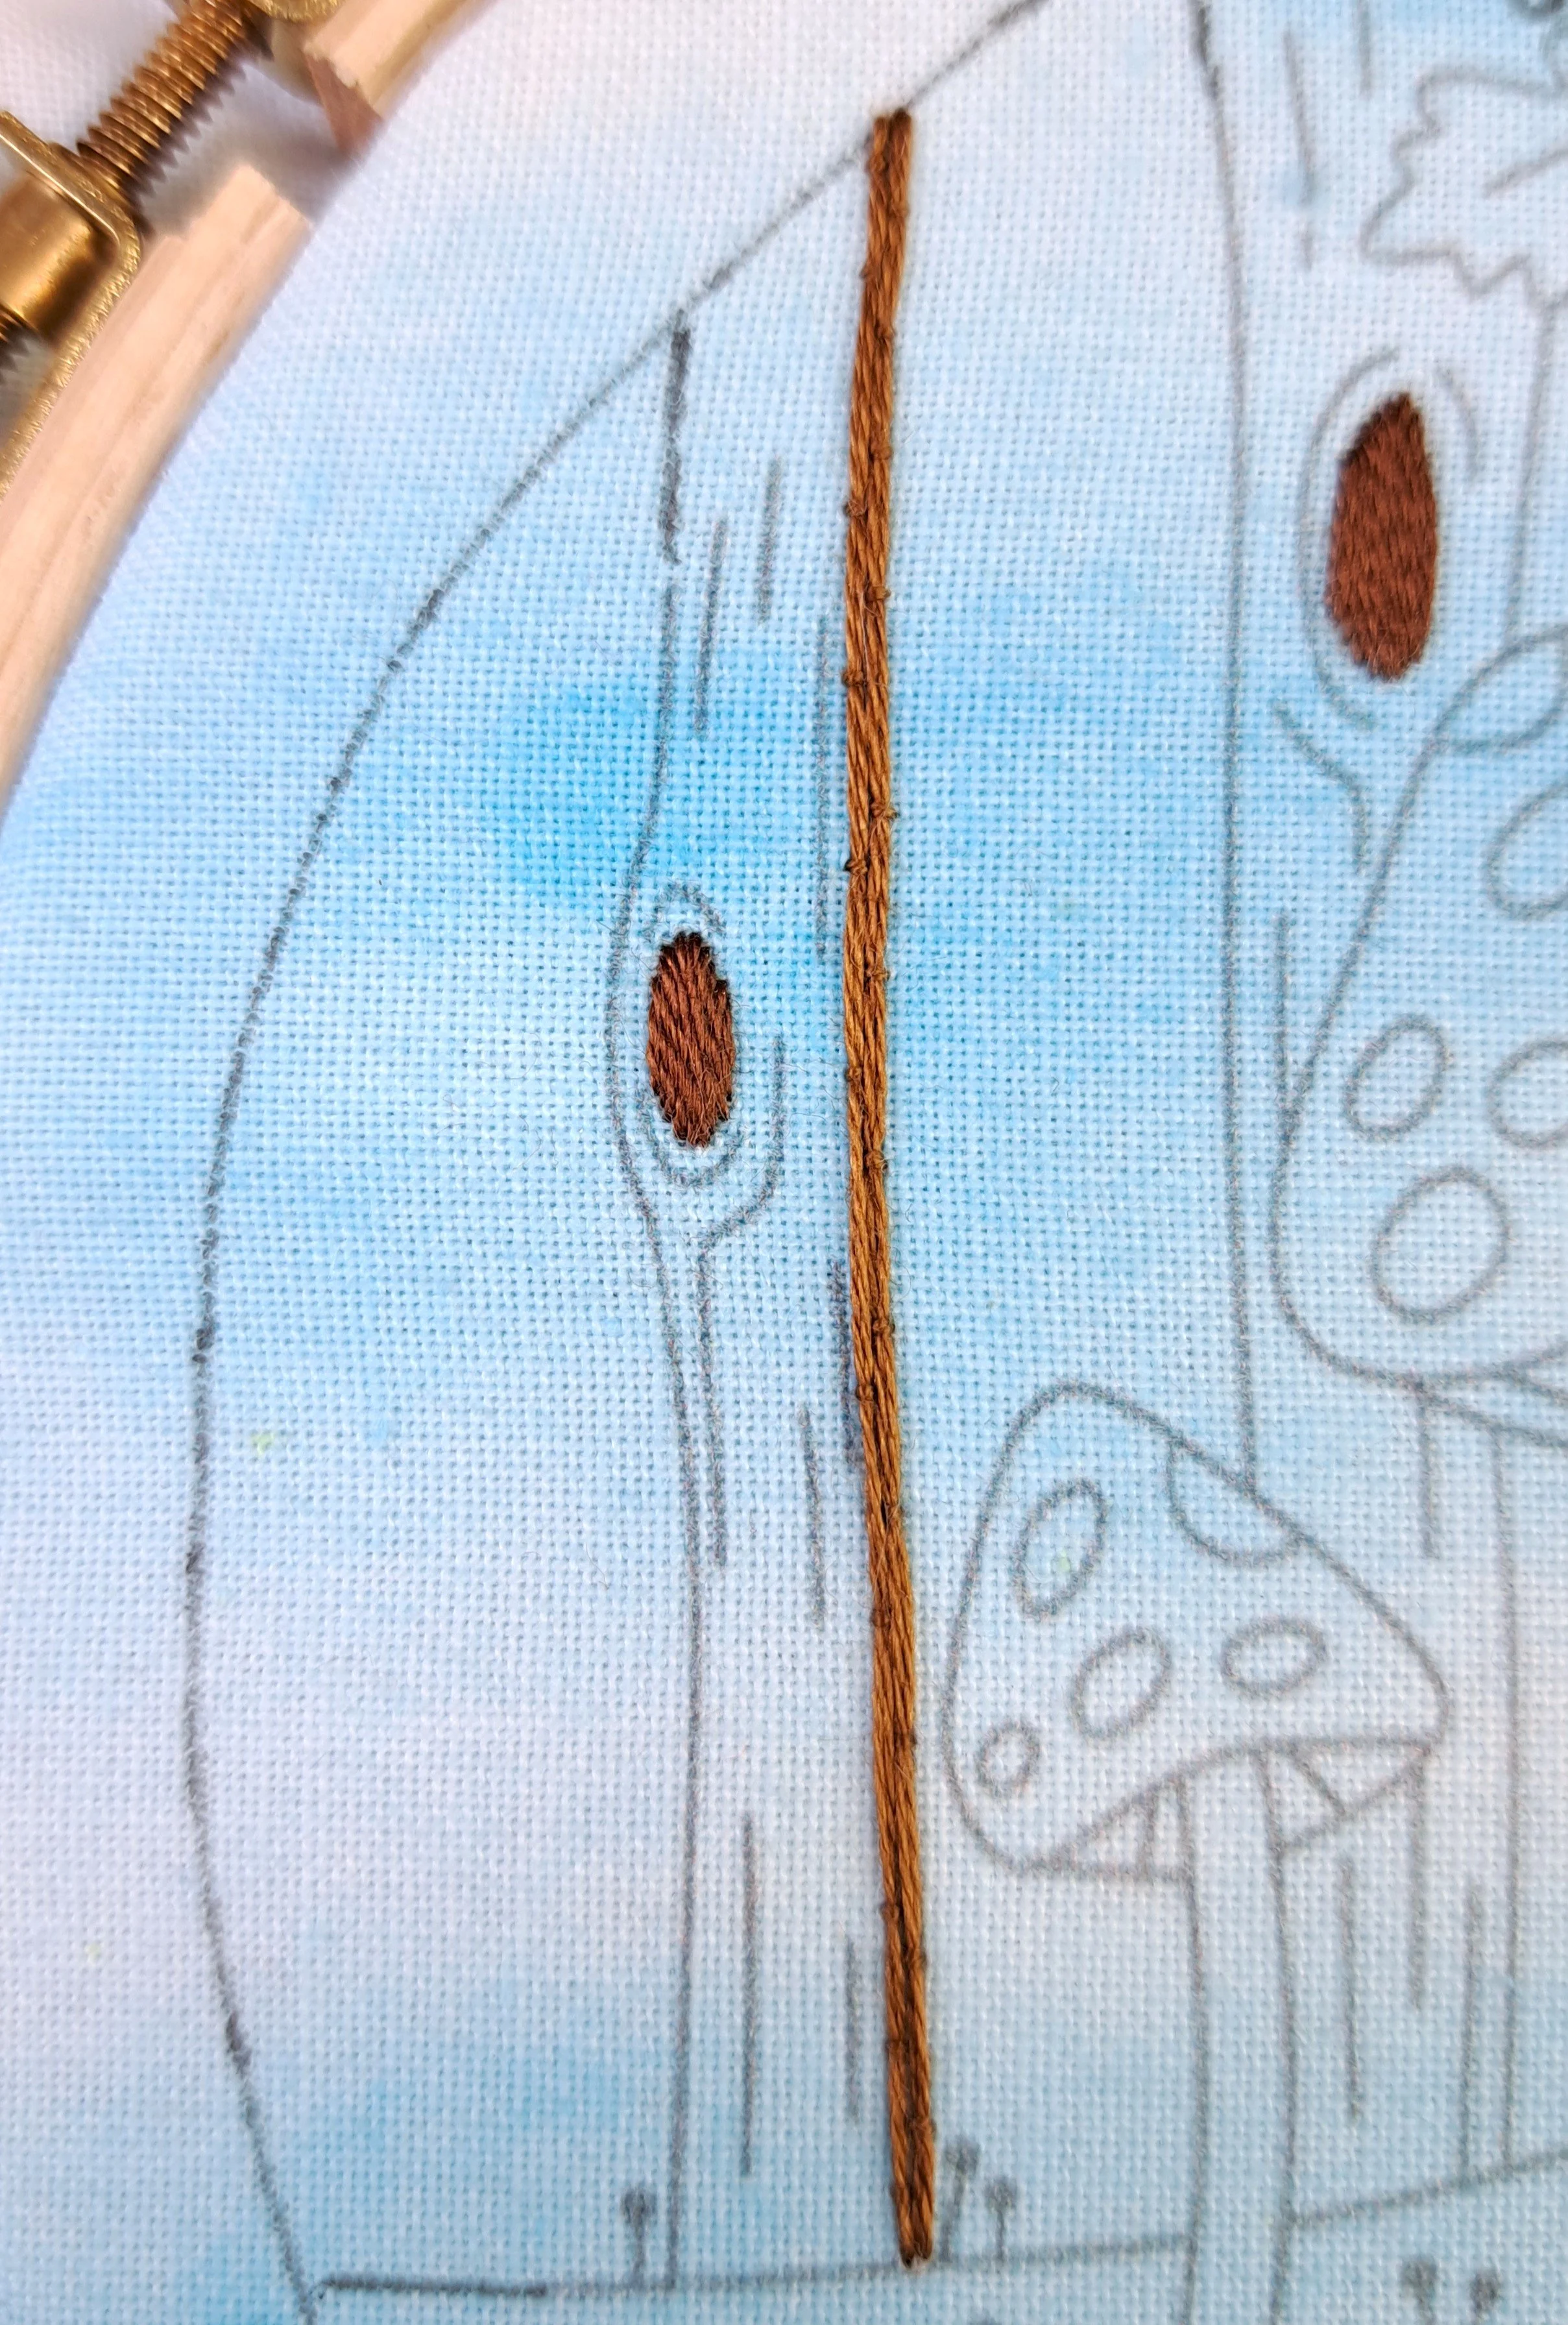
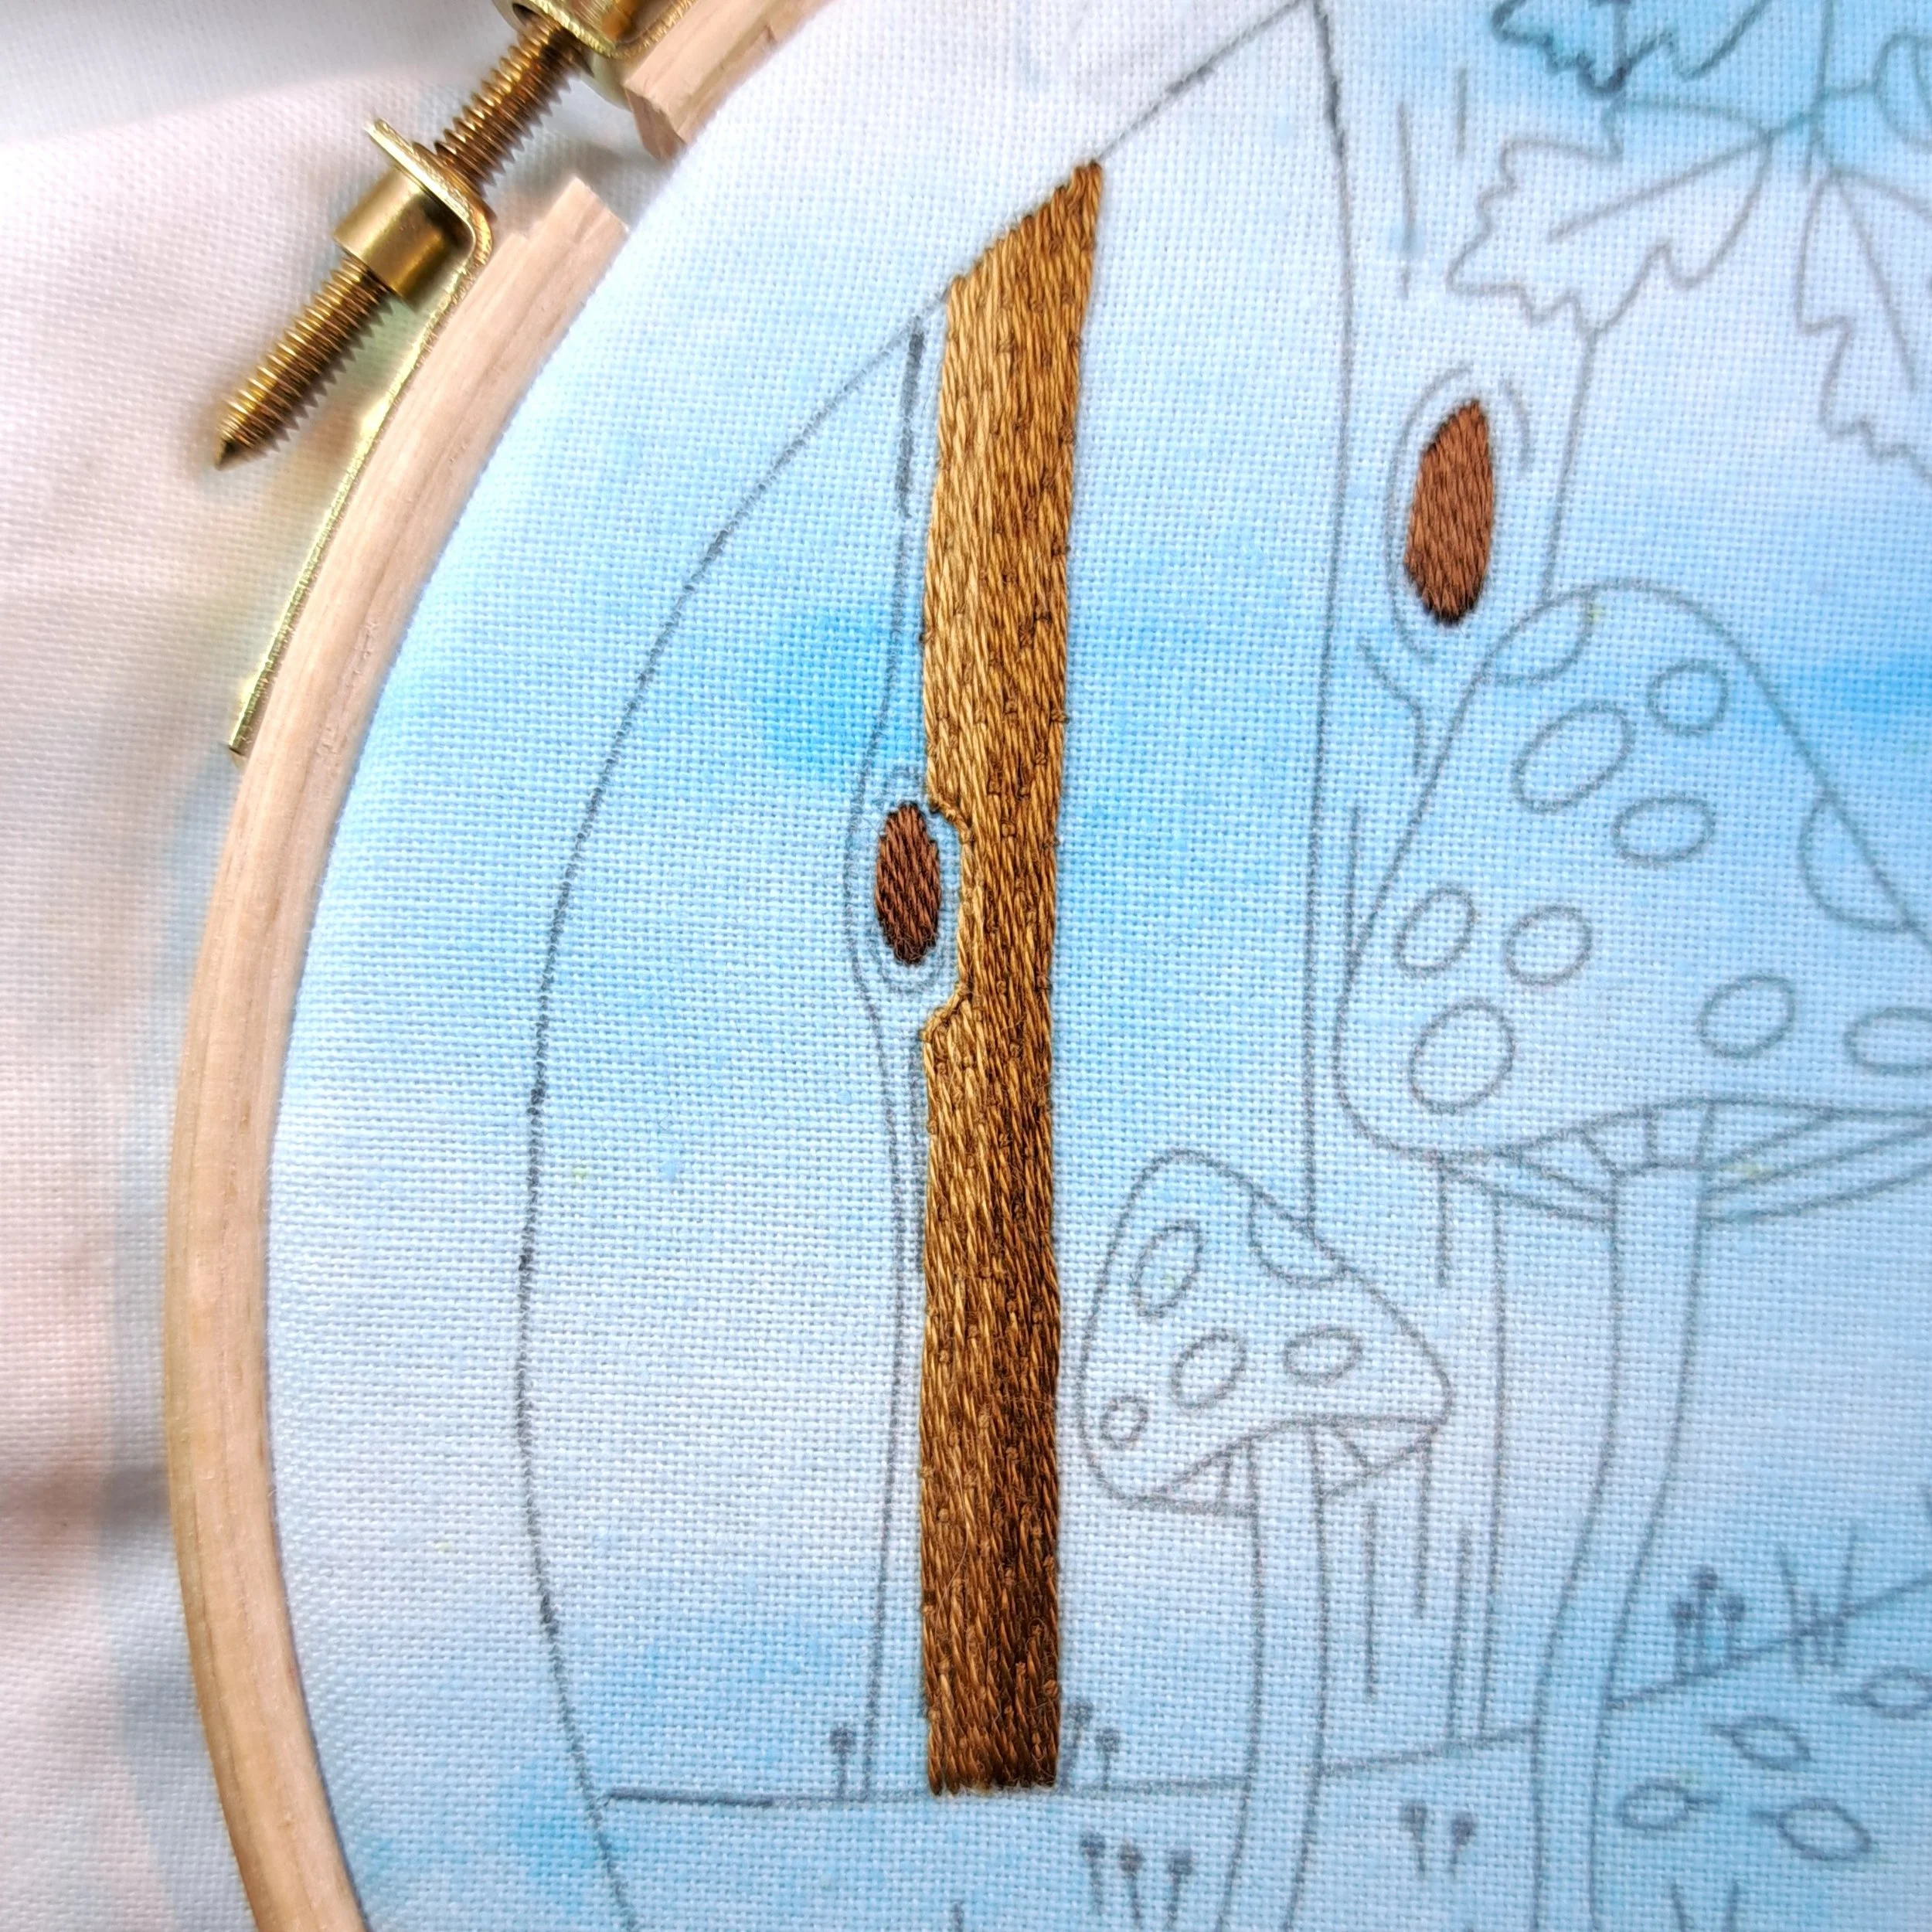
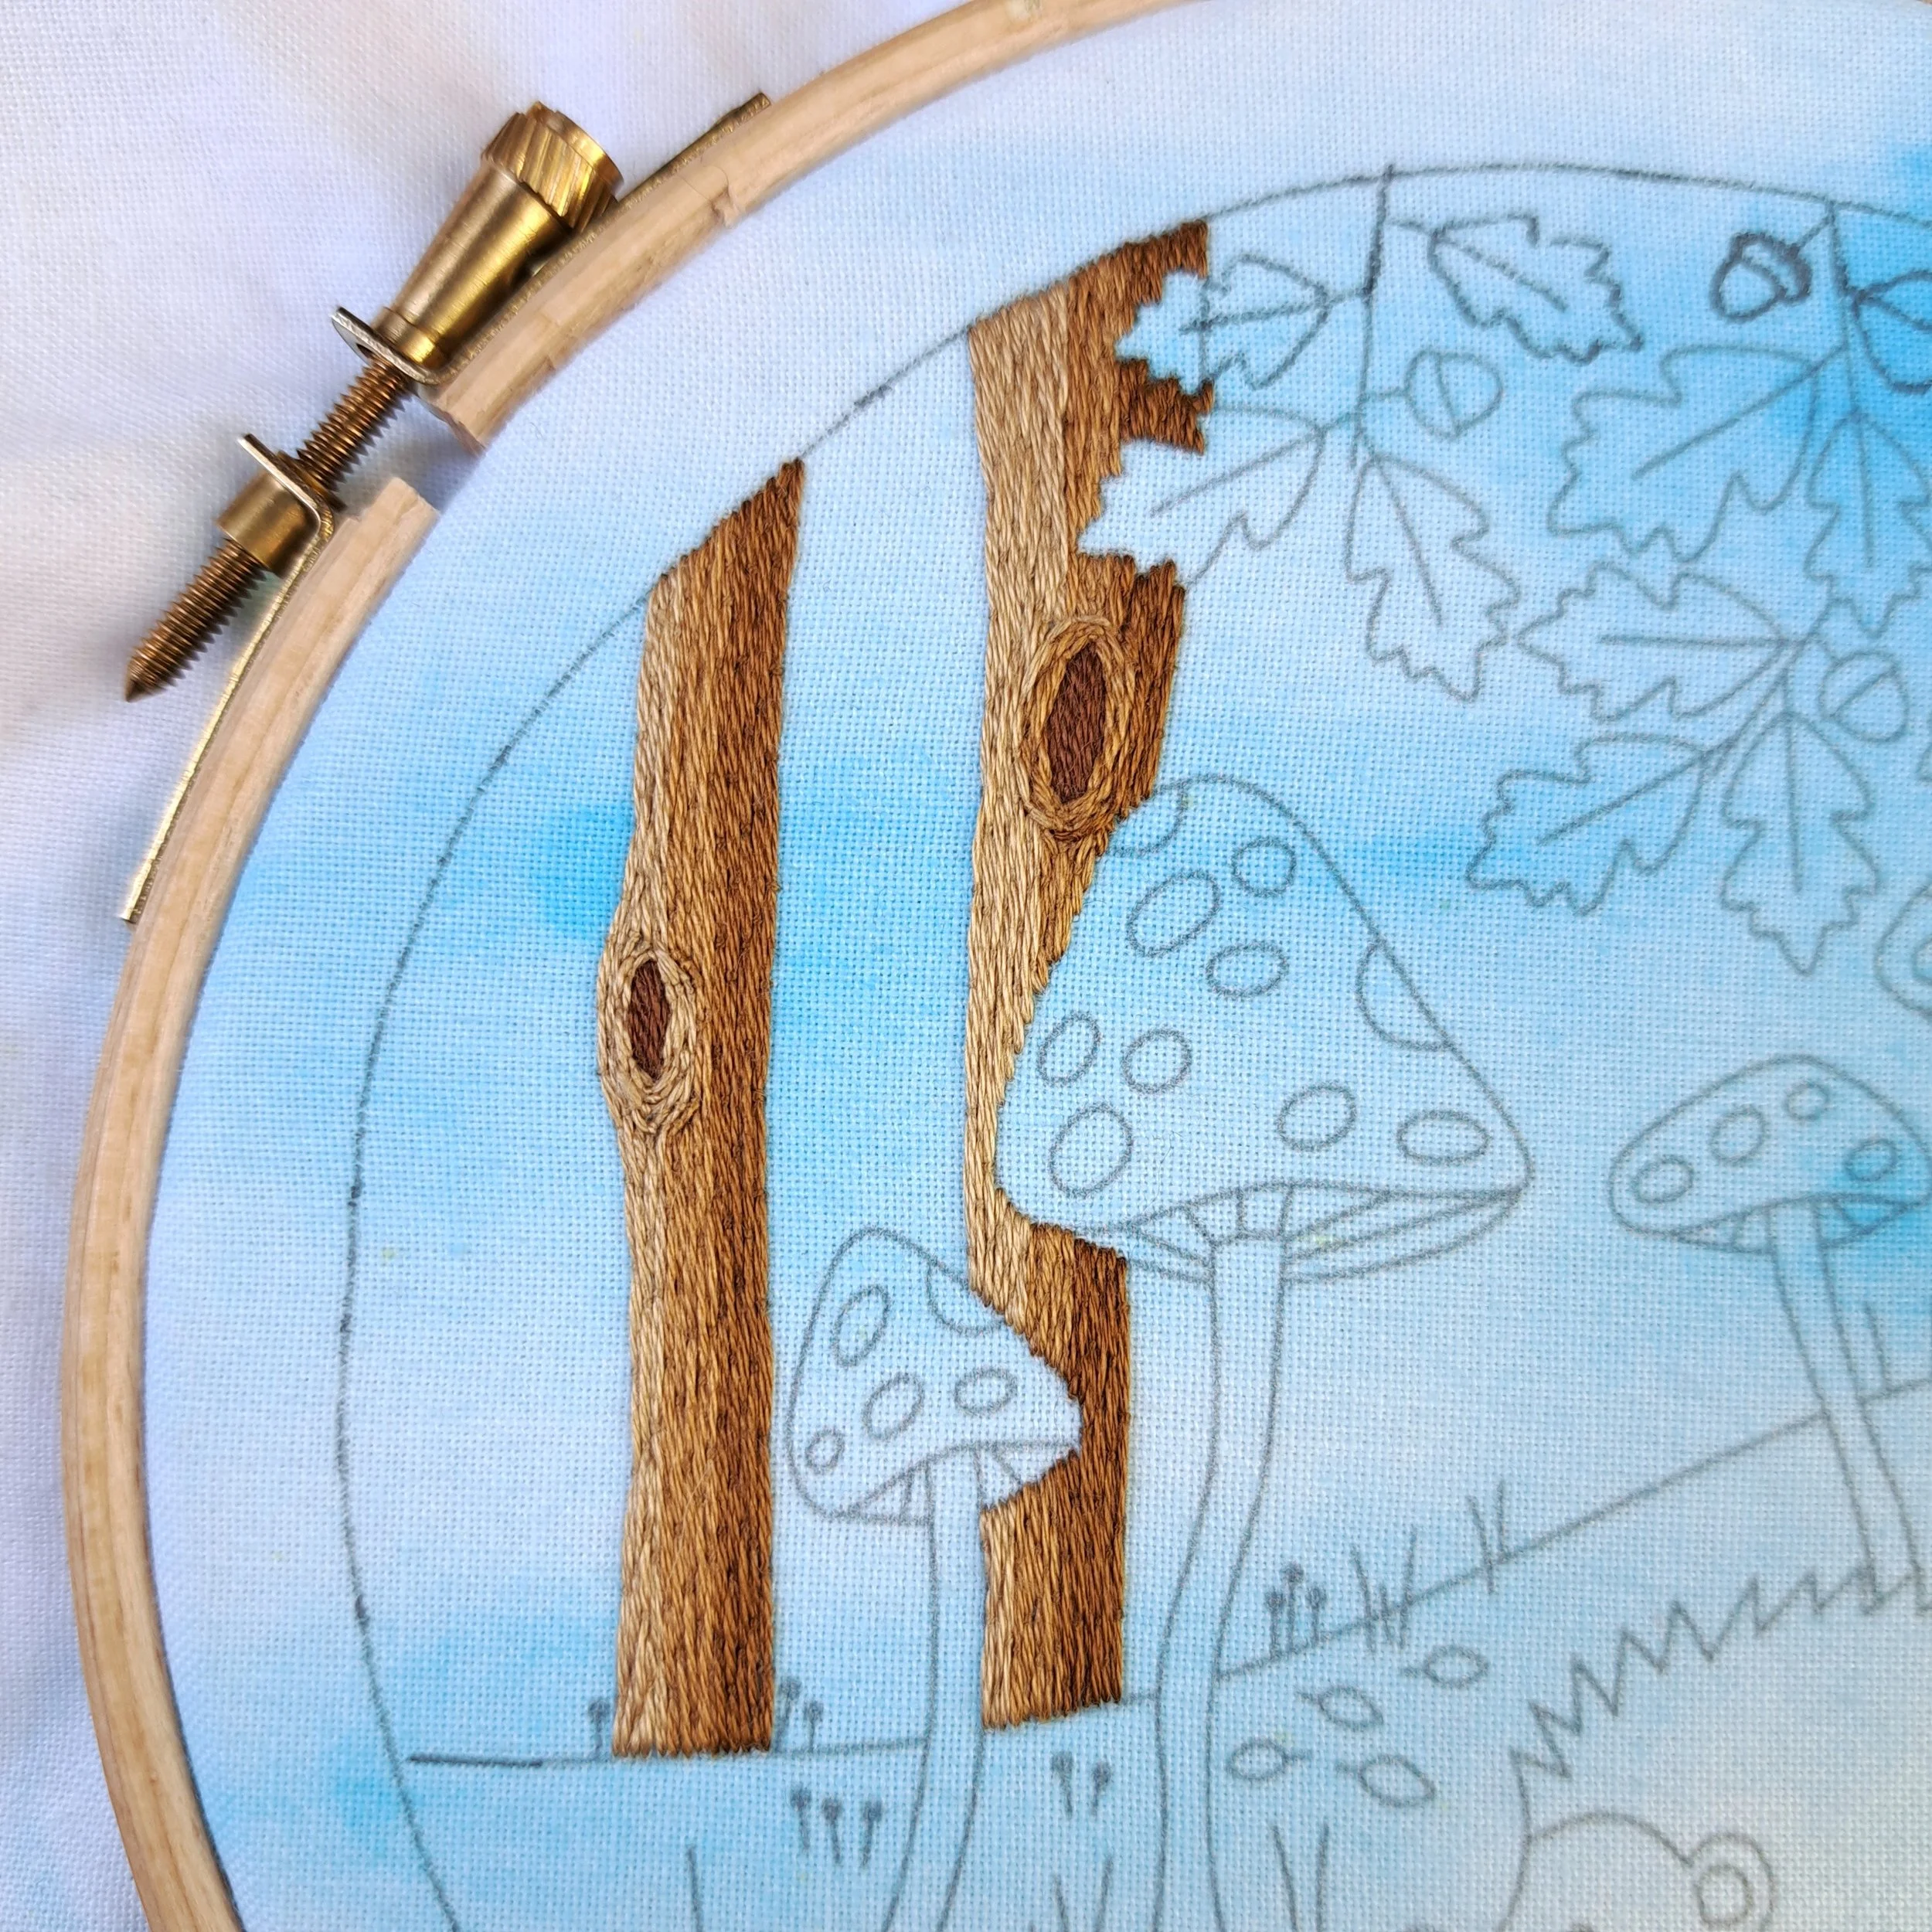
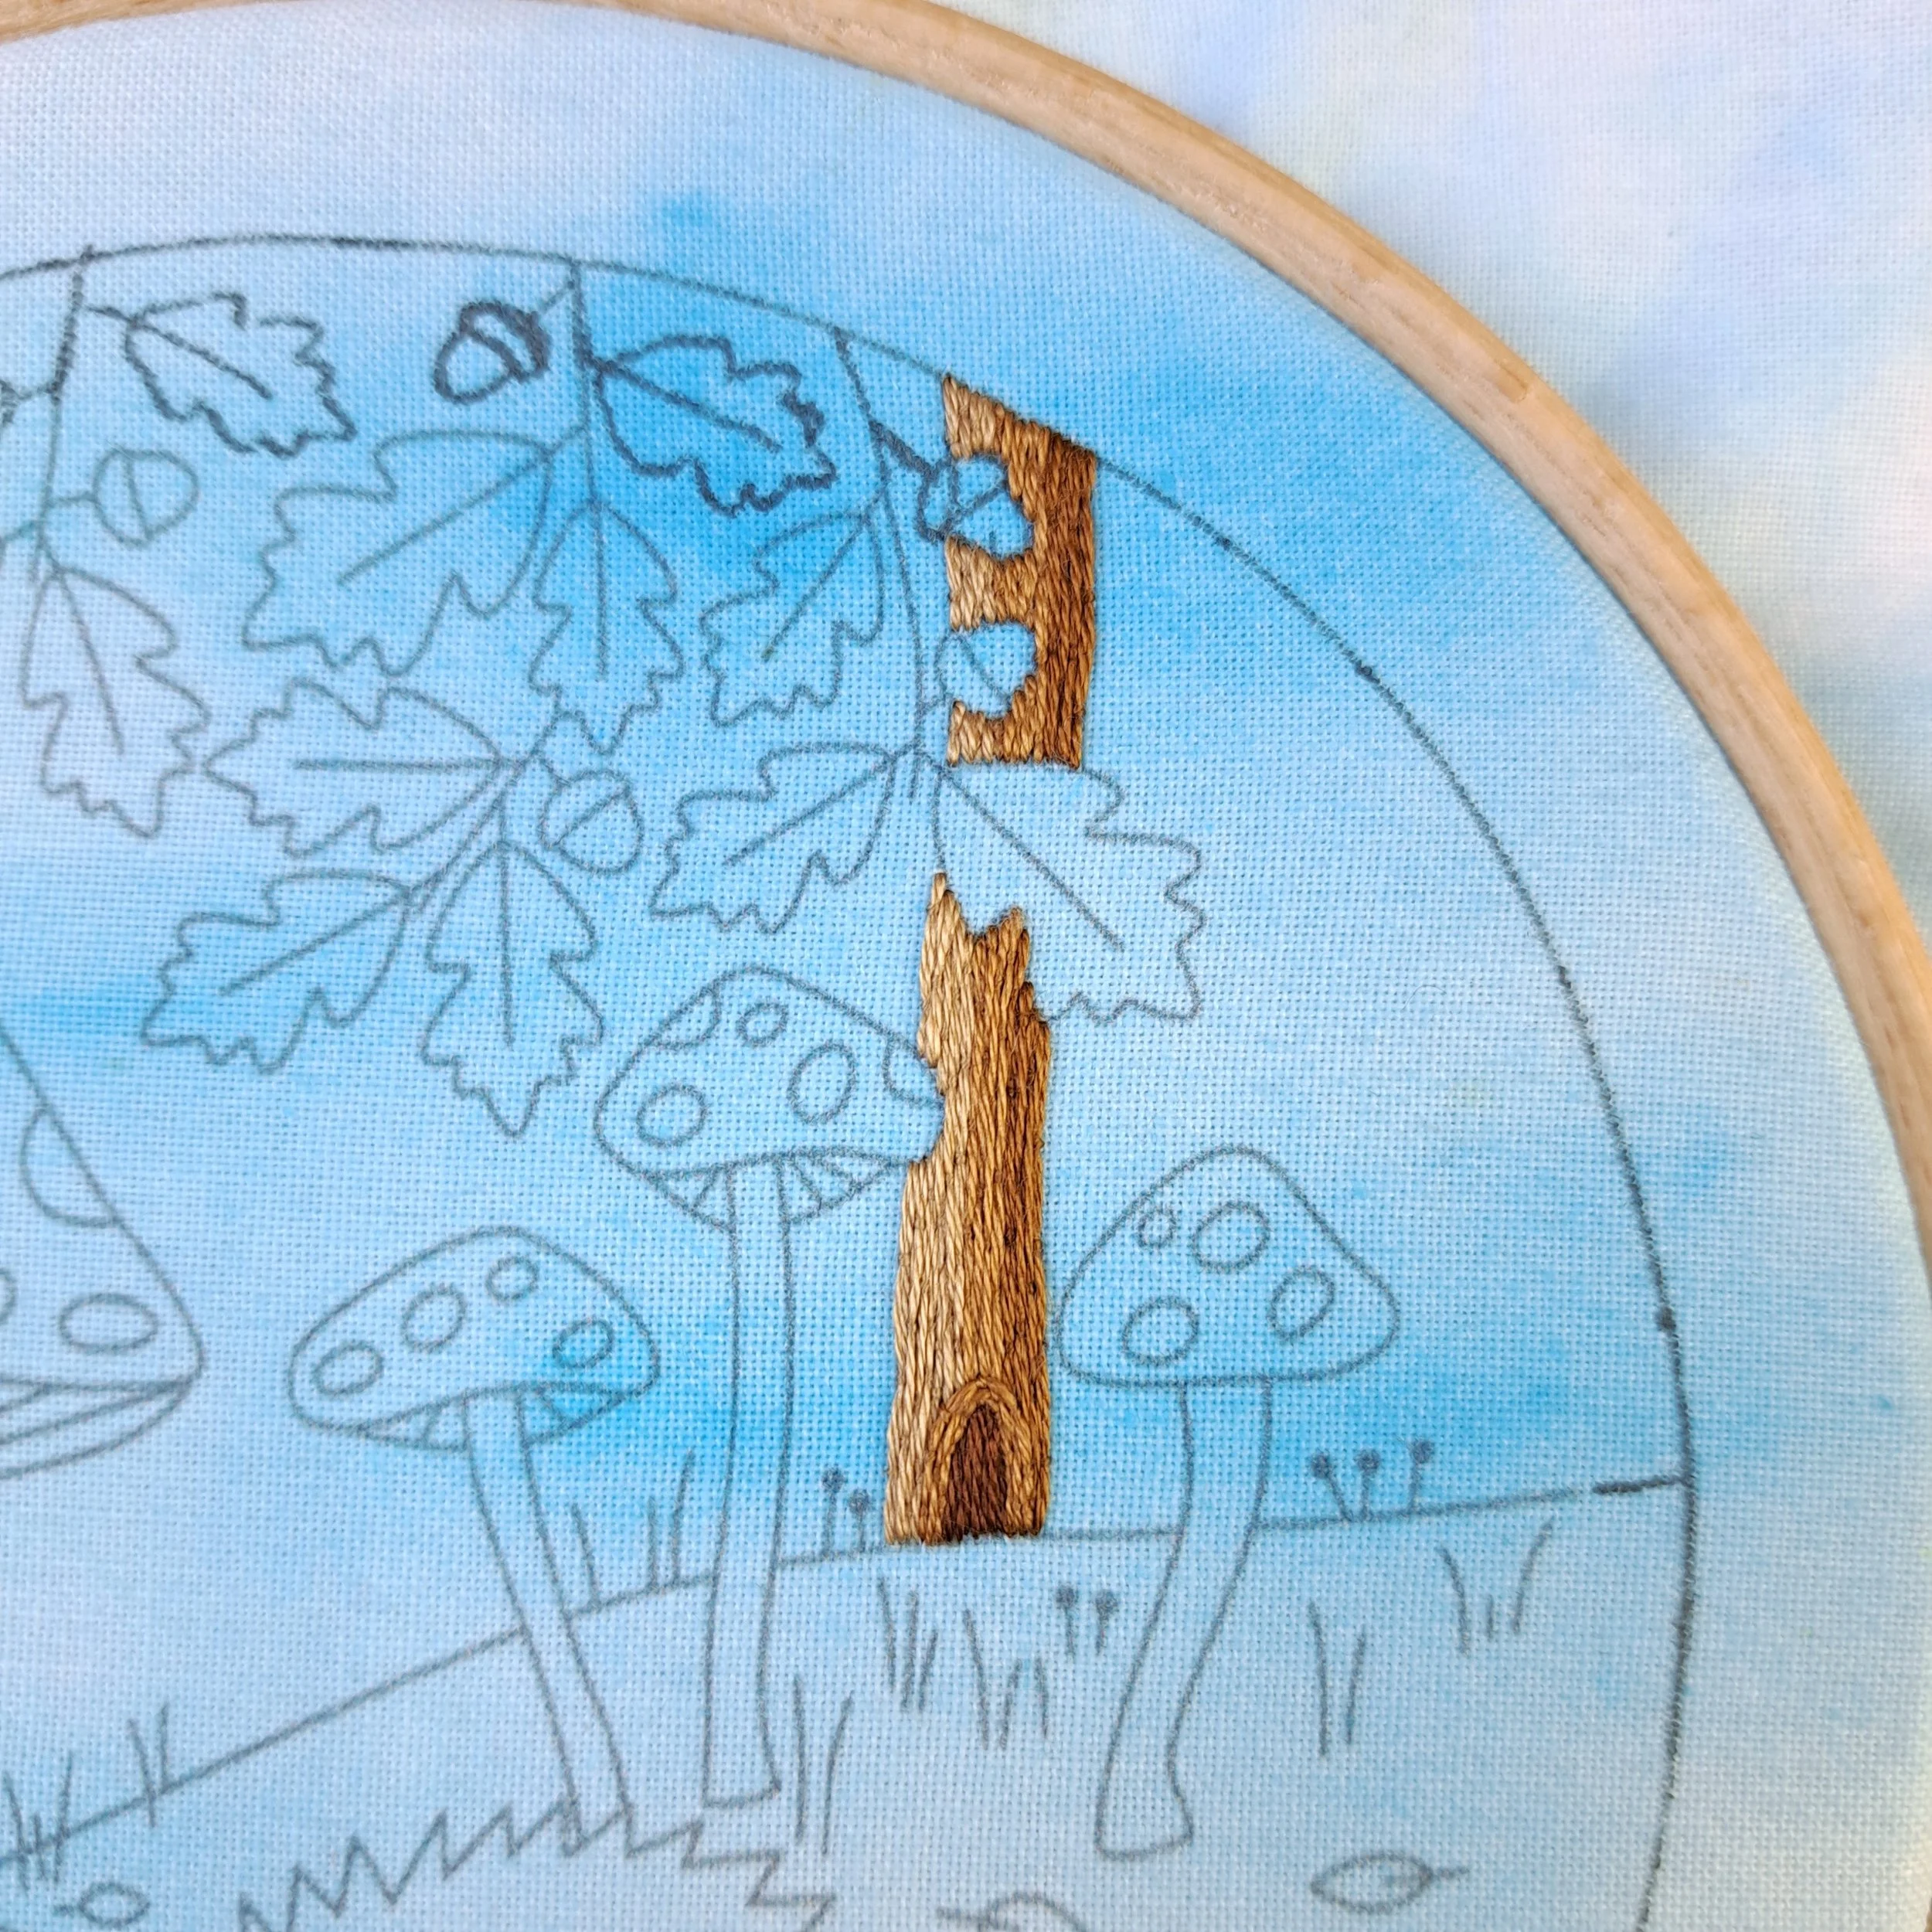
For the trunks, I stitched vertical rows of Couch Stitch. I used 2 strands for the lying thread and 1 strand for the couching stitches.
I’ve never actually used this stitch for bark before, but I really love the texture it’s created! 😍
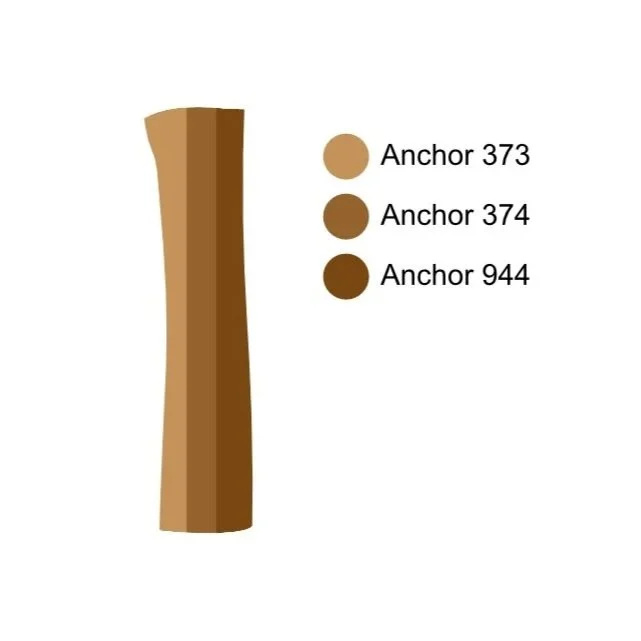
I divided each trunk into 3 colour bands and stitched each one using a different shade of brown thread. I didn’t draw these bands onto the design – I just stitched until I felt I’d added enough of each colour. But you could always mark them on first if you wanted.
I used Anchor 373, 374 and 944. Starting with the lightest shade on the left band and changing to a darker shade in each band makes a really lovely shadow effect on the trunks.
I stitched straight over the bark lines printed on the panel, but I did have fun stitching some rings around the knots, using the bark lines to help guide my stitches there.
I kept most of my Couch Stitch rows fairly straight, but you could add lots of twists and turns if you wanted to add even more texture.
I also stitched around any of the overlapping elements, rather than crossing underneath them. I won’t lie - it was slightly annoying starting and stopping so many times! 😆 But I wanted to keep those areas free of threads in case it affected any later stitching.
Stitch – Couch Stitch
Thread colours - Anchor 373, Anchor 374, Anchor 944
Number of strands – 1 and 2
The Branches
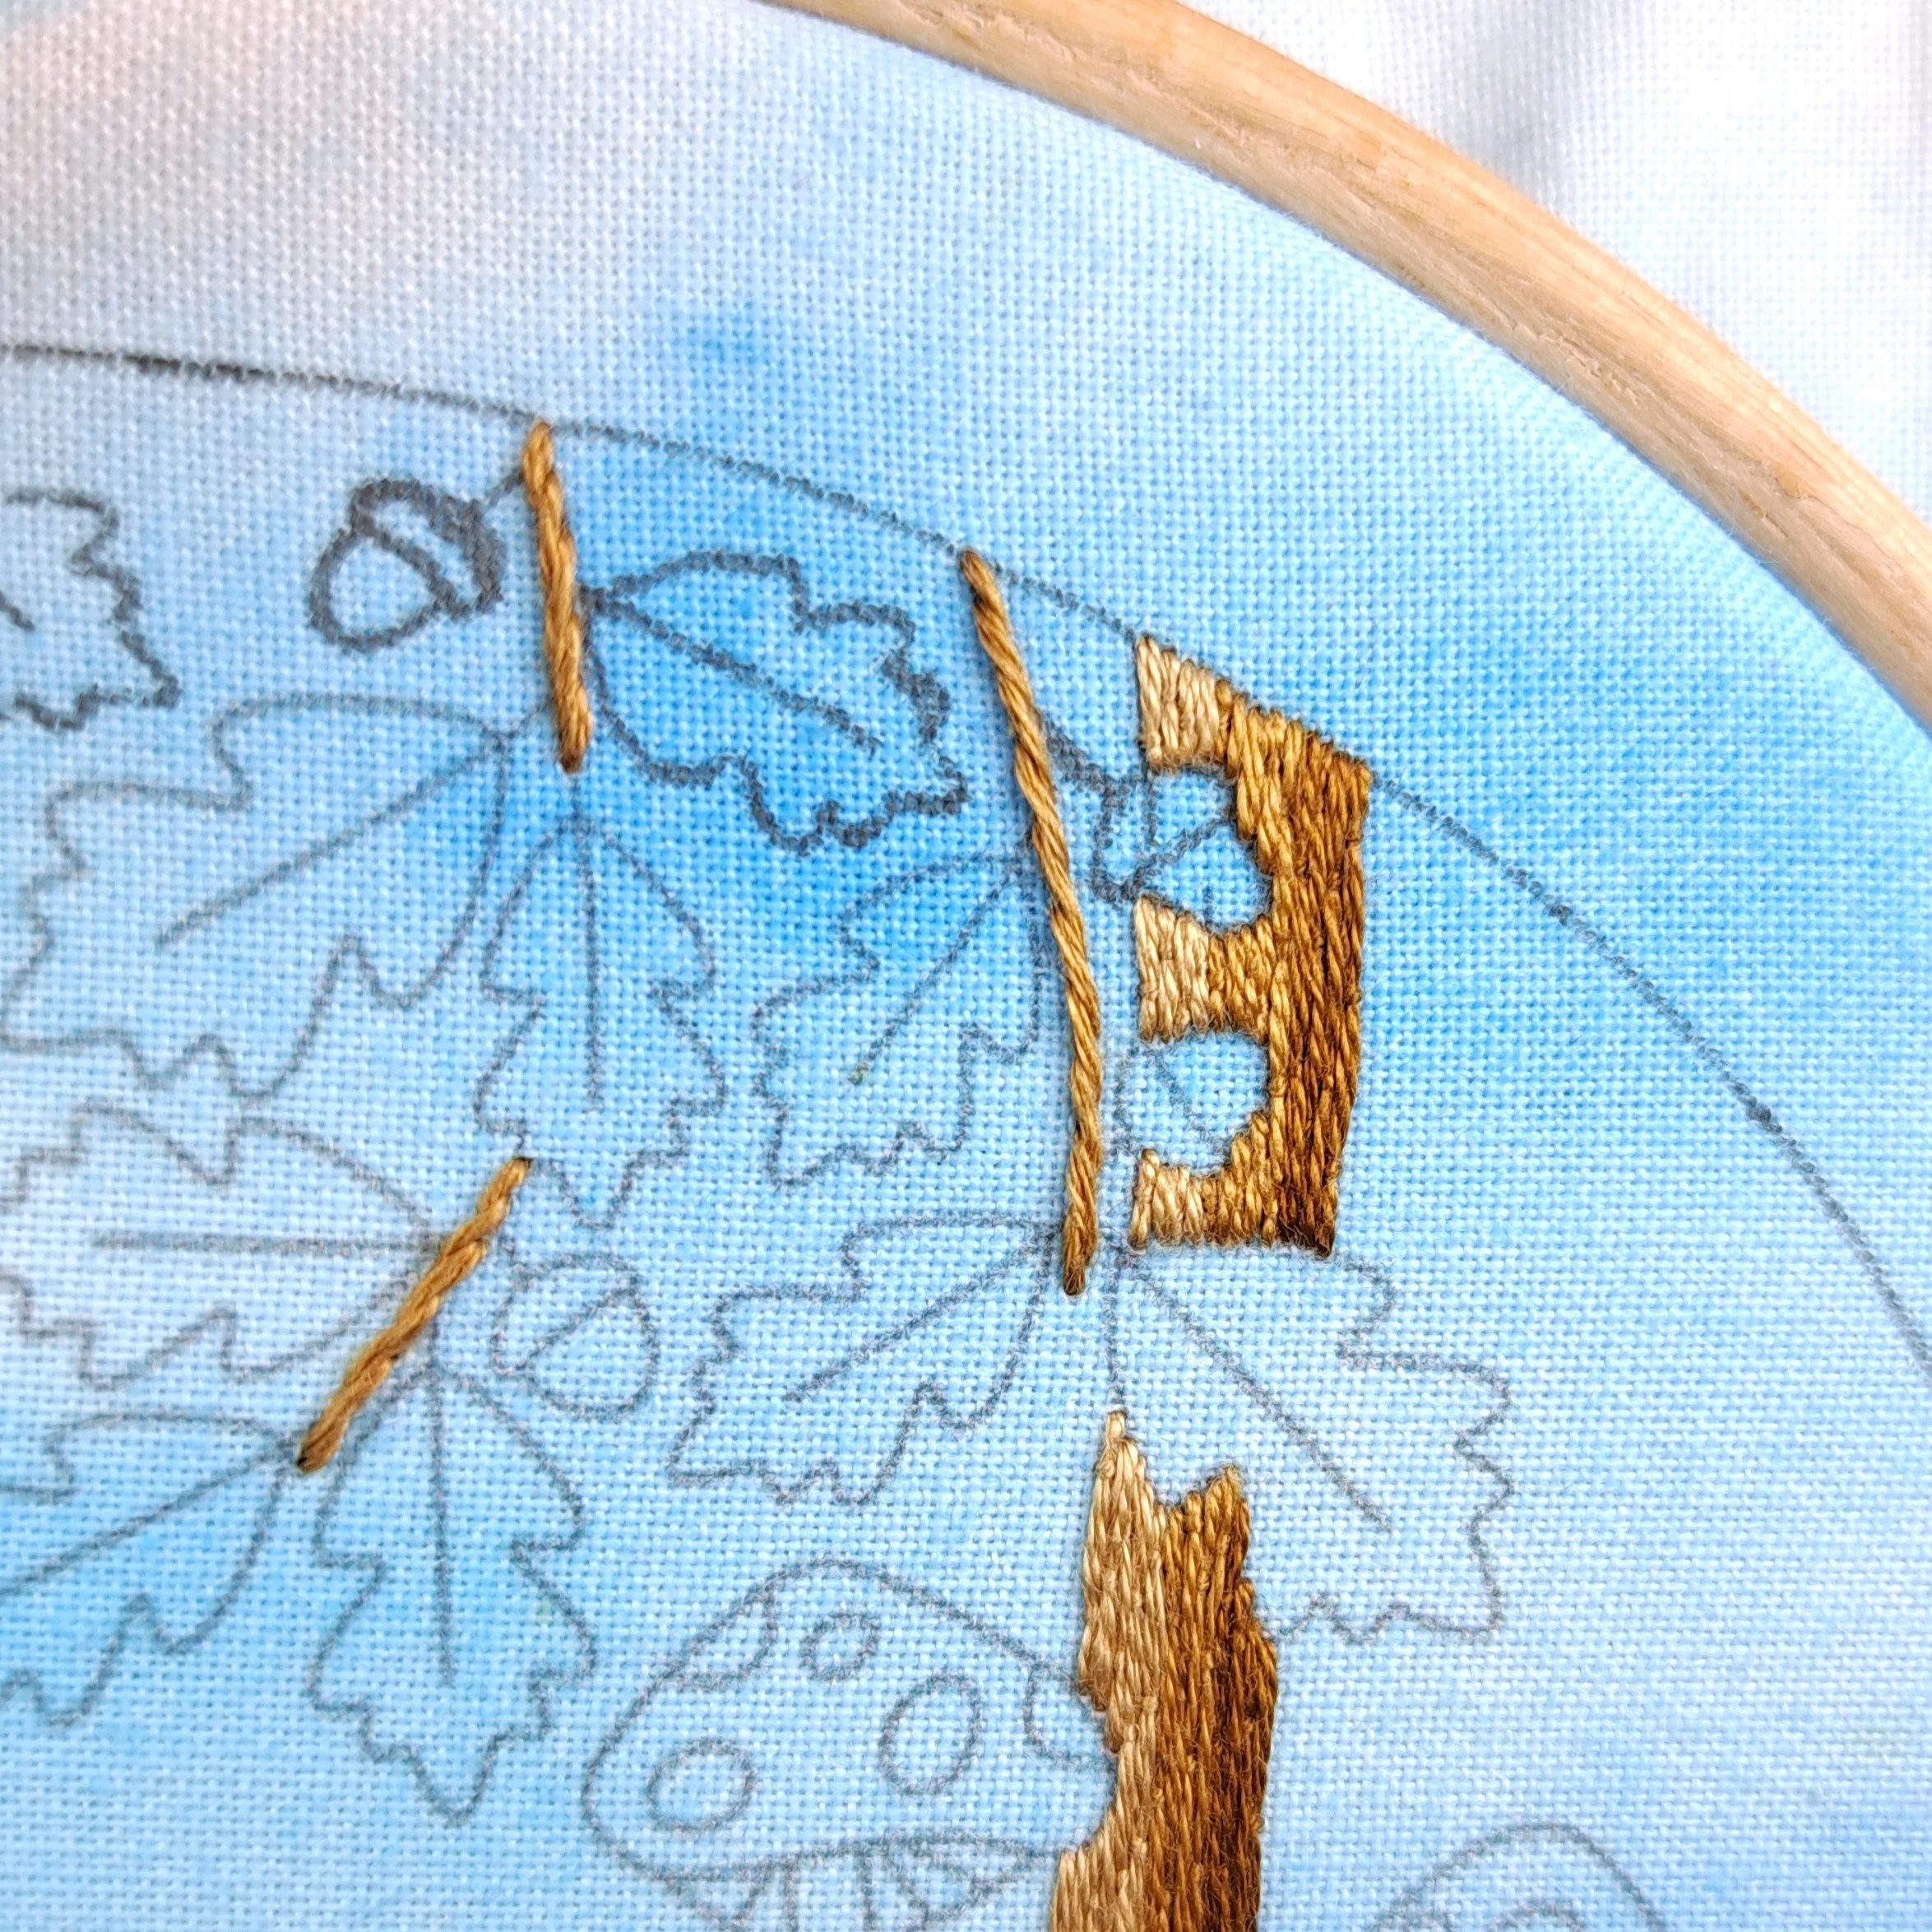
I stitched each branch with a single row of Stem Stitch using 3 strands of Anchor 374.
I finished each branch and started the next one separately, rather than travelling between them on the back of the fabric.
Stitch – Stem Stitch
Thread colour - Anchor 374
Number of strands – 3
The Oak Leaves
Time to start adding some colour (other than brown)! 😄
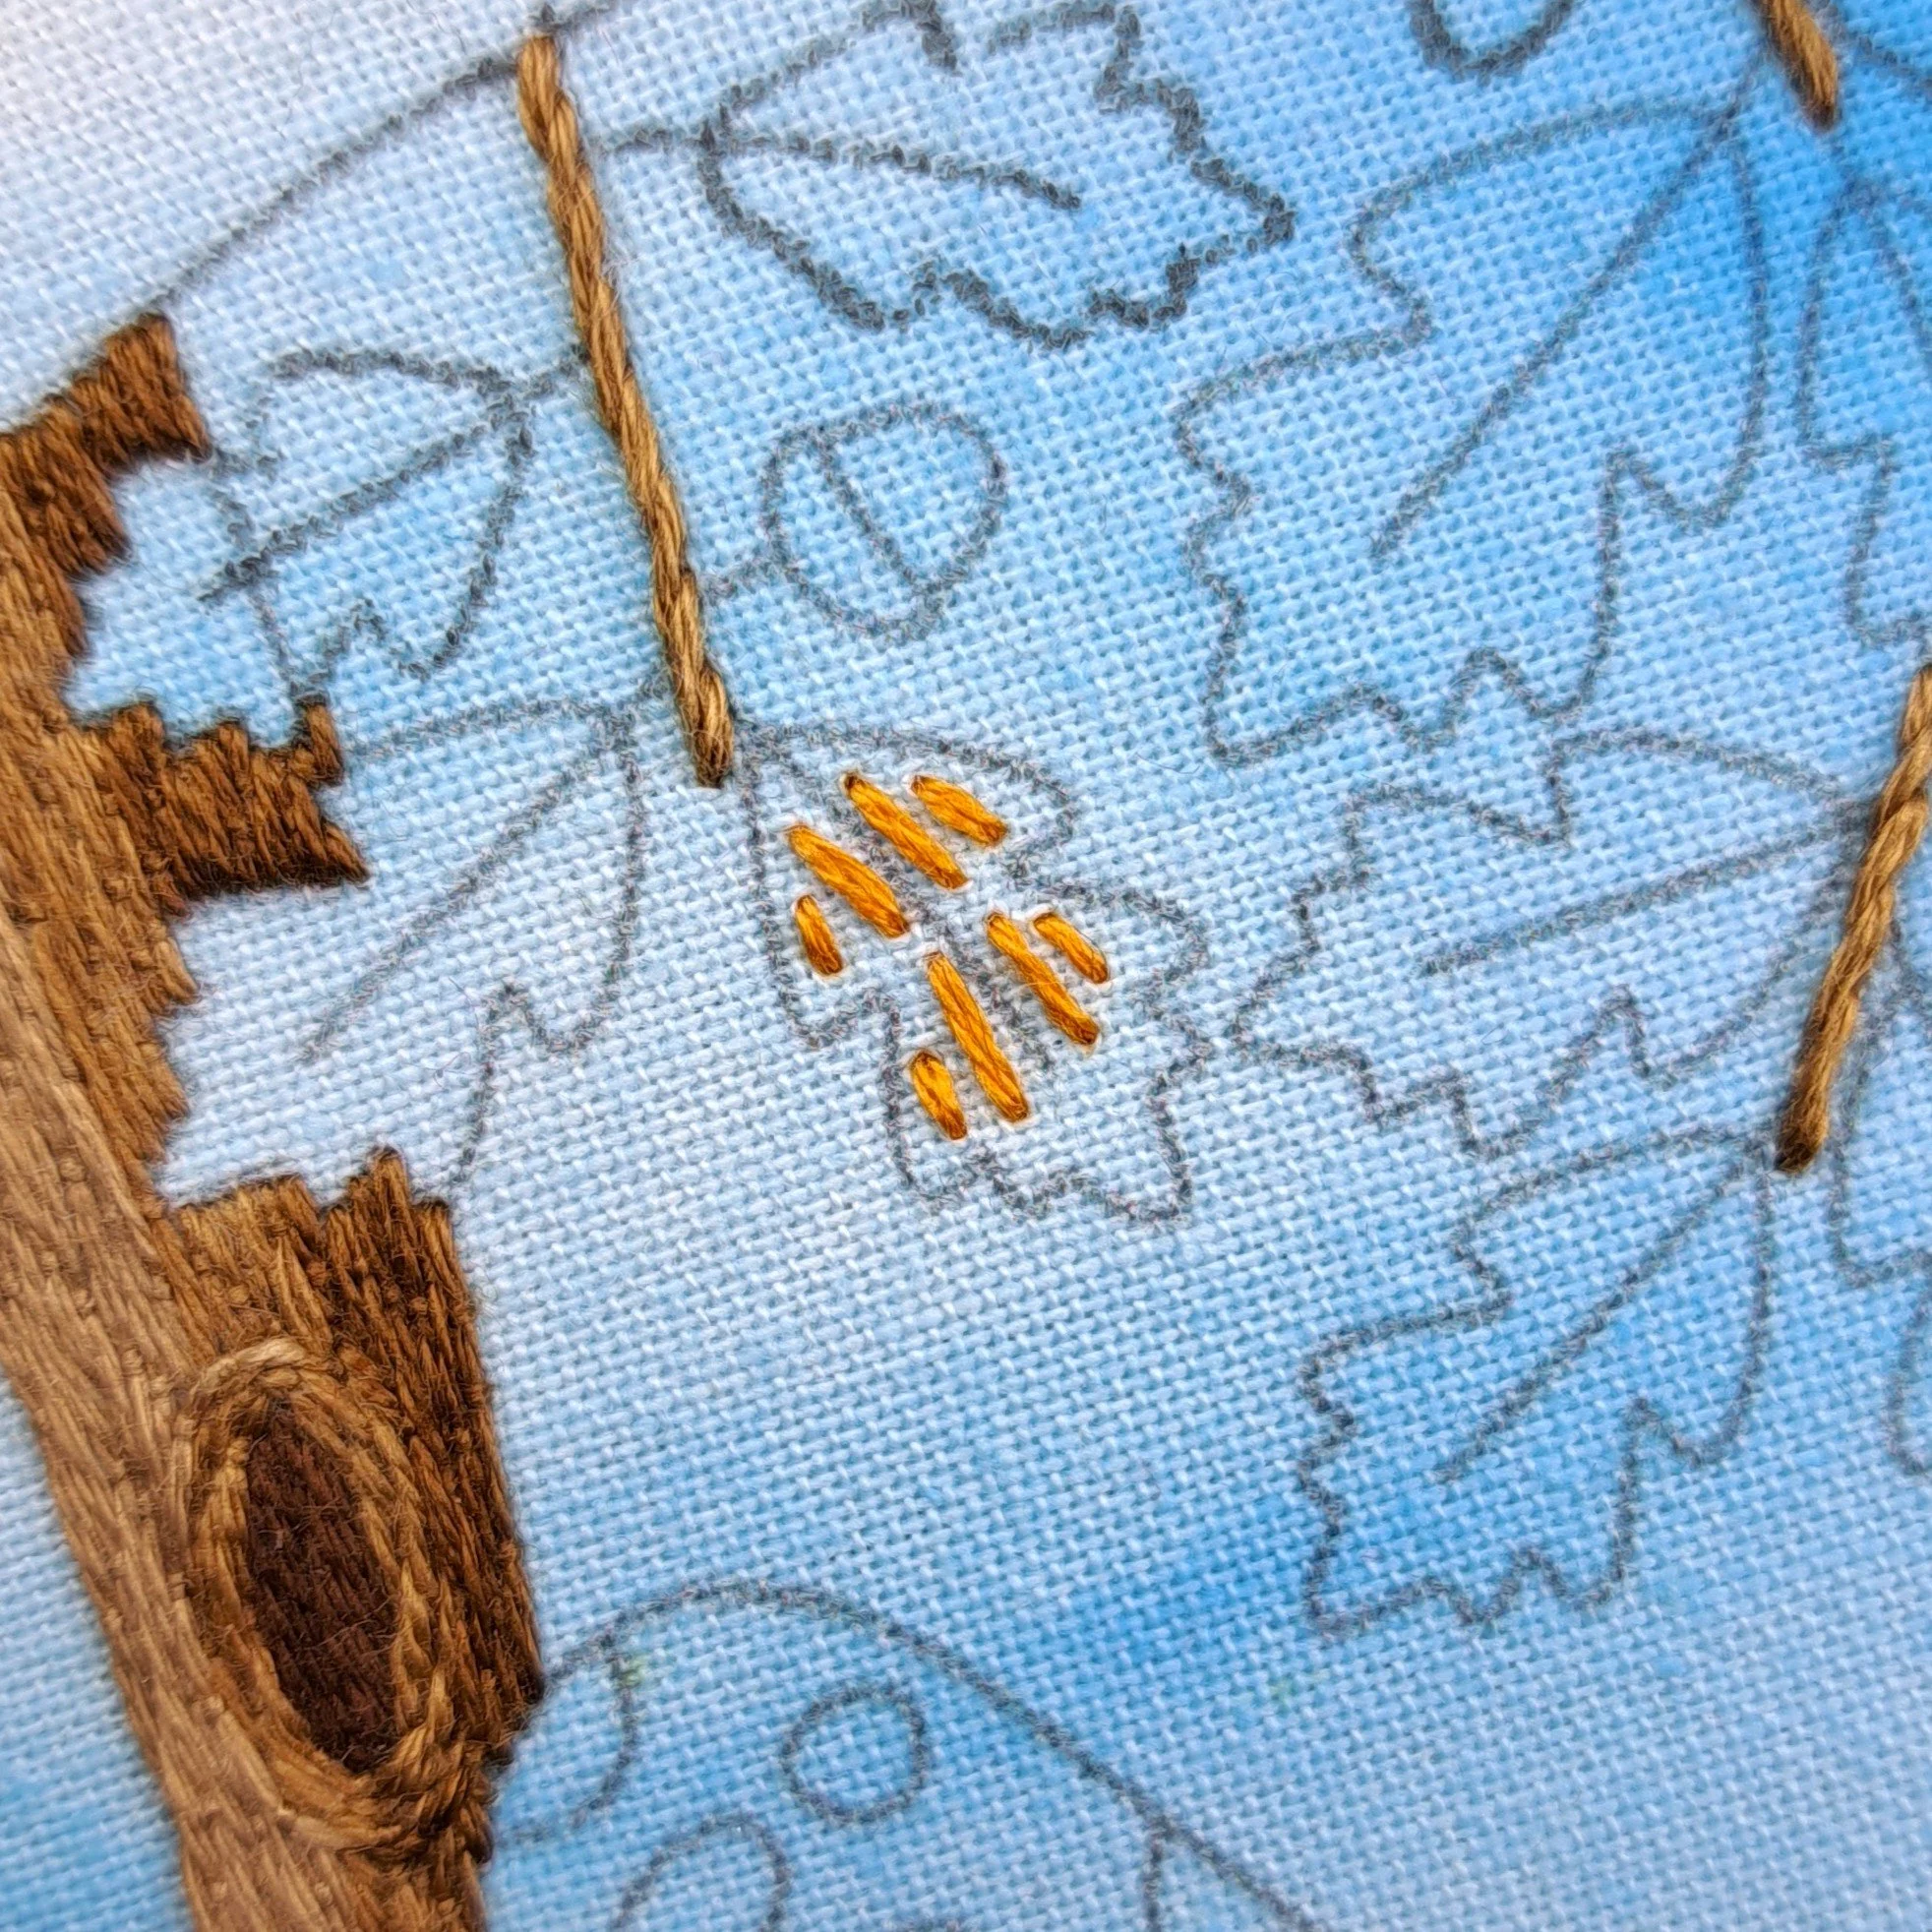
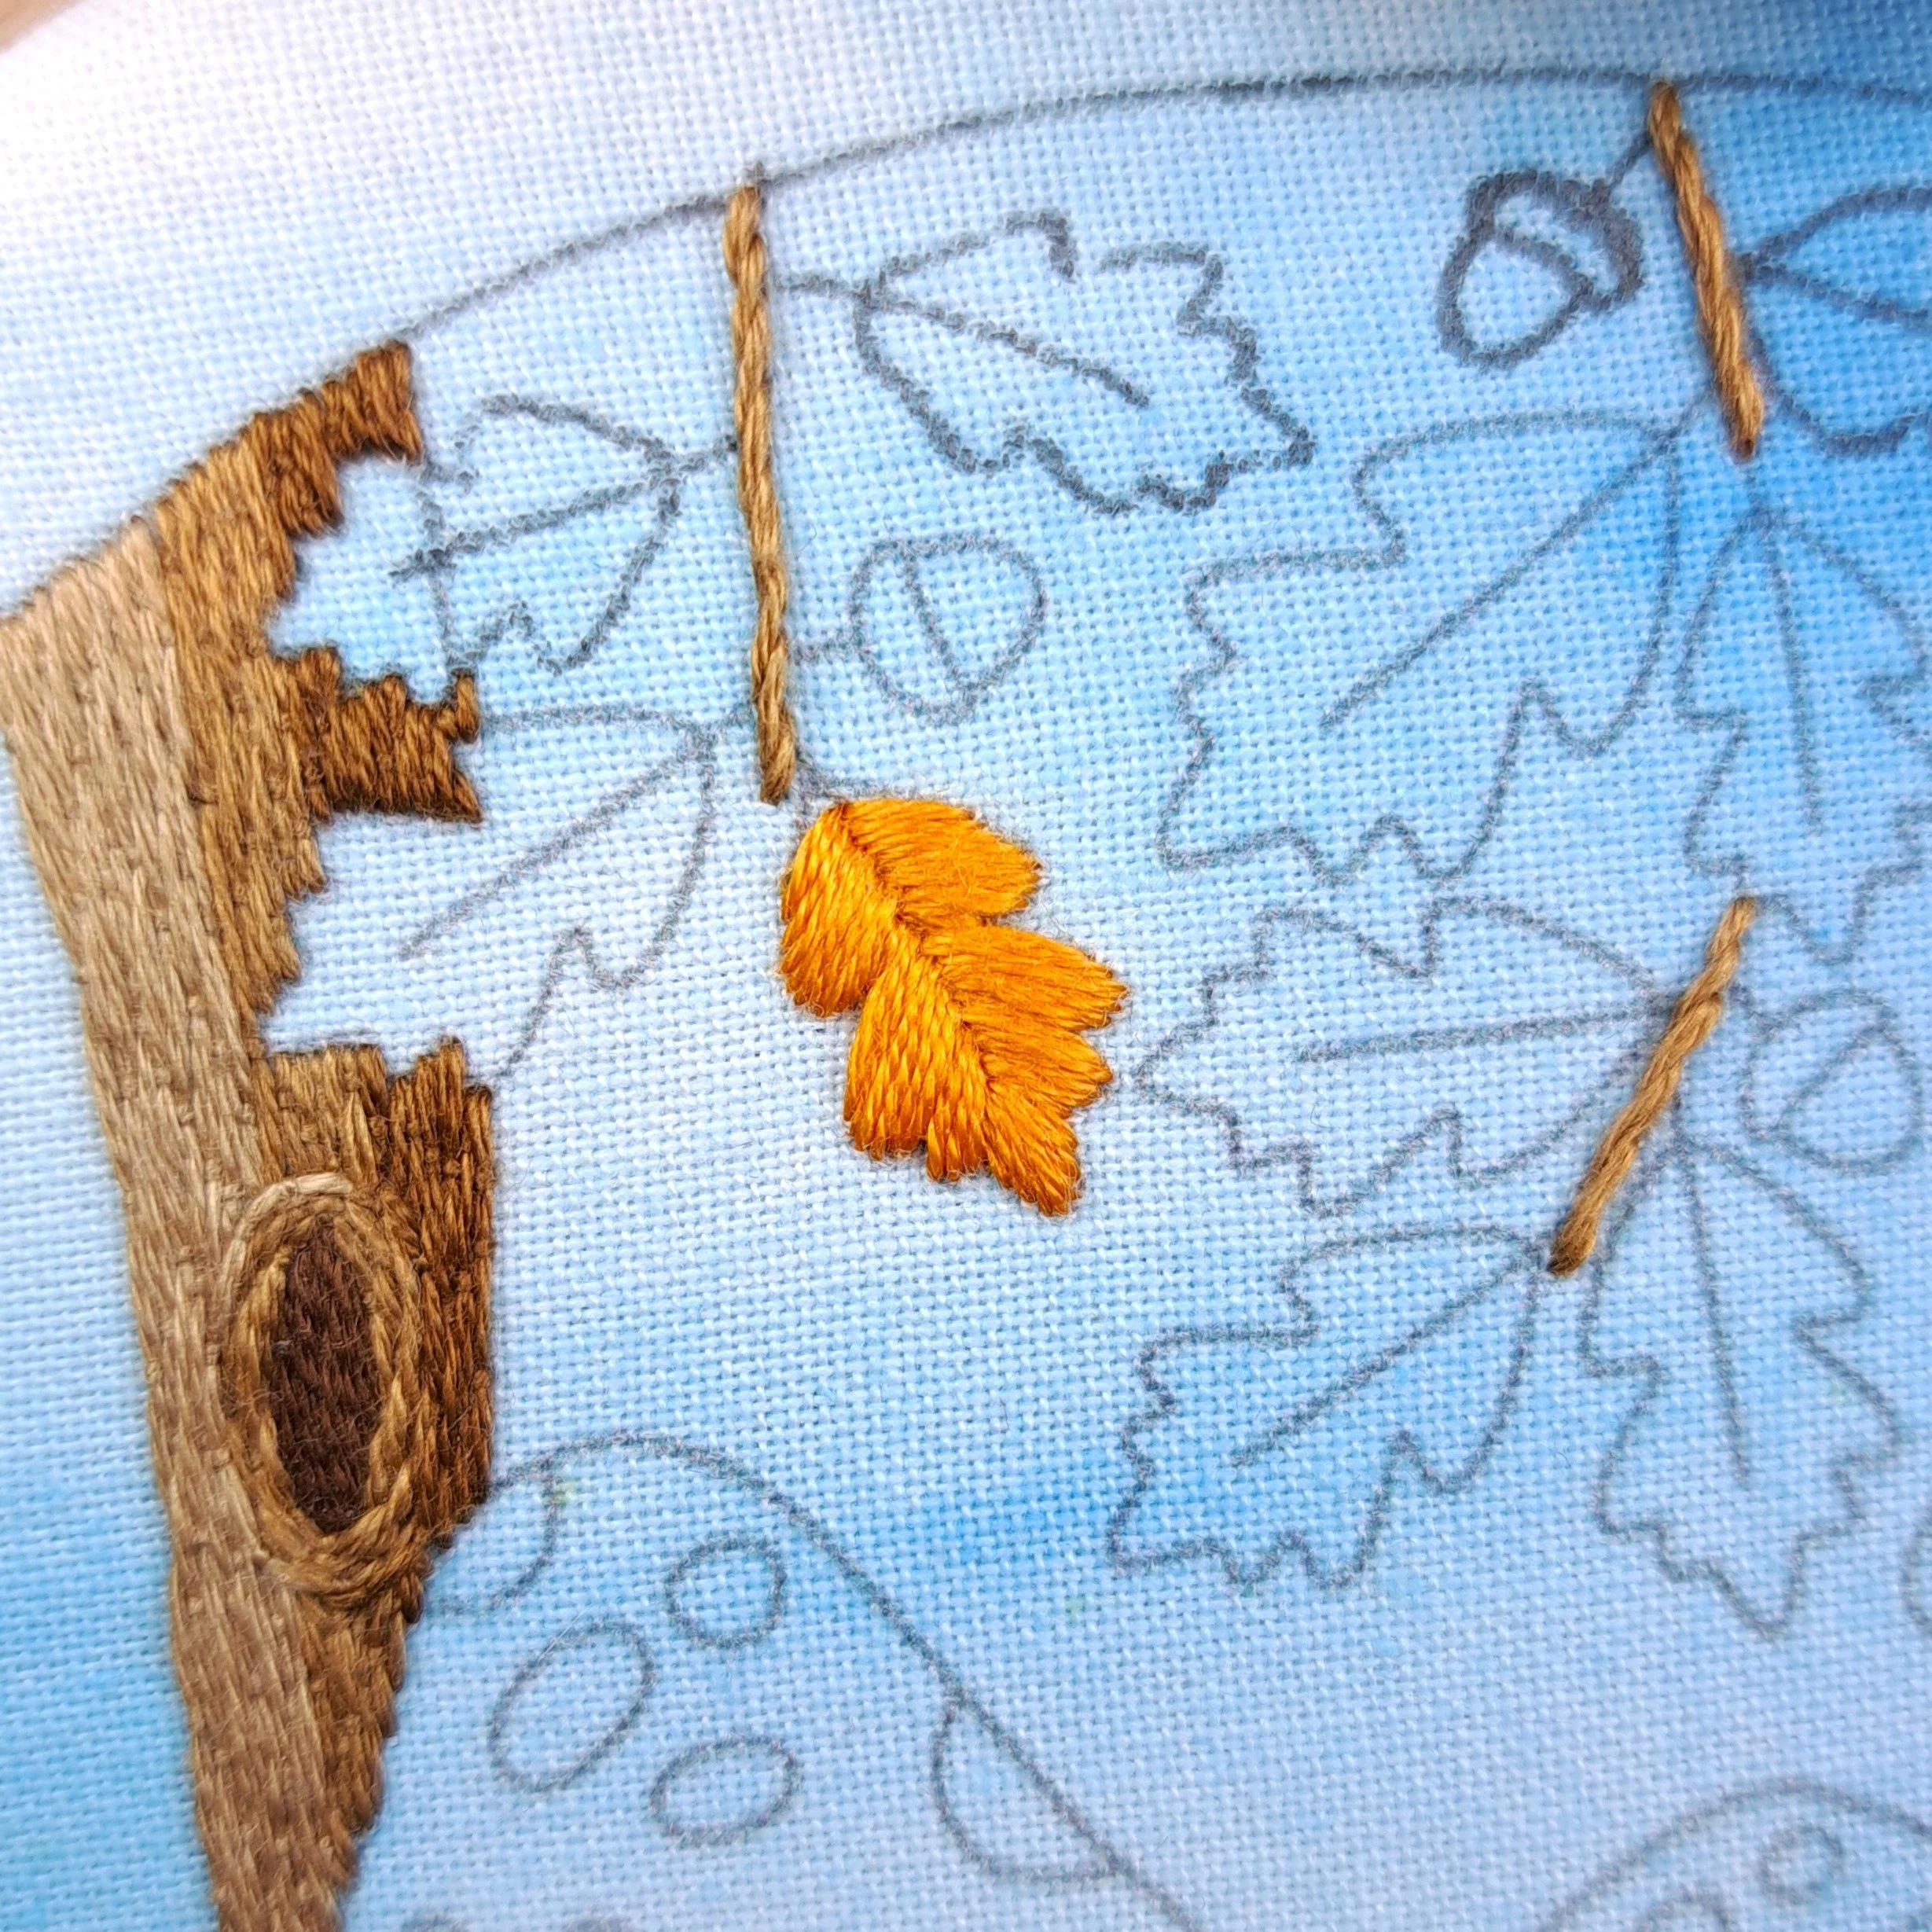
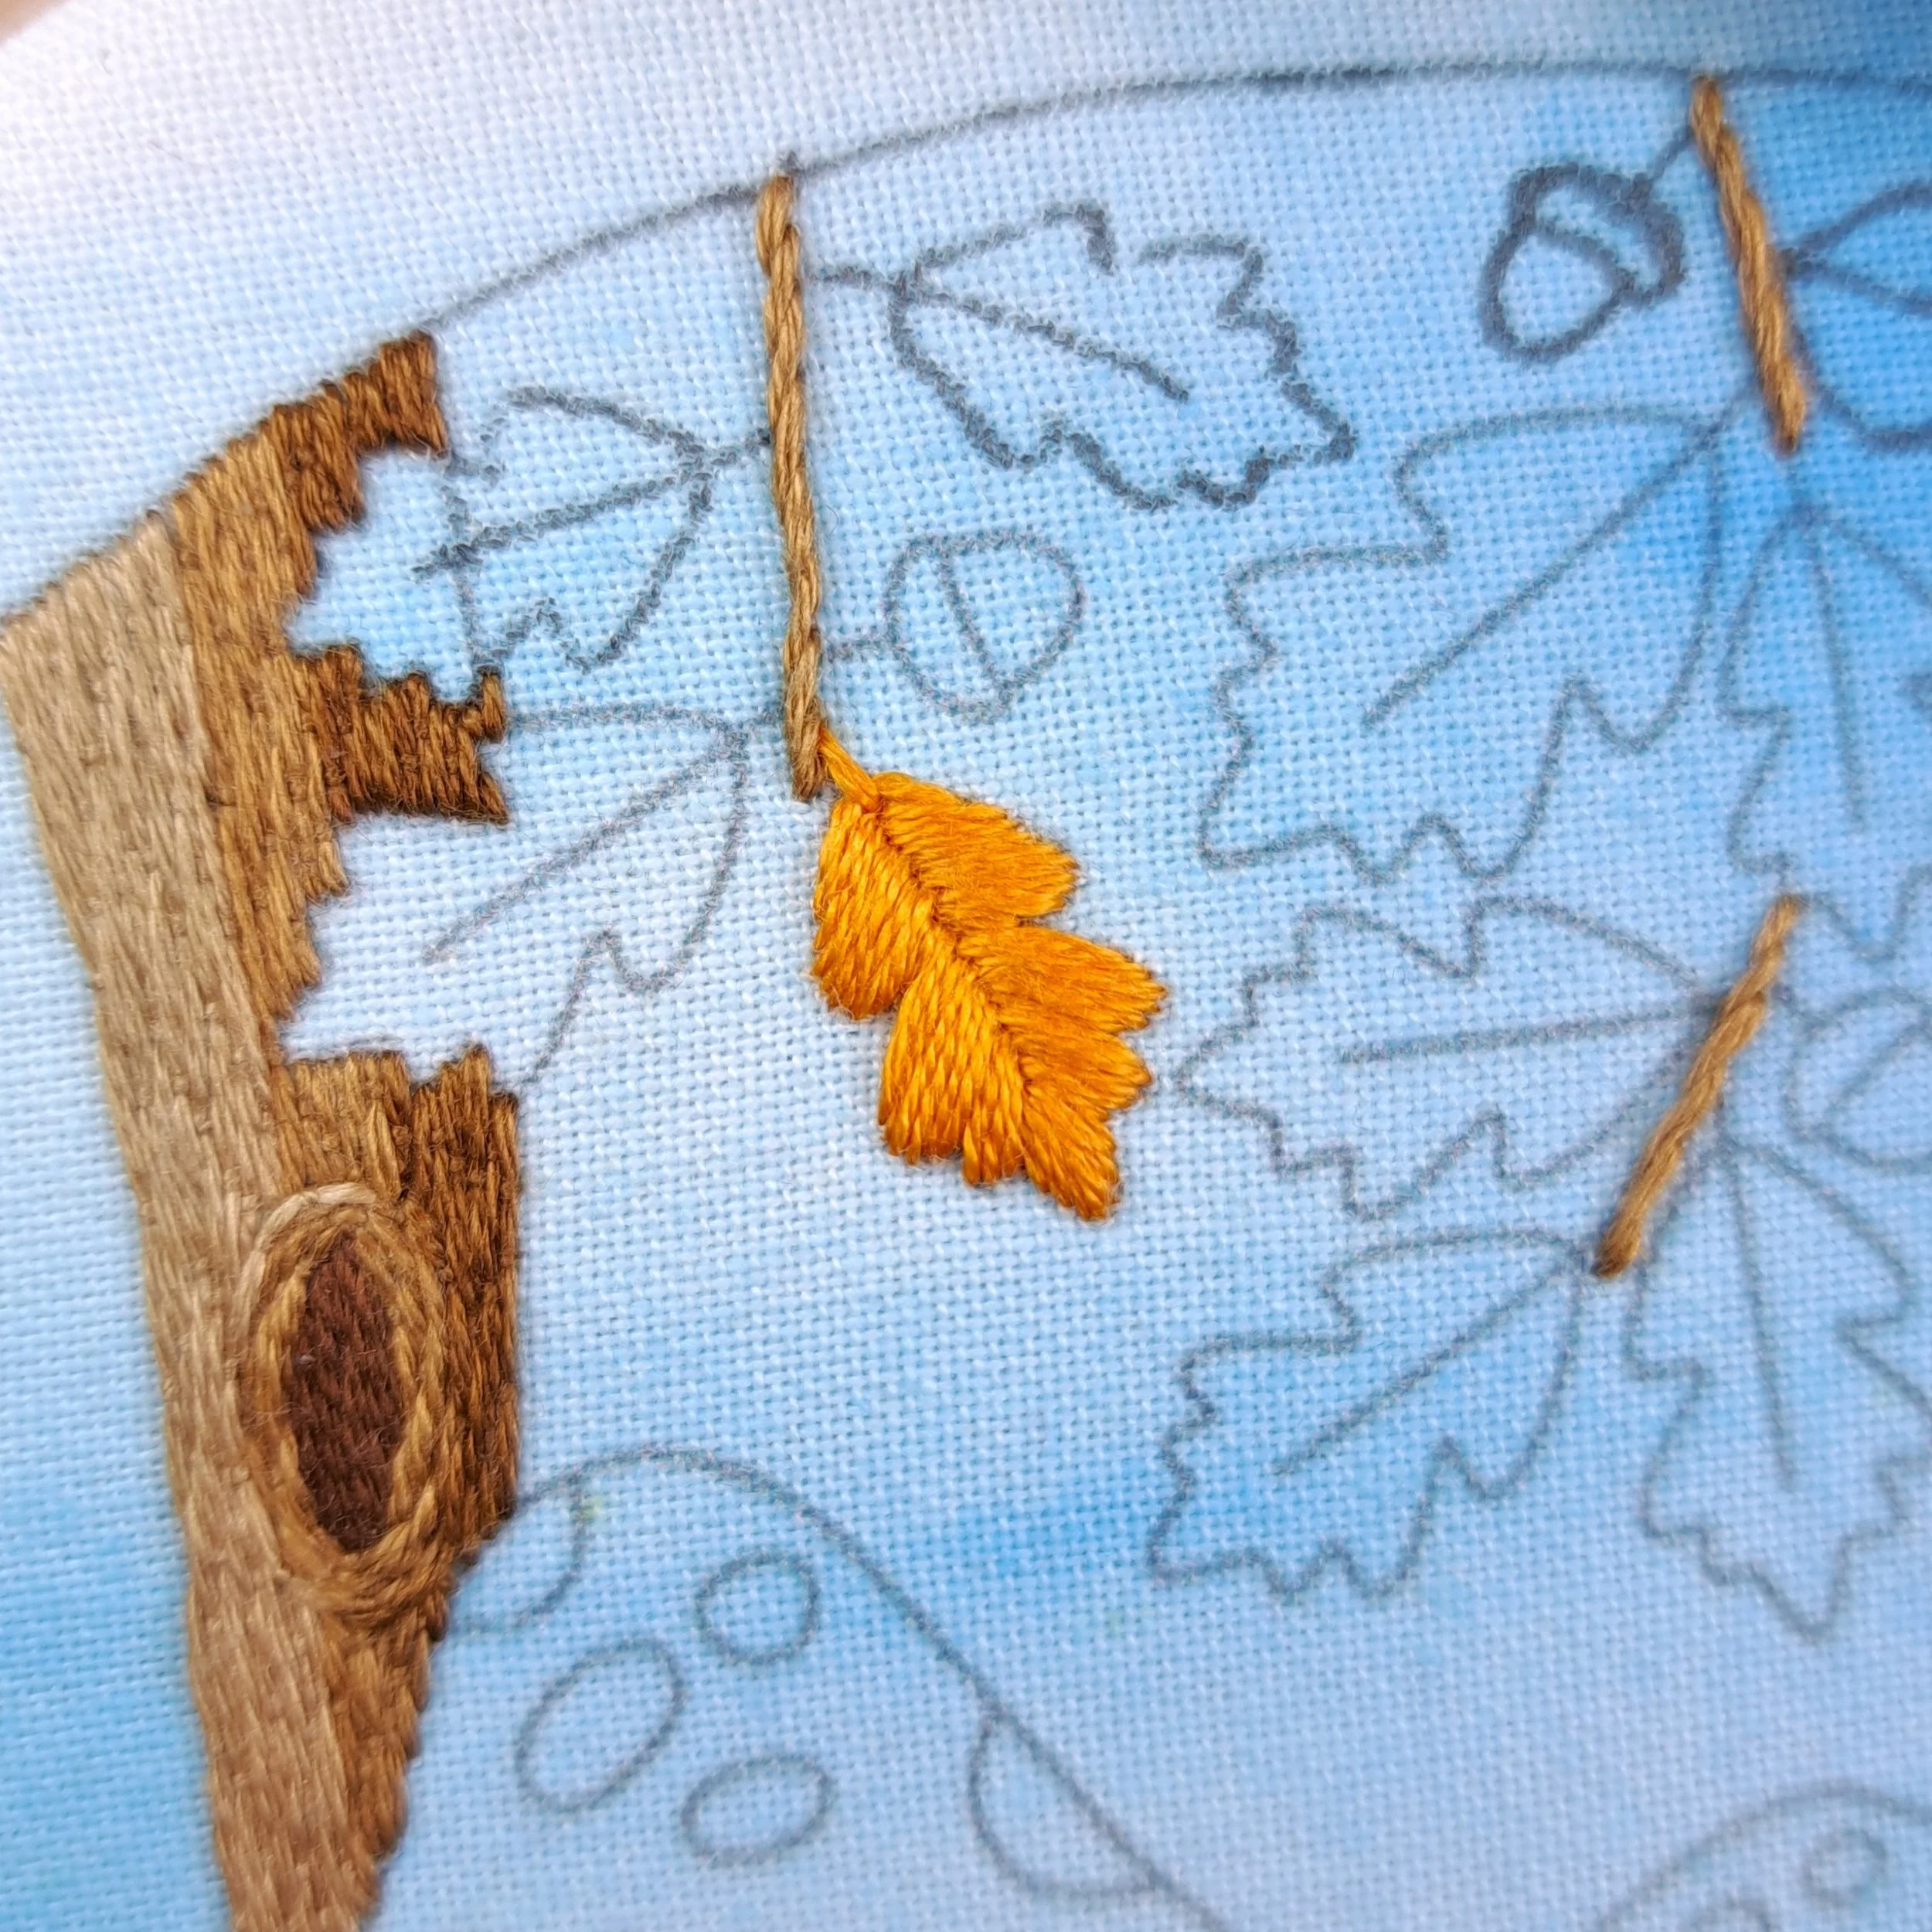
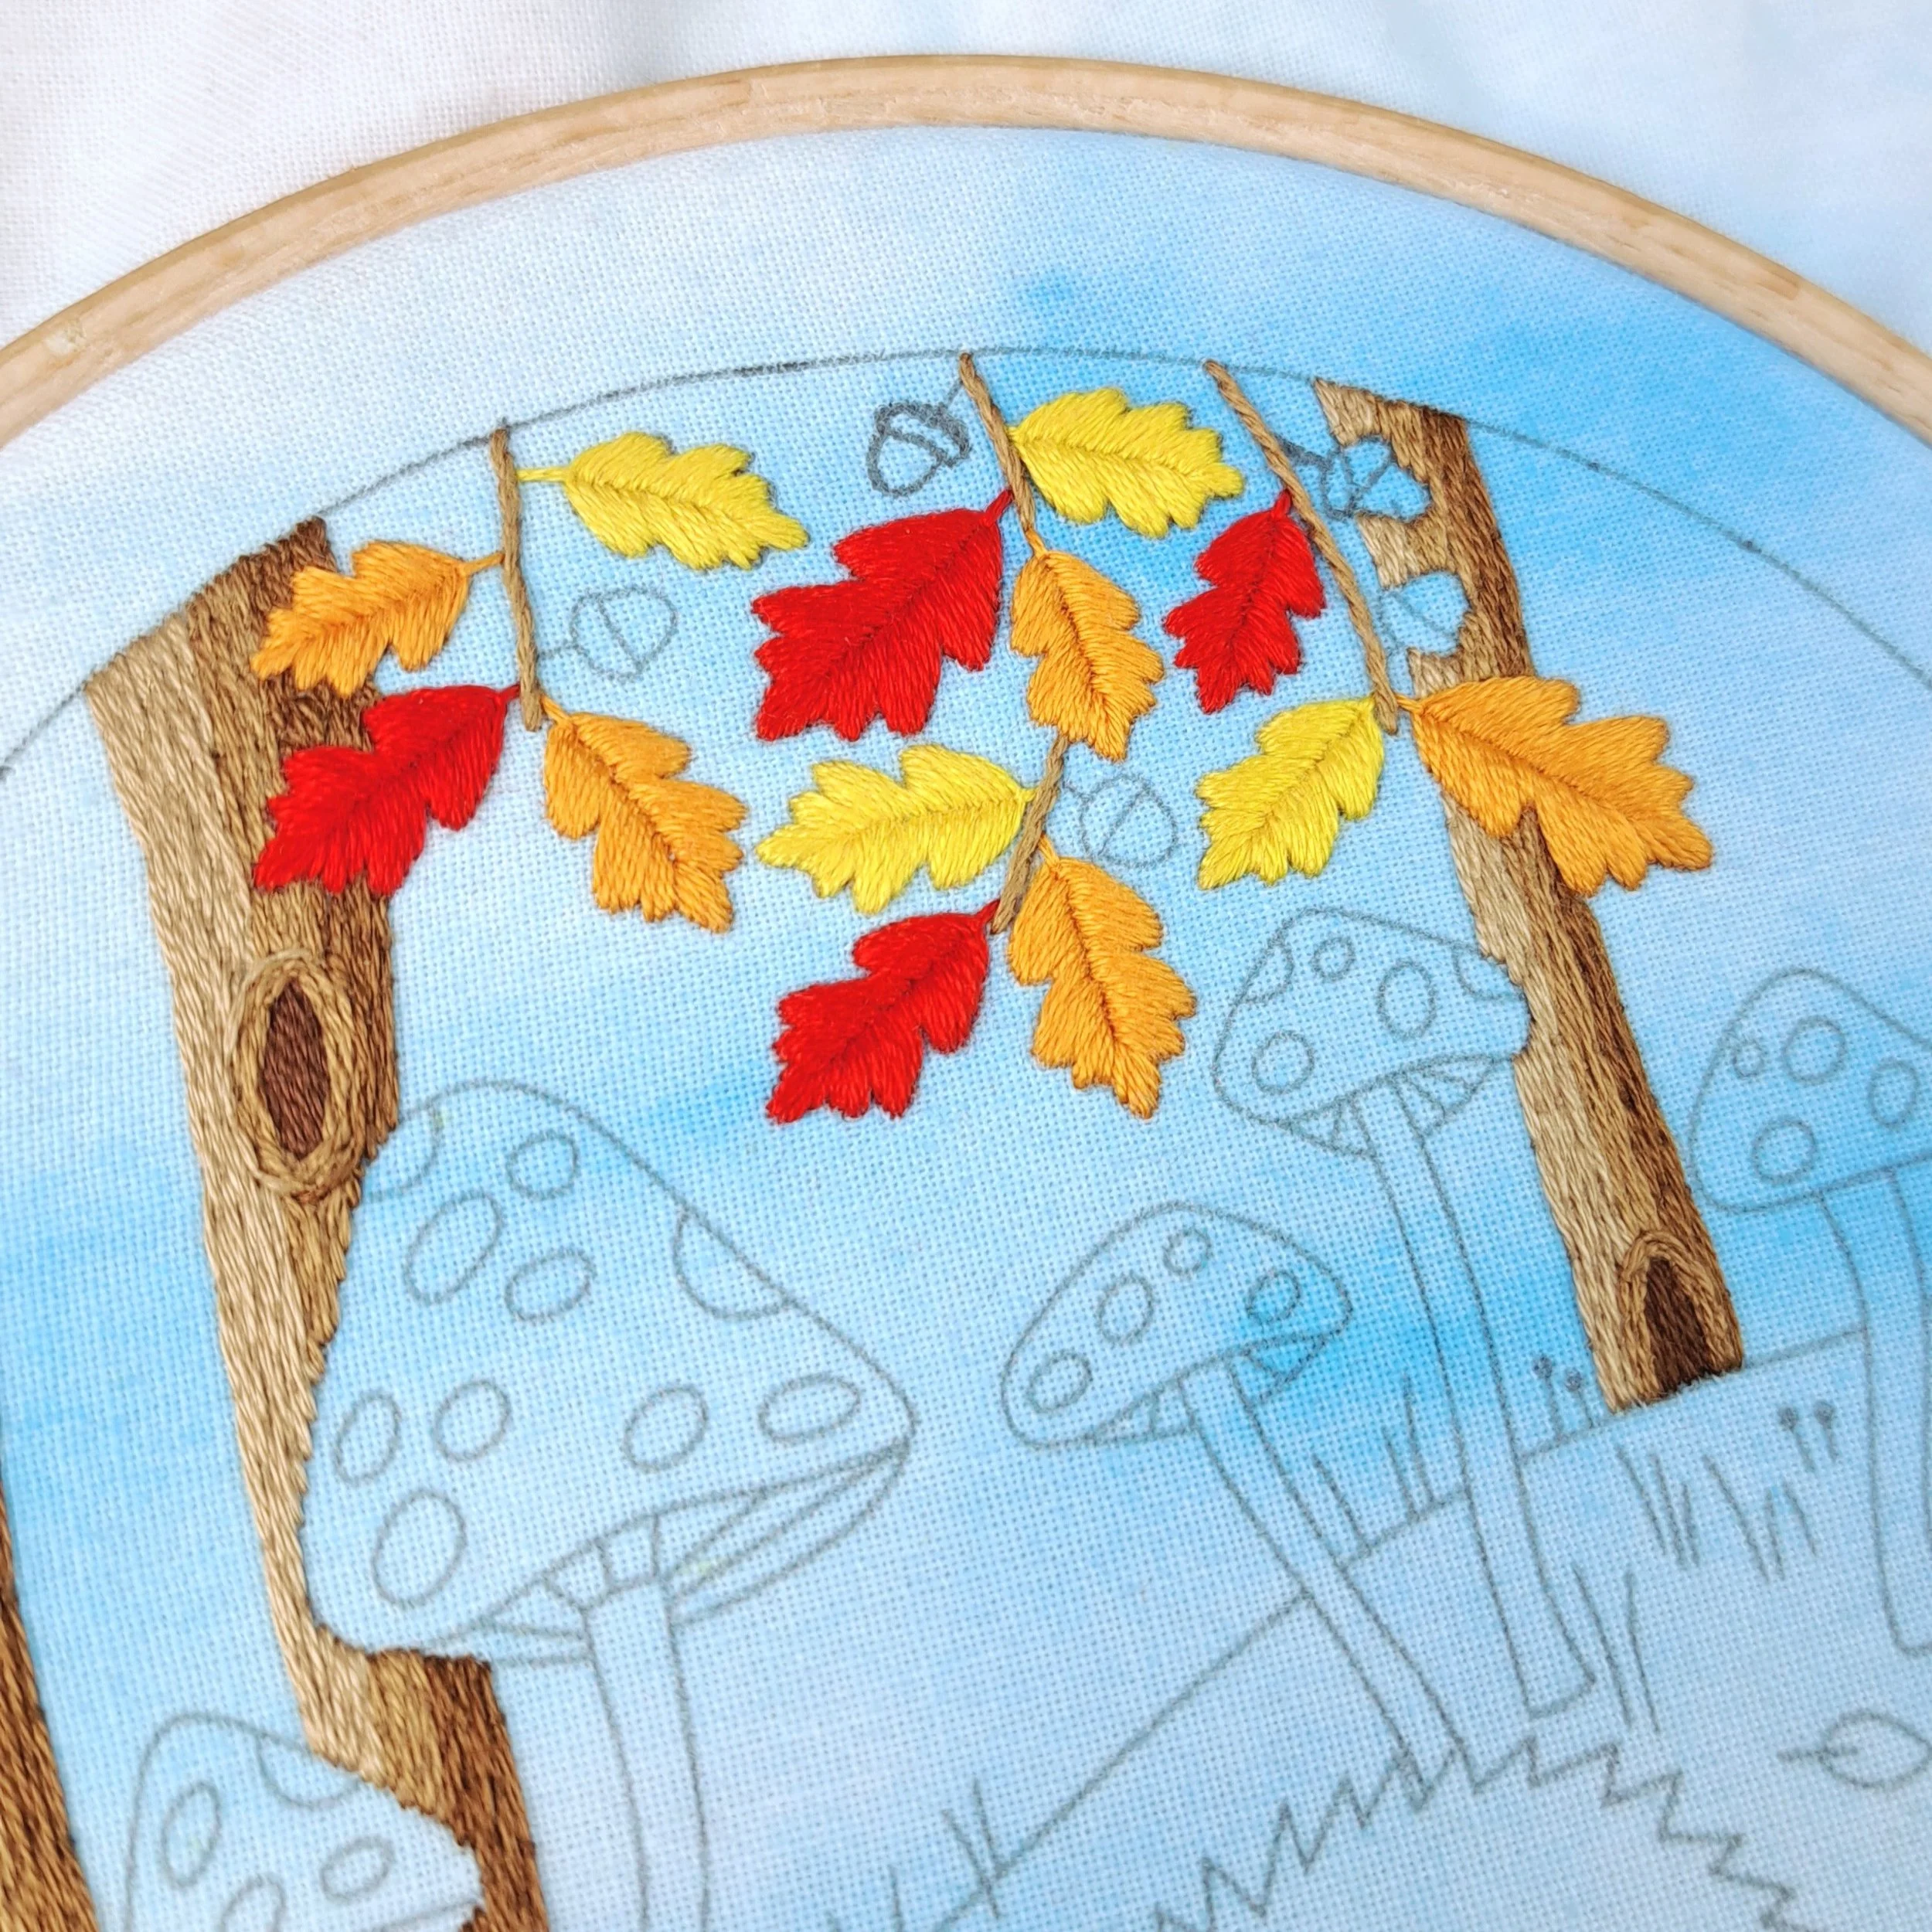
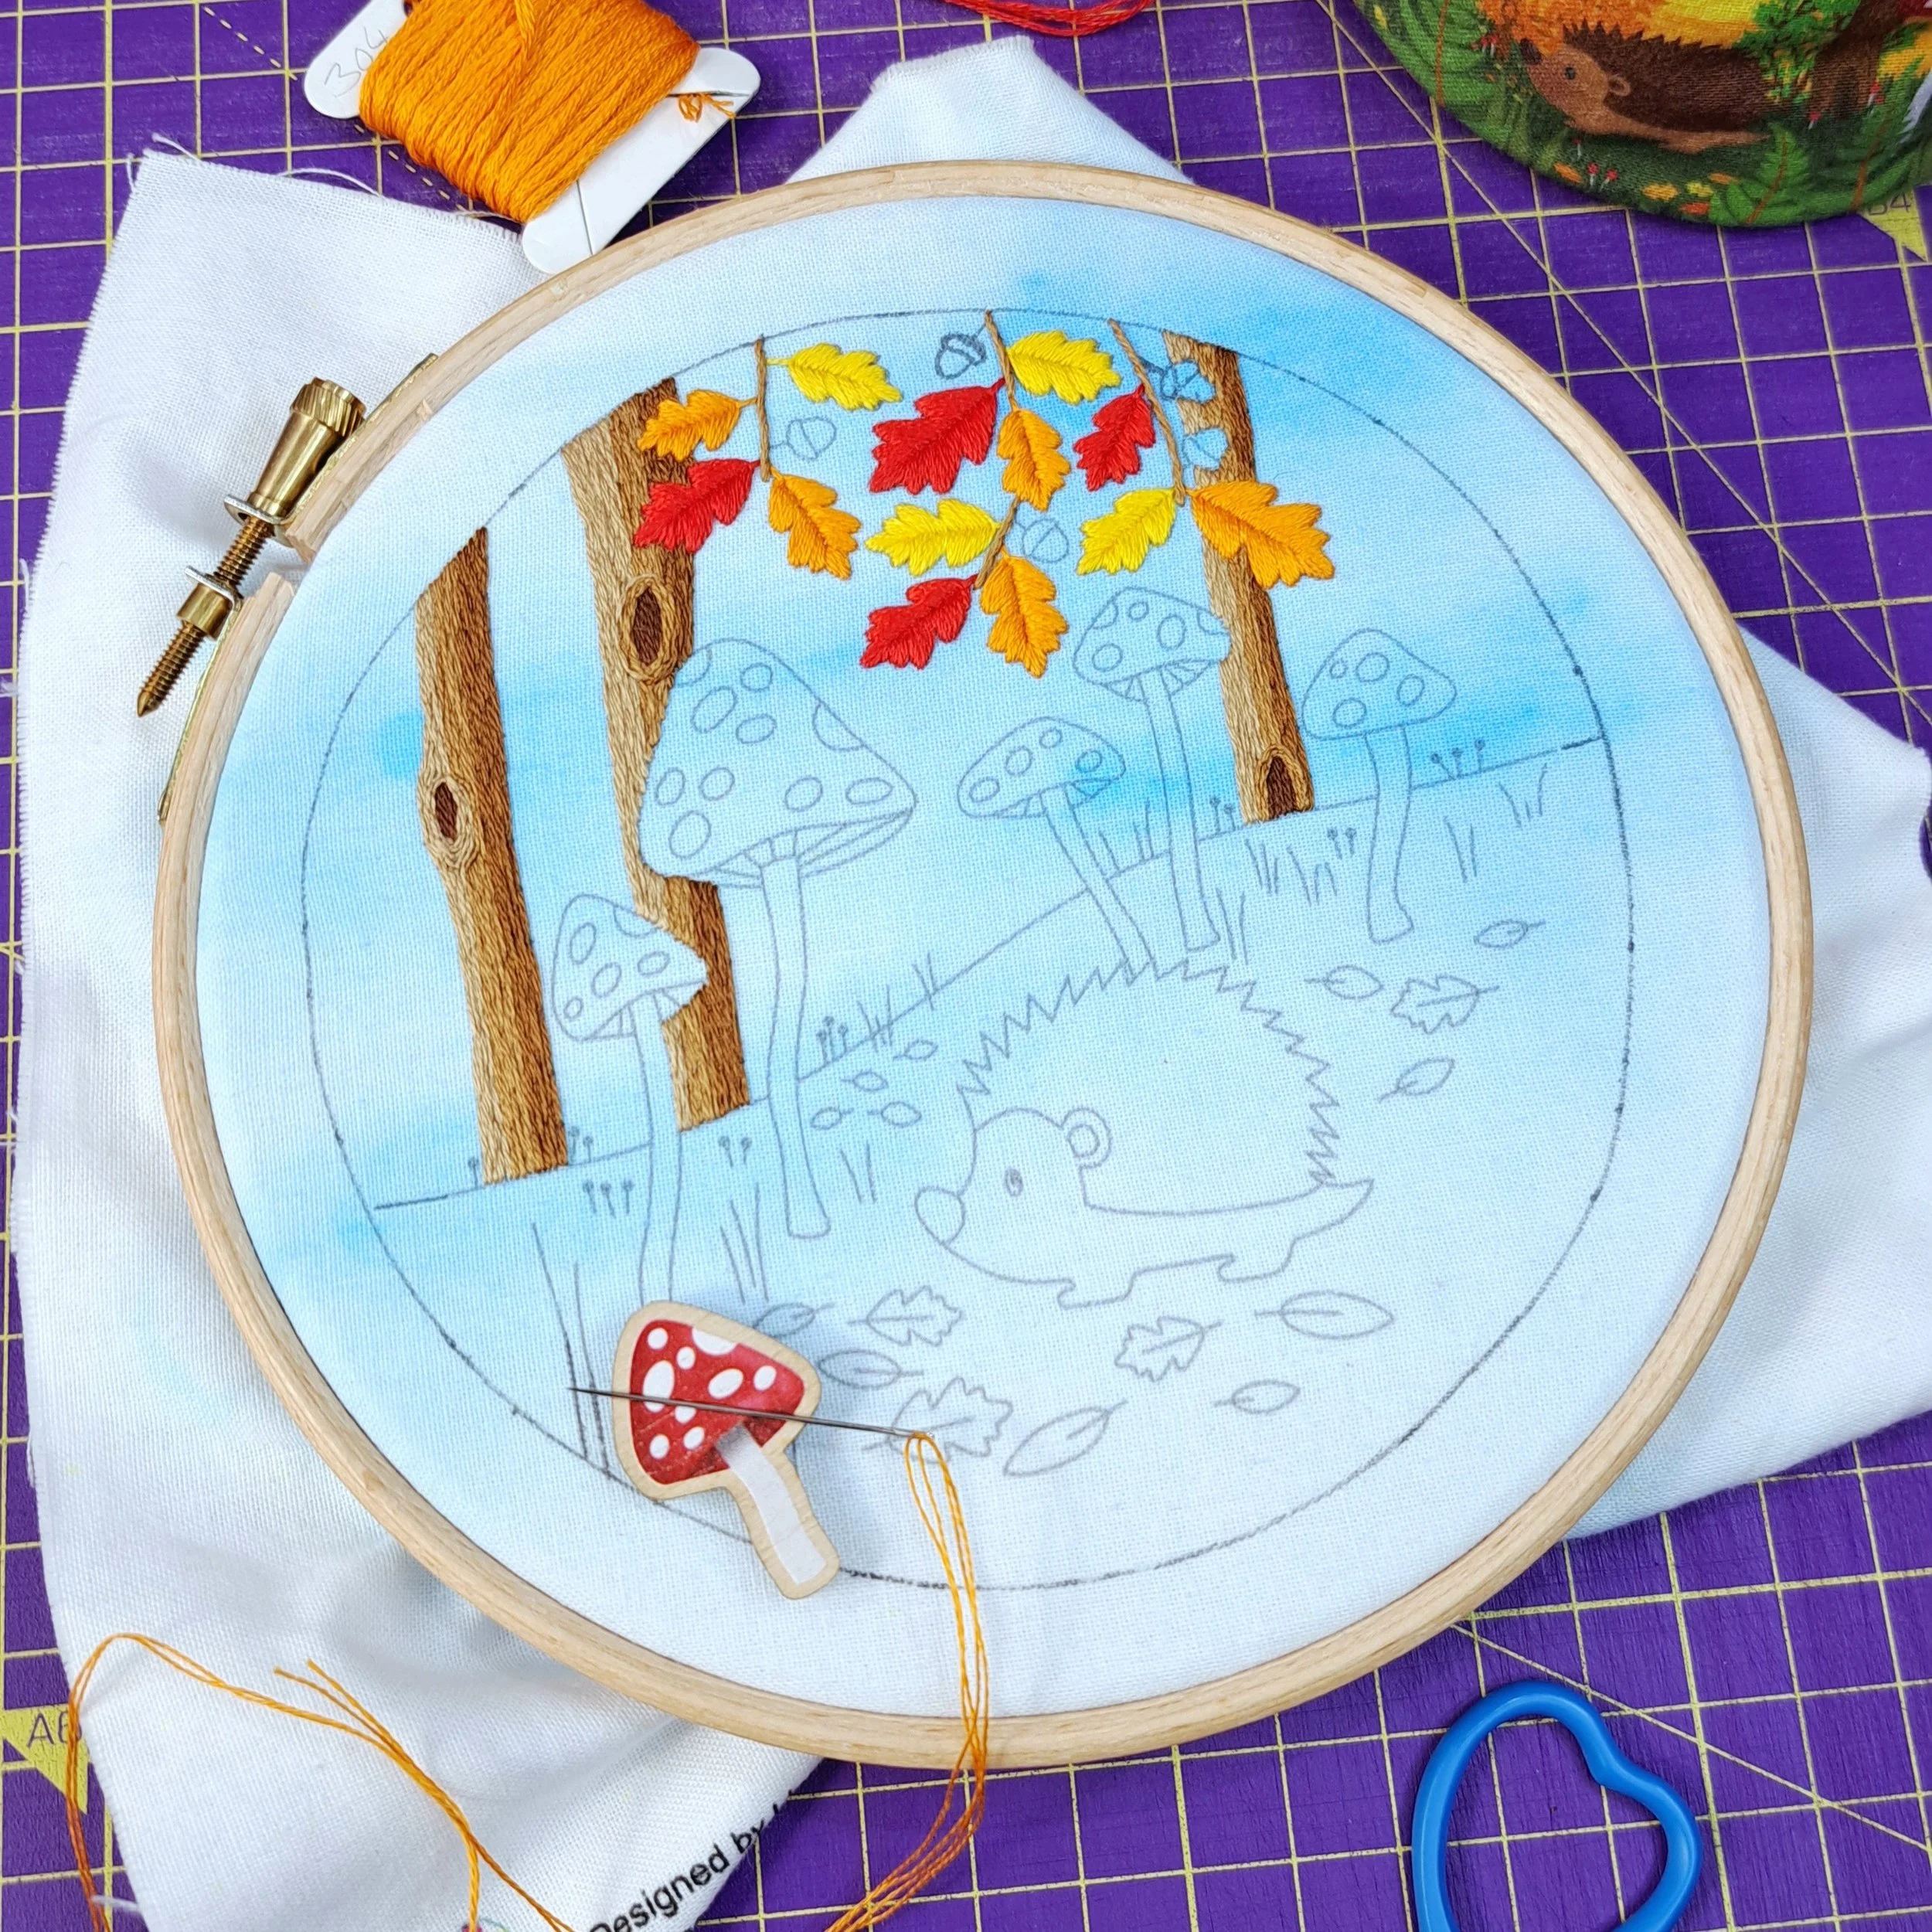
I stitched each oak leaf at the top of the design with Padded Leaf Stitch plus a single Fly Stitch using 2 strands of thread.
I used Anchor 298 (yellow), Anchor 304 (orange) and Anchor 9046 (red), and randomly decided which colour to use leaf at a time.
I started by adding a few straight stitches inside a leaf to make the padding. I stitched them parallel to the stem line of the leaf – this means that the stitches on top will sit over the padding, rather than falling in between them.
Then I stitched Leaf Stitch over the top, starting at the top of the leaf and working my way down.
Once the leaf was stitched, I finished the bottom with a single Fly Stitch to connect it to the branch.
🪡 I only seemed to be able to stitch my leaves neatly if they were the ‘right’ way up, so I had to keep adjusting and turning the hoop in my stand for every leaf. I’m not quite sure if this is a tip – I suspect it’s just a ‘me quirk’ 😄
Stitch – Padded Leaf Stitch and Fly Stitch
Thread colours - Anchor 298, Anchor 304 & Anchor 9046
Number of strands – 2
The Acorns – The Nut Part
I stitched one acorn at a time, but you could also stitch all the nut parts first, then move on to the stems and caps. It would save you changing thread colours as often.
I stitched the nut with Padded Satin Stitch using 2 strands of Anchor 355.
I started by adding a few horizontal straight stitches inside each nut to create the padding, then stitched vertical Satin Stitches over the top.
✨ A little tip:
I like to place my very first Satin Stitch right down the centre of the shape, then stitch outwards one side at a time. It really helps keep the stitches at a consistent angle.
Stitch – Padded Satin Stitch
Thread colour - Anchor 355
Number of strands – 2
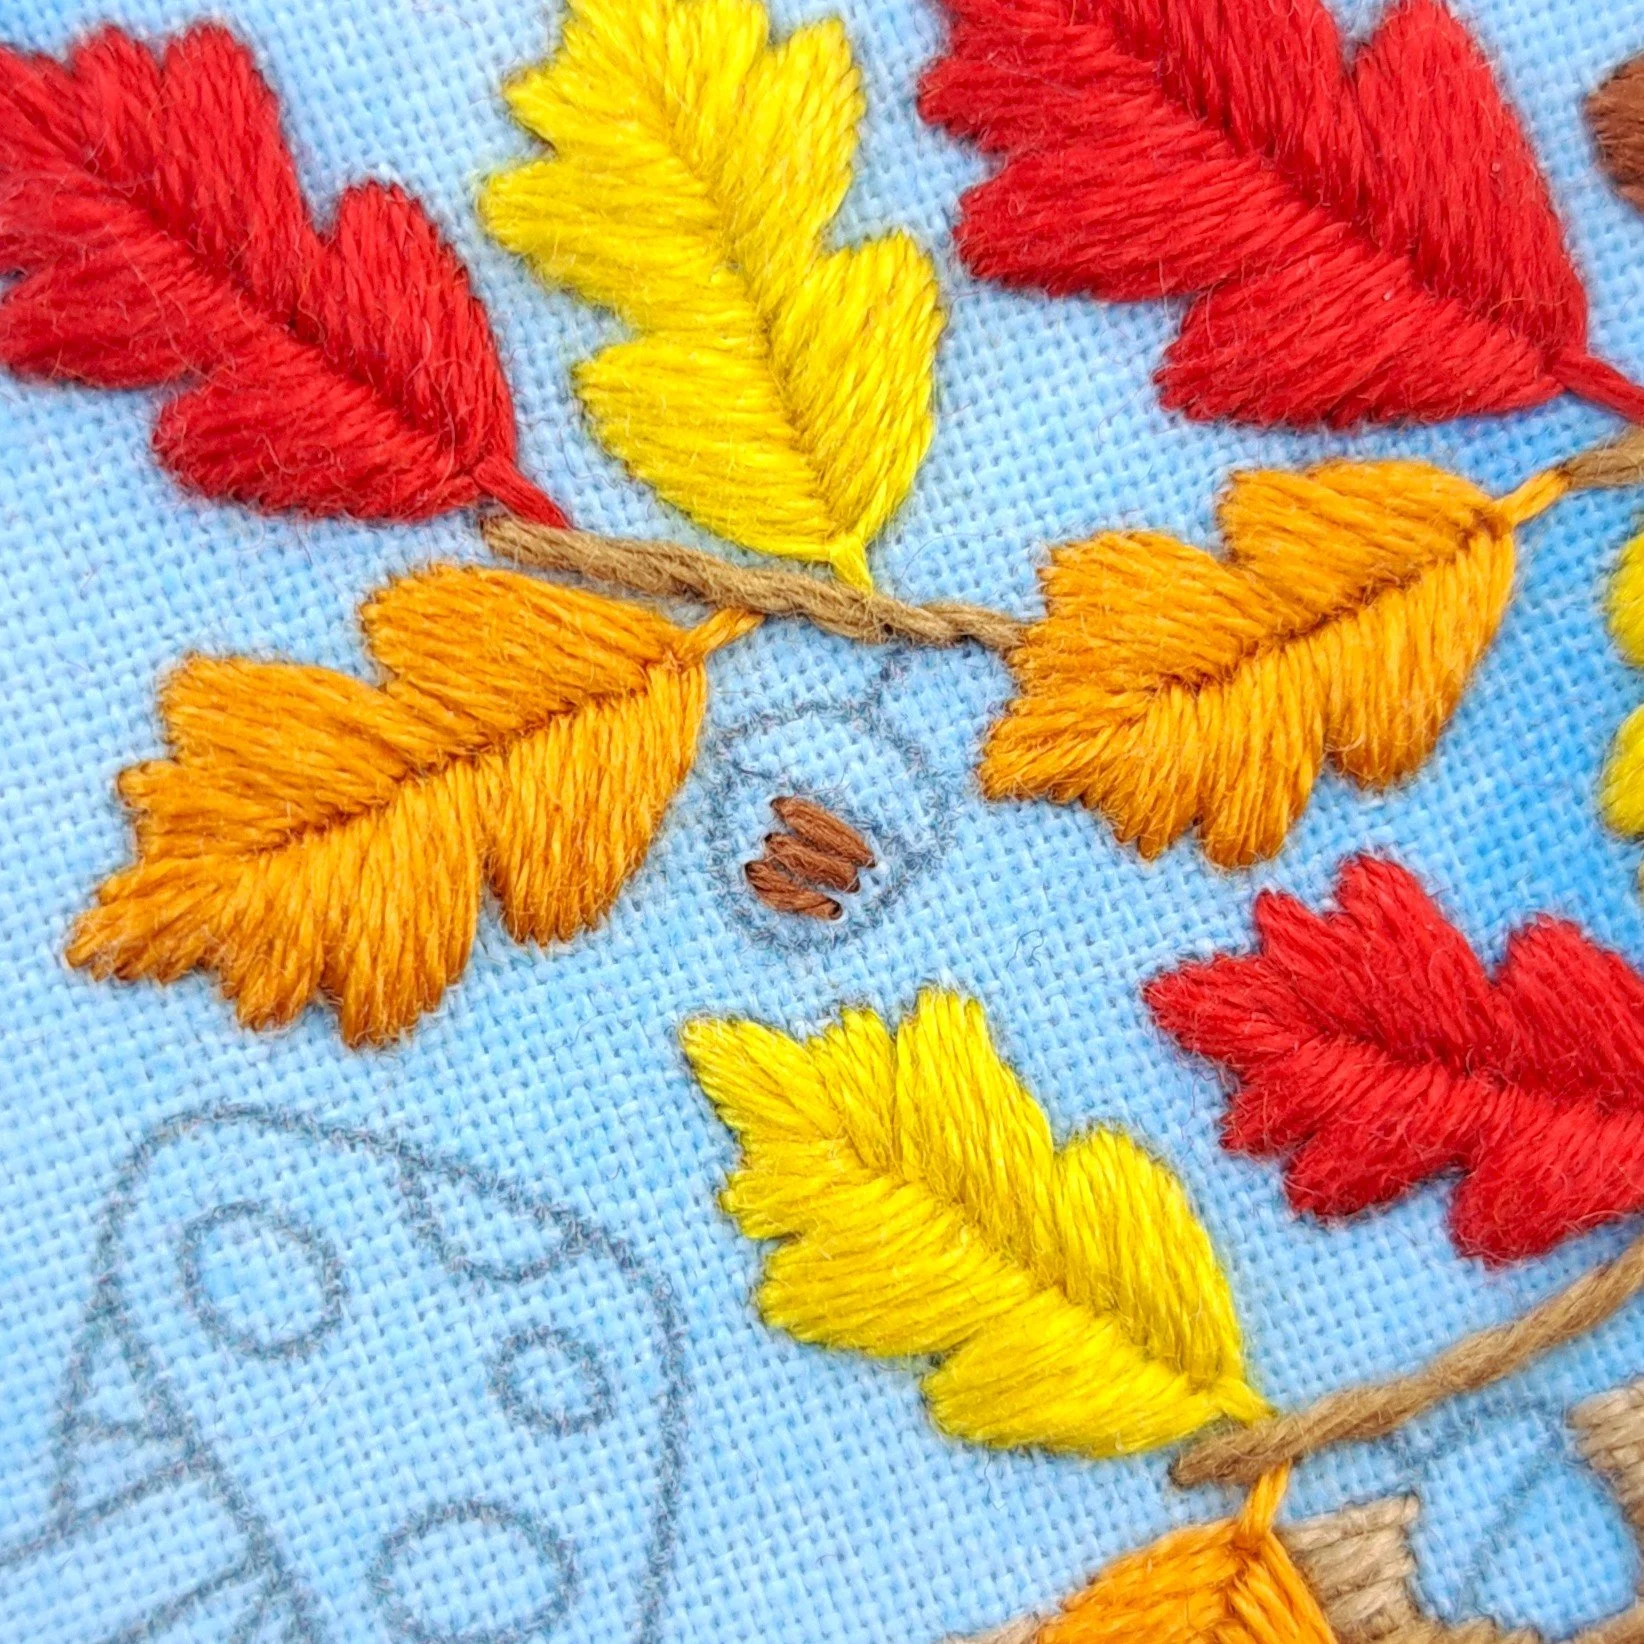
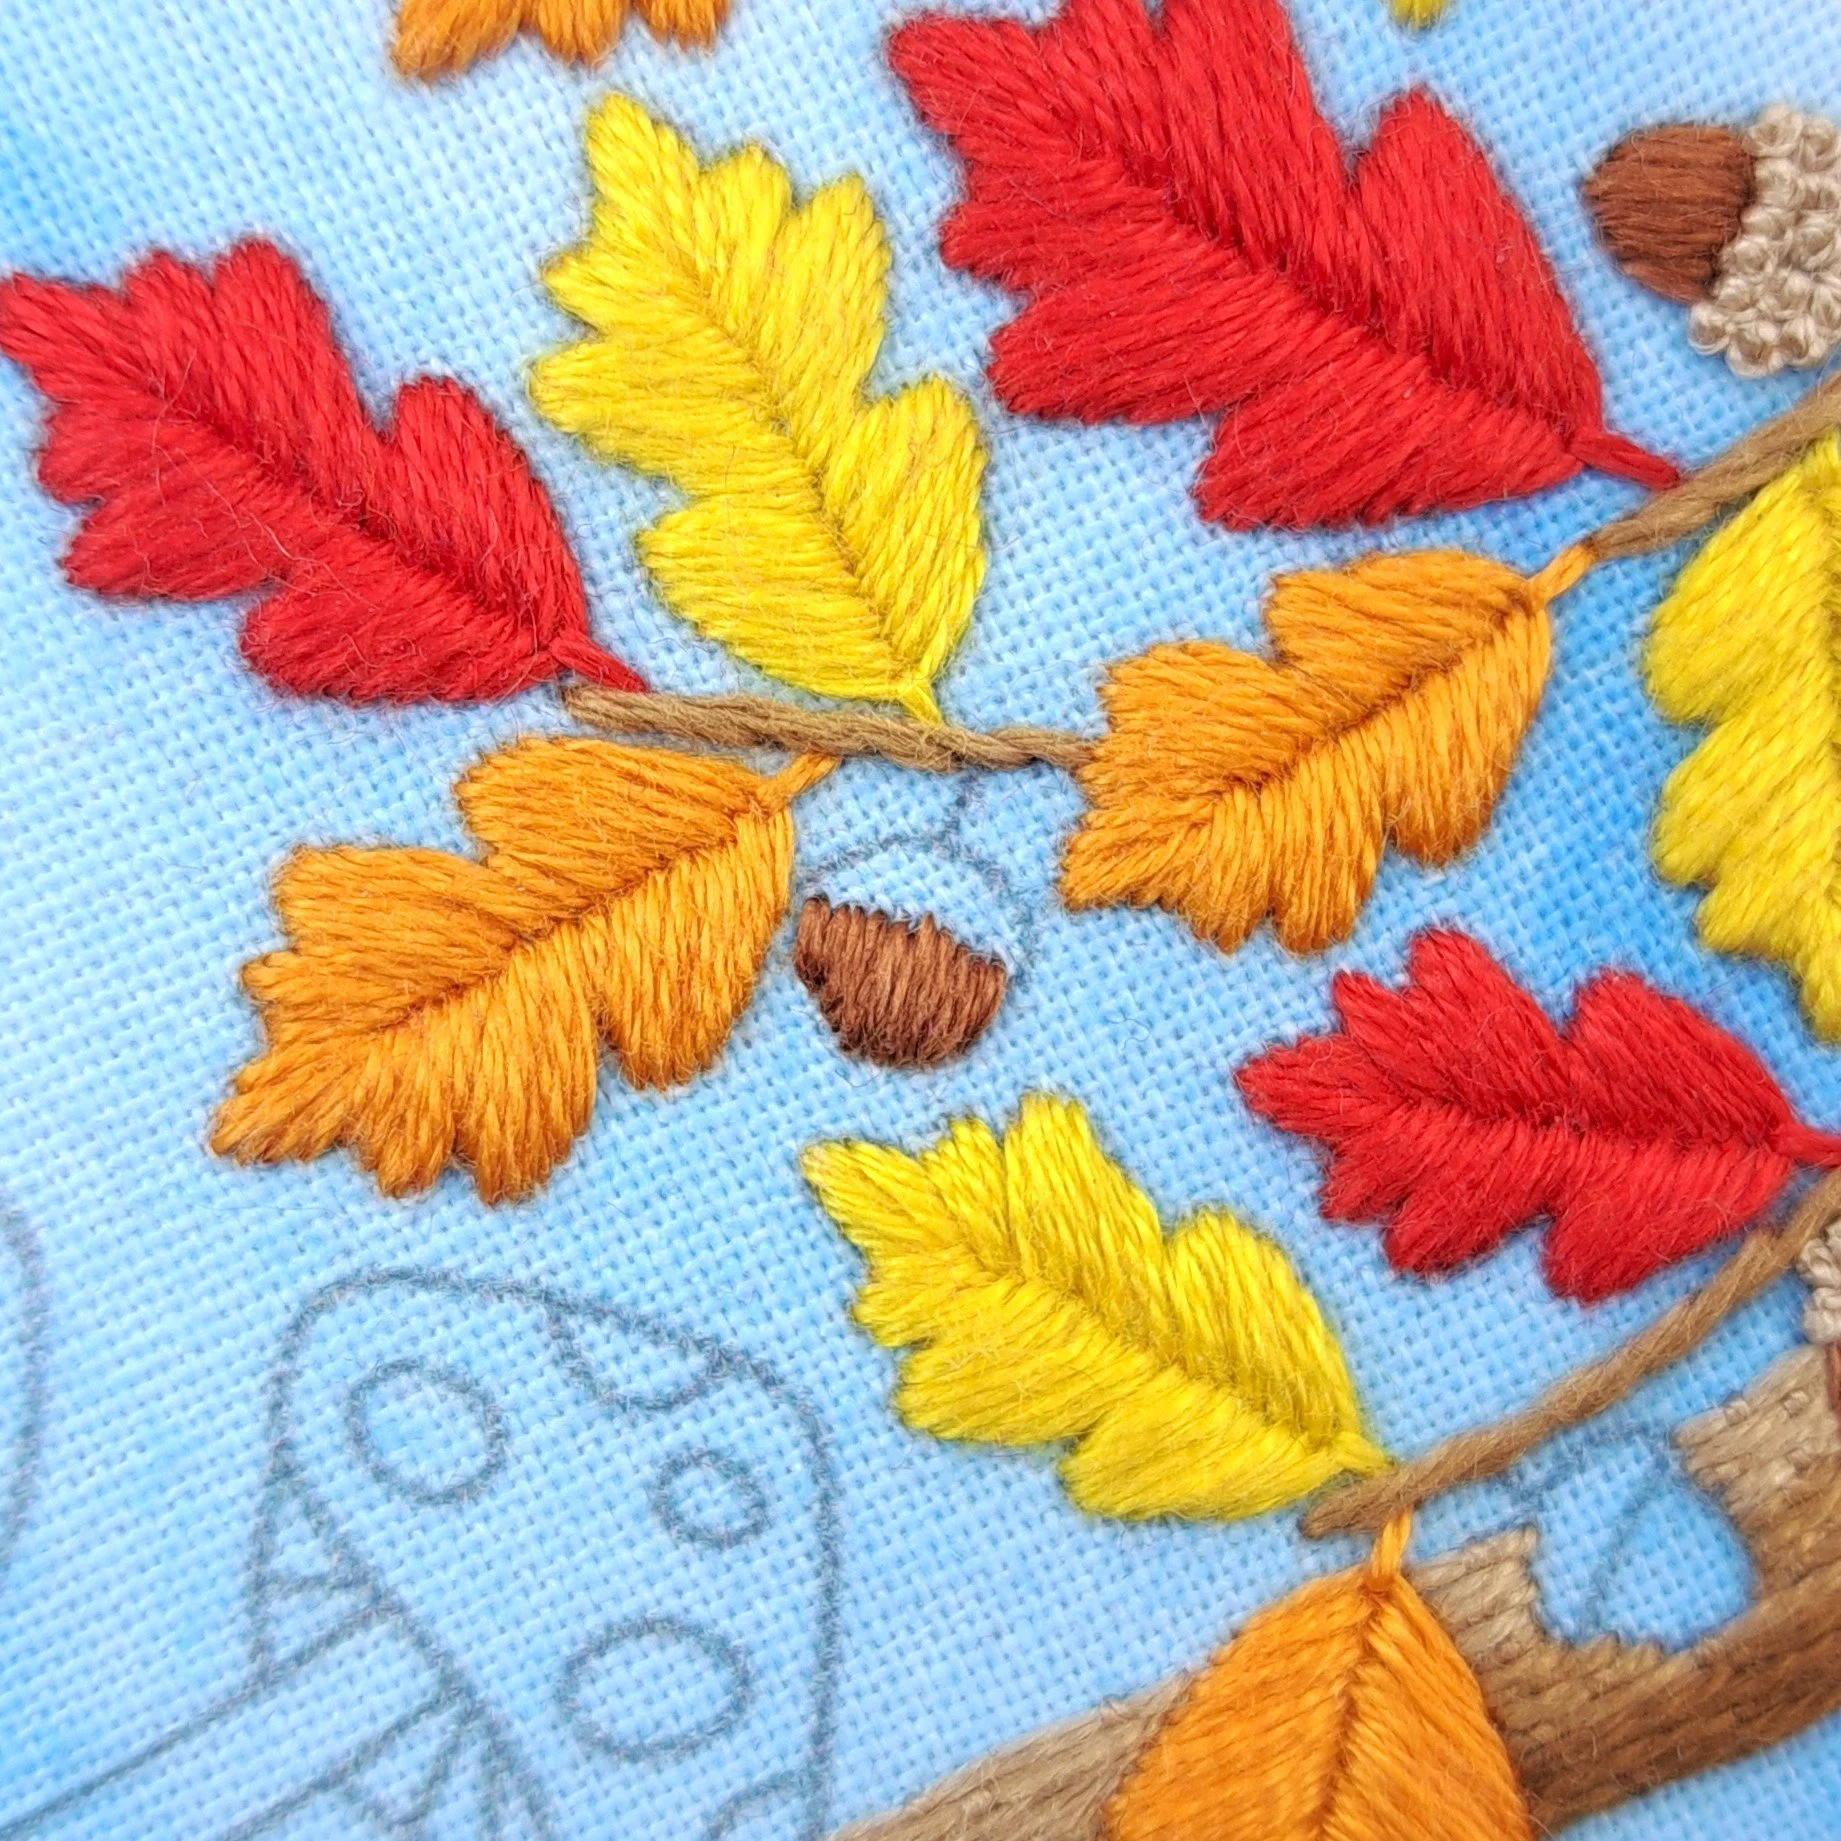
The Acorns – The Stems
I stitched a single Straight Stitch using 2 strands of Anchor 374 for the stem of each acorn.
Stitch – Straight Stitch
Thread colour - Anchor 374
Number of strands – 2
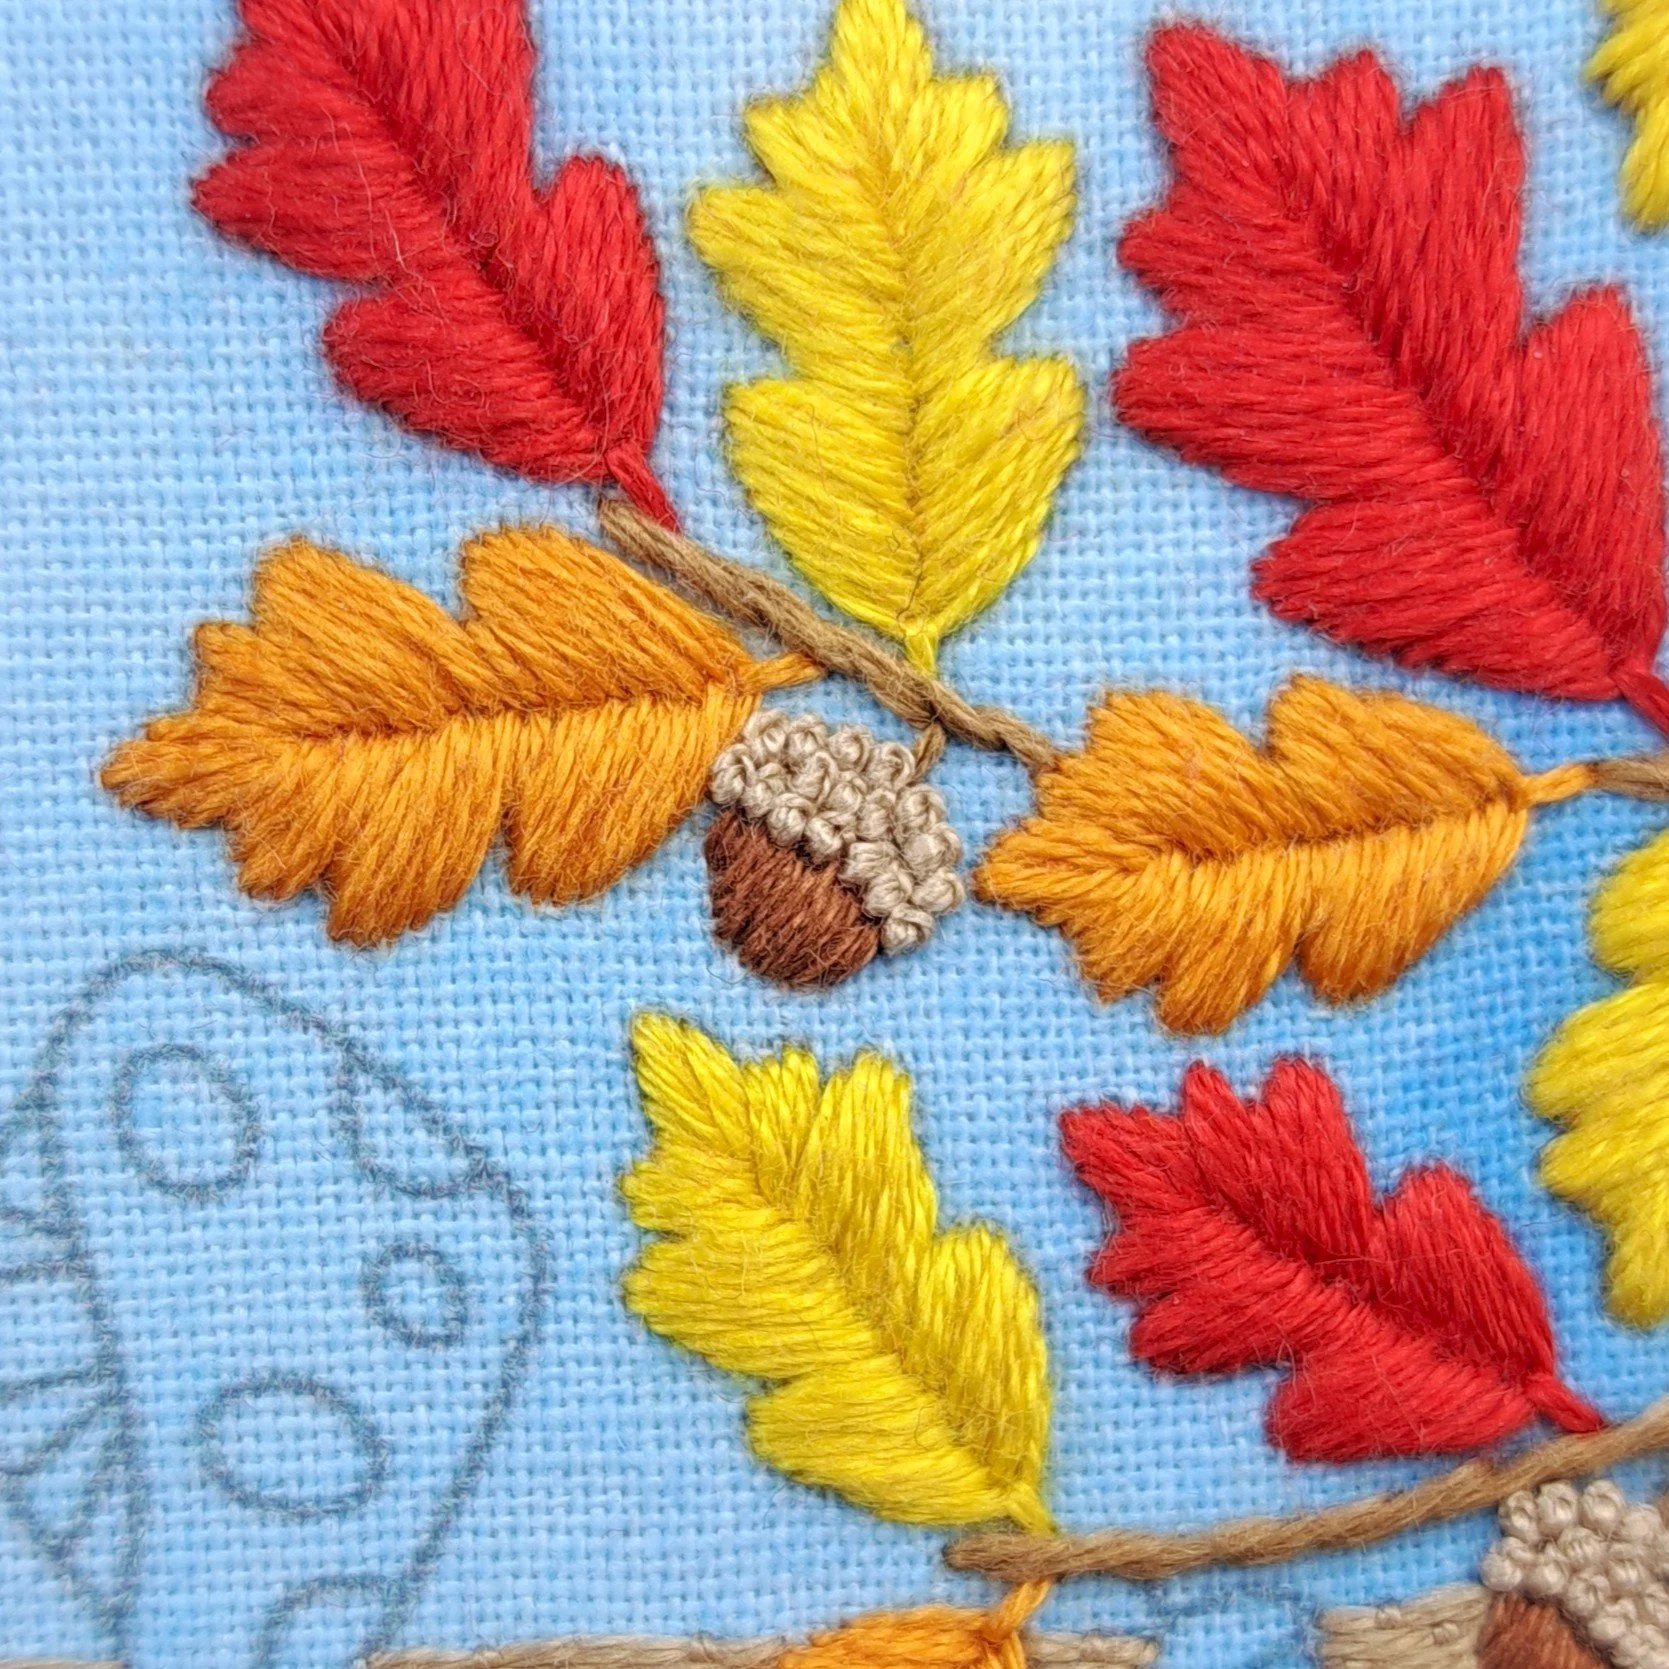
The Acorns – The Cap
To finish off these cute little acorns, I filled the caps with French Knots (with 1 wrap) using 2 strands of Anchor 372.
I started with a ring of knots around the outside edge of the cap, then popped a few more knots in the middle to fill them in.
Stitch – French Knots (1 wrap)
Thread colour - Anchor 372
Number of strands – 2
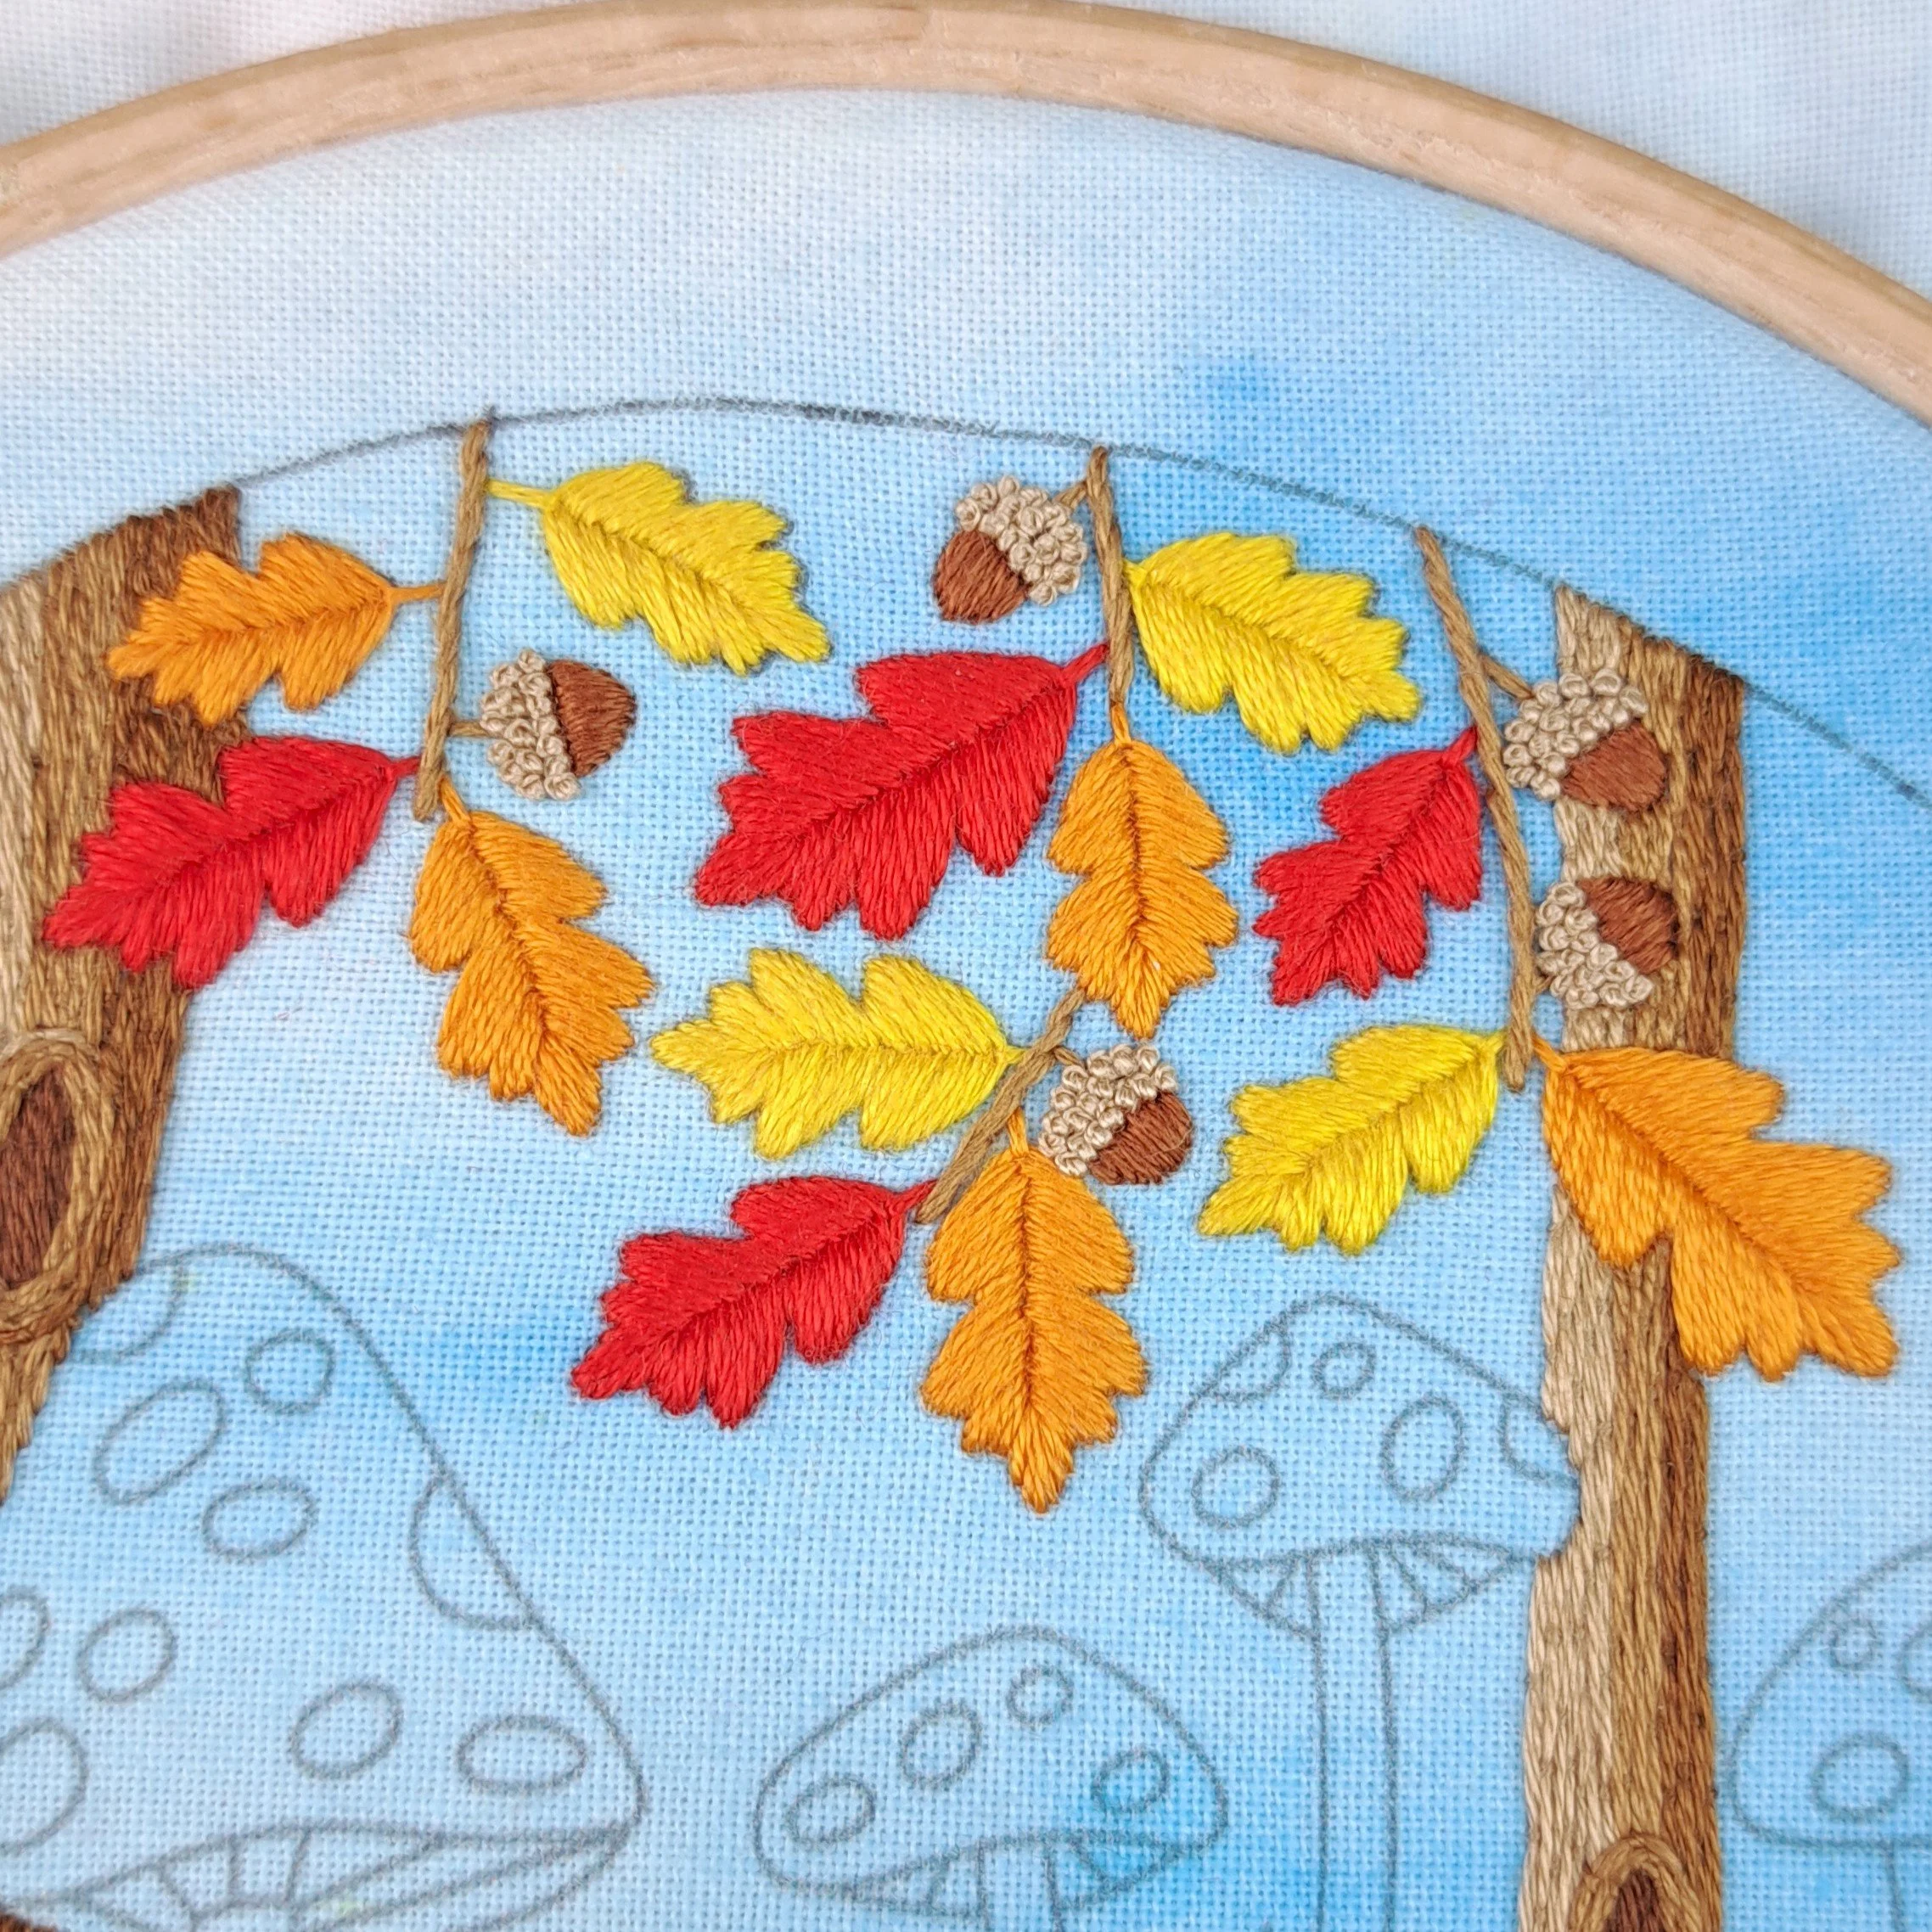
The Mushrooms – The Gills
Originally, I wasn’t planning on stitching these next (I was going to stitch the grass, as that’s the next furthest back part of the design). But then I realised I wanted the grass to come up into the bottom of the mushroom stalks a little, so I switched things around and decided to stitch the mushrooms next instead 😄
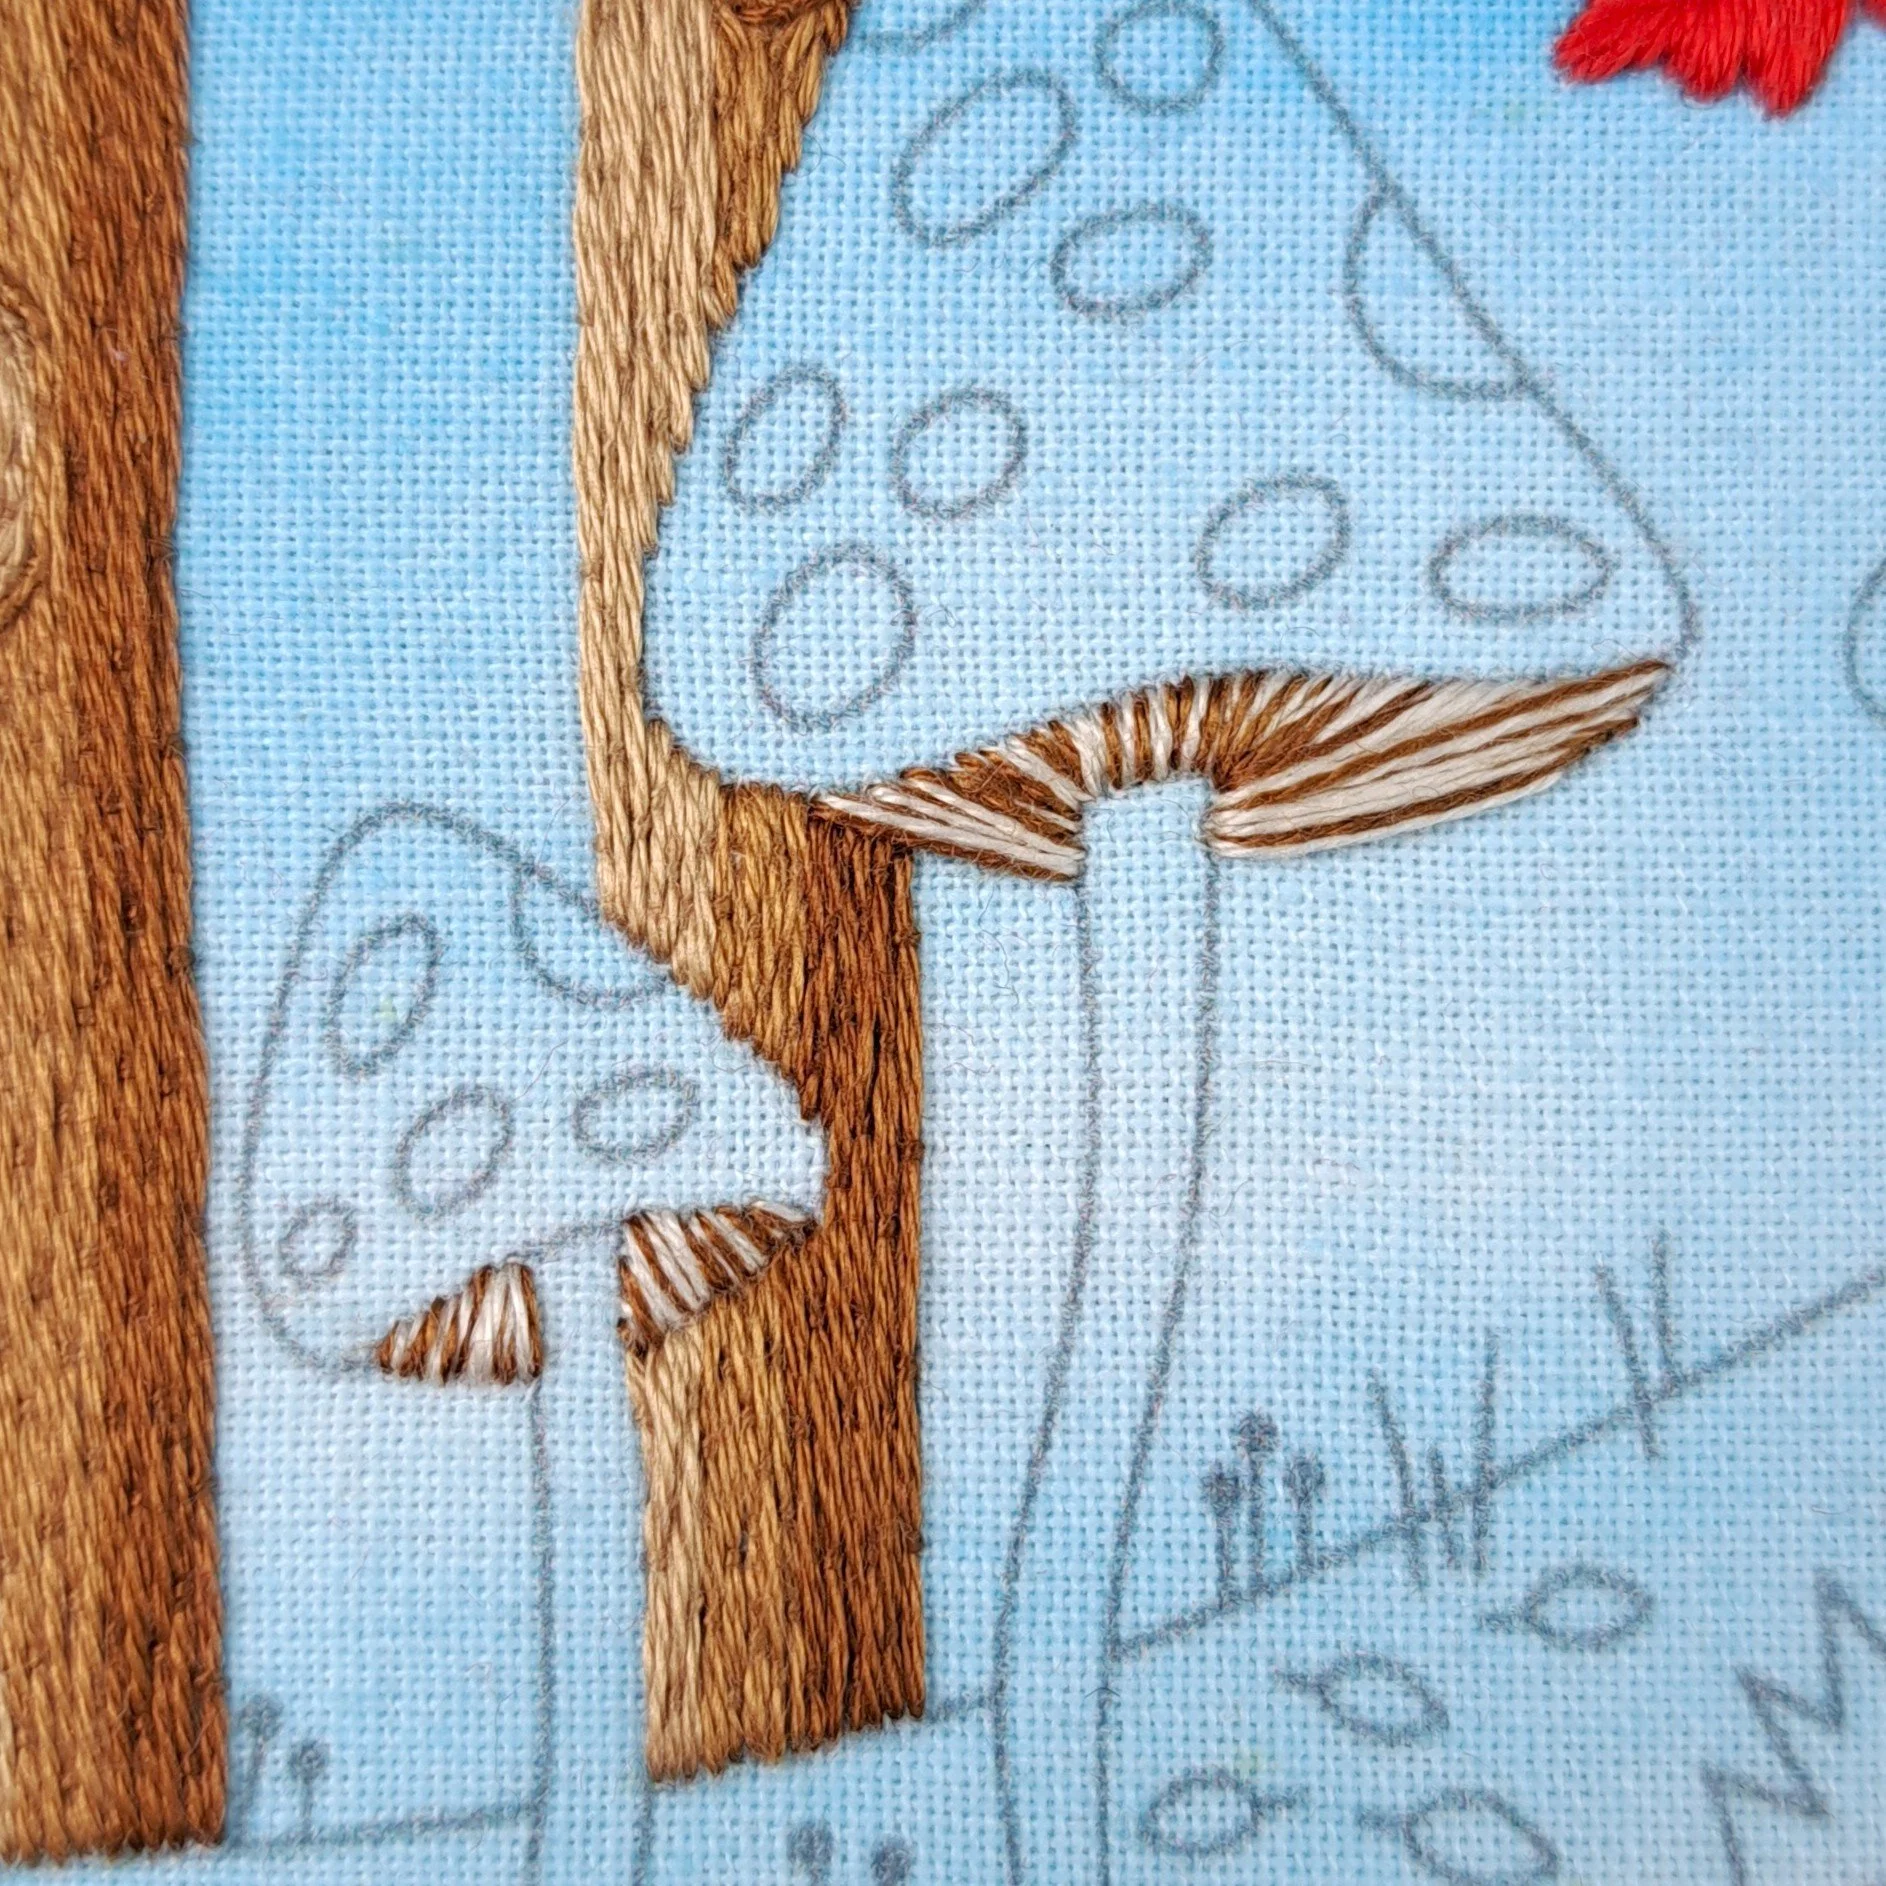
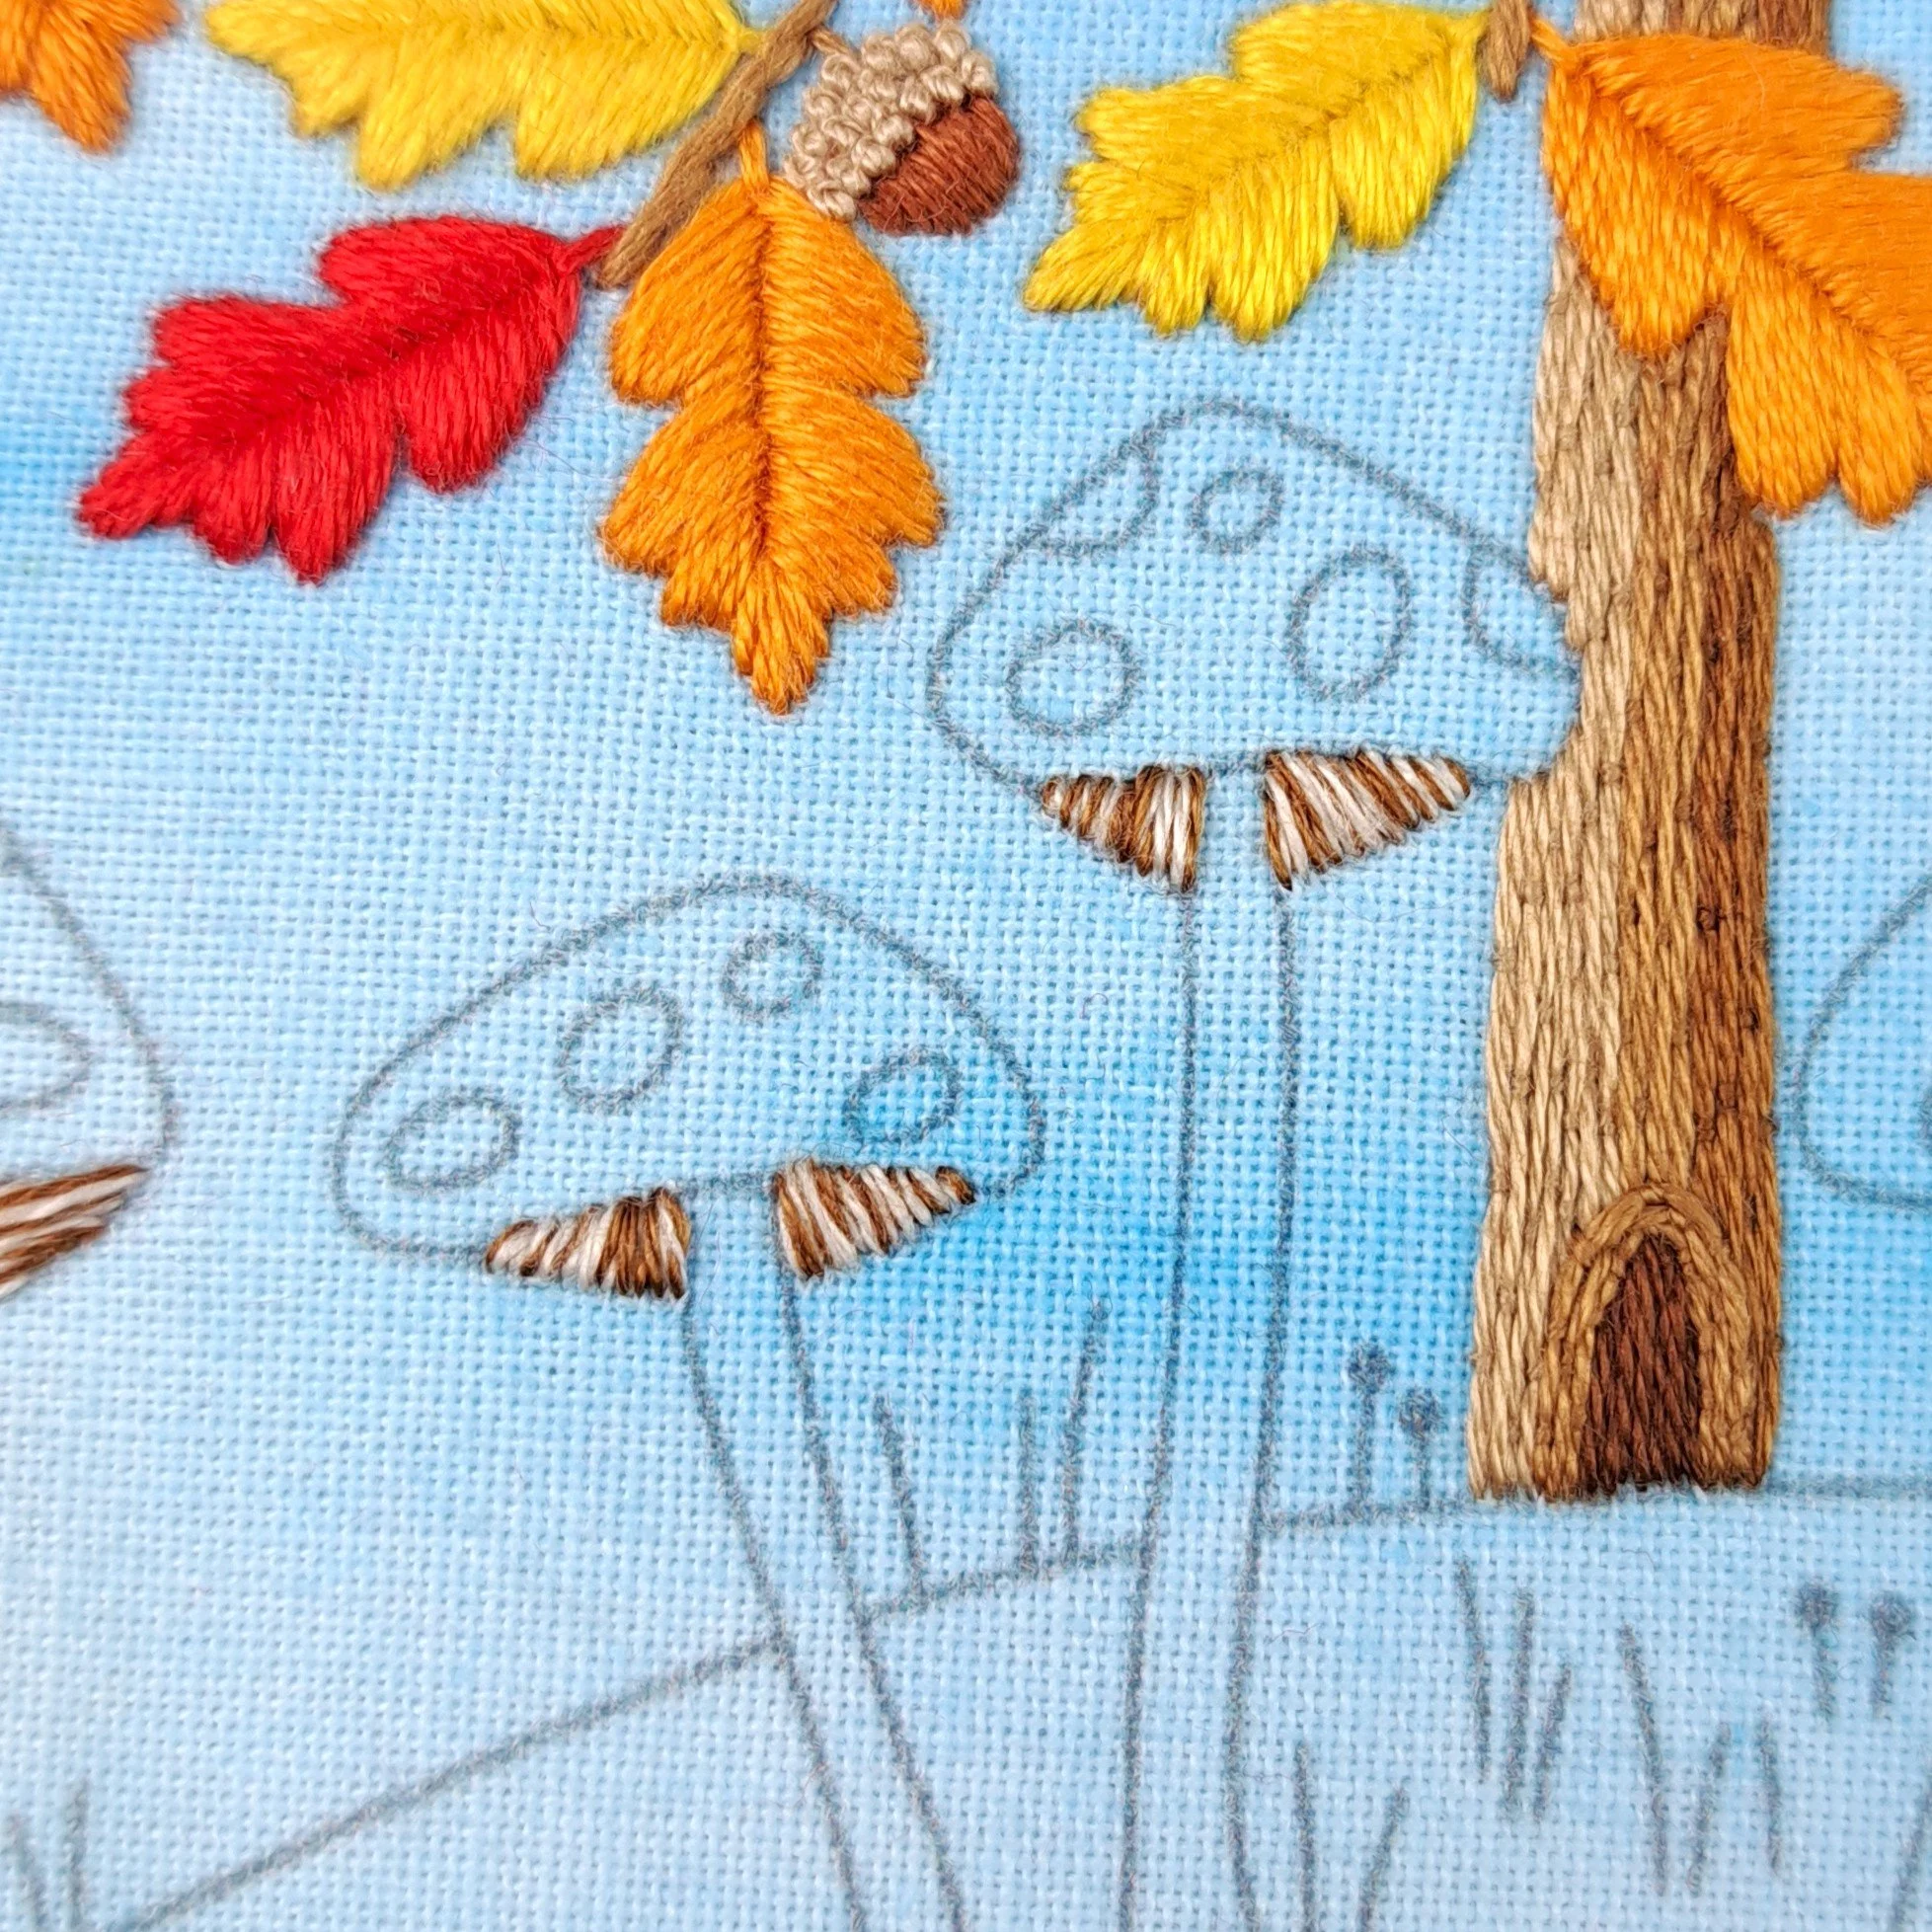
I stitched the gills with Satin Stitch using 2 strands of thread. I used 1 strand of Anchor 926 and 1 strand of Anchor 944, combined and stitched as one.
I really love the effect of stitching with two (or more) shades of thread at once. I really love how it makes a lovely random striped pattern here – and it also helps to disguise any imperfect stitching and looks much more complicated than it actually is! 😉
I stitched over the printed gill lines but used them to guide the angles of my stitches.
✨ A couple of little tips:
Because of the curved, wedge shape of these areas, I added a few ¾ length stitches (shorter satin stitches) here and there. Sometimes I also had stitches sharing a hole. This helped me keep the stitch angles consistent without creating too much bulk in the tighter areas, particularly on the biggest mushroom.
I also find it much easier to stitch from the outside of a wedge or curve towards the inside, so I mostly stitched all the gills that way. However, it is always easier to bring your needle up in an empty space and down into existing stitches. There is just one spot where I stitched in the opposite direction to avoid bringing my needle up through the stitches of the tree trunk.
Stitch – Satin Stitch
Thread colours - Anchor 926 and Anchor 944
Number of strands – 2 (one strand of each combined and stitched together)
The Mushrooms – The Stalks
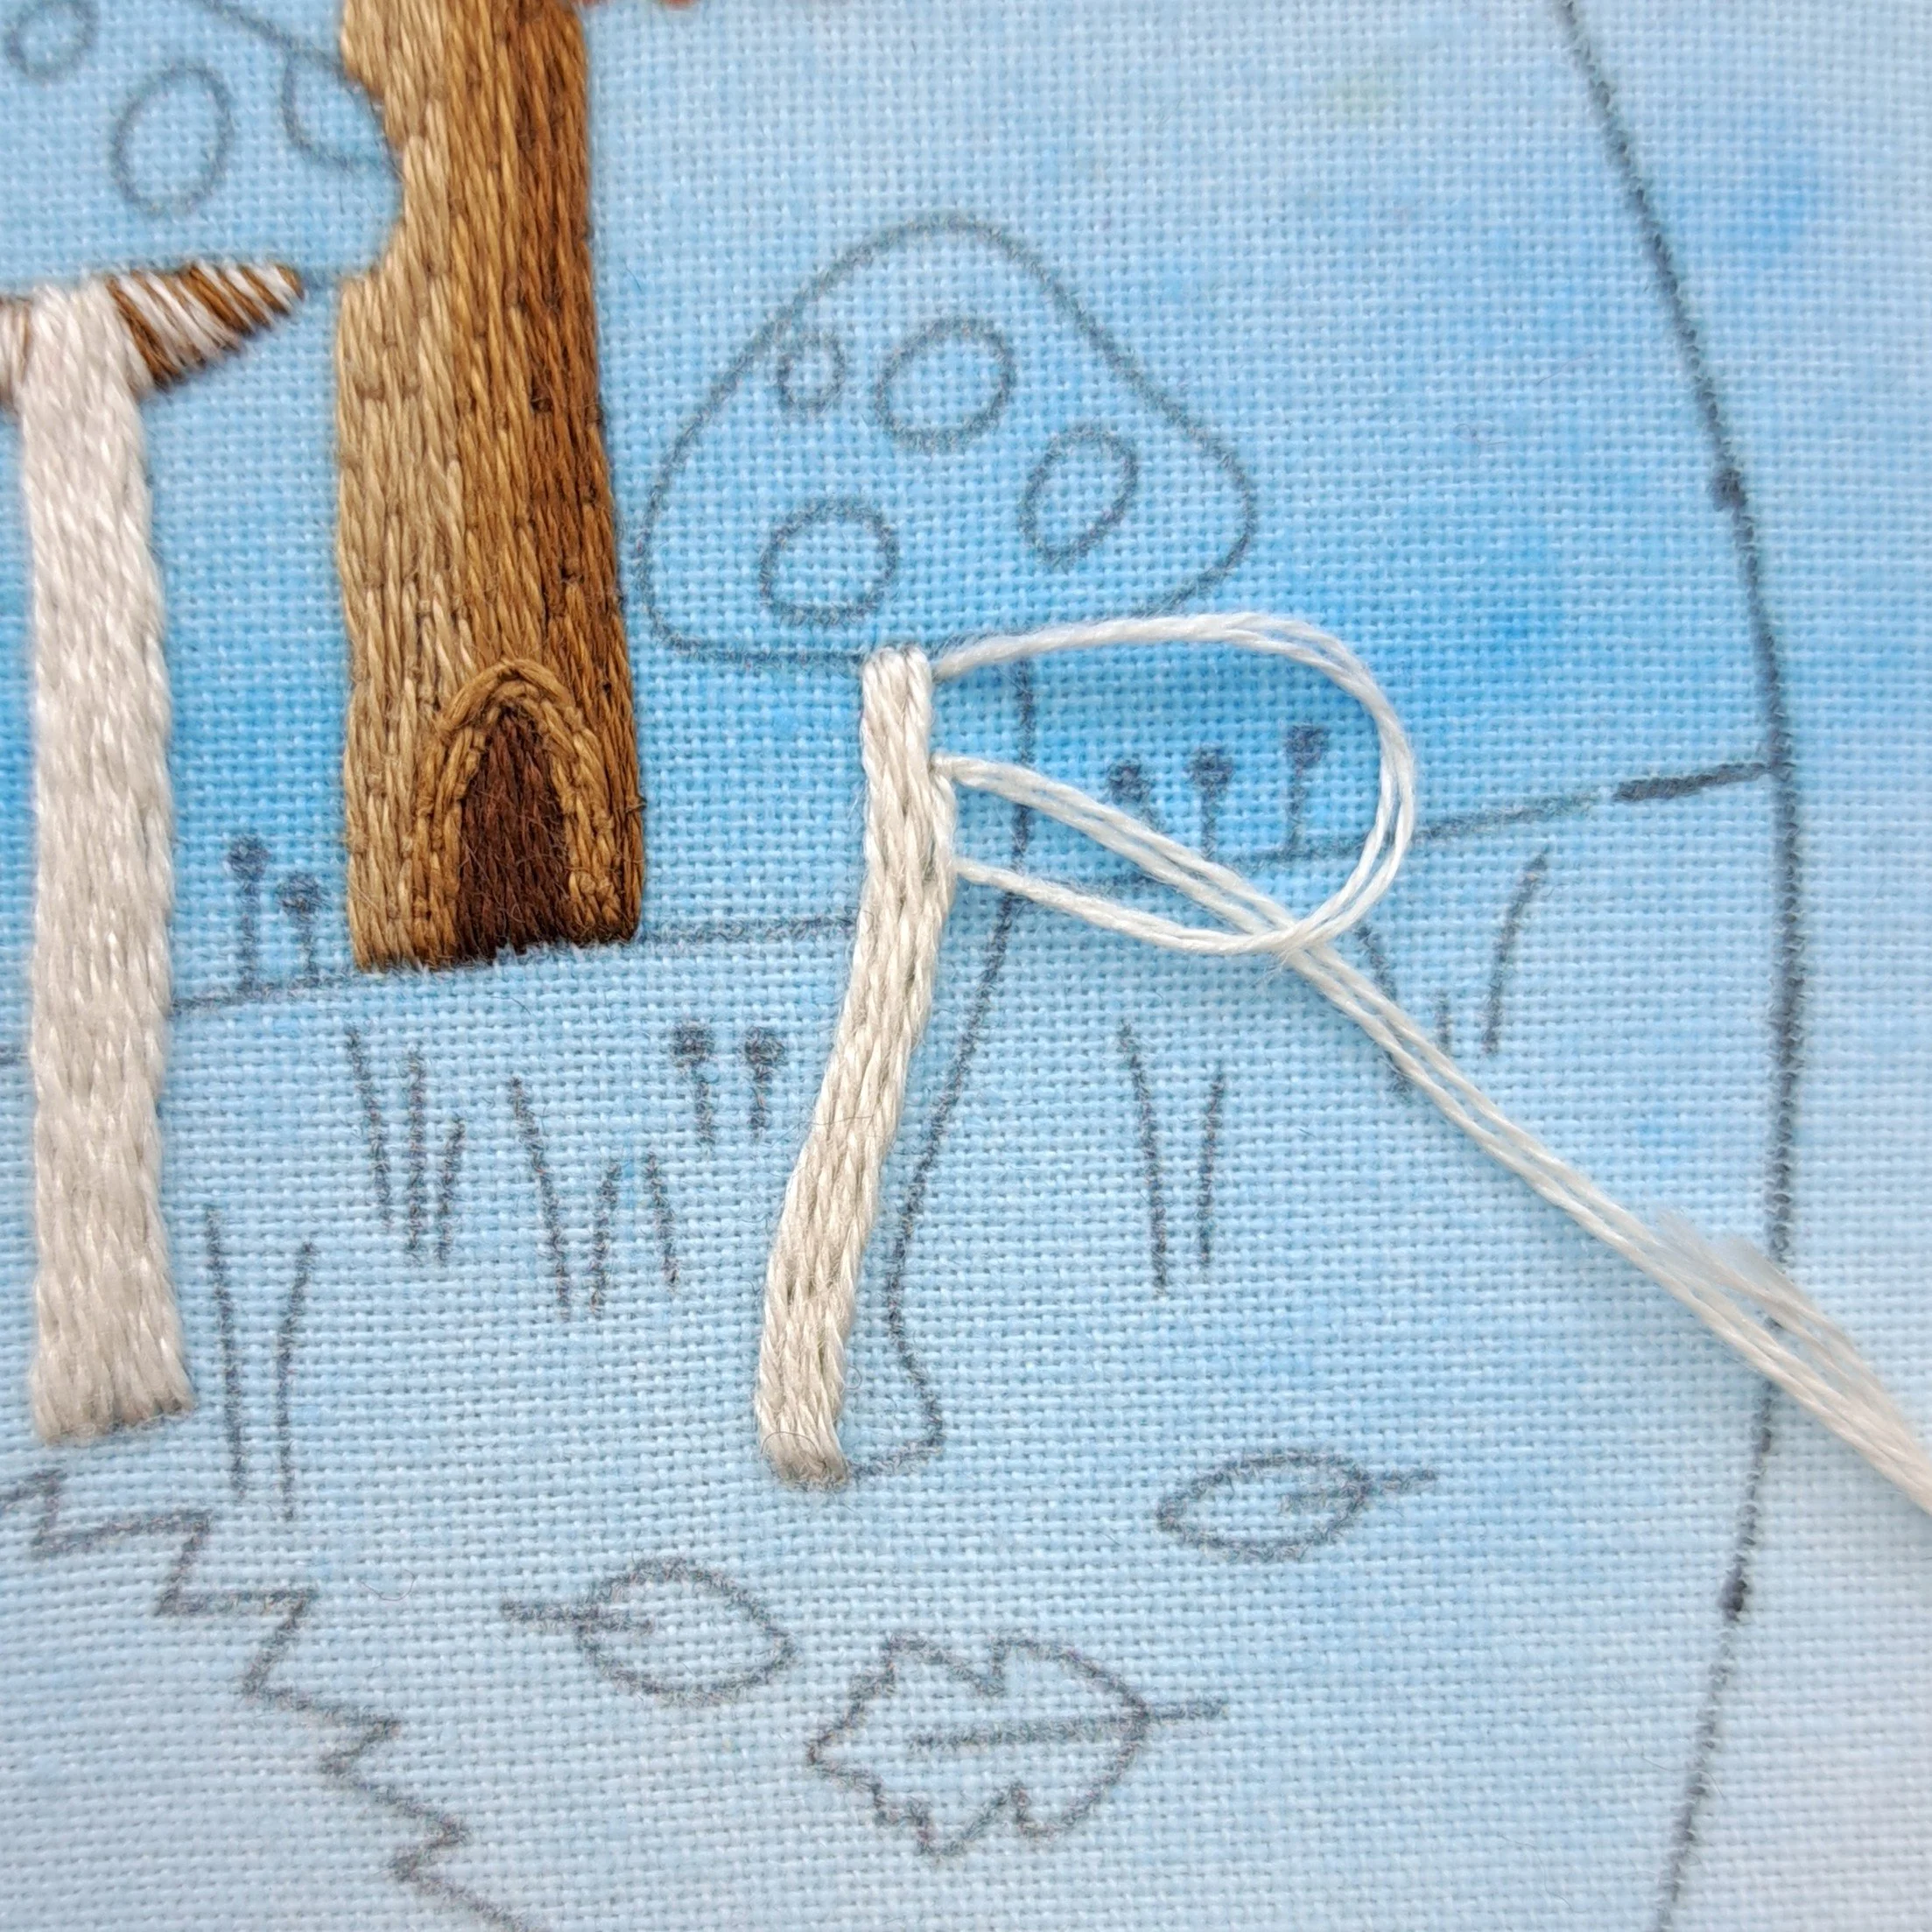
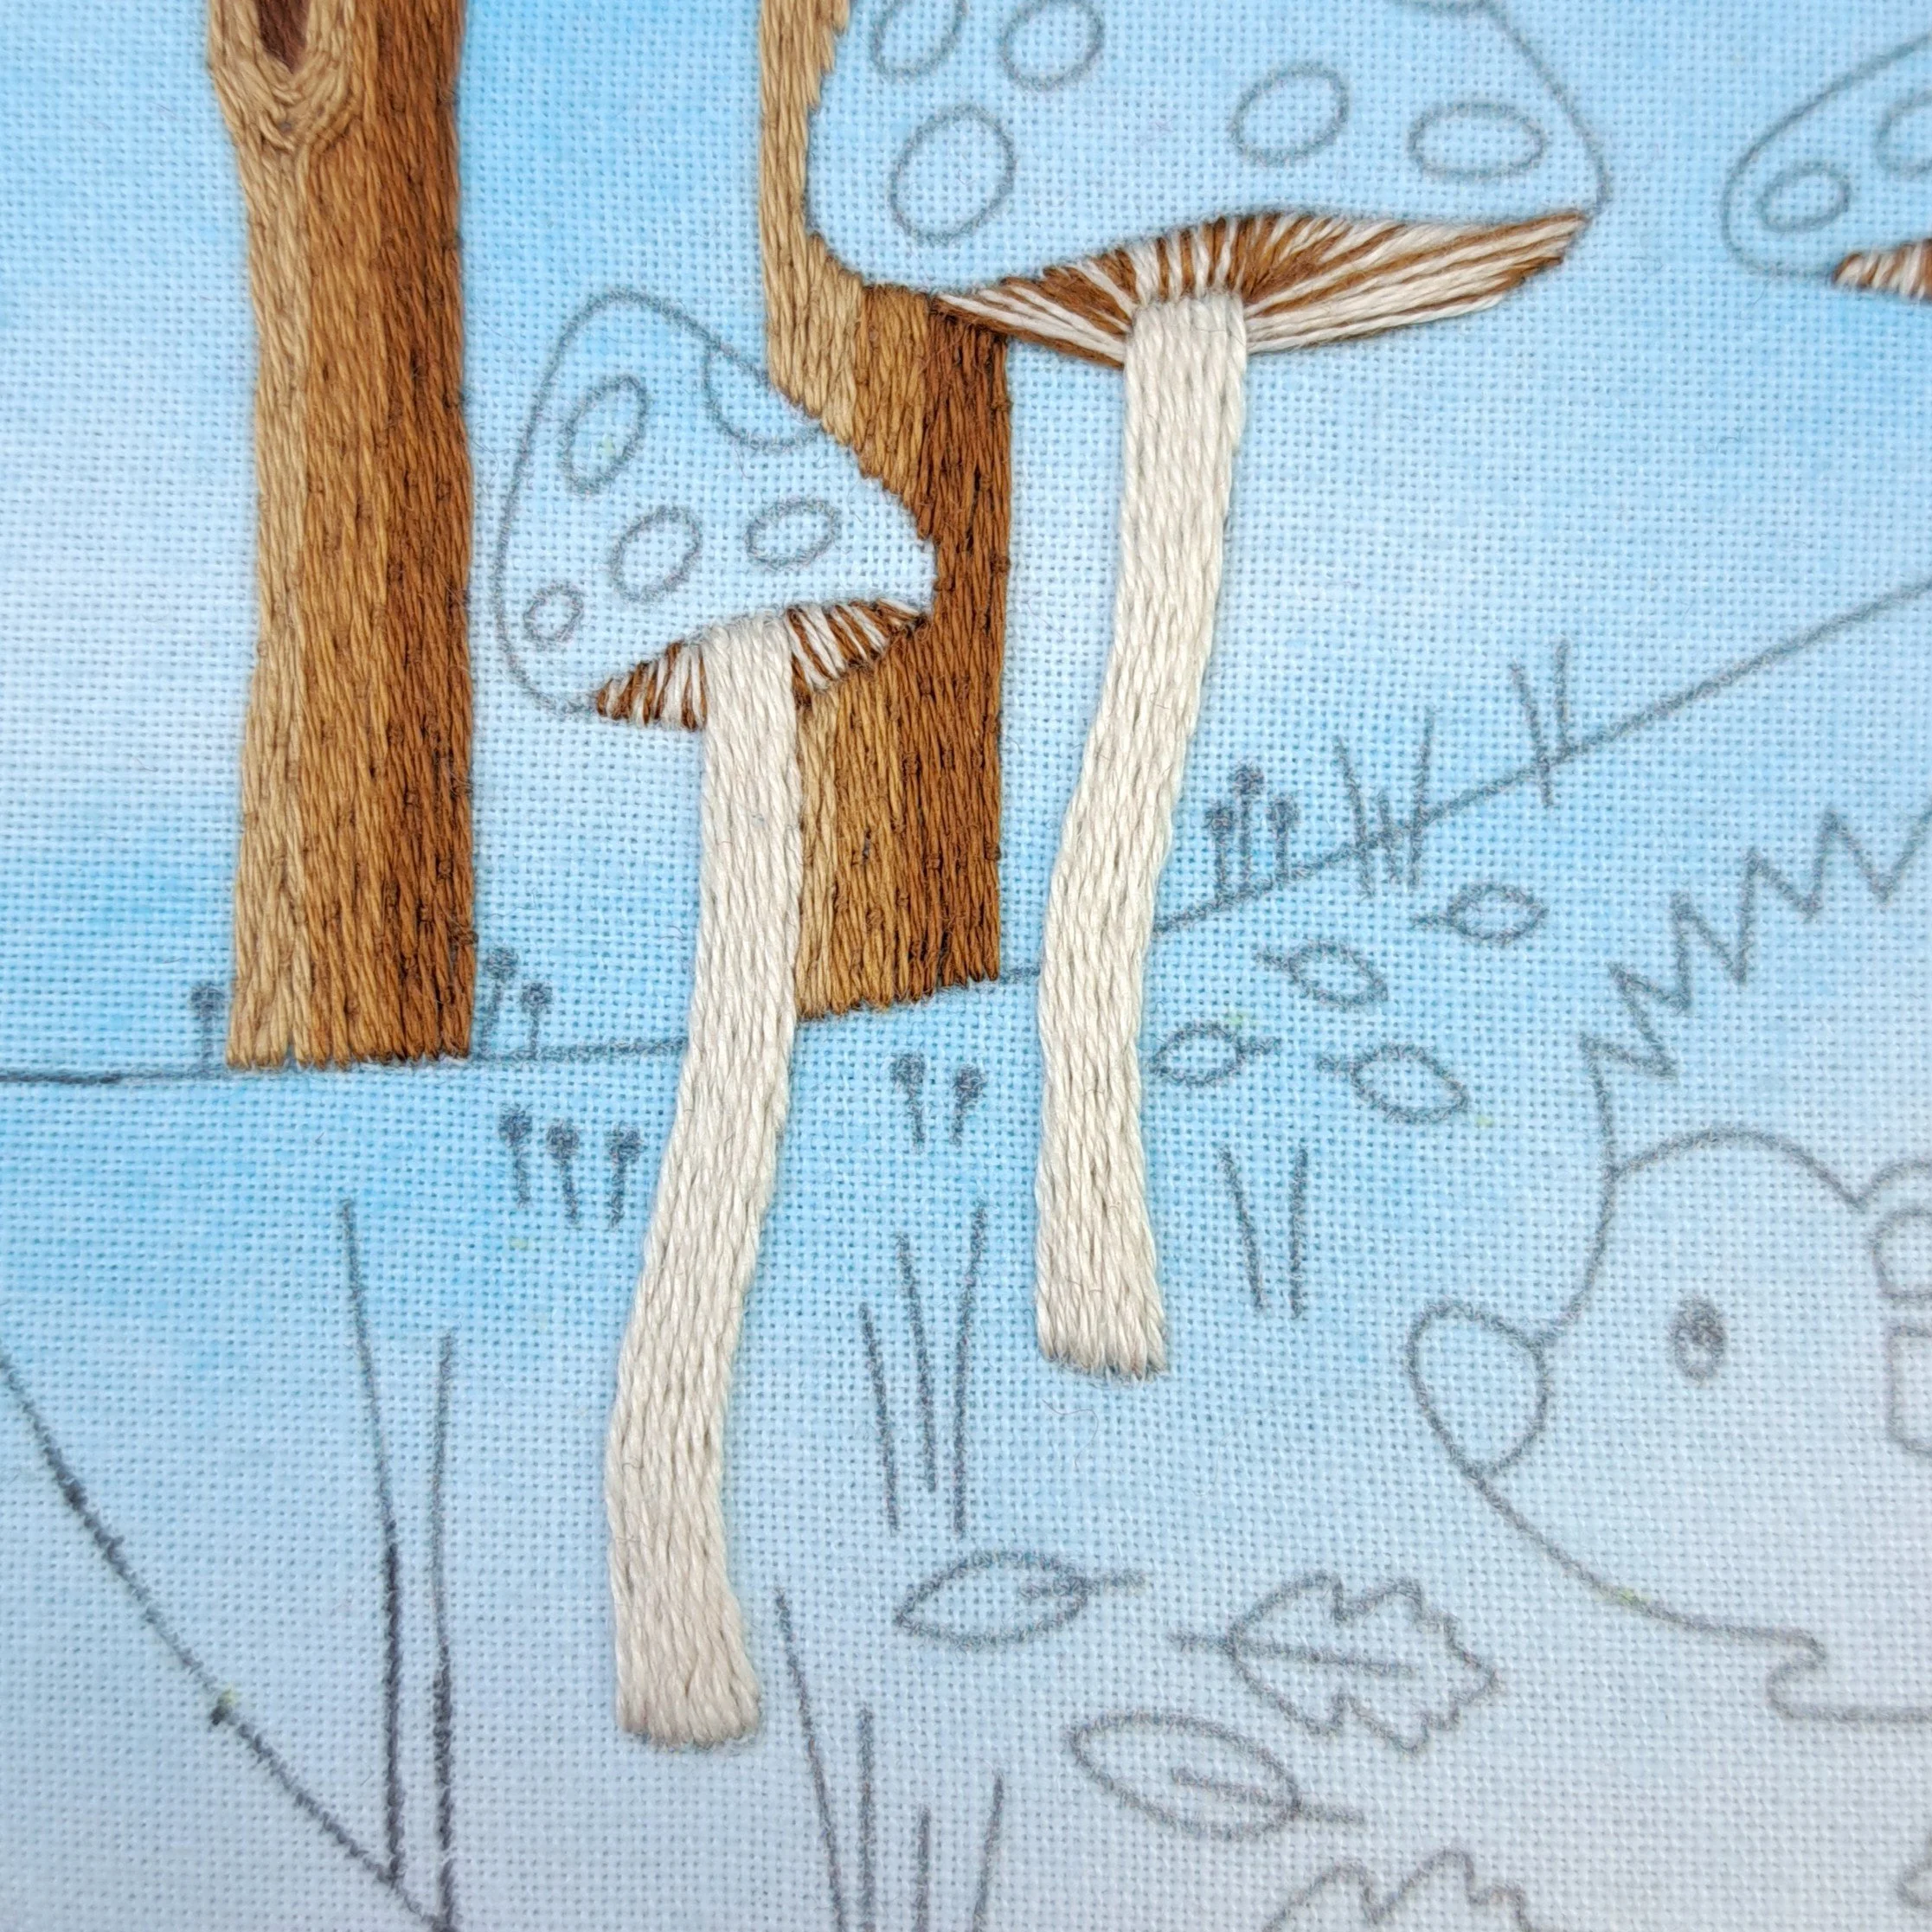
I stitched vertical rows of Stem Stitch using 2 strands of Anchor 926 to fill each mushroom stalk.
I started with a row along the left line of the stalk, then added rows working towards the right. Once I was starting to run out of room for full rows, I stitched a row on the right side edge, then filled in the remaining gaps with a few shorter rows.
Stitch – Stem Stitch
Thread colour - Anchor 926
Number of strands – 2
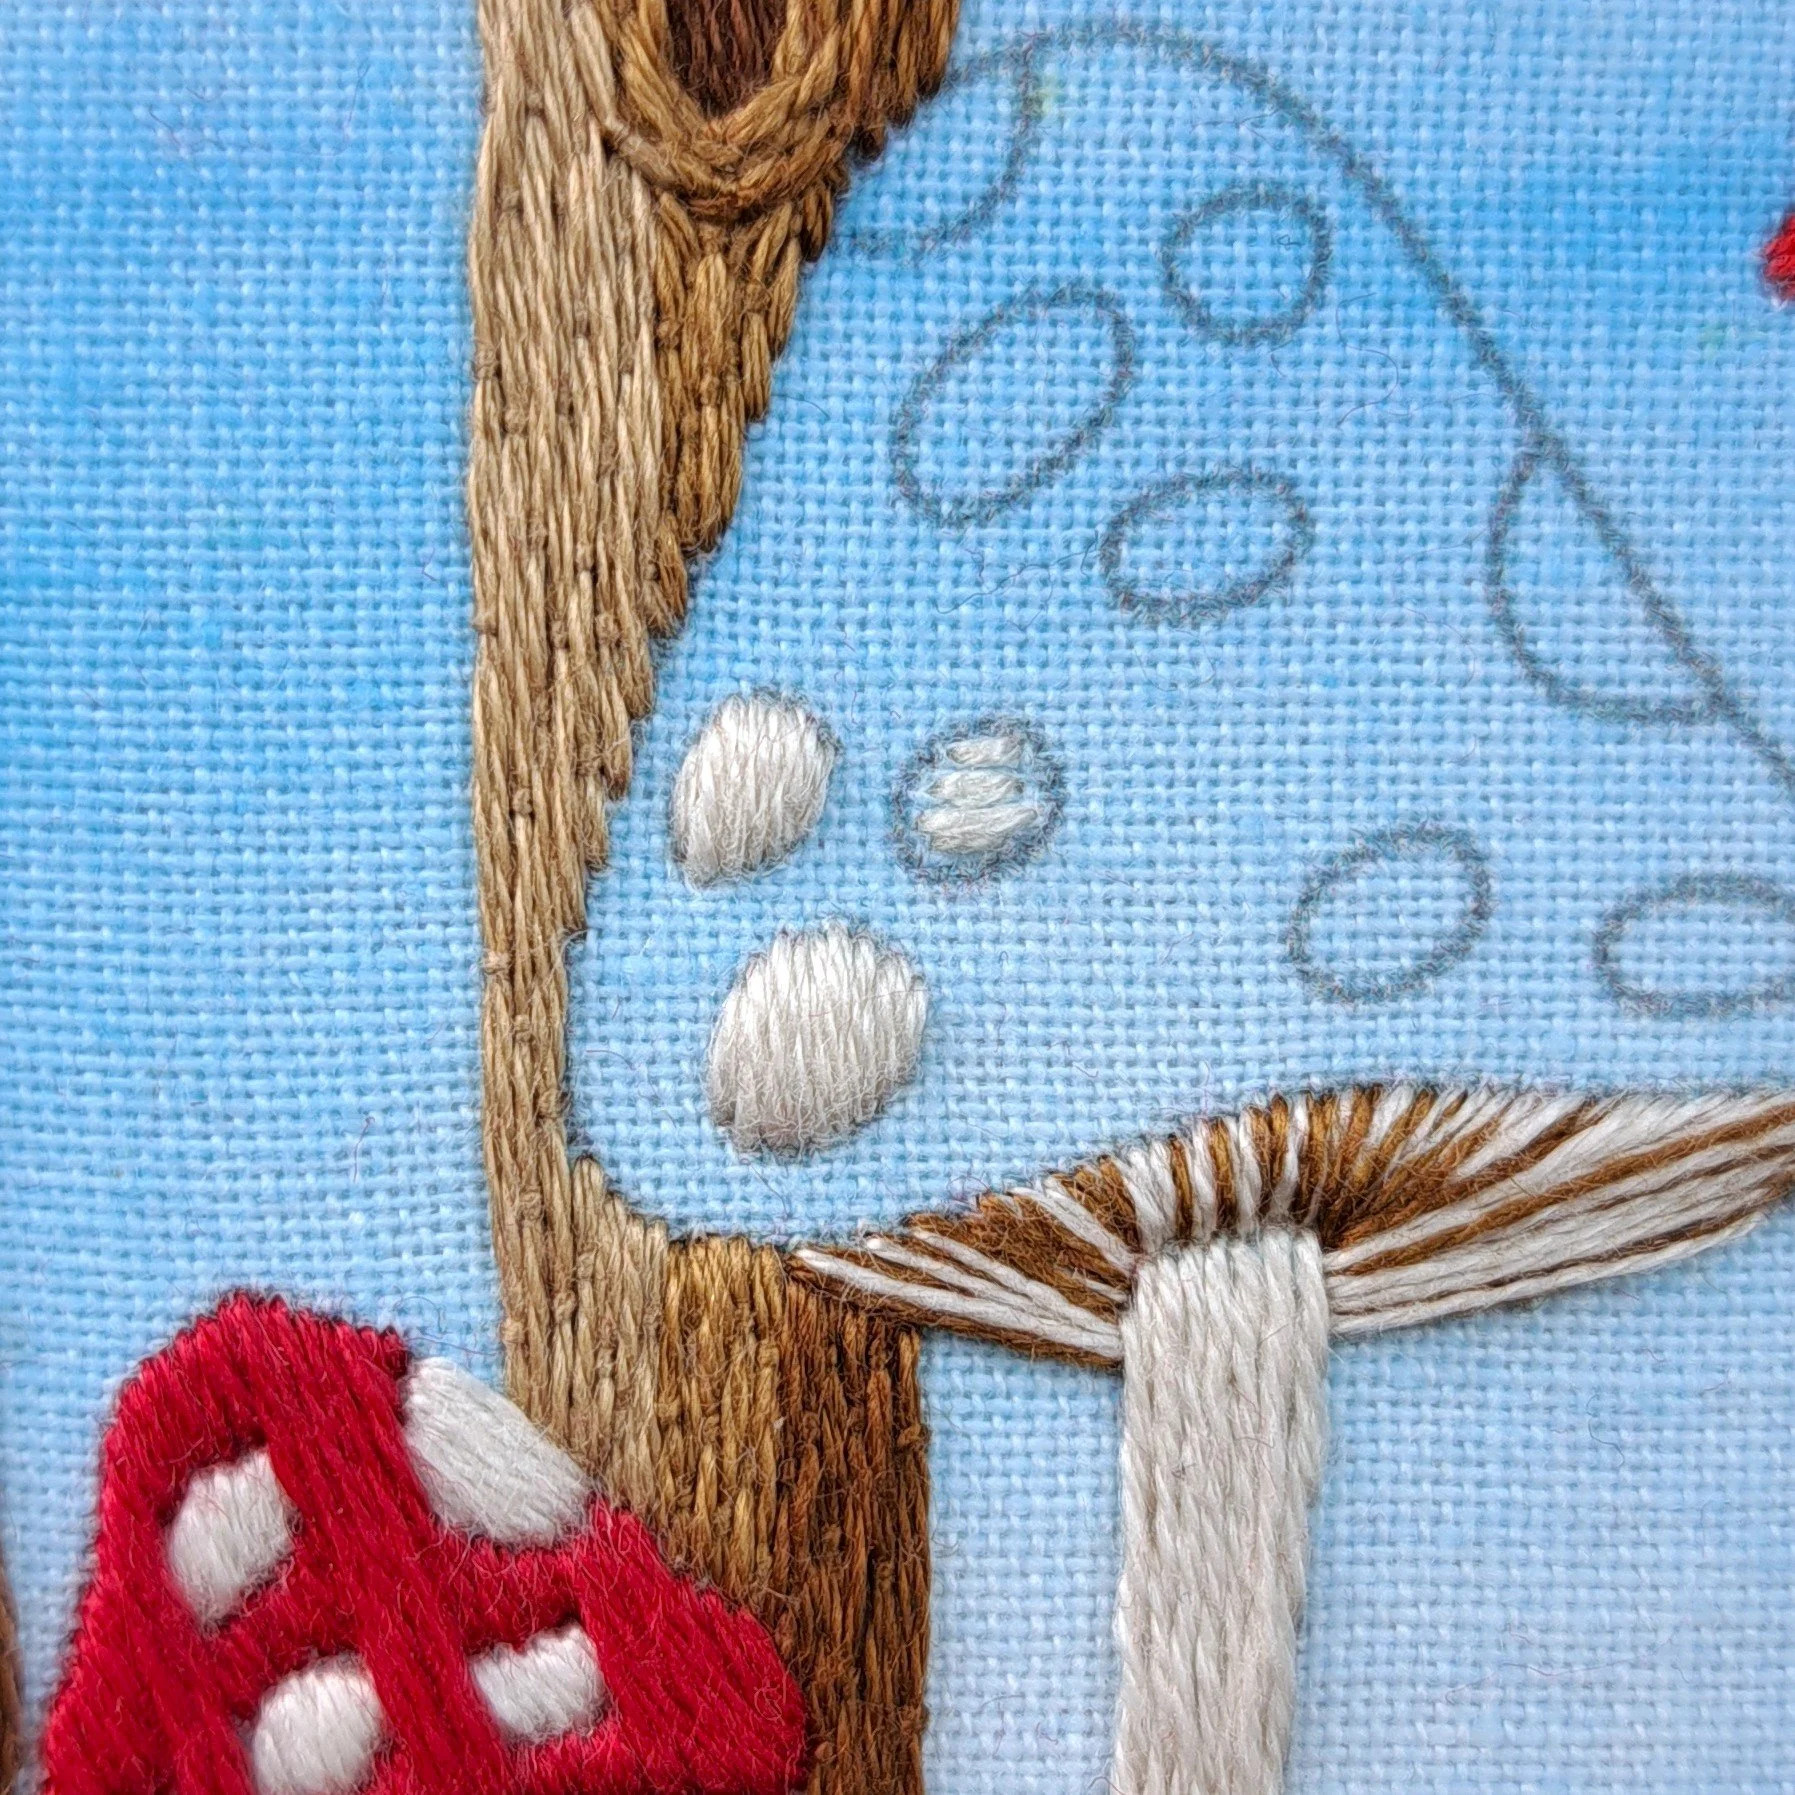
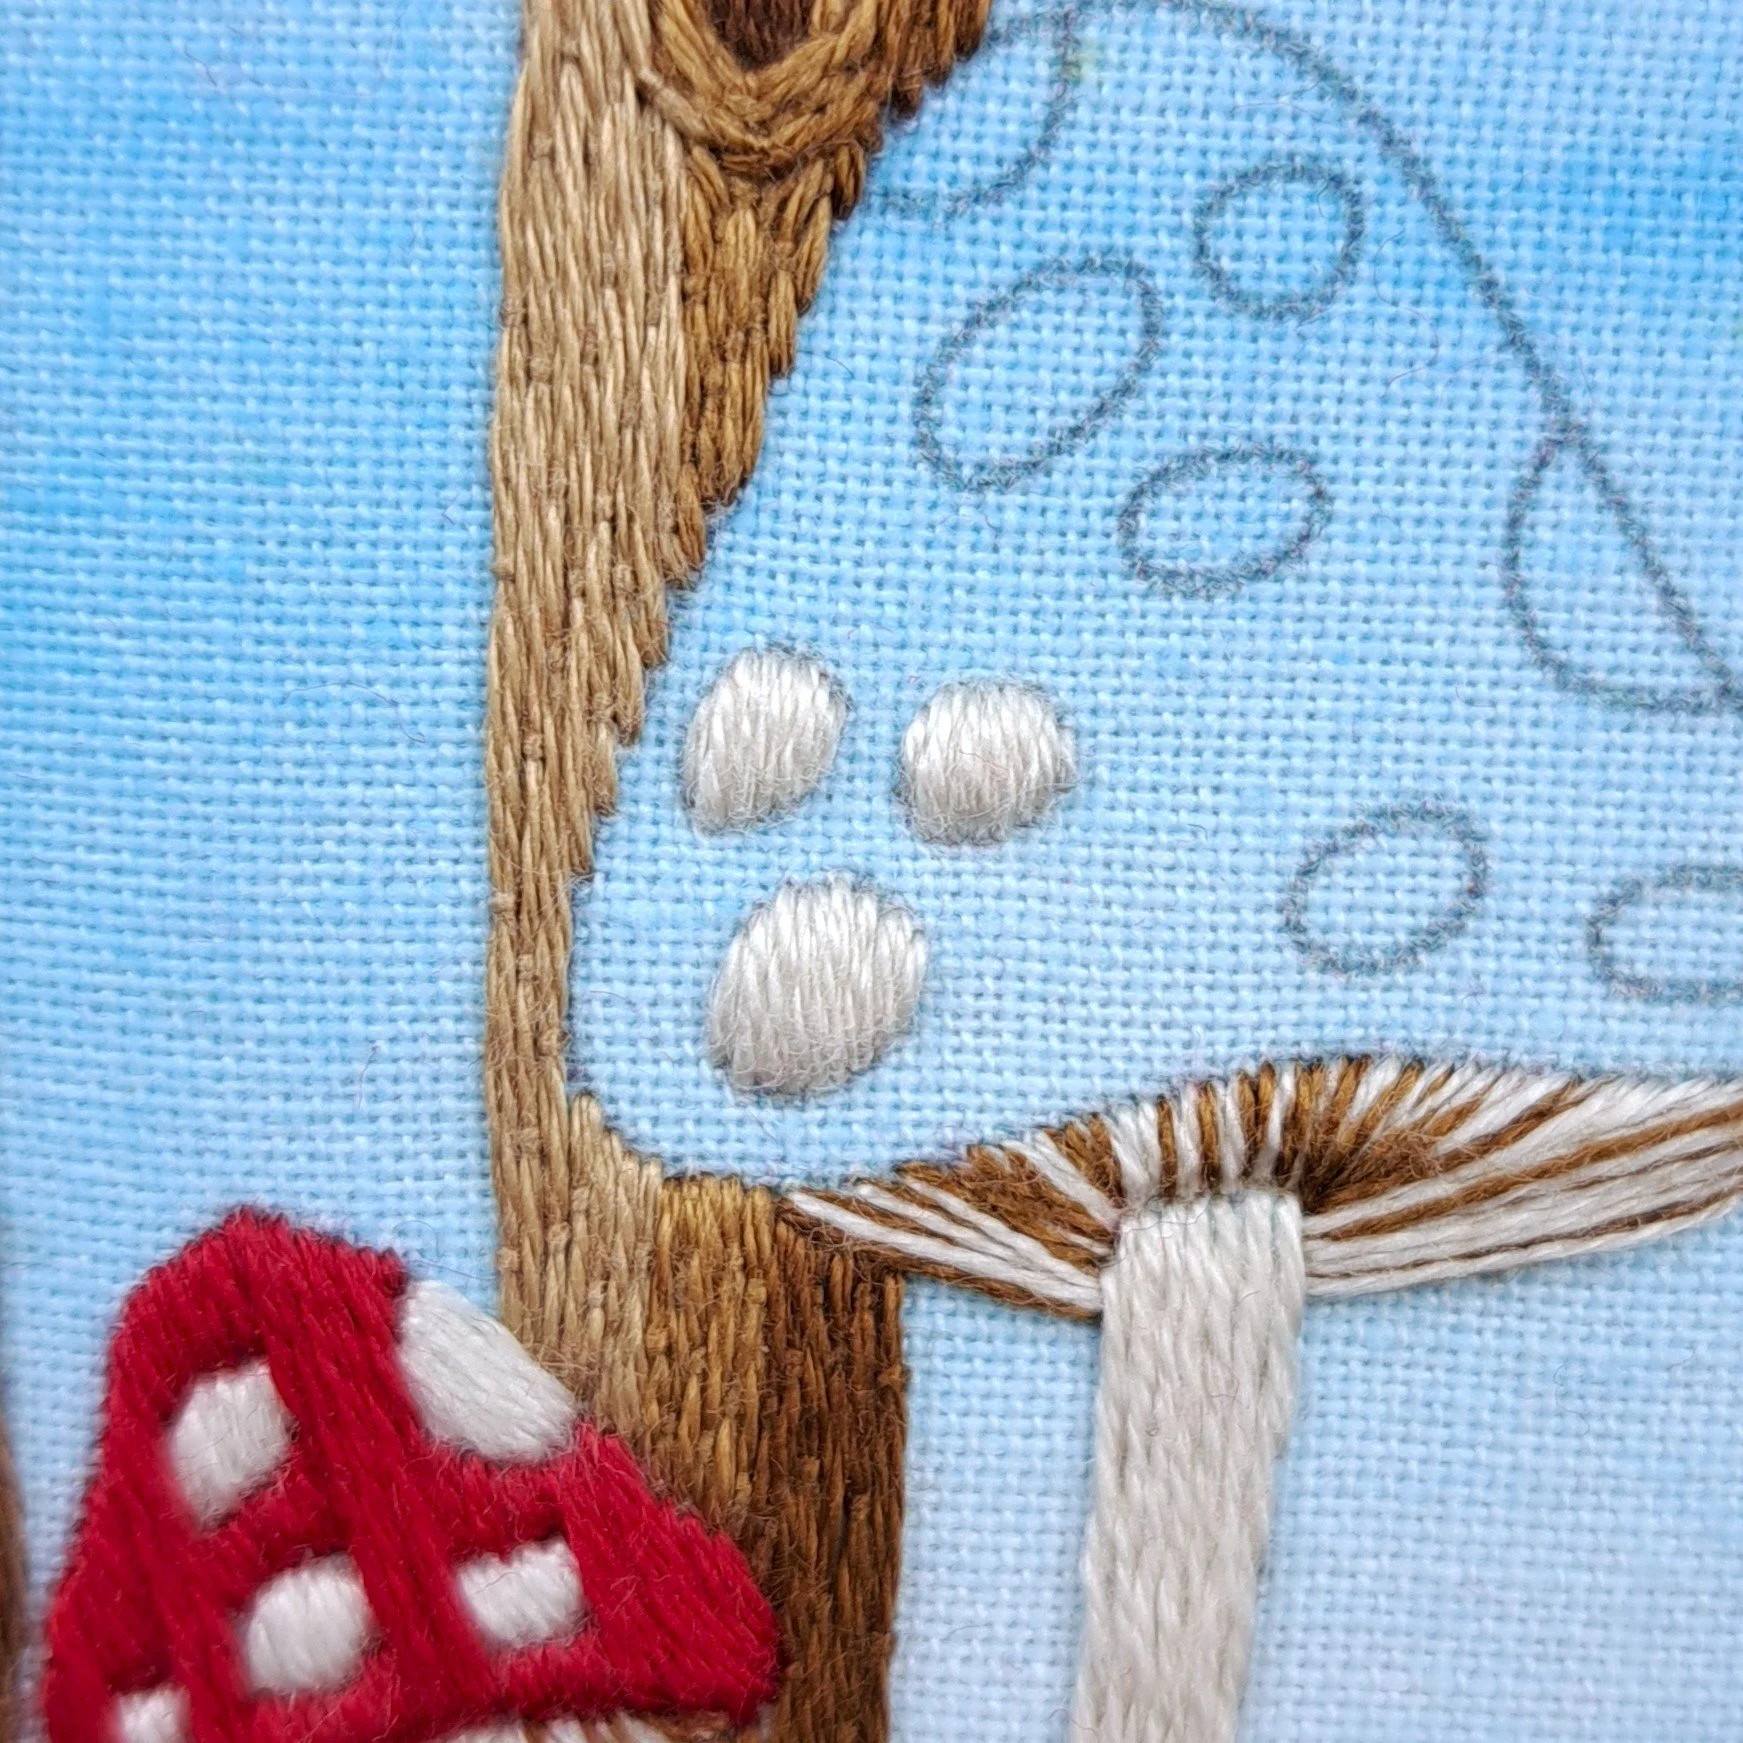
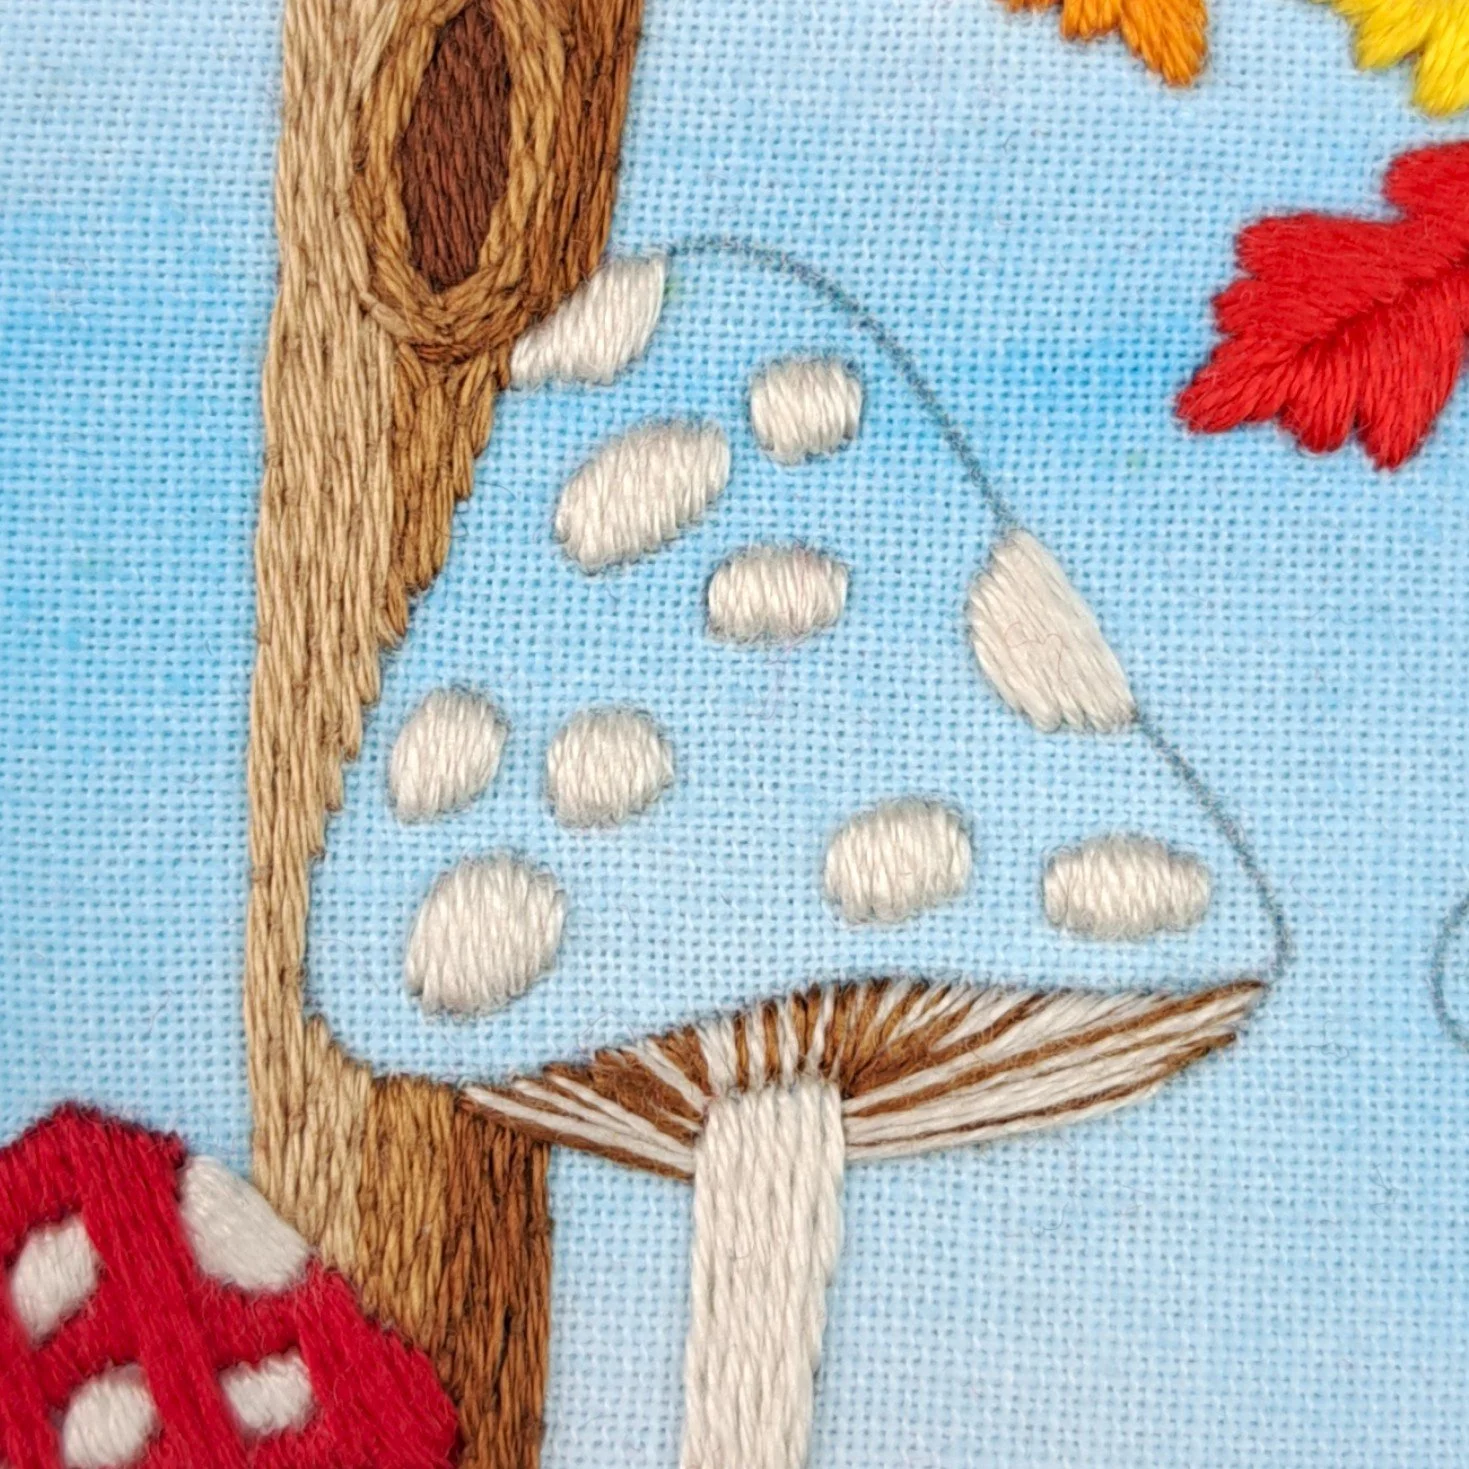
The Mushrooms – The Scales
I filled each scale (that’s the spots 😄) with Padded Satin Stitch using 2 strands of Anchor 926.
I started by adding a few horizontal Straight Stitches inside each scale to make the padding, then added vertical Satin Stitch over the top.
✨ A little tip:
I like to place my very first Satin Stitch right down the centre of the shape, then stitch outwards one side at a time. It really helps keep the stitches at a consistent angle.
Stitch – Padded Satin Stitch
Thread colour - Anchor 926
Number of strands – 2
The Mushrooms – The Caps
Just a little reminder here that mushrooms and fungi come in sooo many colours! Whites, creams, browns, greys, yellows, oranges, pinks, blues, and even purples. So you can really have fun picking the colours here.
If you scroll back through my blogs (maybe a few years ago now!), you’ll find my original hedgehog and mushroom stitching from when I was hand printing the panels. I stitched those mushrooms in blues and turquoises – super pretty!
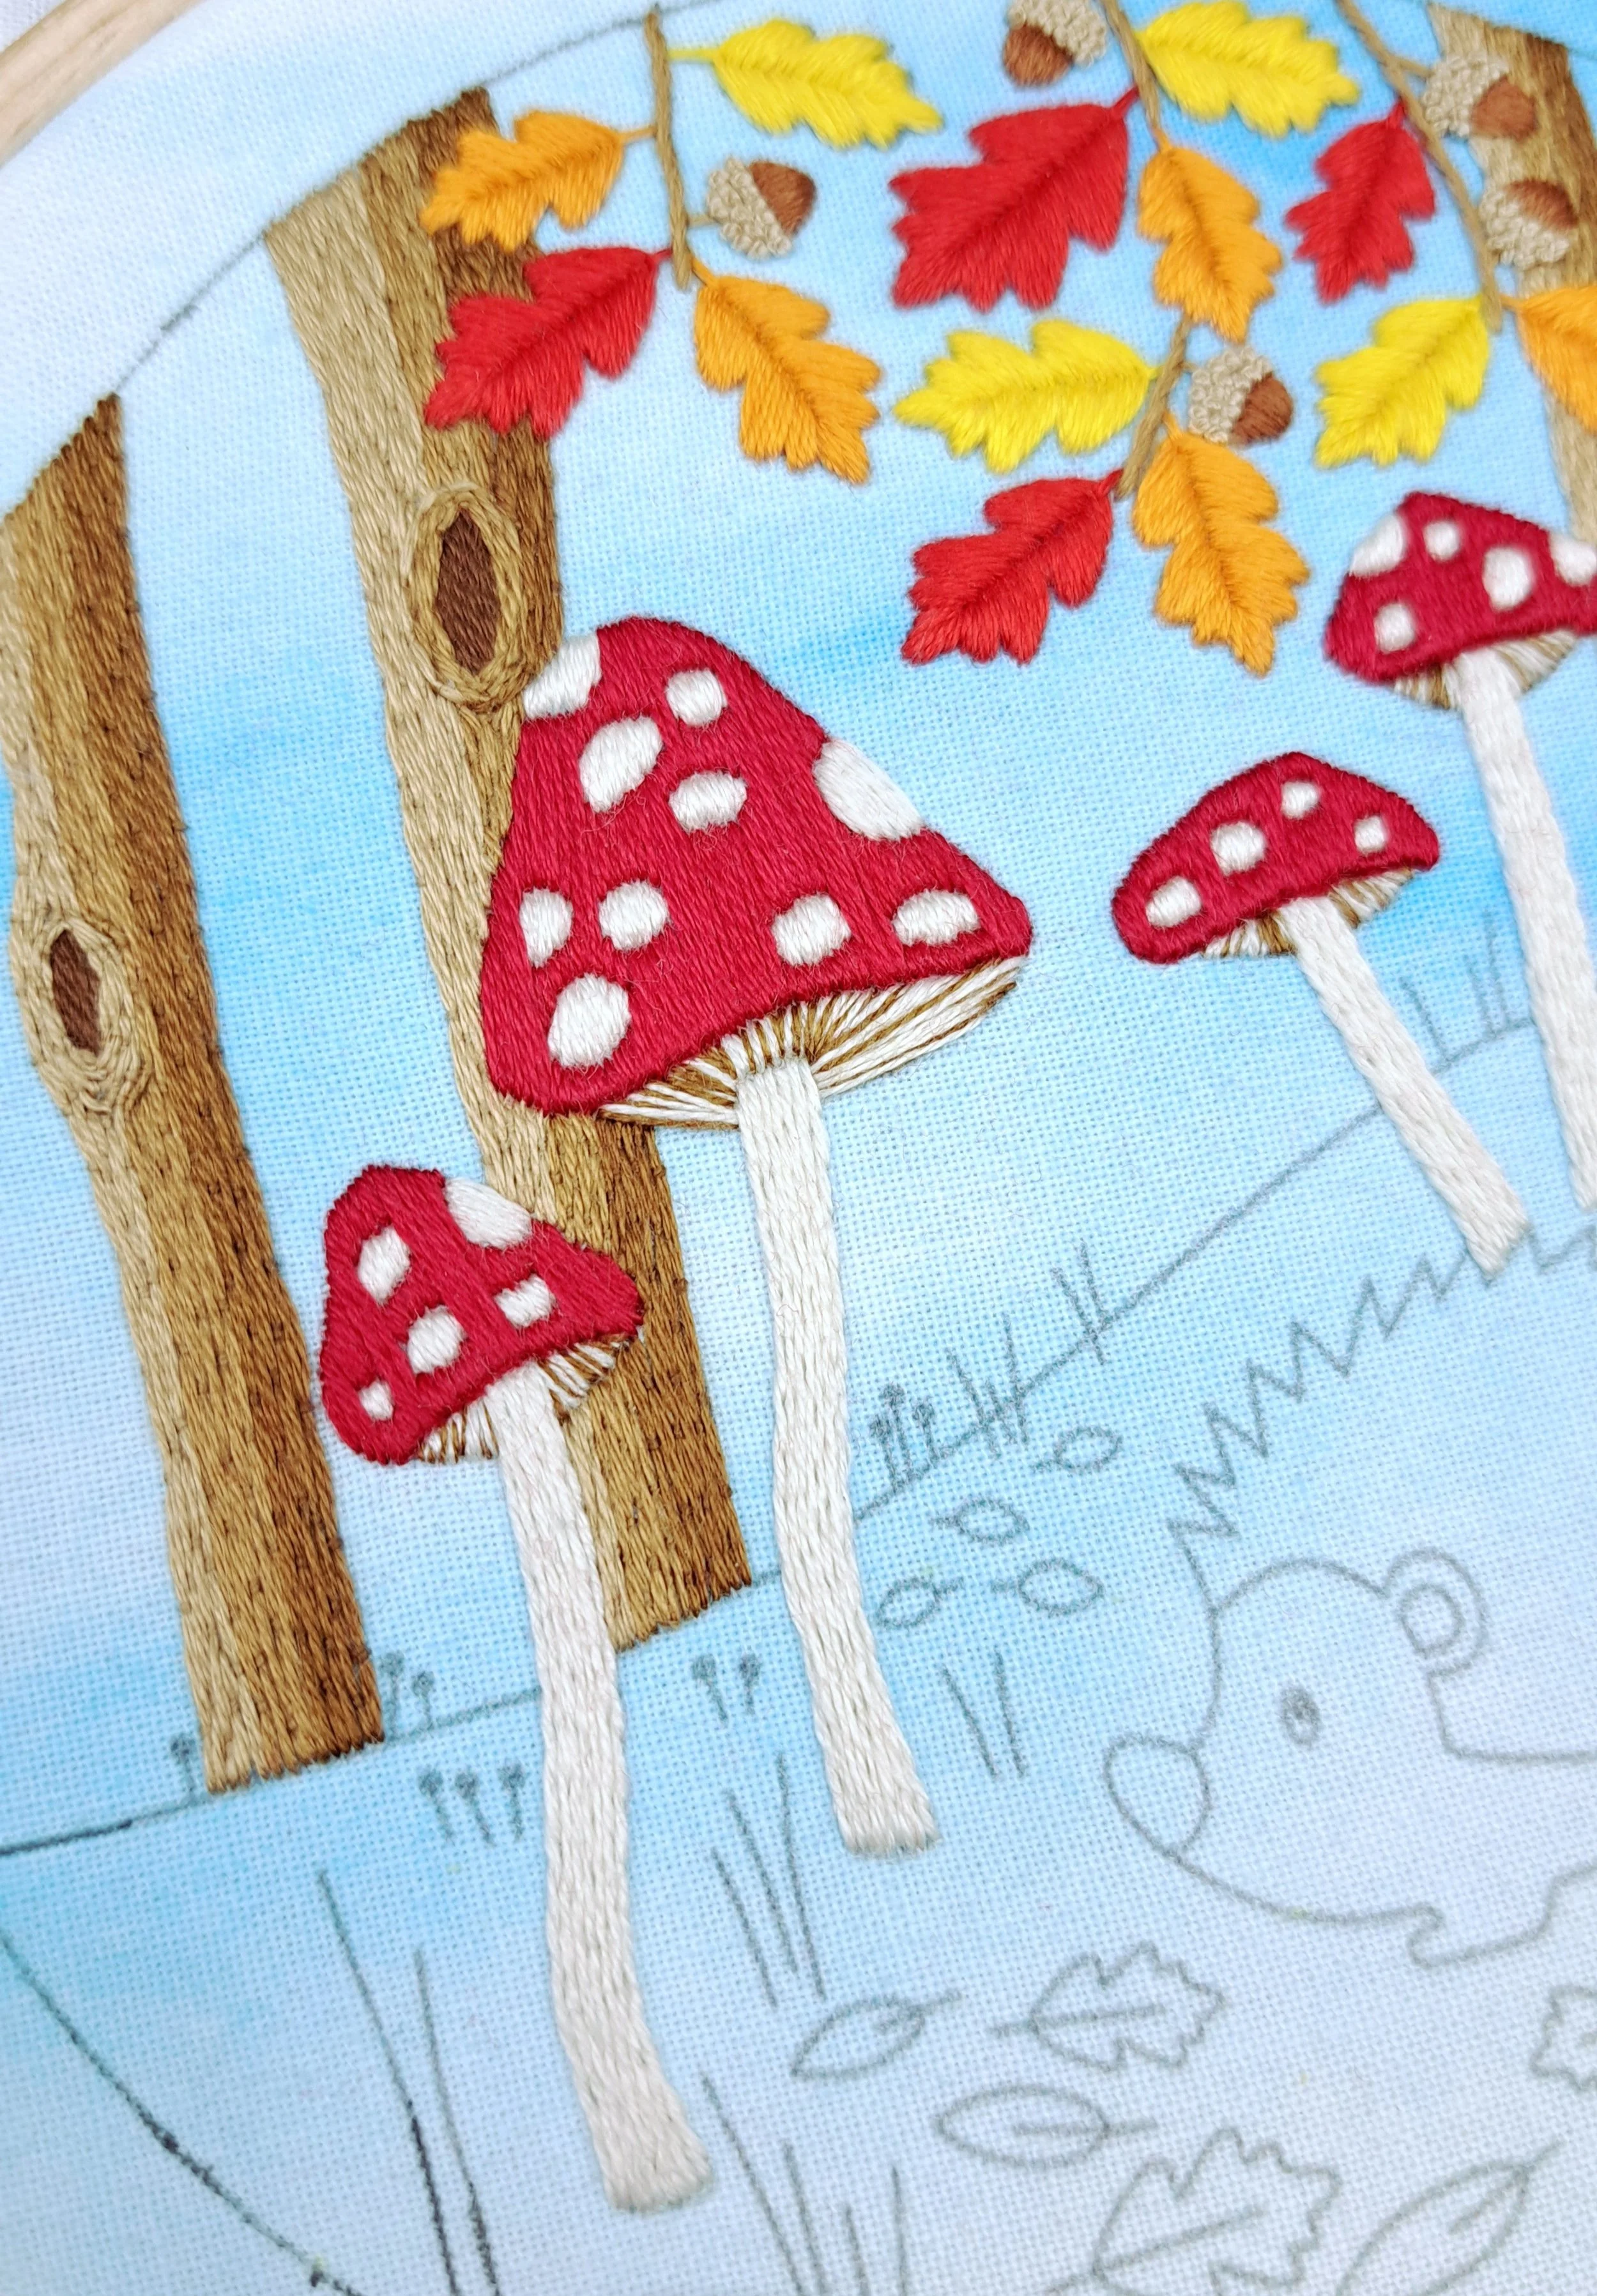
This time, I decided to go with classic red 😍
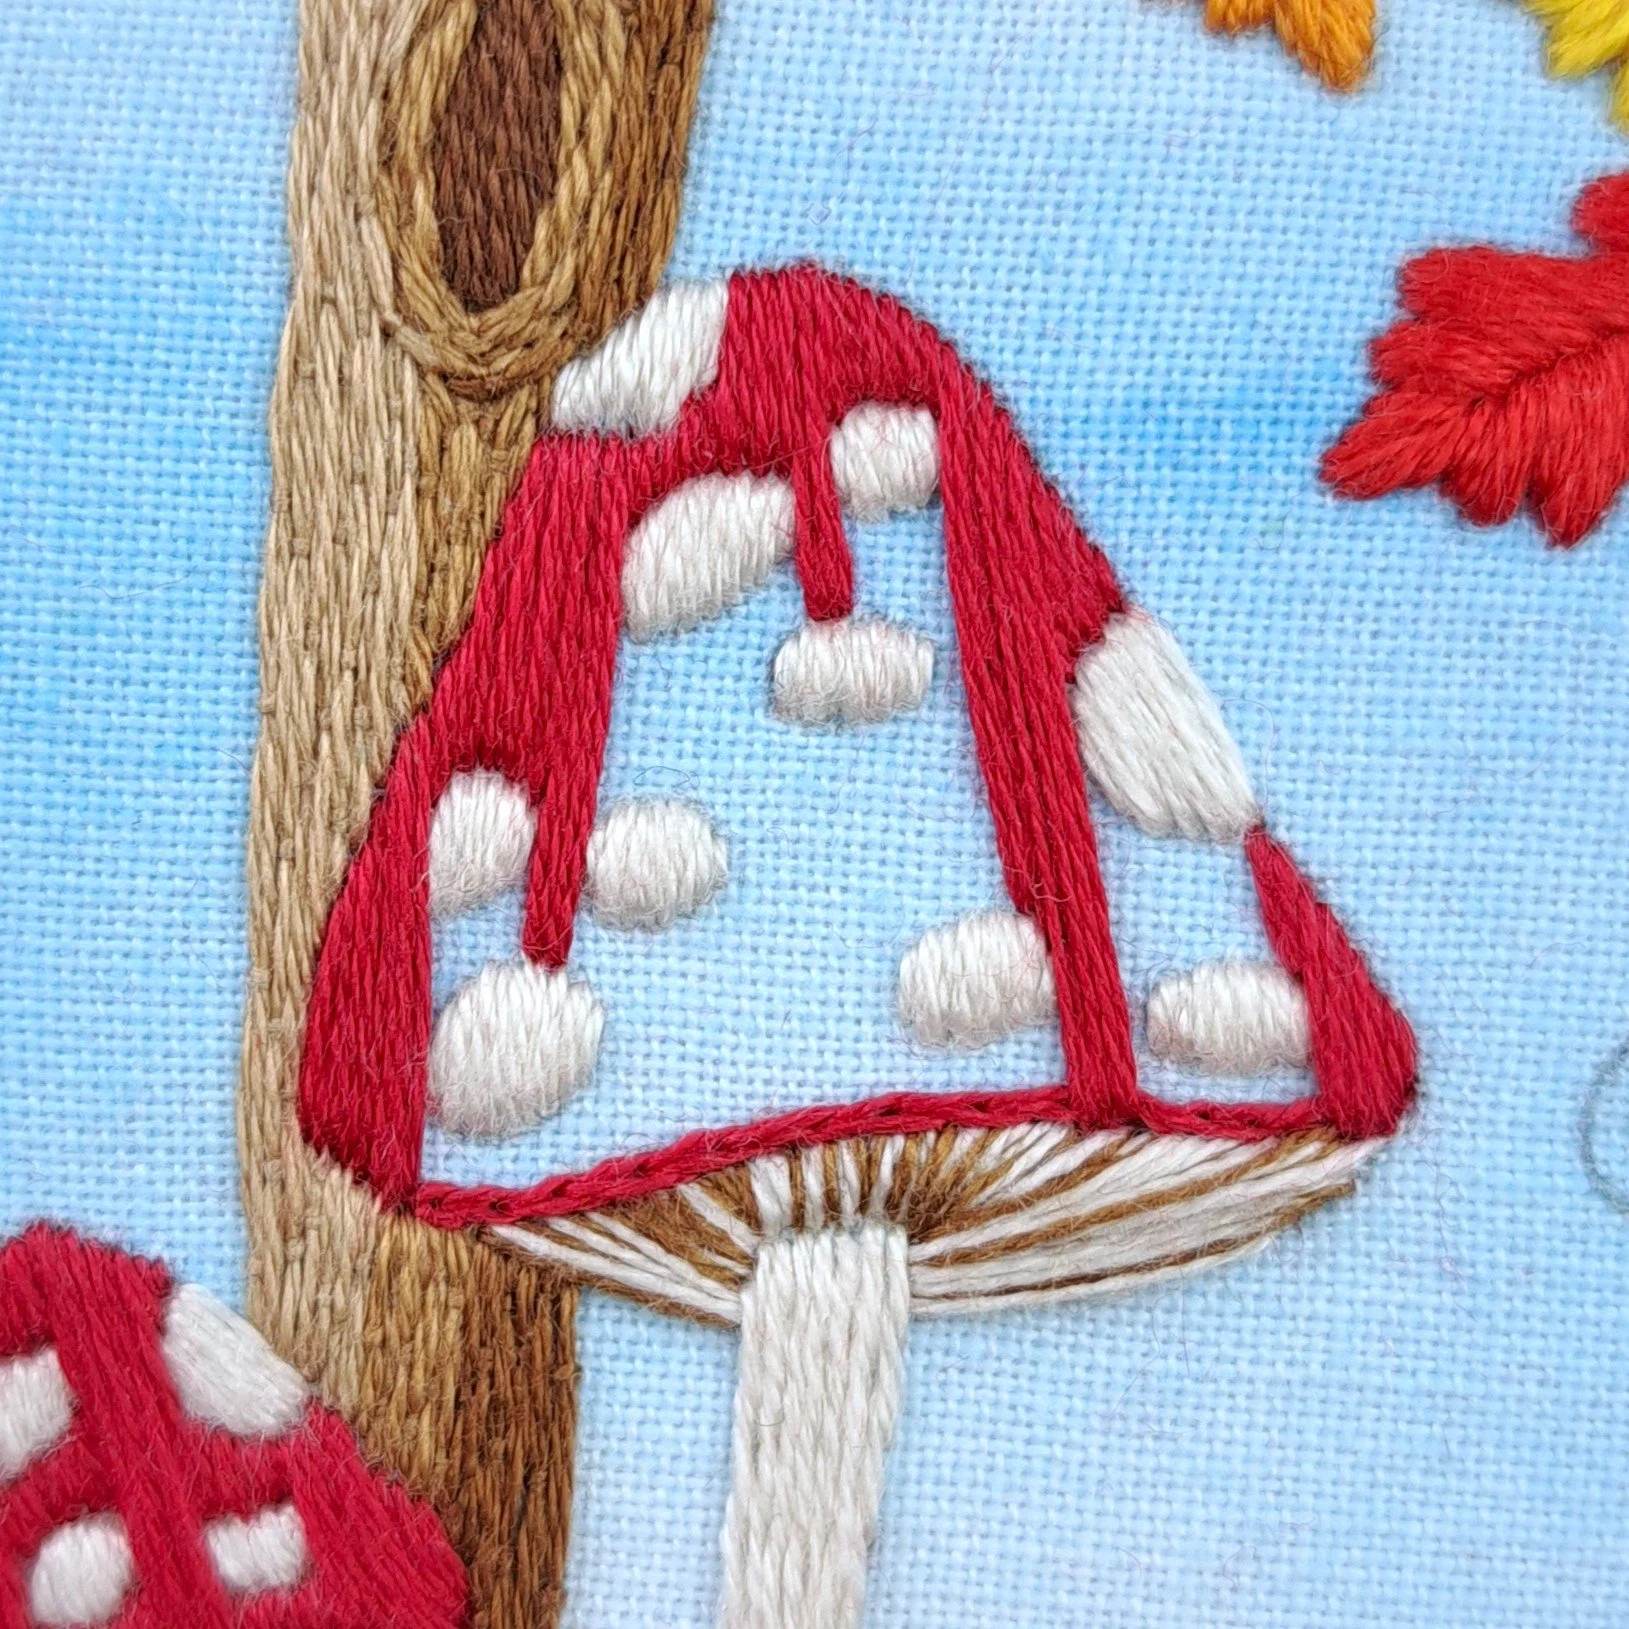
I started with a single row of Split Stitch using 2 strands of Anchor 47 along the bottom of the cap. This row acts as a little bit of padding along the bottom edge, and by tucking the overlying Satin stitches slightly underneath, it’ll also help create a neater edge.
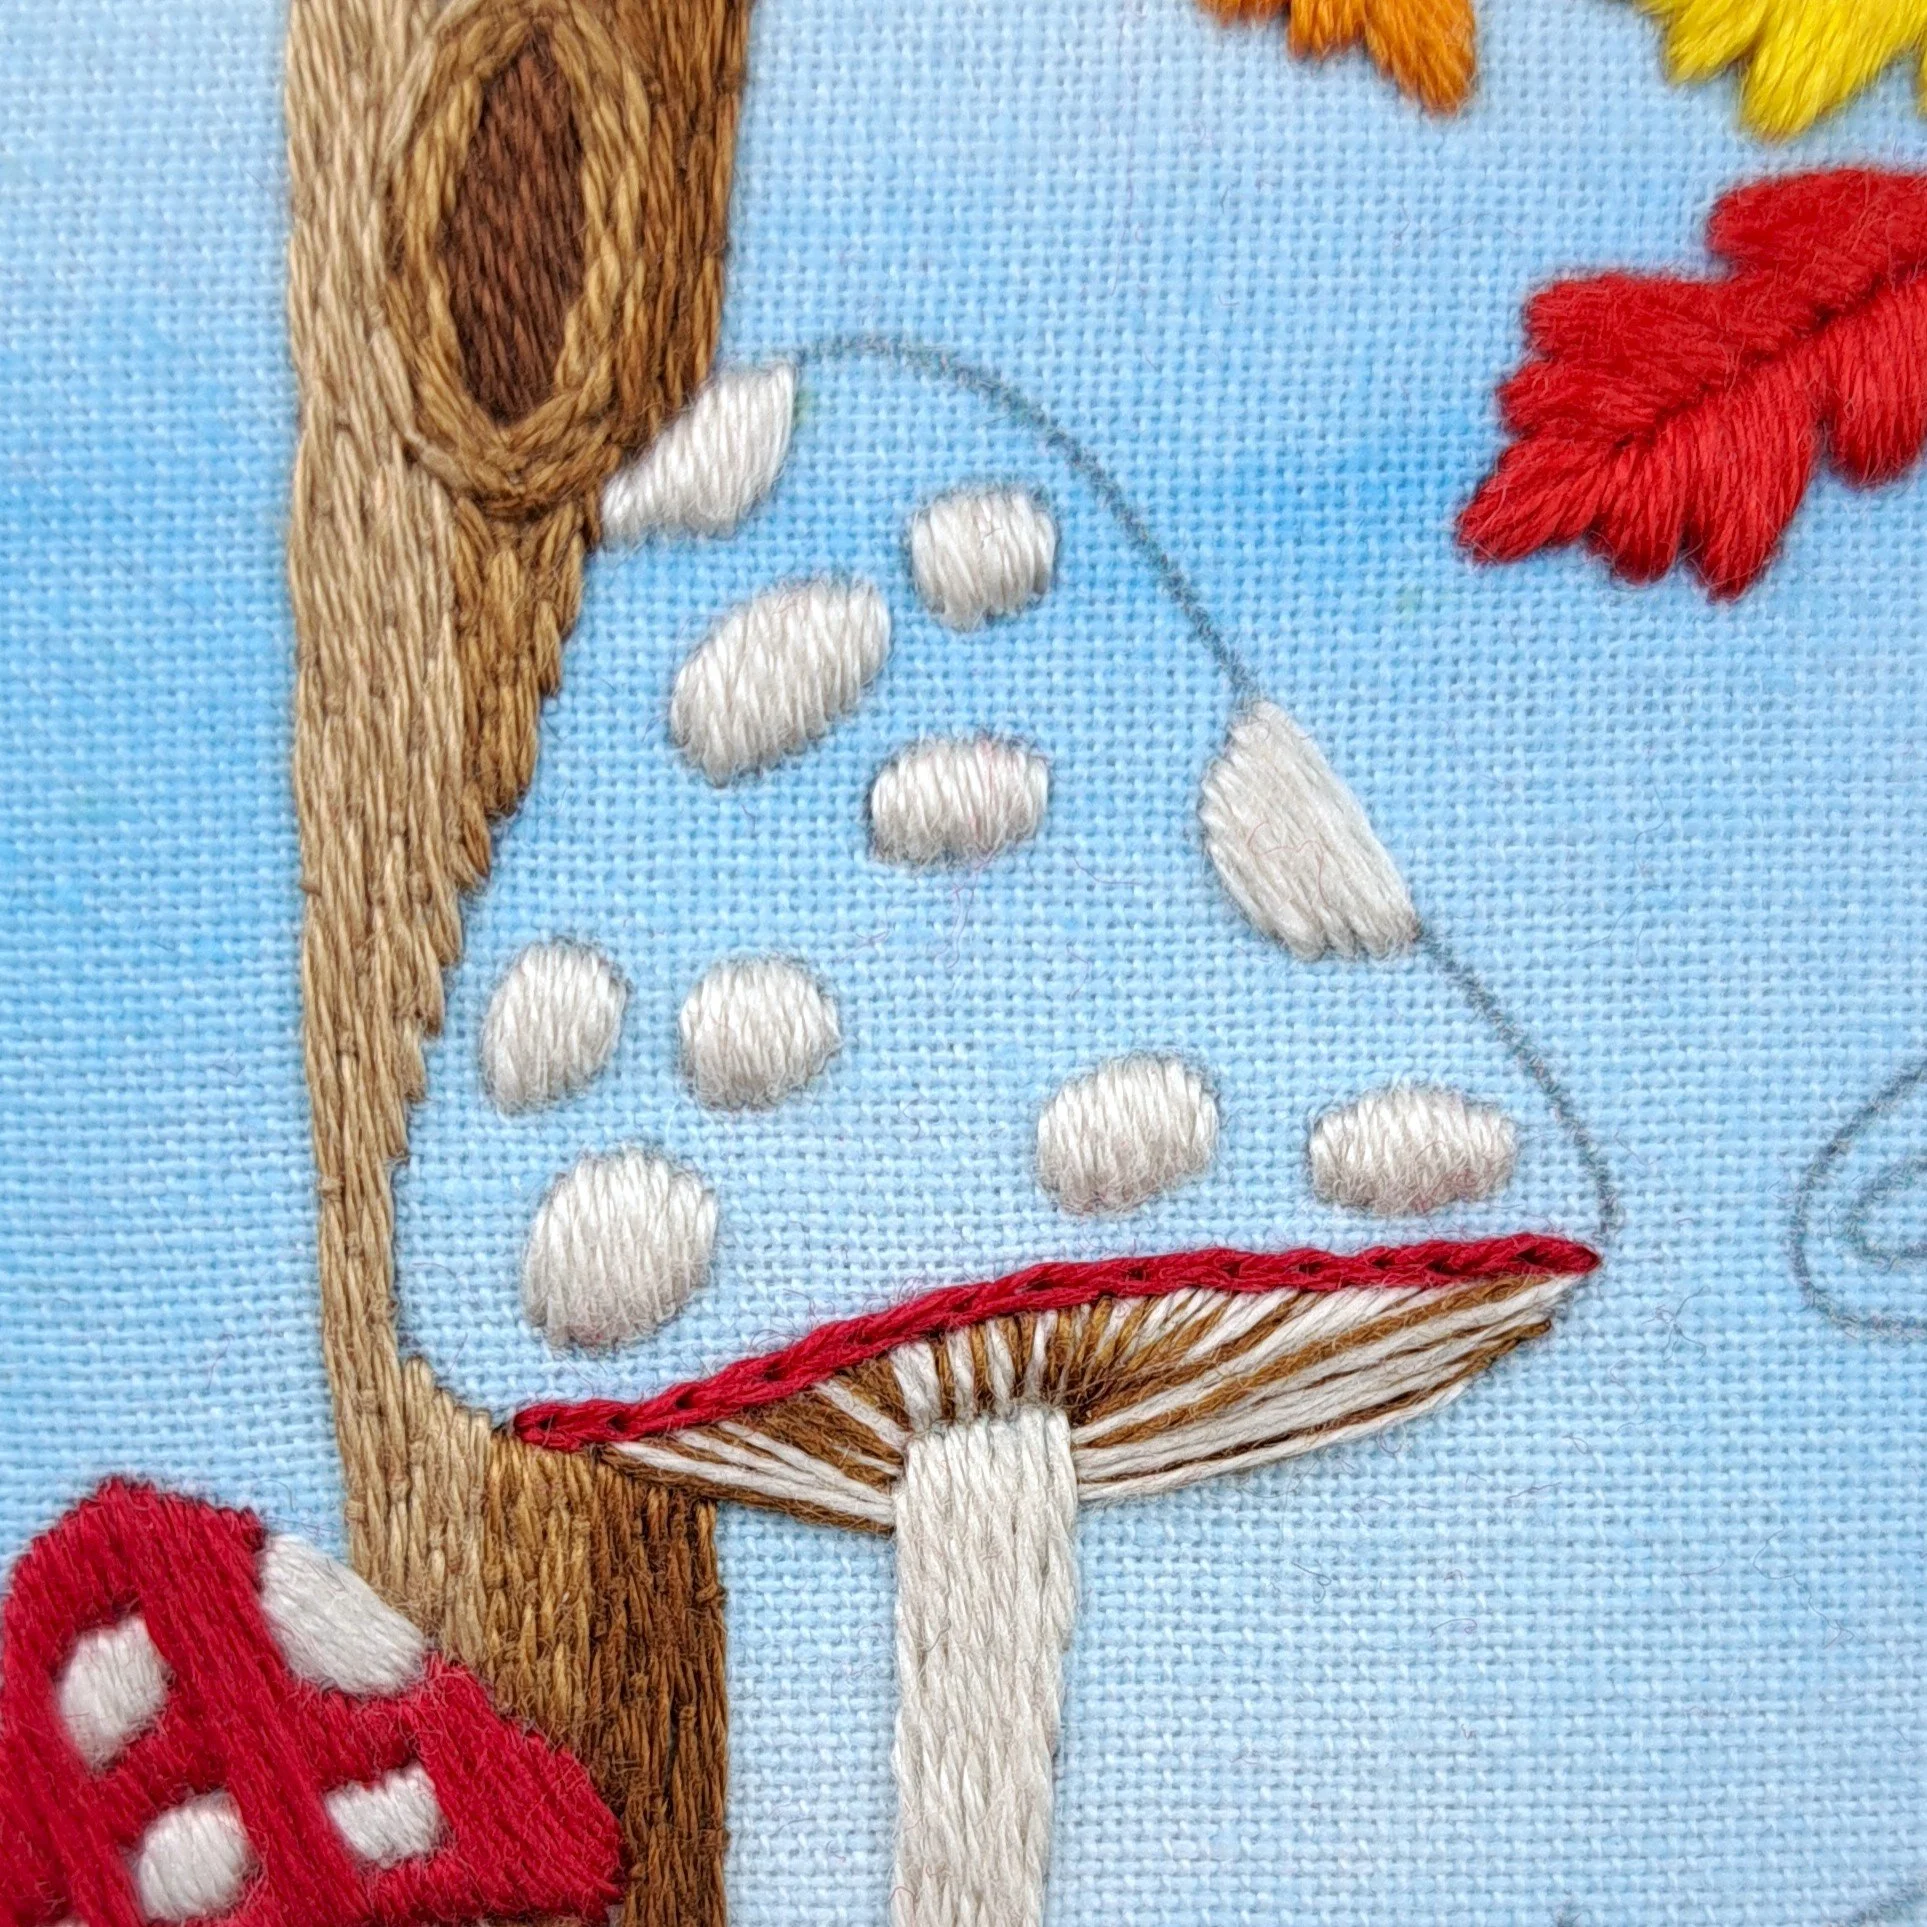
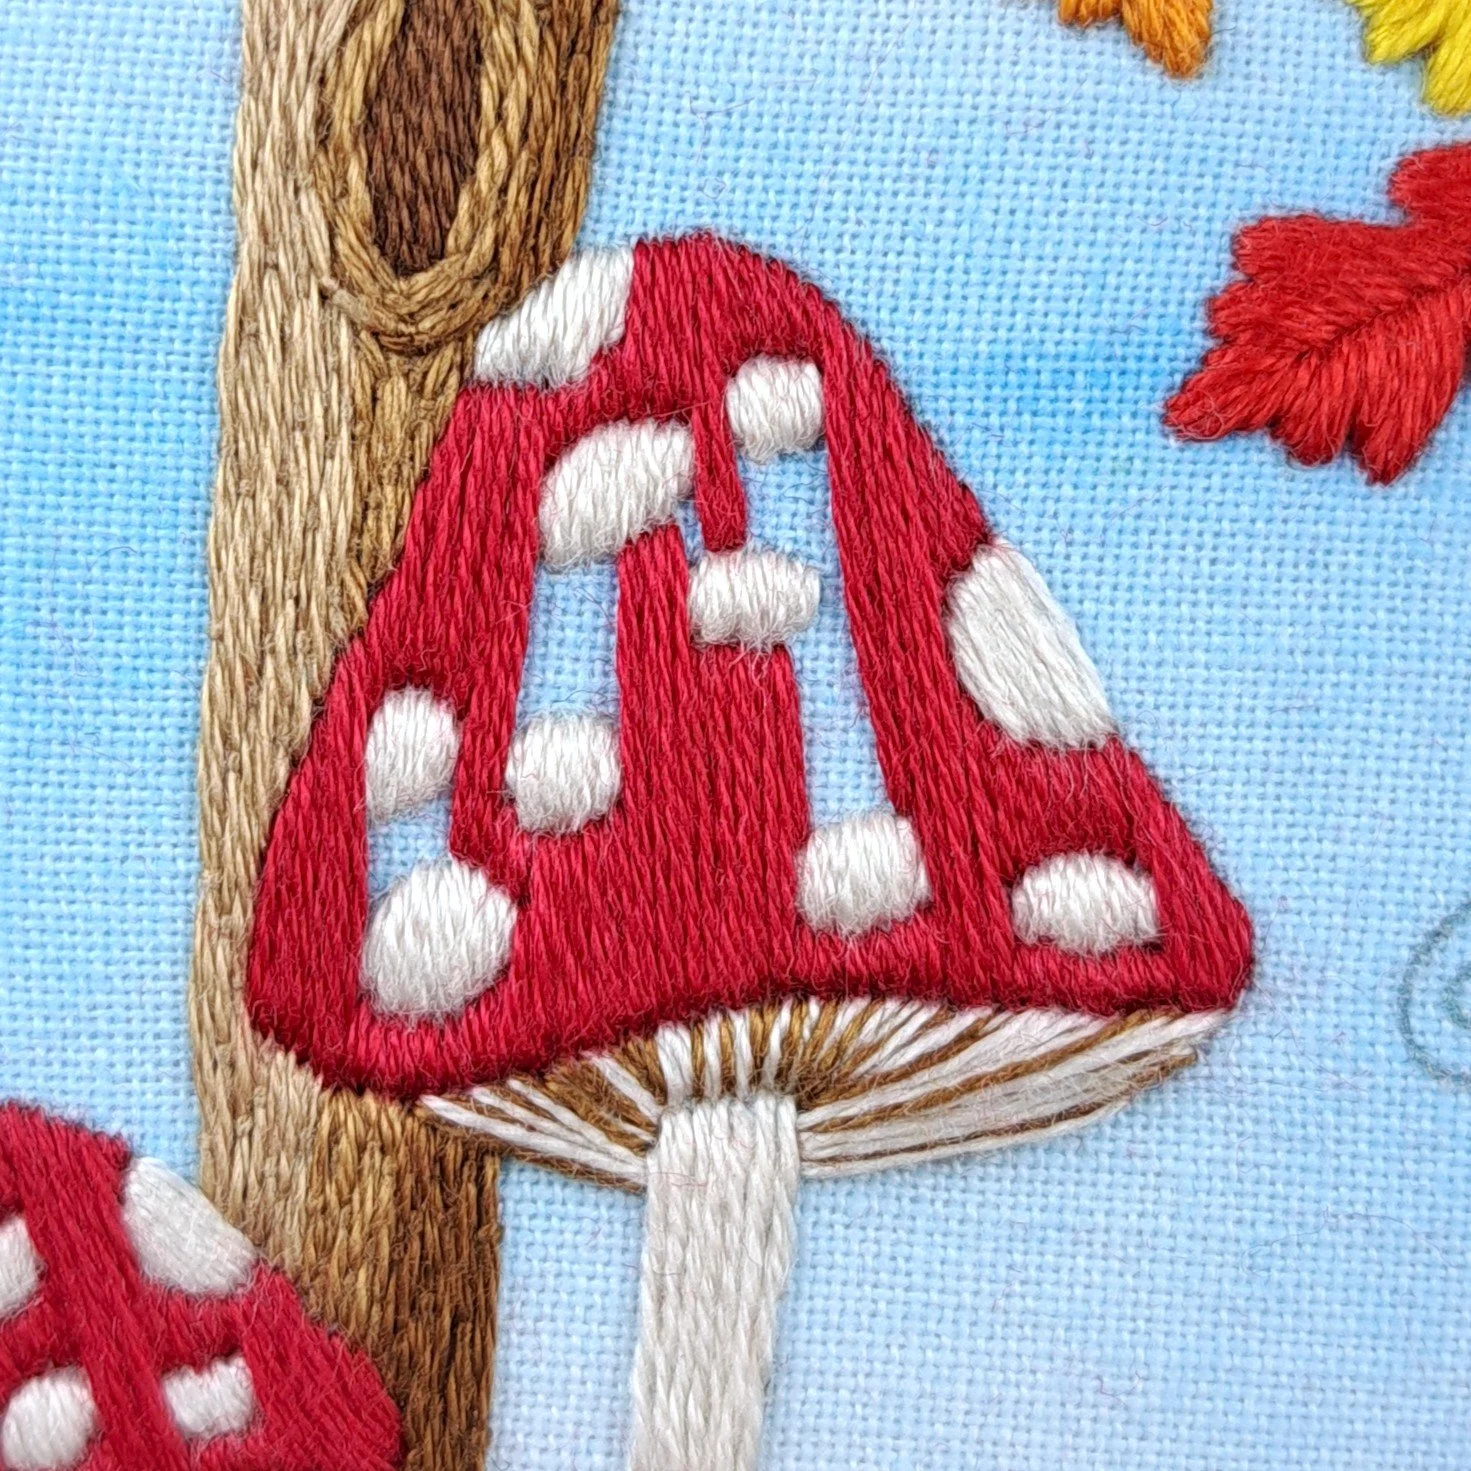
Then I filled the caps with Satin Stitch using 2 strands of Anchor 47.
It’s always easier to bring your needle up in an empty space and take it back down into existing stitches (although sometimes this can’t be avoided!). I also like to place my first Satin Stitch right down the centre of the shape.
So, I started by stitching the very first Satin Stitch from the top centre of the cap downwards. Depending on the mushroom, this stitch either went all the way down to the bottom of the cap or finished at one of the scales.
I then stitched all the Satin Stitches along the outside edge of the cap. Once all the edge were stitched, I filled in the middle.
Along the bottom of each cap, I angled my needle so that my Satin Stitches tucked ever so slightly underneath the row of Split Stitch.
The biggest mushroom is the trickiest because it has the most scales, but just take your time - there’s no rush.
✨ A couple of little tips:
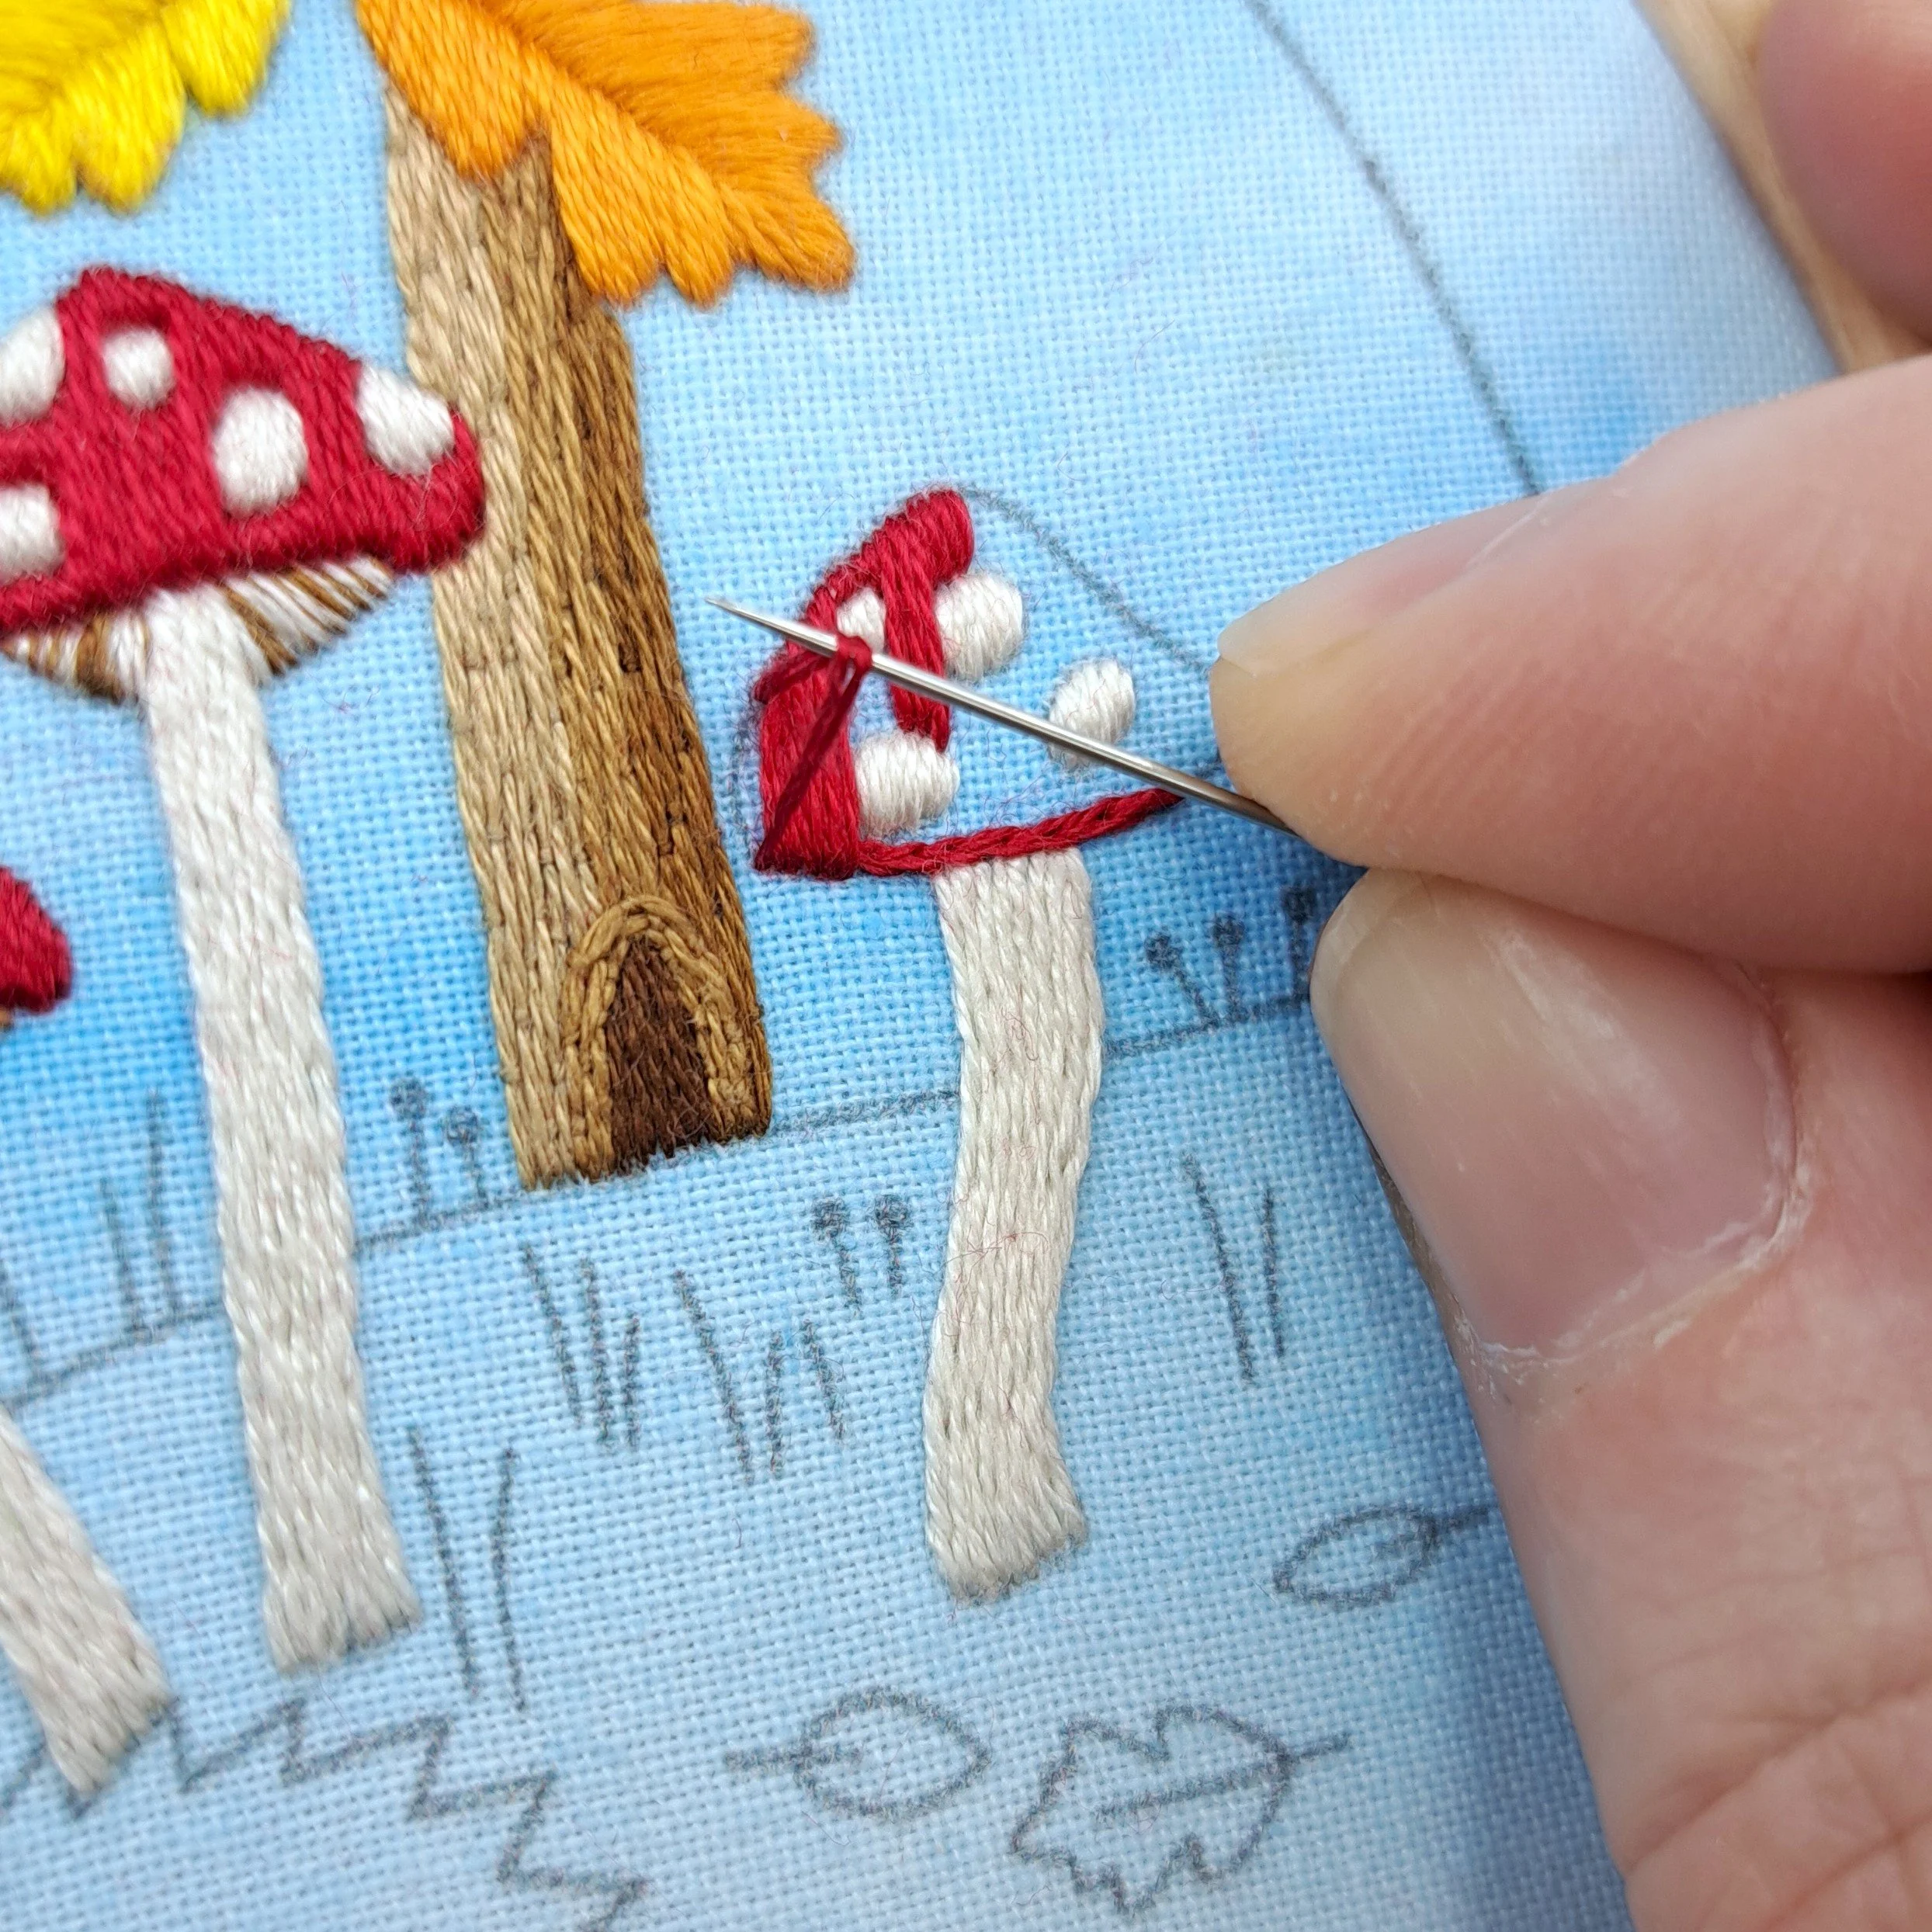
Before finishing each stitch, use your needle to gently stroke along the stitch and untwist the threads so they lie nice and flat. As my thread gets shorter, I often use a second needle for this.
Another thing I find helpful is to hold my thread across the fabric before stitching. This helps you visualise the angle of each stitch and gives you a guide for where to place your needle.
Stitch – Split Stitch and Satin Stitch
Thread colour - Anchor 47
Number of strands – 2
And that’s it……for now!
I’ll continue to add the next steps as I stitch them.
✨ Enjoying the blog so far?
I’ve poured a lot of time and stitches into this one, so if you’re finding it helpful and fancy leaving a little Ko-fi tip, that would be amazing - but absolutely no pressure 💛
Now back to the stitching…
5. Finishing and Displaying your Embroidery
You can frame your finished embroidery right in the hoop you used for stitching - one of my absolute favourite ways to display projects.
To do this, trim away the excess fabric, leaving a few centimetres all the way around. Then, stitch a running stitch about 1 cm from the fabric edge using 6 strands of thread, leaving unknotted tails at both the start and the end. Gently pull these tails to gather the fabric in, then tie them together in a knot to hold everything neatly in place.
I’ll show you how to do this in this video (it’s a Christmas one, sorry about that! 🙈 but the process is exactly the same):
The best part about this method is that it’s not permanent - so if you ever decide to add more stitching later, you can easily unpick the running stitches and keep going until you’re happy.
Then, step back and admire your beautiful stitching!
I hope you loved this project as much as I did!
I’ll be stitching my way through all my new embroidery designs (there are 15 of them - eek! 🥰) and I’ll be adding more step-by-step blog posts like this as I go. But of course, you can dive straight into stitching them right now!
If you need a bit of guidance, the Panel Packs come with a stitch suggestion sheet, and many of the techniques from my hand-printed panels still apply to the new designs.
You can find them all here……….
And don’t forget to tag me on social media when you show off your beautiful work - I’d love to see it!

If you enjoyed this blog and would like to support my work, feel free to visit my Ko-fi and leave a tip - every little bit helps keep the creativity flowing! 🌸
Enjoy your stitching!
Until next time,
Liz x