
How I Made A Felt Case for My Needle Pack
I’ve recently given my embroidery needle packs a little upgrade! They’ve always contained a selection of different needle sizes – the exact needles I’ve been using for all my stitching projects for years. But I’ve started using a few extra sizes in between… so now my needle packs include those extra sizes too 😄
Plus, they now come on a little printed cotton fabric envelope that’s nice and clear as to what needles are for what.
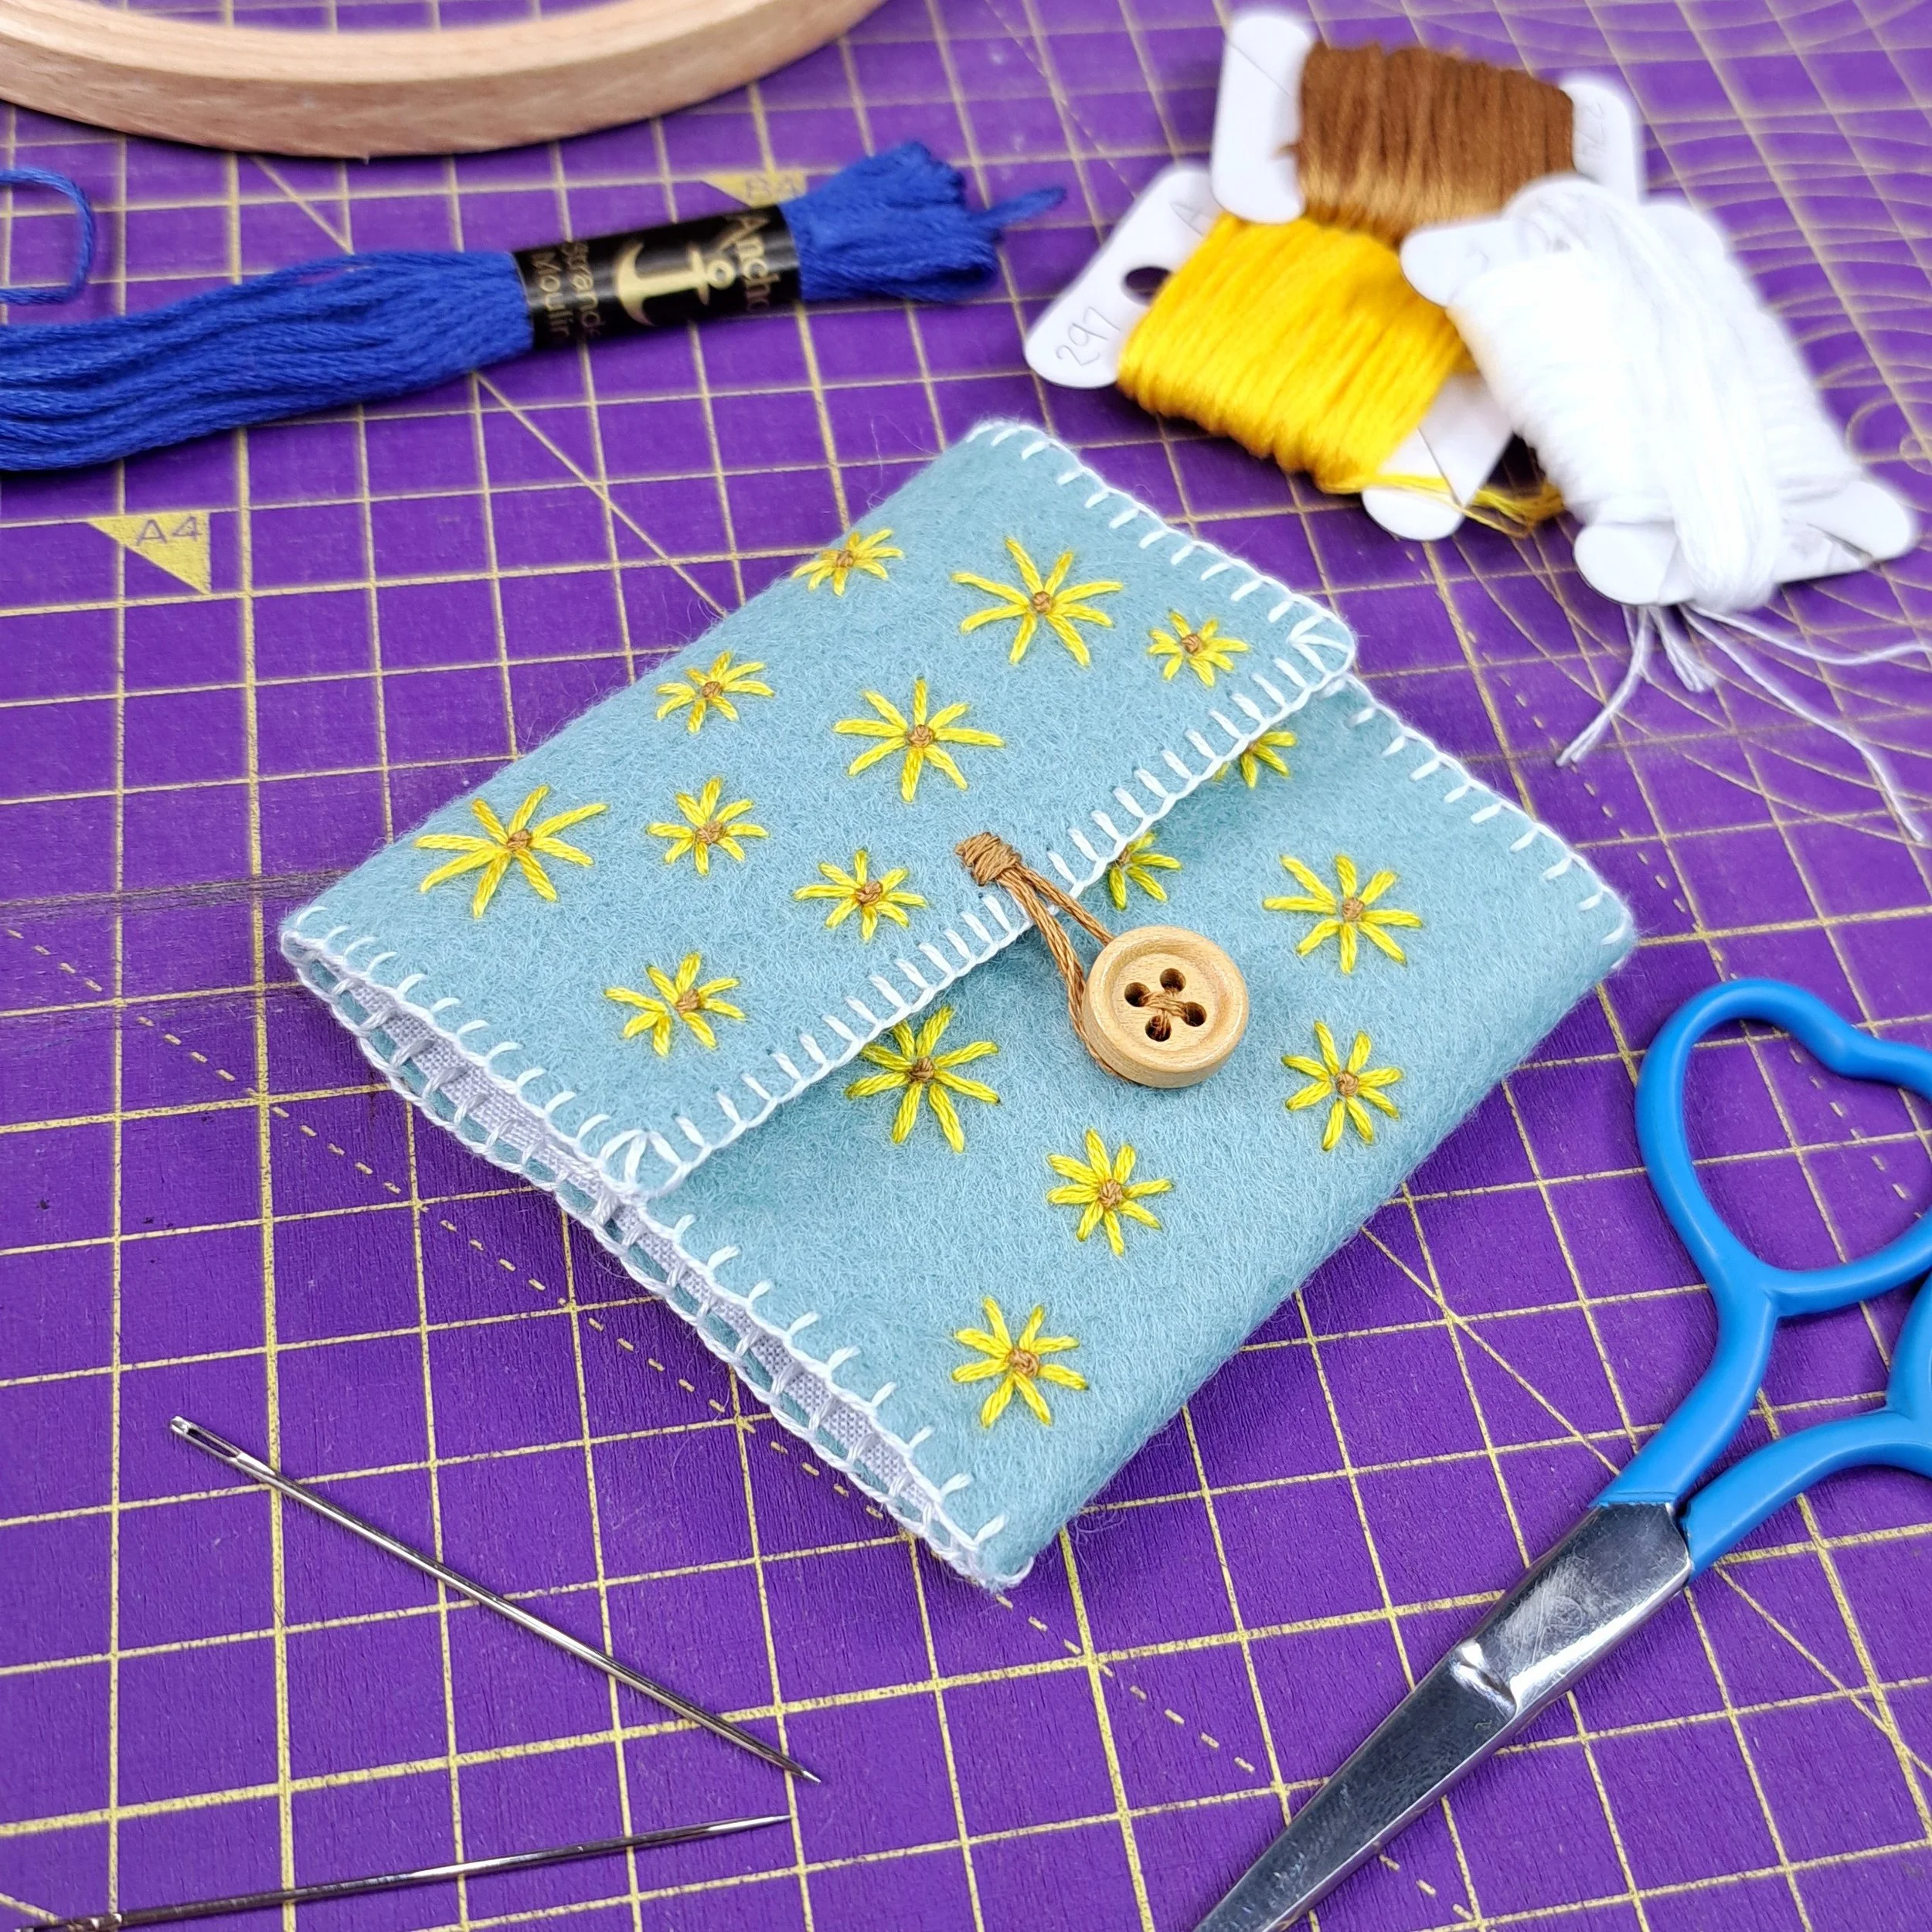
Make it your own and decorate your needle pack!
Each needle pack comes with little card of motifs that you can trace and stitch onto the cotton fabric.
I decided to take mine one step further and add a little felt case with a cute button and loop to close it. As well as looking super pretty, the felt is really going to help protect the edges of the cotton fabric from fraying.
Now that I’ve finished it, I’ll show you exactly how I made it in this step-by-step guide.
Let’s get stitching! 🪡
What You’ll Need
Time to gather your supplies! Here’s everything you’ll need…
A needle Pack – you can find these in my shop here [link]
Felt - I used a wool mix Felt made from 45% wool and 55% viscose. It’s just what I had in my stash!
Embroidery thread - I used 3 shades of 6-stranded cotton embroidery thread: Anchor 374 (brown), Anchor 297 (yellow) & Anchor 2 (white).
Scissors
A button
A heat-erasable pen
And, of course… a nice hot cuppa ☕ (and even some biccies!) 🤭
Step by step guide
1. Cut out your felt
Cut out your felt so that it’s 1/8 inch wider and longer than the needle pack’s cotton fabric, leaving an extra 1/8 inch all the way around.
[pic cut out felt]
2. Mark the Fold Lines
Lay your needle pack onto the felt, making sure it’s centred. Using your fabric pen, add a tiny dot on the felt to mark the position of each end of the dashed lines printed on the cotton fabric.
[image me drawing marks]
[image marks on felt when needle pack removed]
3. Position and Attach Your Button
Use the guide dots on the felt to fold it into the shape of your case. Place your button where you’d like it to sit, then use your fabric pen to mark its position with a dot.
[image folded felt with button placed]
[image marking the button dot on]
Now attach your button. I used three strands of Anchor 374 (brown) and stitched a simple cross to hold mine in place.
[image of button]
4. Add the Button Loop
This bit was slightly fiddly! First, mark a little dot where you’d like your loop to sit.
Using six strands of Anchor 374 (brown), stitch a simple loop. I brought my needle up through the back of the felt, wrapped the thread around my button to get a rough idea of the length I needed, and then took my needle back down through the felt to form the loop.
I carefully tied off the thread, trying not to change the size of my loop in the process!
[image of loop]
I then added a few straight stitches over the top of the loop to hold the loop together and help it lie flat. I also think it makes it look a little prettier! 😊
[pic finished loop]
5. Decorate Your Felt
Now for the really fun part… decorating the felt! 😊
I decided to cover mine in cute little flowers. To make each flower, I stitched eight small straight stitches using three strands of Anchor 297 (yellow).
I made my flowers different sizes and scattered them across the felt in a random pattern. I avoided stitching too close to the edges, as I’d be adding stitching there later, and left the fold lines clear too.
[image of flower}
Next, I added a French knot with one wrap to the centre of each flower, using three strands of Anchor 374 (brown).
[image close up flower]
[image whole thing stitched]
Of course, you can decorate yours however you like! You could use the motifs supplied with your needle pack, stitch a few flowers like mine, or come up with your own design. There are no rules here – have fun with it!
6. Attach the Printed Cotton Fabric
Lay your needle pack's printed cotton fabric onto the felt, making sure everything is lined up correctly. Pop a couple of pins in at the sides to hold the two layers together.
Just double-check that the printed fabric is on the inside of the felt case! You want the printed side facing inwards when the case is folded closed.
[image pinned pack]
Using two strands of Anchor 2 (white), stitch a row of running stitch along each of the dashed lines fold lines printed on the cotton fabric. Use the dashed lines as a guide to help you space your stitches evenly.
I started each row by bringing my needle up through the printed cotton fabric only, so that my knot was tucked away between the cotton and the felt.
I finished each row in the same way, taking my needle down through the cotton fabric only and tying off the thread so that the knot was hidden neatly between the two layers.
[image back of felt]
[image – inside]
7. Stitch Around the Edge
Finally, I stitched a blanket stitch all the way around the edge of the felt, making sure I caught the printed cotton fabric on the inside as I went.
When I reached the ends, I realised I must have cut my felt a little too long, as I needed to make my blanket stitches longer to reach the edge of the cotton fabric. But I actually think it looks rather cute with those longer stitches at the ends – I love a happy accident! 😄
A little tip: Make sure you leave yourself plenty of thread for this final bit. I cut a length that was four times the length around the edge of the felt, but even that wasn't quite long enough! 🙈 I had to start a new thread halfway around. You can absolutely do this, of course, but it's definitely easier to keep that lovely blanket stitch pattern if you can work your way around in one go.
8. Admire Your Finished Needle Pack!
Don't forget to remove any fabric pen marks that might still be showing. I like to do this with a little blast of my hairdryer.
Then step back and admire your beautiful needle pack!
I hope you've enjoyed making your own little felt case. Don't forget to tag me on social media when you show off your beautiful work – I'd love to see it! 💛

If you enjoyed this blog and would like to support my work, feel free to visit my Ko-fi and leave a tip - every little bit helps keep the creativity flowing! 🌸
Enjoy your stitching!
Until next time,
Liz x